Run Command box is useful in Windows 10 that lets you access various applications directly, such as Registry Editor, Group Policy, Command Prompt, etc. Windows 10 also offers an auto-complete feature that helps to execute similar commands easily. Let it be Command Prompt or Run dialog box; the auto-complete feature saves a lot of time if your typing matches the previously executed command. This feature is beautifully implemented in Windows 10. It lets you access the previously executed commands by using the up and down arrow keys. If you are working in the command prompt, you can access the history of all commands of the active session by just pressing the F7 key from the keyboard. If you suddenly notice that history is not getting saved on your PC, what will you do?
If on your Windows 10 PC, the Run Command box does not save the history of your executed commands; this gearupwindows article will help you fix it.
How do I view run history in Windows 10?
You can access all the stored Run command history by clicking on the down arrow on the Run box.
How do I save my Run history in Windows 10 using the Settings app?
Saving the Run command history on Windows 10 is pretty straightforward; all you need to go through the Settings app. Here is how it is possible.
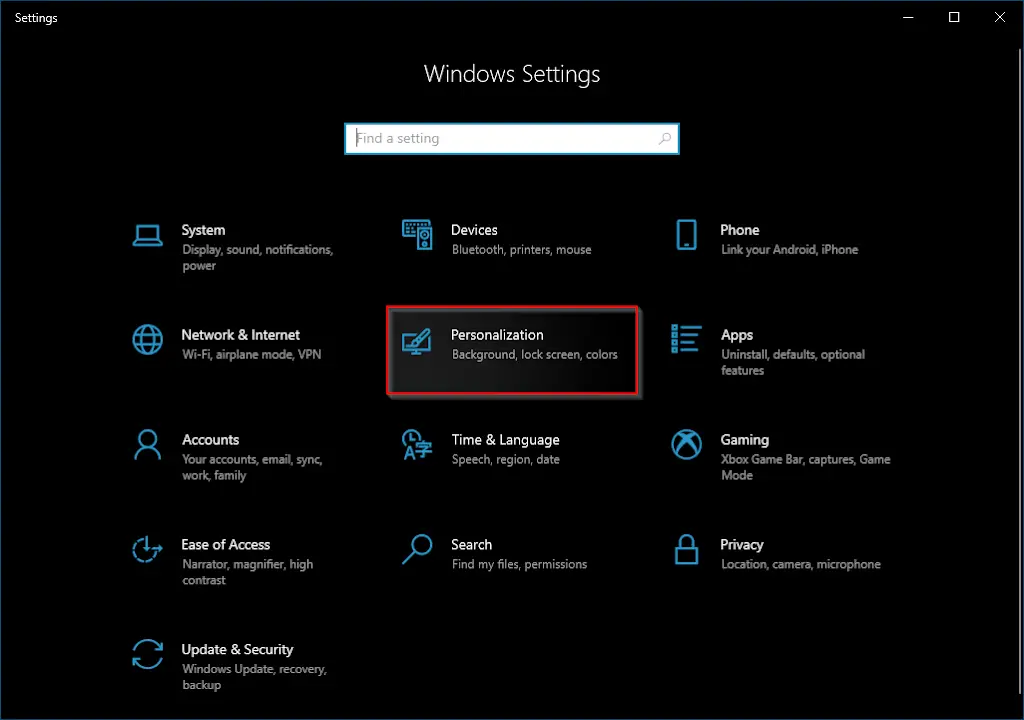
Step 1. Open the Settings app by pressing the Windows logo + I keys simultaneously or any other method. Here, in the Settings app, click on the Personalization category.
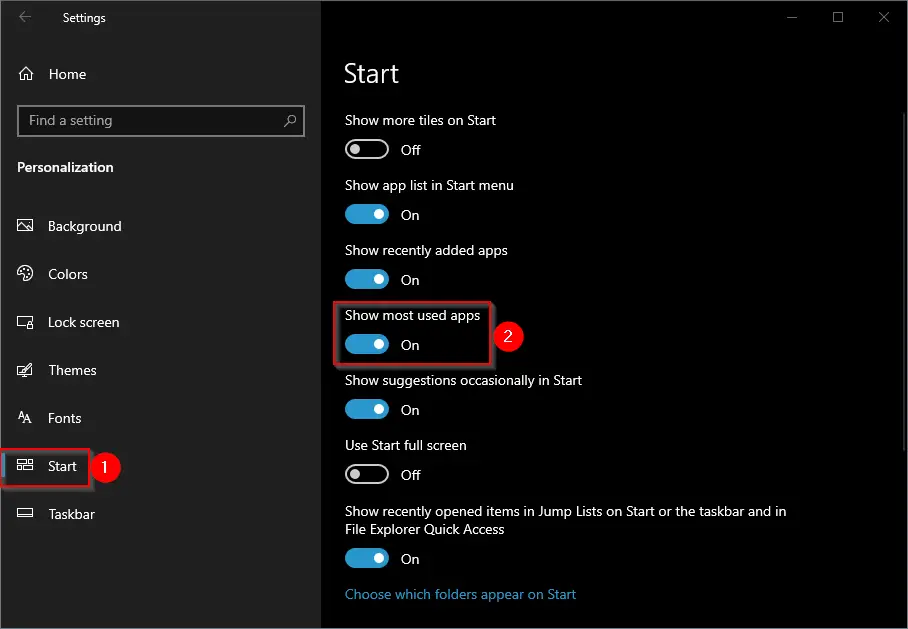
Step 2. Under Personalization, select the Start tab from the left side pane, and on the right side of it, turn the toggle to the On position next to the “Show most used apps” option.
In case the “Show most used apps” toggle is greyed out, do the following steps:-
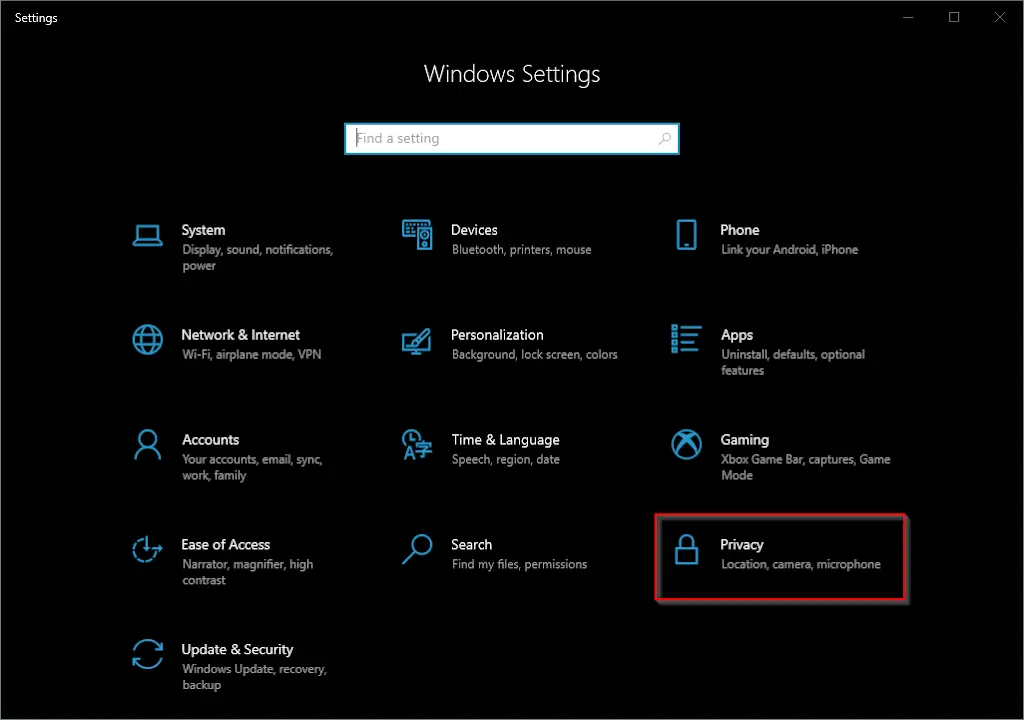
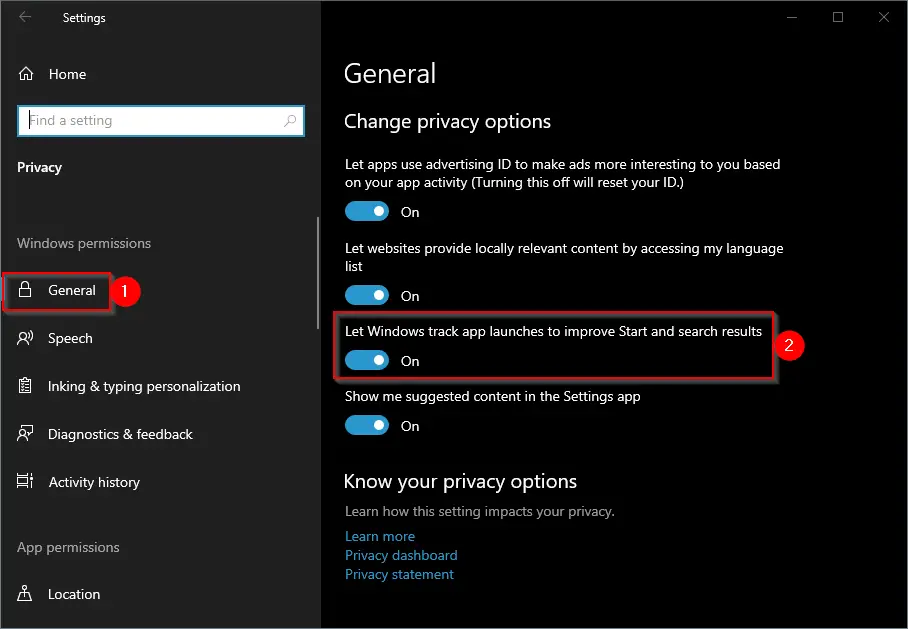
Step 1. Again, open the Settings app and select the Privacy category in it.
Step 2. Click on the General in the left side pane, and on the right of it, turn On the toggle switch, “Let Windows track app launches to improve Start and search results.”
By using either above-mentioned methods, the Run command should store the history on your Windows 10 PC.
How to Save Run History in Windows 10 using Registry Editor?
Registry Editor is another method to allow Windows to Save Run history. You need to perform the following steps;-
Step 1. Open Registry Editor.
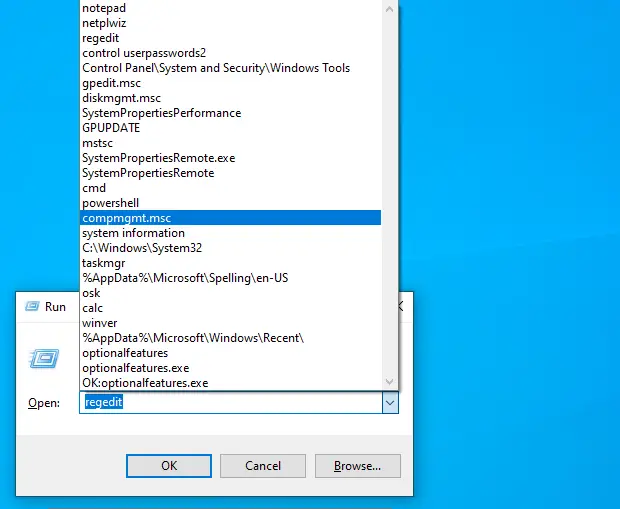
To access Registry Editor, first launch the Run dialog box by pressing the Windows logo + R keys on your PC. In the Run box, type regedit and hit Enter from the keyboard to open the Registry Editor window.
If the User Account Control dialog box appears, click Yes to allow.

Step 2. In the Registry Editor window that opens, navigate the following key from the left side pane:-
HKEY_CURRENT_USER\SOFTWARE\Microsoft\Windows\CurrentVersion\Explorer\Advanced
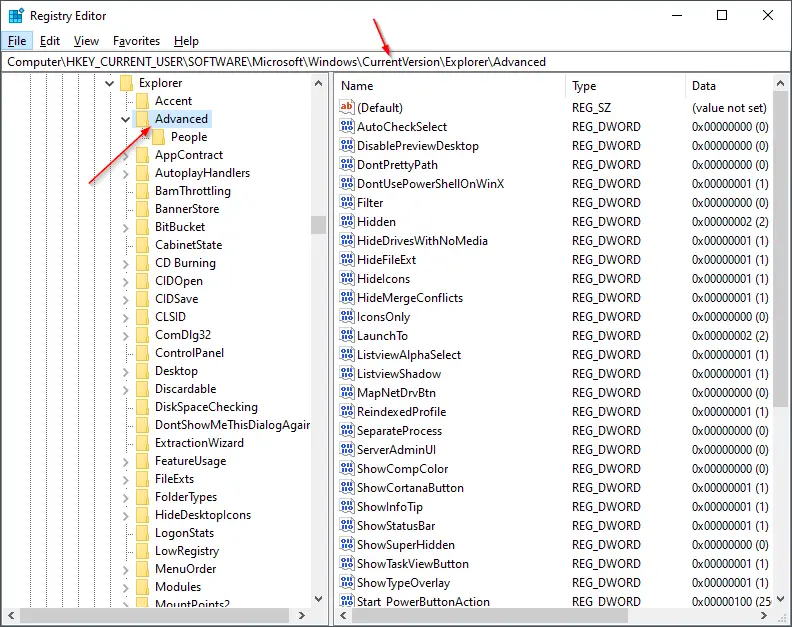
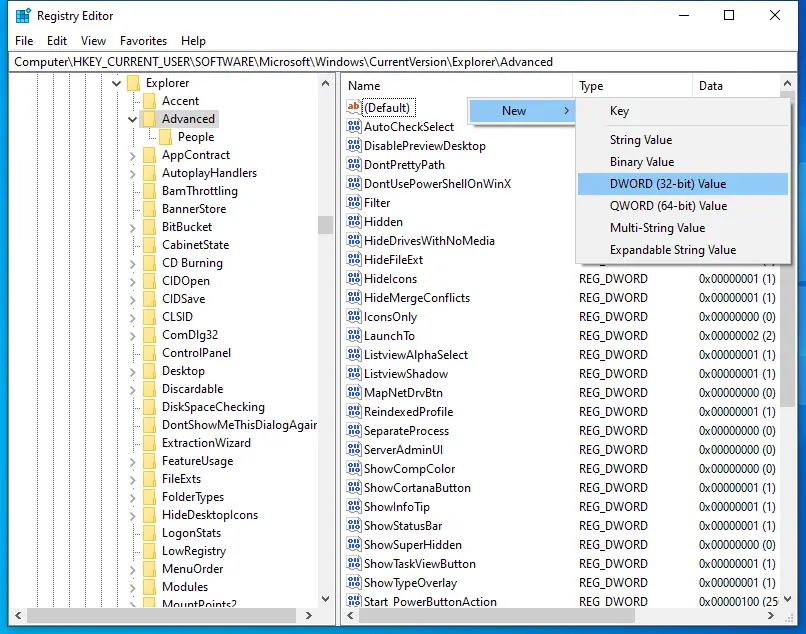
Start 3. On the right side pane, look for Start_TrackProgs DWORD Value. If it is not available, then you need to create a new one.
Right-click on the free space on the right-side pane, select New, and then DWORD (32-bit) Value. Name it Start_TrackProgs.
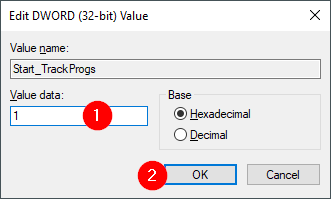
Step 4. Double-click on Start_TrackProgs to open it and set its Value data to 1. Finally, click on the OK button to apply the changes.
Step 5. Reboot your PC.
Once your computer is restarted, execute a few commands in the Run prompt. Now, use the arrow keys to see if they are saved in the list. I am sure you should see the recently executed commands on the Run command box.
Conclusion
In conclusion, the Run Command box is a powerful tool in Windows 10 that allows users to access various applications directly. The auto-complete feature in the Run box and Command Prompt can save a lot of time for users. However, if the history of executed commands is not getting saved on your PC, you can follow the steps outlined in this article to enable the feature. By using either the Settings app or the Registry Editor, you can easily save your Run history in Windows 10 and access your previously executed commands.