Checking your RAM amount, type, and speed on Windows 11 can be helpful in several ways:-
- System performance: Knowing the amount of RAM installed on your computer can help you understand your system’s performance. If your computer has insufficient RAM, it can lead to slow system performance and frequent crashes.
- Upgrades: If you’re planning to upgrade your computer’s RAM, you need to know the type and speed of RAM already installed on your computer. This information can help you buy compatible RAM for your system.
- Troubleshooting: If you’re experiencing system crashes or performance issues, checking your RAM can help you identify whether RAM is the issue. Faulty RAM modules can cause system instability and crashes.
- Optimization: If you’re planning to optimize your system’s performance, knowing your RAM type and speed can help you understand the limits of your system. You can use this information to optimize your system’s performance by adjusting settings or upgrading your RAM.
How to Check RAM Amount, Type, and Speed on Windows 11 using Task Manager?
Checking your RAM amount, type, and speed is a straightforward process on Windows 11. Here are the steps:-
Step 1. First, press the Windows key on your keyboard to open the Start menu.
Step 2. Then, type “Task Manager” and click on the Task Manager app in the search results.
Step 3. In the Task Manager window, click on the “Performance” tab at the left of the window.
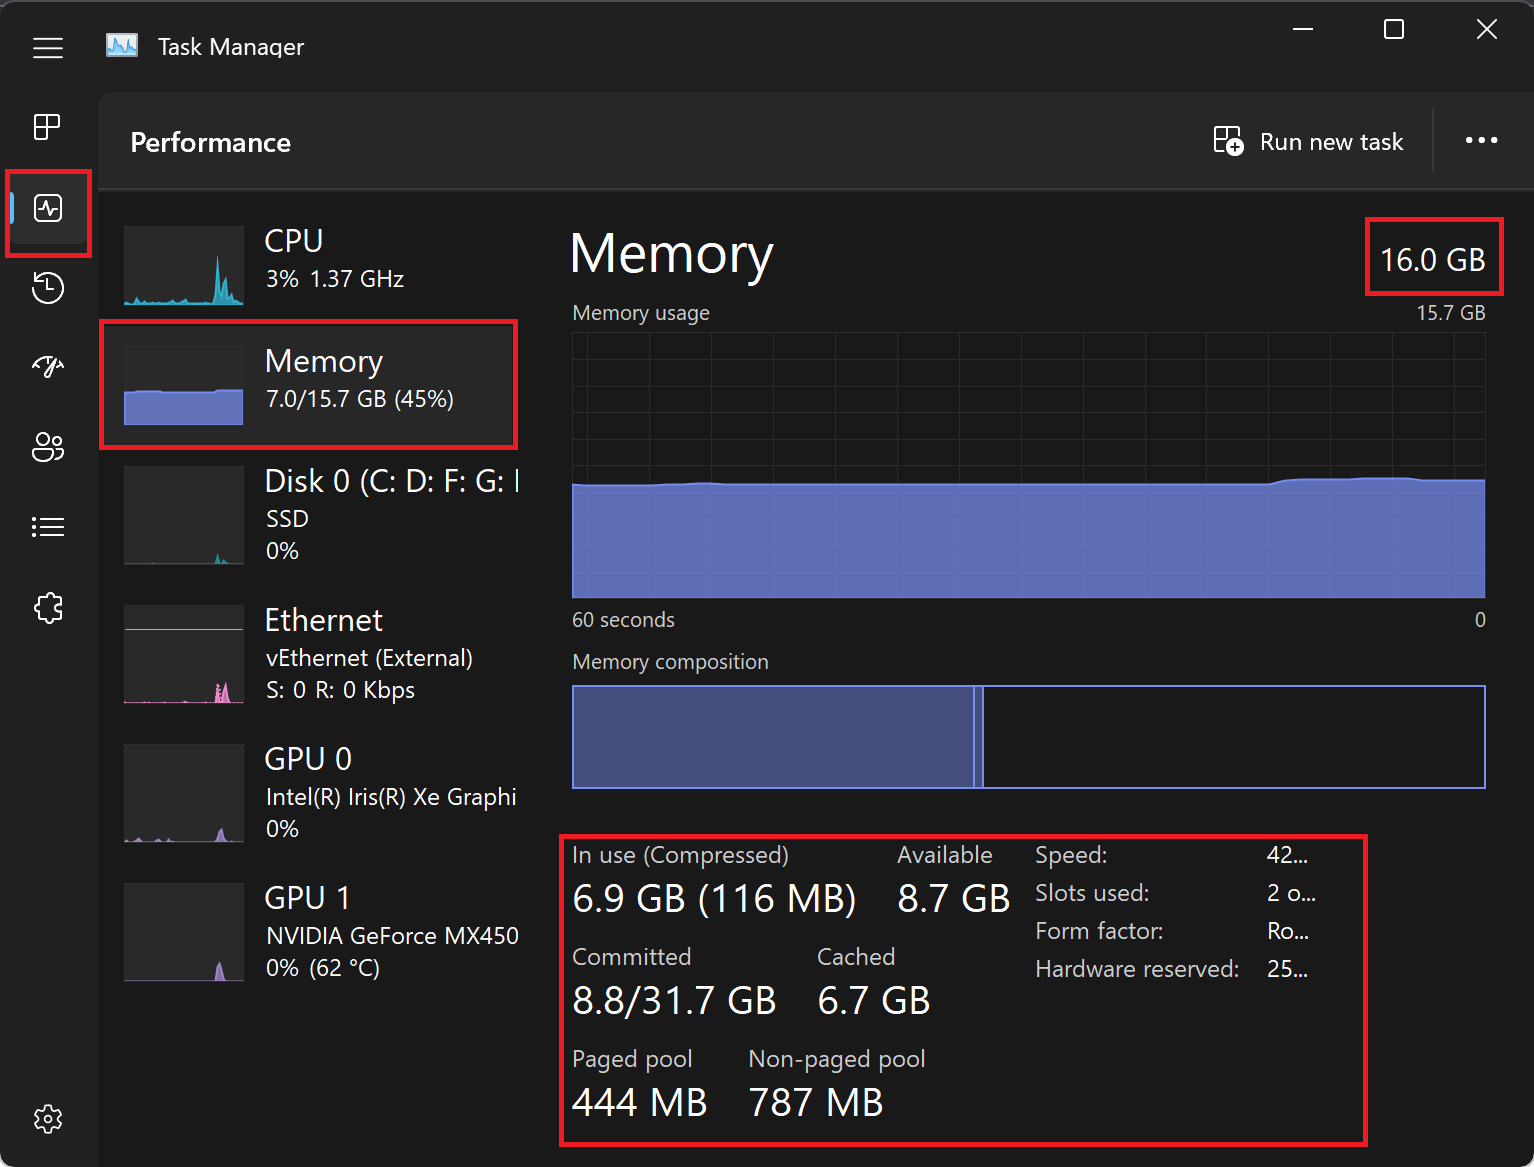
Step 4. Then, click on “Memory” to view your computer’s RAM information.
Under “Memory,” you’ll see the amount of RAM installed in your computer, as well as the RAM speed and more.
That’s it! You now know how to check your RAM amount, type, and speed on Windows 11.
How to Check How Much RAM you Have in Windows 11 using Settings?
To check how much RAM you have in Windows 11 using settings, follow these steps:-
Step 1. Open the “Start” menu.
Step 2. Click on the “Settings” icon (gear icon).
Step 3. Click on “System” from the left side options.
Step 4. Click on “About” from the right menu.
Step 5. Scroll down to the “Device specifications” section.
Step 6. Here, you can view the installed RAM amount under the “Installed RAM” section.
That’s it! You have now checked how much RAM you have in Windows 11 using settings.