If you are an IT professional or a networking enthusiast, you might have come across the need to use a Telnet client at some point. Telnet is a client-server protocol that allows remote access to a command-line interface on a computer or server. It’s a handy tool for troubleshooting network issues, configuring network devices, and even testing network security.
However, the Telnet client is not enabled by default in modern versions of Windows, including Windows 11, 10, 8, and 7. If you try to use it without enabling it first, you might encounter errors or connection issues. In this step-by-step guide, we’ll show you how to enable Telnet client in Windows 11, 10, 8, and 7, so you can start using it for your networking needs. Whether you’re a beginner or an experienced user, our easy-to-follow instructions will get you up and running with a Telnet client in no time.
How to Enable Telnet Client in Windows 11/10/8/7 using Control Panel?
Here are the steps to enable Telnet Client in Windows 11/10/8/7:-
Step 1. First, open the Control Panel on your Windows machine.
Step 2. Then, click “Programs and Features” or “Programs,” depending on your version of Windows.
Step 3. Next, click on “Turn Windows features on or off.”
Step 4. Now, scroll down the list and locate “Telnet Client.” Check the checkbox next to it.
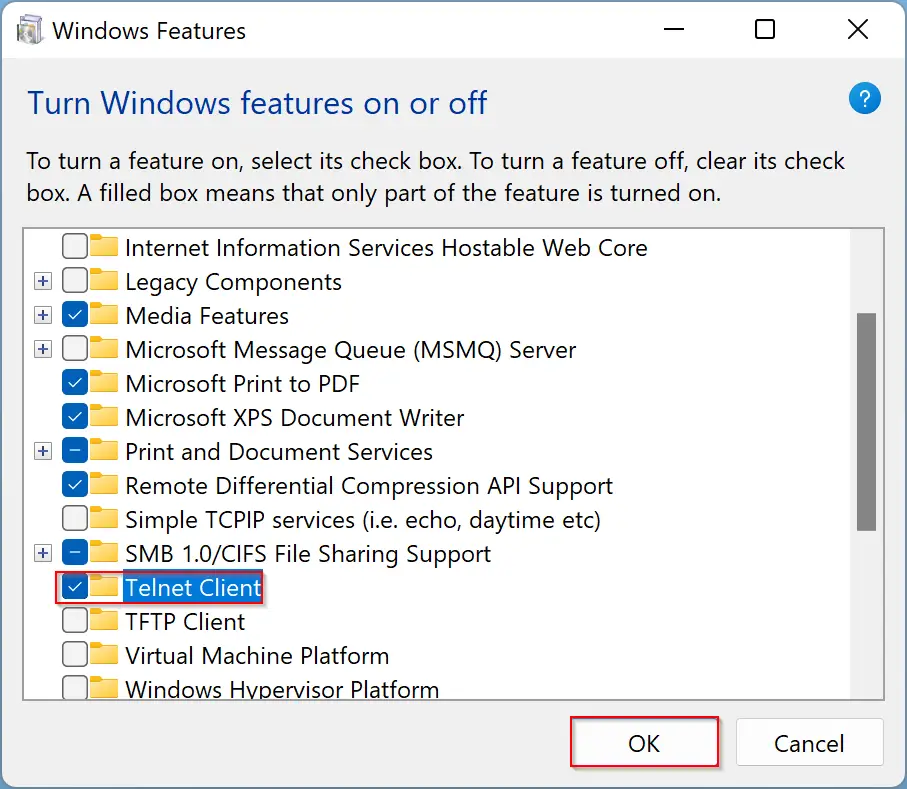
Step 5. Click “OK” to save the changes.
Wait for Windows to install Telnet Client. This may take a few minutes.
Once the installation is complete, you can start using Telnet Client by opening the Command Prompt and typing “telnet,” followed by the IP address or hostname of the device you want to connect to.
If you no longer need Telnet Client, you can disable it by following the same steps as above and unchecking the checkbox next to “Telnet Client” in the list of Windows features.
How to Enable Telnet Client Using PowerShell or Command Prompt?
To enable Telnet Client using PowerShell or Command Prompt, follow these steps:-
Step 1. Open Windows PowerShell or Command Prompt as administrator.

Step 2. Then, type the following command and press Enter:-
dism /online /Enable-Feature /FeatureName:TelnetClient
This command will initiate the installation process for Telnet Client, and it may take a few minutes to complete.
Once the installation is complete, you can start using Telnet Client by opening PowerShell or Command Prompt and typing “telnet,” followed by the IP address or hostname of the device you want to connect to.
To disable or uninstall Telnet Client, run the following command:-
dism /online /Disable-Feature /FeatureName:TelnetClient
This command will remove Telnet Client from your computer.
That’s it! You have successfully enabled Telnet Client using PowerShell or Command Prompt.