Speccy is a good piece of free software that allows us to check the full system information on Windows 10/8/7. But if you are one of those who don’t prefer to use a third-party tool and want to check full system information on Windows 10, it is possible in a few ways.
Why do we need to check system information?
There may be various occasions when you want to check your PC system information. It may you want to install a big game on your PC and want to check your PC minimum configuration that the game will run on your PC or not. If your computer or laptop is not working properly and you want to troubleshoot the problem. It may also happen your PC is getting slower day by day, and you want to upgrade it; before upgrading your PC, you want to know the configuration of your device. These are some examples of what you need to know about your PC system configuration or information.
The reasons may be many; our purpose is to check the system information or configuration. Windows 10 has a few ways to check the PC specifications, such as processor, installed memory, motherboard, graphics card, Basic Input/Output System (BIOS), or Unified Extensible Firmware Interface (UEFI), device model number, drivers, updates details, and Windows version. You can get this information using desktop applications or command-line tools. The only problem is that you will not get every piece of information in one place.
This post will see all the possible ways to determine your computer or laptop’s configuration. These are the following:-
- Obtain computer hardware specs using the Settings app
- Get computer specifications using System Information
- Find computer or laptop specs using DirectX Diagnostic Tool
- Check or view the PC’s full specifications on Windows 10 using PowerShell
- Find computer specs using Command Prompt
How to obtain computer hardware specs using the Settings app?
Basic system specifications, such as the processor, memory, and Windows details, can be found on the “About” settings page. To see the computer tech specs with the Windows 10 Settings app, perform the following steps:-
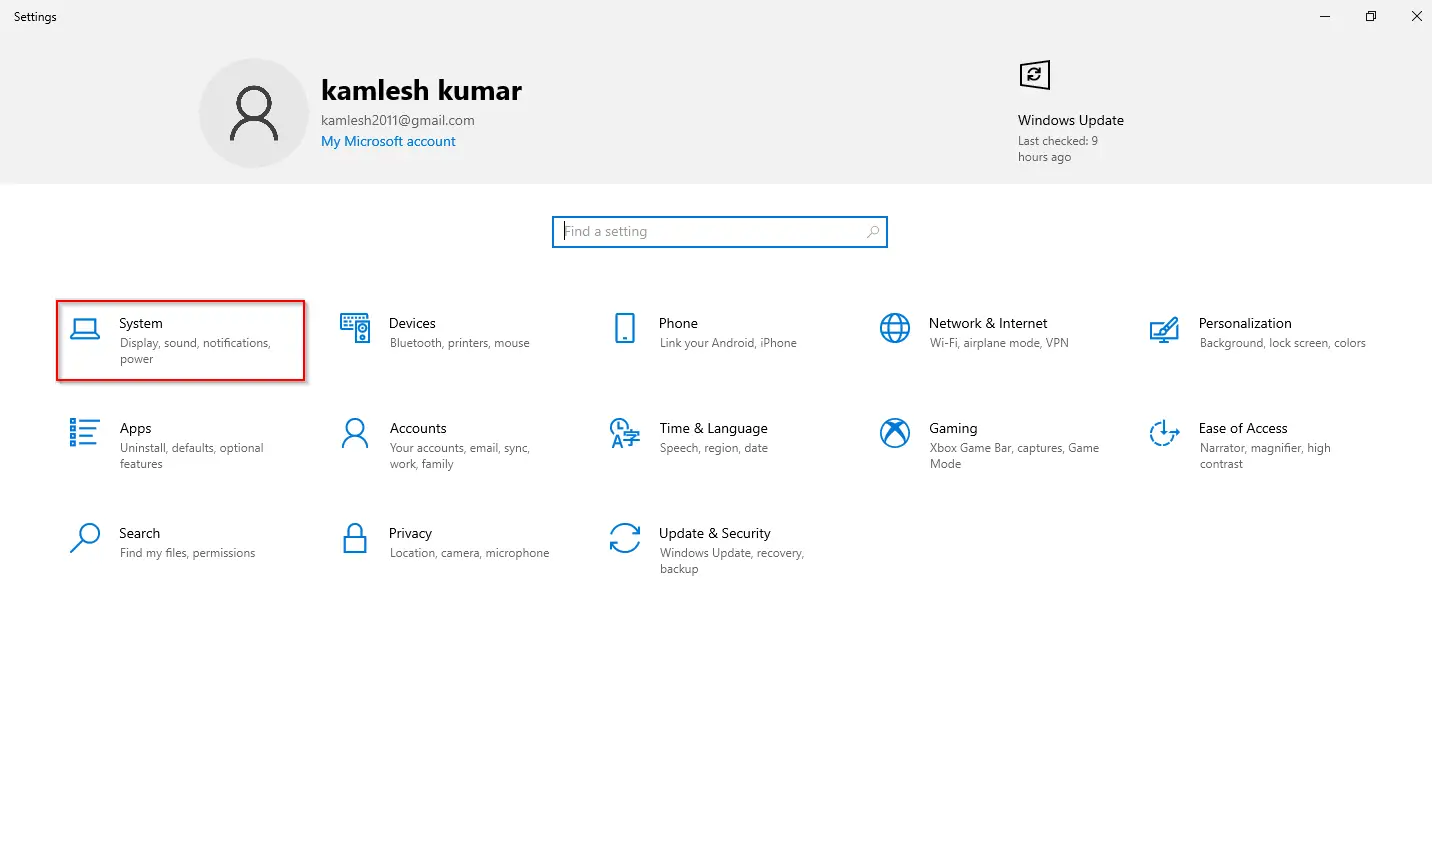
Step 1. Click on the Start button and select the Settings icon to open the Settings app.
![]()
Step 2. Click the System category in the Windows Settings.
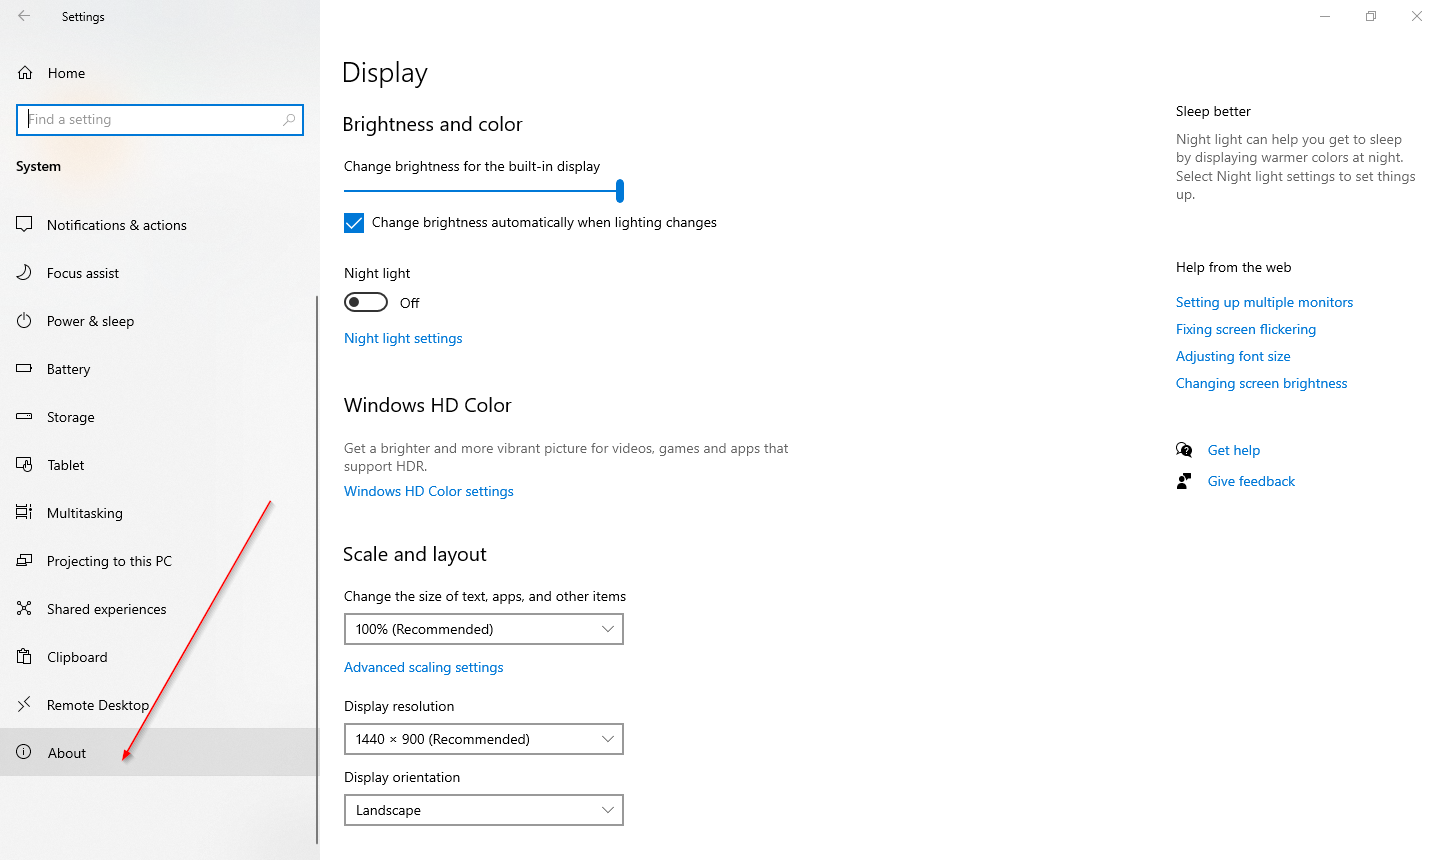
 Step 3. Under the System category left-side menus, scroll down and click on About.
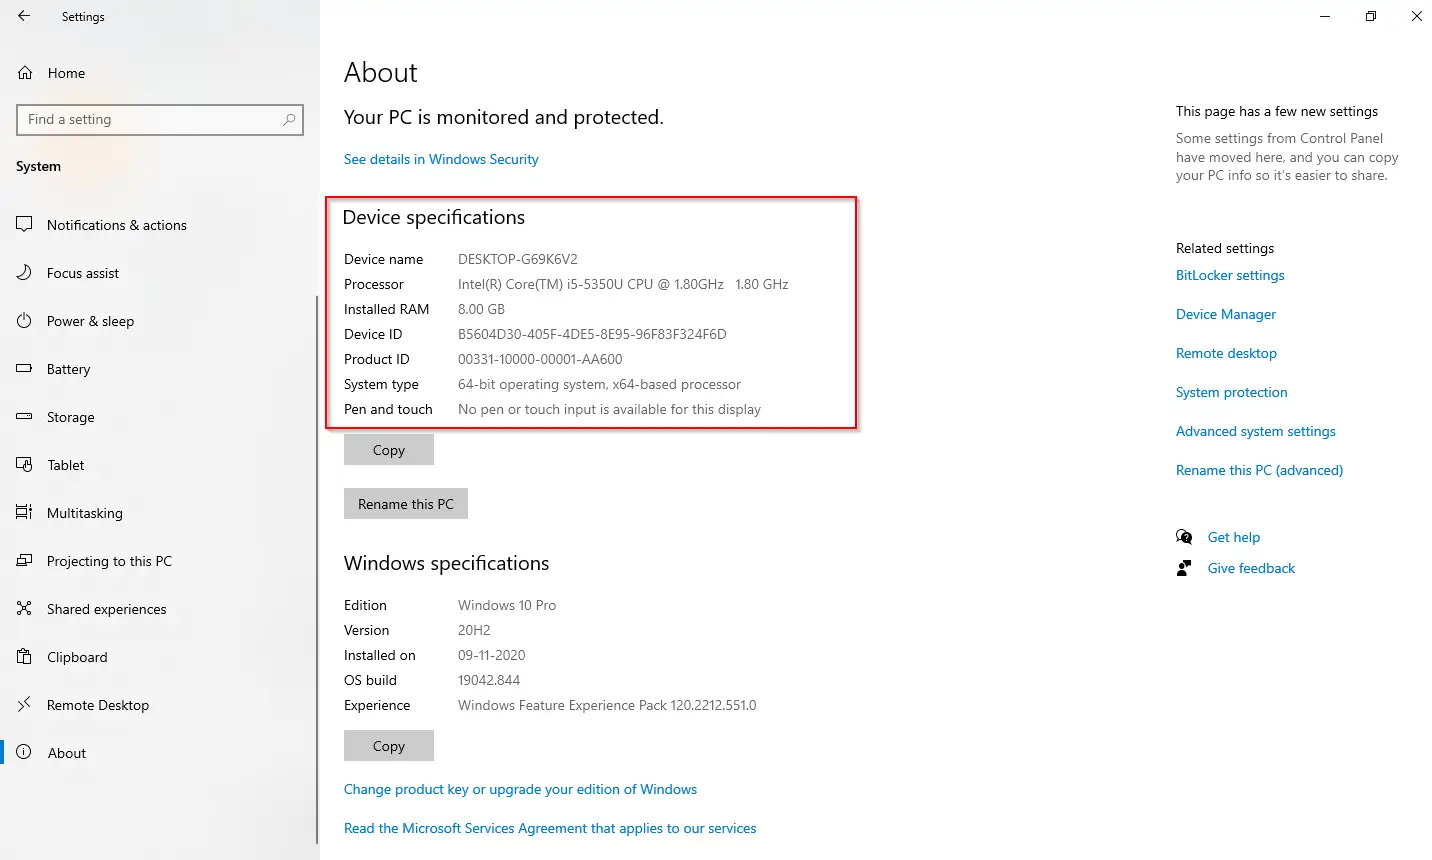
Step 4. In the Device specifications section, you can see the processor, installed system memory (RAM), architecture (32-bit or 64-bit), and “Pen and touch support.”
Step 5. Below the “Device specifications” section, you will find the “Windows specifications” section. Here, you can check Edition, Version, Installed on, OS build, and Experience.
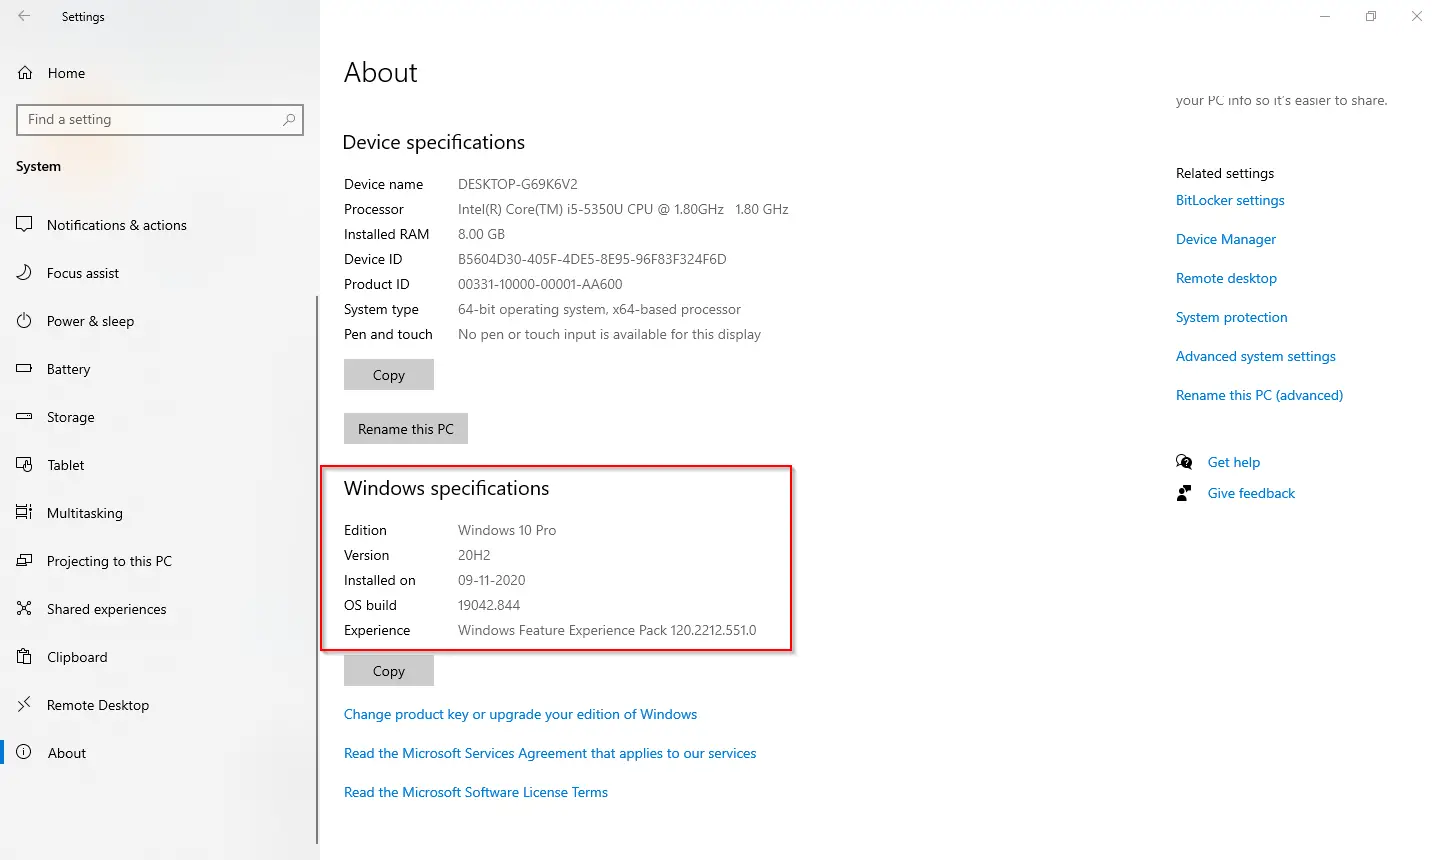
- Edition – This shows if you have Windows 10 Pro or Windows 10 Home Edition installed on your PC.
- Version – It reveals the Windows release currently installed on the computer.
- Installed on – It shows up to the date when the last “feature update” was installed on your PC.
- OS build – It indicates the technical build number of the Windows 10 release. The first five numbers represent the version, and anything after the period represents the latest quality update installed on your computer.
- Experience – It reveals the service feature pack installed on your device.
How to get computer specifications using System Information?
On every Windows version, including Windows 10, the System Information application is available to view your machine’s complete device’s technical specifications. To see all the hardware specs of the computer using the System Information application, perform the following steps:-
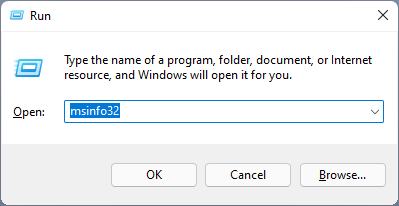
Step 1. Press the Windows Logo + R keys to open the Run command box. Type msinfo32 and press the Enter key from the keyboard to launch the System Information app.
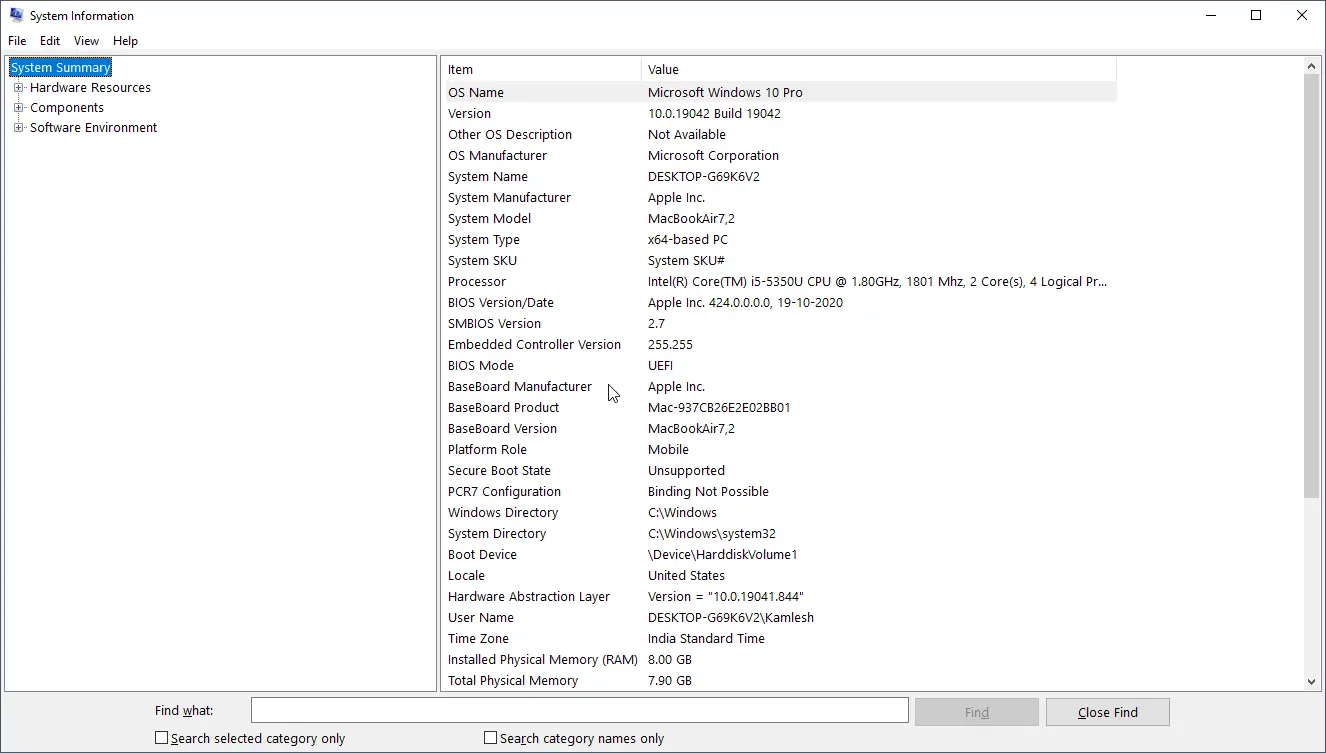
Step 2. From the left side pane, click the System Summary category. You can see the details on the right side, including OS Name, Version, System Manufacturer, System Model, System Type, Processor Brand, BIOS Version, BIOS Mode, Windows Directory, RAM, Motherboard brand, and virtualization support.
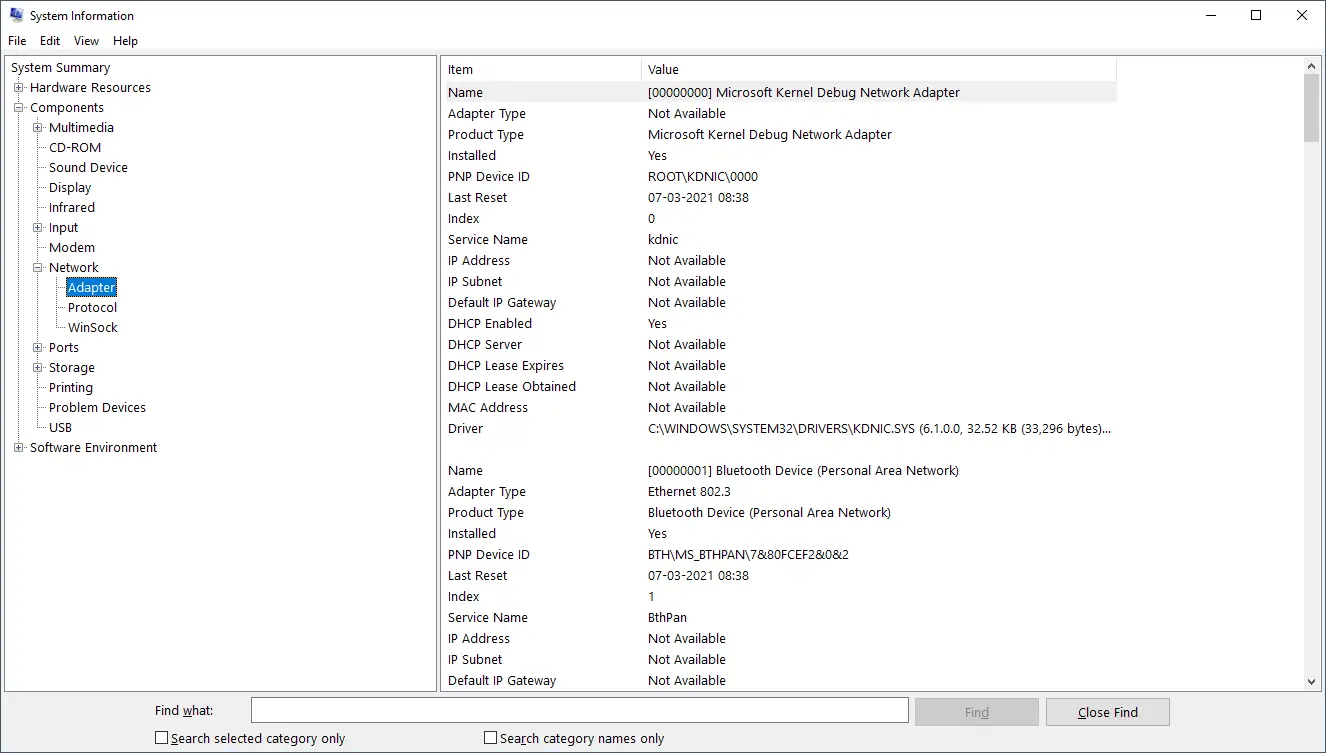
To know more about any component of your device, you can expand the category and see the details in depth. Suppose you want to know more about the Adapter which is installed on your PC. Select the Adapter entry by expanding the Components category, and on the right-side pane, you can view the full details of the Adapter.
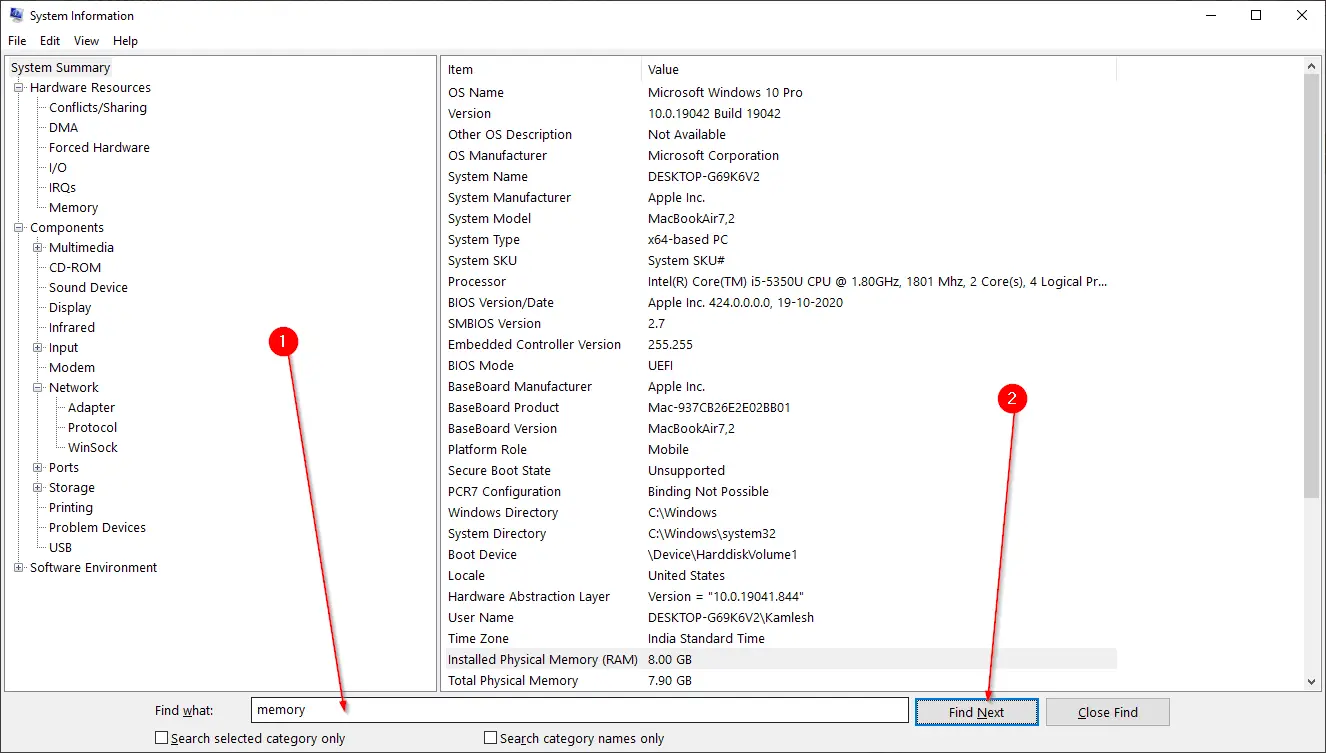
The System Information tool also offers a search option at the bottom of the page to quickly find the information you need.
The System Information tool includes creating a report with the hardware and software specifications, which you can save on your PC for future reference. To create a report with the system specs on Windows 10, click on File and select Export in the System Information window.
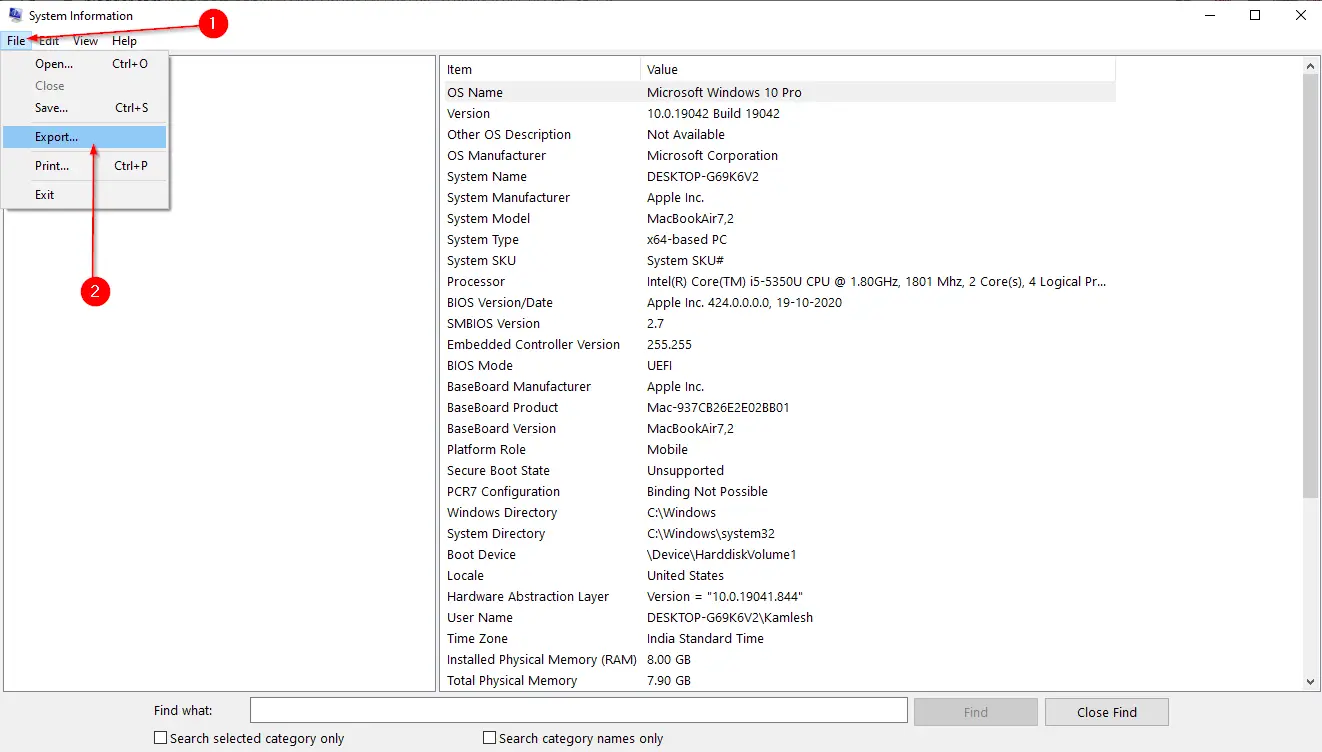
Type a file name and select the location where you want to save the System Information.
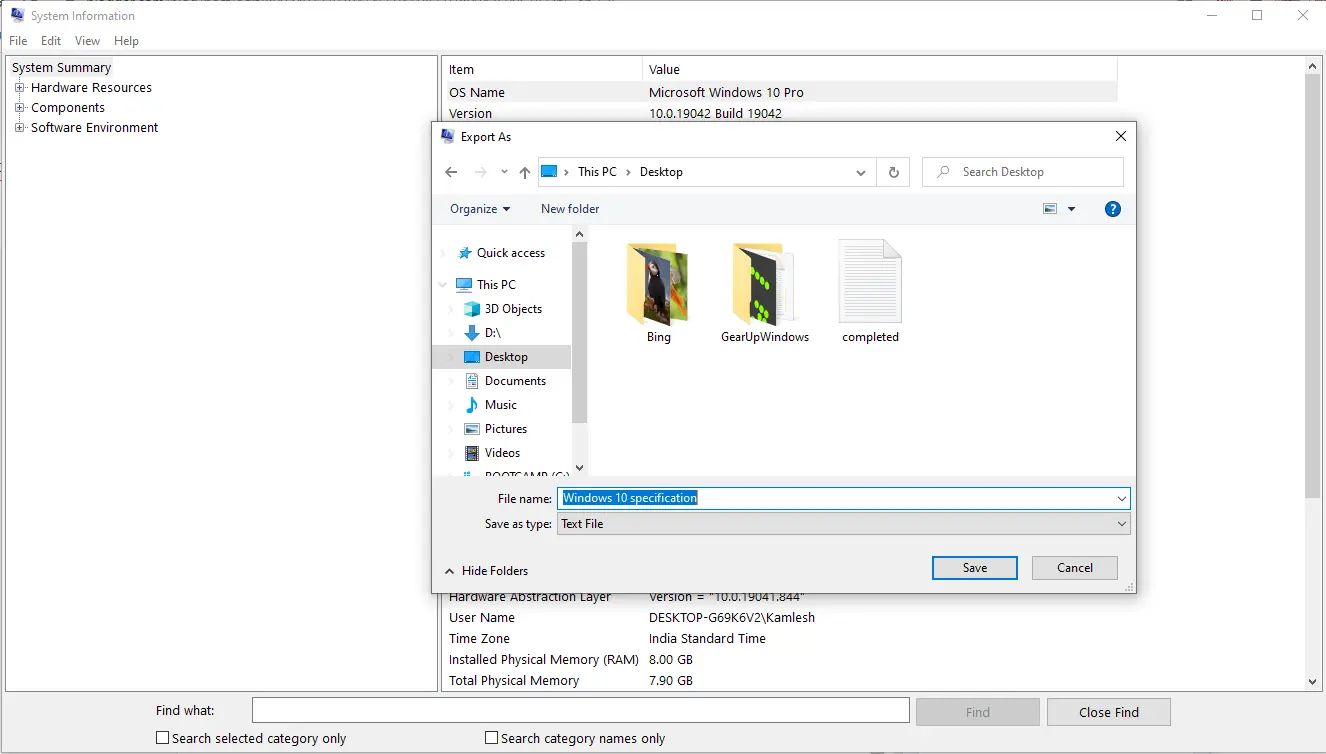
Finally, click on the Save button to save the System Information details of your PC. It will take a few seconds to generate and copy the results on your PC.
Once you have completed the above-mentioned steps, all specifications are exported into a text file, which you can open with a notepad by double-clicking on it.

How to find computer or laptop specs using the DirectX Diagnostic Tool?
On Windows 10 PC, you can also view the information about DirectX sound and video to troubleshoot different system problems using the DirectX Diagnostic Tool (dxdiag). Other specs are also available, like the information available through the “About” settings page. To view your computer specs using the DirectX Diagnostic Tool, do the following steps:-
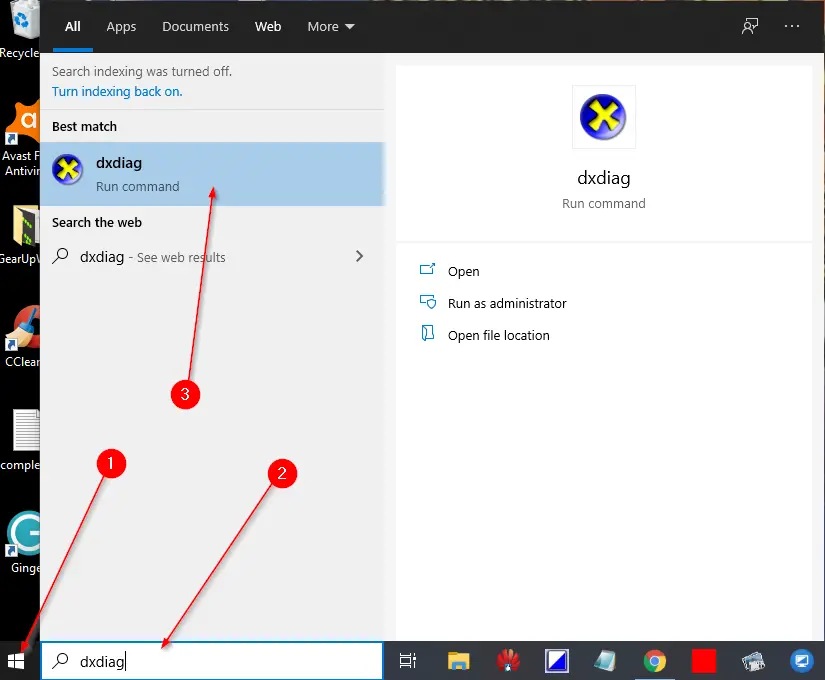
Step 1. Click on the Start button and type dxdiag. From the available search results, click the dxdiag to open the DirectX Diagnostic Tool.
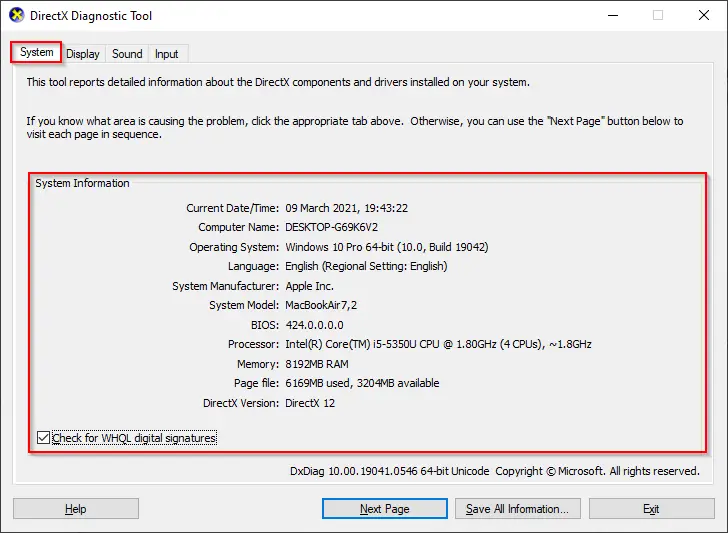
Step 2. Click on the System tab. You can view the computer tech specs in the “System information” section, including operating system version, system manufacturer, system model, processor manufacturer and core, memory (RAM), BIOS, or UEFI version.
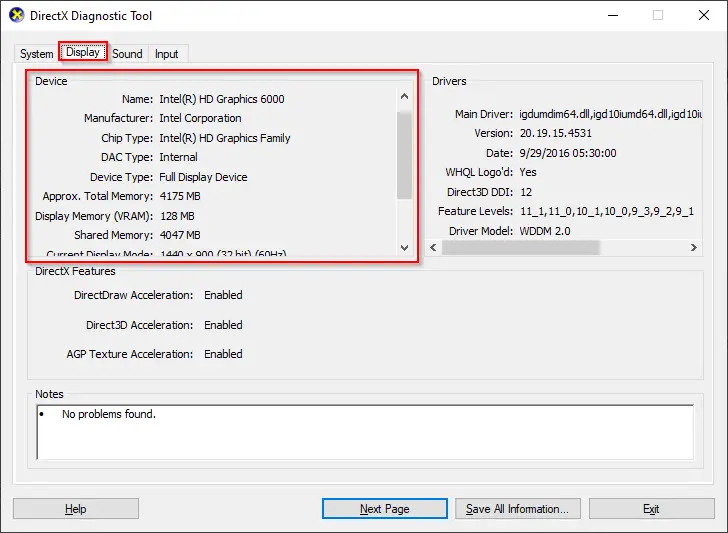
Step 3. In the Display tab, under the Device section, you can see the graphics or video card technical specs like name and manufacturer of the graphics card, display memory (VRAM), chip, etc.
Step 4. Clicking on the Sound tab, you can find the manufacturer of the sound card and other details.
Step 5. If you want to save these details for future reference, you can do this by pressing the button labeled “Save All Information.”
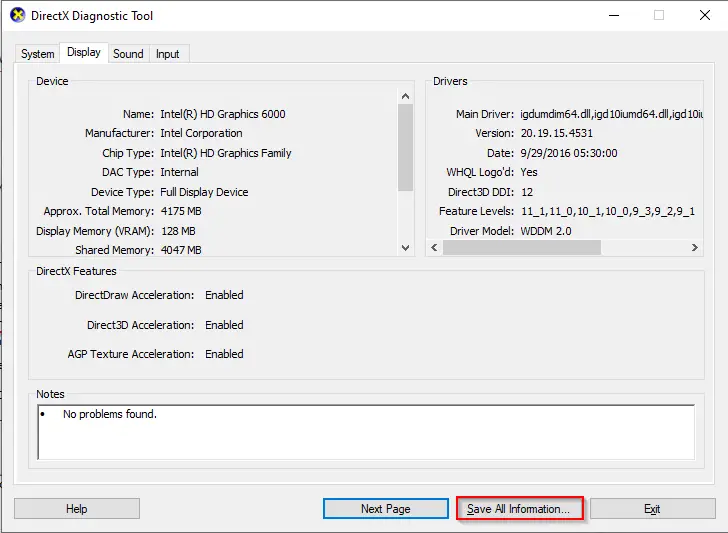
Step 6. Once you click the “Save All Information” button, select the location you want to save the file and type a file name. Finally, click on the Save button.
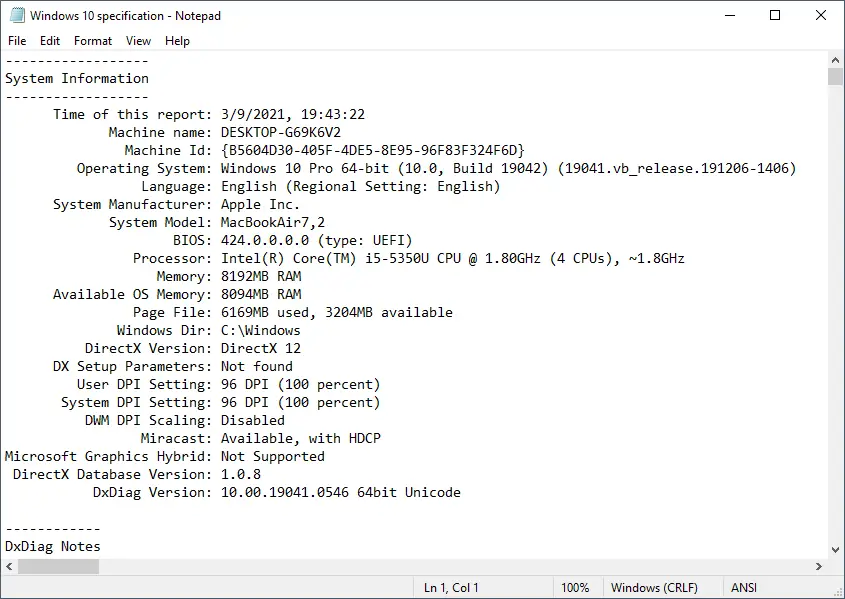
Once you have completed the above-mentioned steps, your PC’s system information is saved on your computer. You can open that file with a Notepad application.
How to check or view the PC’s full specifications on Windows 10 using PowerShell?
The system information on Windows 10 can be retrieved using PowerShell. To find out the computer’s technical details, perform the following under-mentioned steps:-
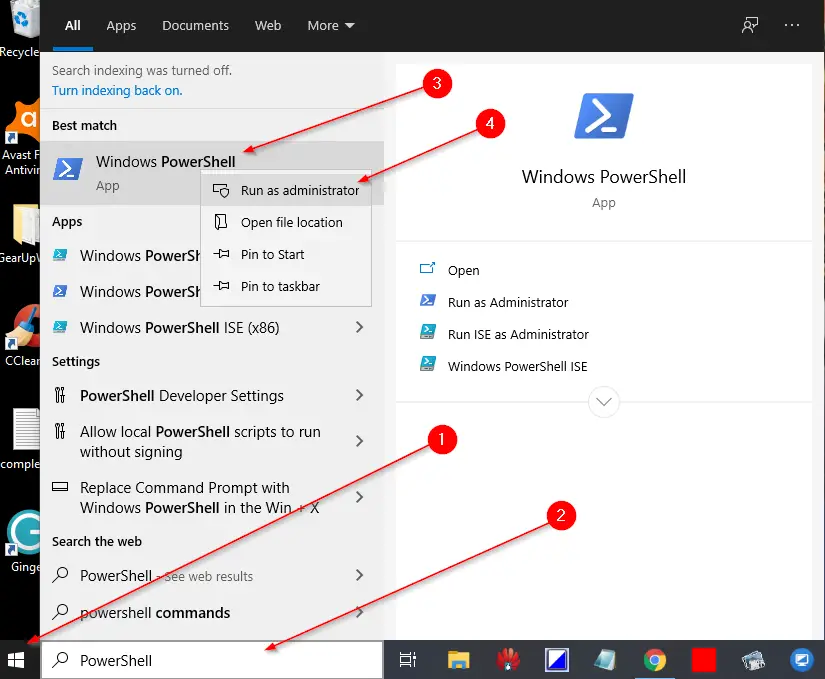
Step 1. Click on the Start button and type PowerShell. In the available search results, right-click on the Windows PowerShell entry and select the Run as administrator option.
Step 2. Type the following command and press Enter from the keyboard:-
Get-ComputerInfo
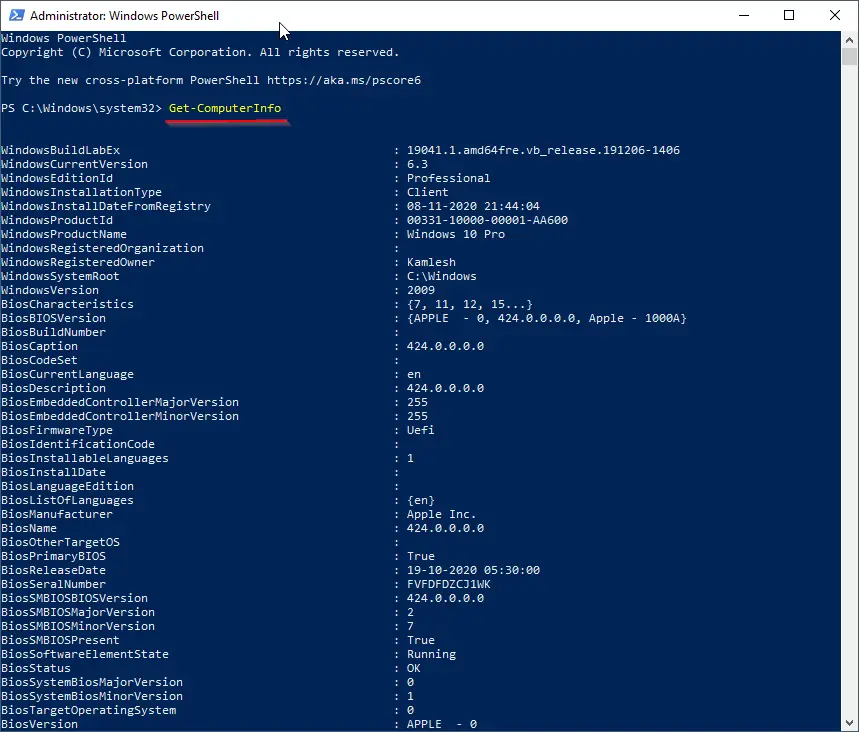
Once you have completed the above-mentioned steps, you can see the complete system information of your PC, including BIOS, processor, Windows version, etc.
Quick Note: If you want to save a copy of the output of PowerShell commands, select the whole text of PowerShell and right-click from the mouse. All selected text is copied into the clipboard. Open a notepad file and use Ctrl + V from the keyboard to paste the copied content.
How to find computer specs using Command Prompt?
Using the Command Prompt, you can find any Windows computer’s complete tech specs. To find the computer hardware and software details, perform the following steps:-
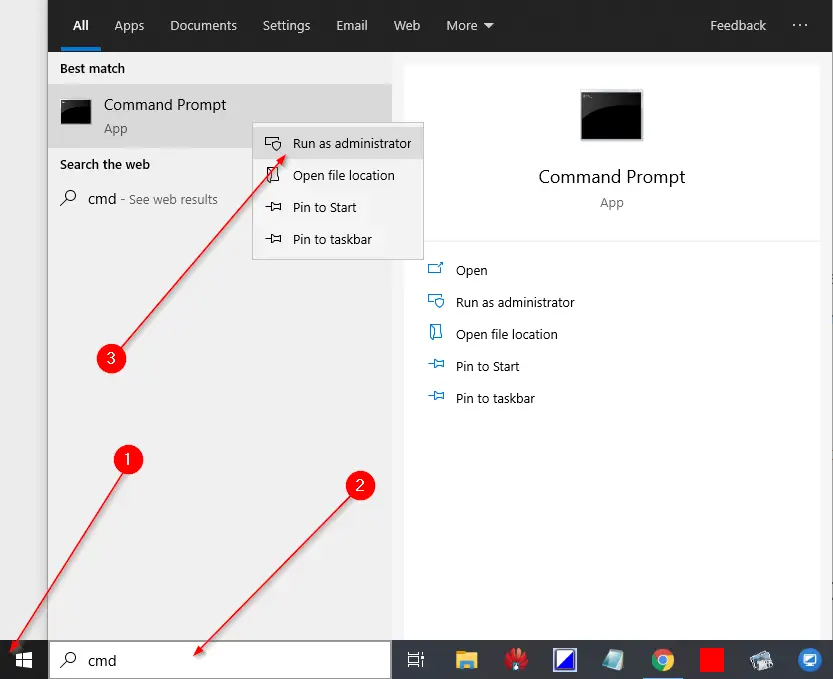
Step 1. Click on the Start button and type cmd. From the available results, right-click on the Command Prompt app and select Run as administrator.
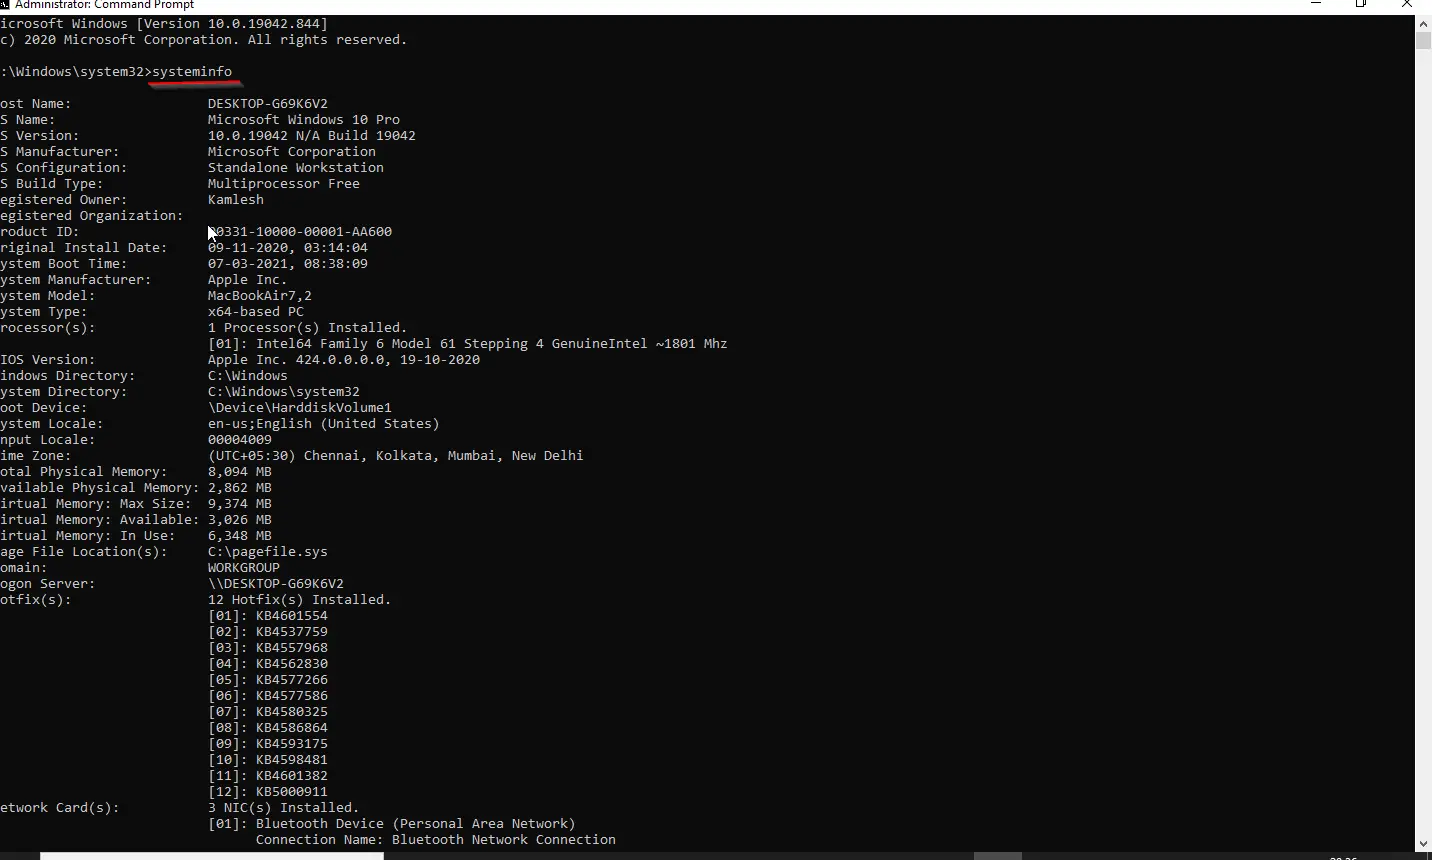
Step 2. Type the following command and press Enter from the keyboard to view the system information of your computer:-
systeminfo
Quick Note: If you want to save a copy of the output of Command Prompts commands, select the whole text of Command Prompt and right-click from the mouse. The selected text is copied into the clipboard. Open a notepad file and use Ctrl + V from the keyboard to paste the copied content.
Once you have completed the above-mentioned steps, you will see the system information about the computer’s hardware and software, including Windows 10 and update information, system architecture, BIOS or UEFI, Memory (RAM), network, and other details.
That’s all!
Let me know if you have more ideas to find out the System Information without any third-party tool.
Conclusion
In conclusion, checking the system information of a computer is necessary for various reasons, such as troubleshooting problems, upgrading the system, or knowing if a particular game can be installed on the PC. While Speccy is an excellent third-party tool for this purpose, Windows 10 provides built-in ways to check the system specifications. The About page in the Settings app displays basic system information, including the processor, installed memory, and Windows details. The System Information application displays detailed information about the computer’s hardware specifications, including the processor, motherboard, graphics card, and BIOS. The DirectX Diagnostic Tool displays information about DirectX sound and video, among other specifications. Additionally, the Command Prompt and PowerShell can also be used to obtain system information. By using these built-in tools, users can avoid the need to use third-party tools for checking system information on Windows 10.
You might also be interested in O&O DeskInfo, which displays the system information on a Windows 10 desktop.