By default, the Windows Update service remains turned on Windows 11, which automatically downloads and installs the latest updates, drivers, and hotfixes released by Microsoft. To complete the installation of updates, sometimes it needs to restart your PC. So, Windows 11 uses the Active Hours feature to schedule updates and restarts when you’re not using your PC. The default active hours is 8 AM for Start time and 5 PM for End time on a 24-hour clock.
Also Read:
- How to schedule a restart for a Windows update on Windows 11?
- How do you specify deadlines for automatic restart to Windows 11 or 10 after the Windows update?
What are Windows Active Hours?
A Windows update may restart your computer several times. If you don’t want this to happen, you can choose a time to restart your computer or schedule Windows 11 updates at night. In such a situation, the Windows active hours feature is essential.
Windows active hours feature doesn’t restart your computer automatically during the hours you have set. It is helpful in many scenarios. For instance, you don’t want your work to be disrupted when working on your computer. So, you can set active hours to prevent that possibility.
In this gearupwindows article, we will guide you on setting active hours so that your PC will not automatically restart during this time to finish installing a Windows Update.
How to Set Active Hours for Windows Update using Settings?
Windows 11 allows you to configure active hours using the Settings app. Here are the steps:-
Step 1. First, open Settings.
Step 2. Then, click on Windows Update on the left side.
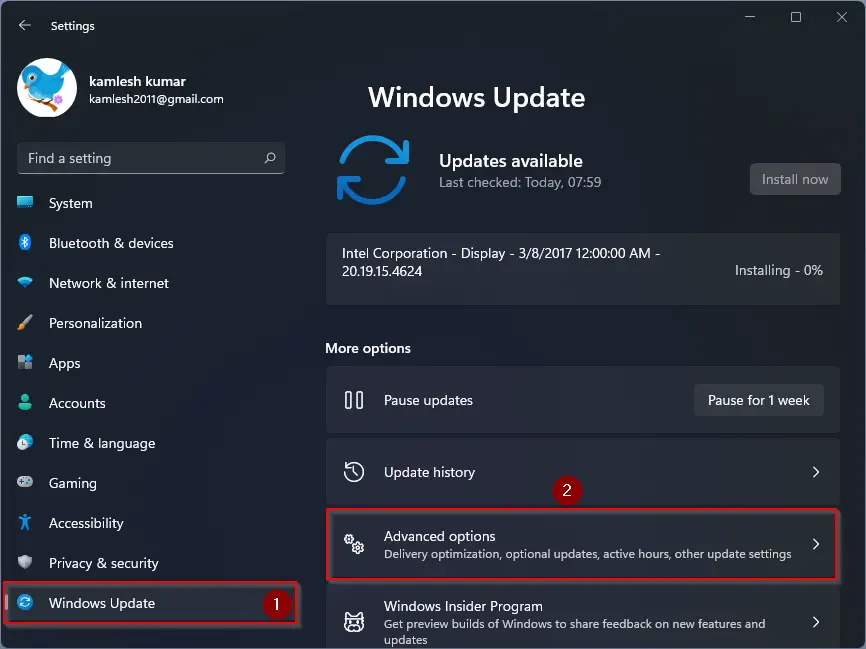
Step 3. After that, select the Advanced options tile on the right.
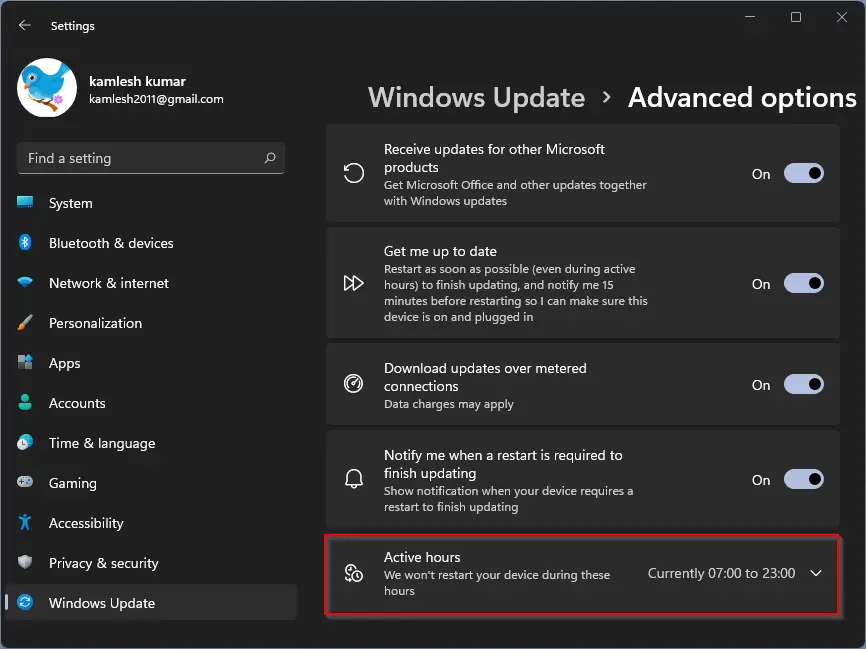
Step 4. Next, click the Active hours setting to expand it.
Step 5. Now, use the drop-down menu “Adjust active hours” and select the Manually option.
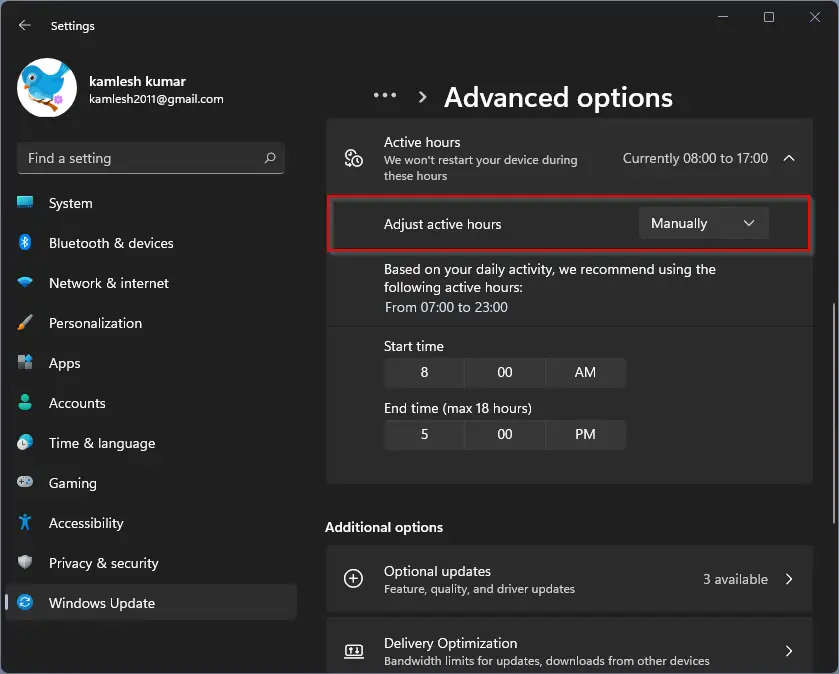
Step 6. Next, select the Start time when you will start using your computer and after that, choose the End time (max 18 hours) when you will no longer be using your PC.
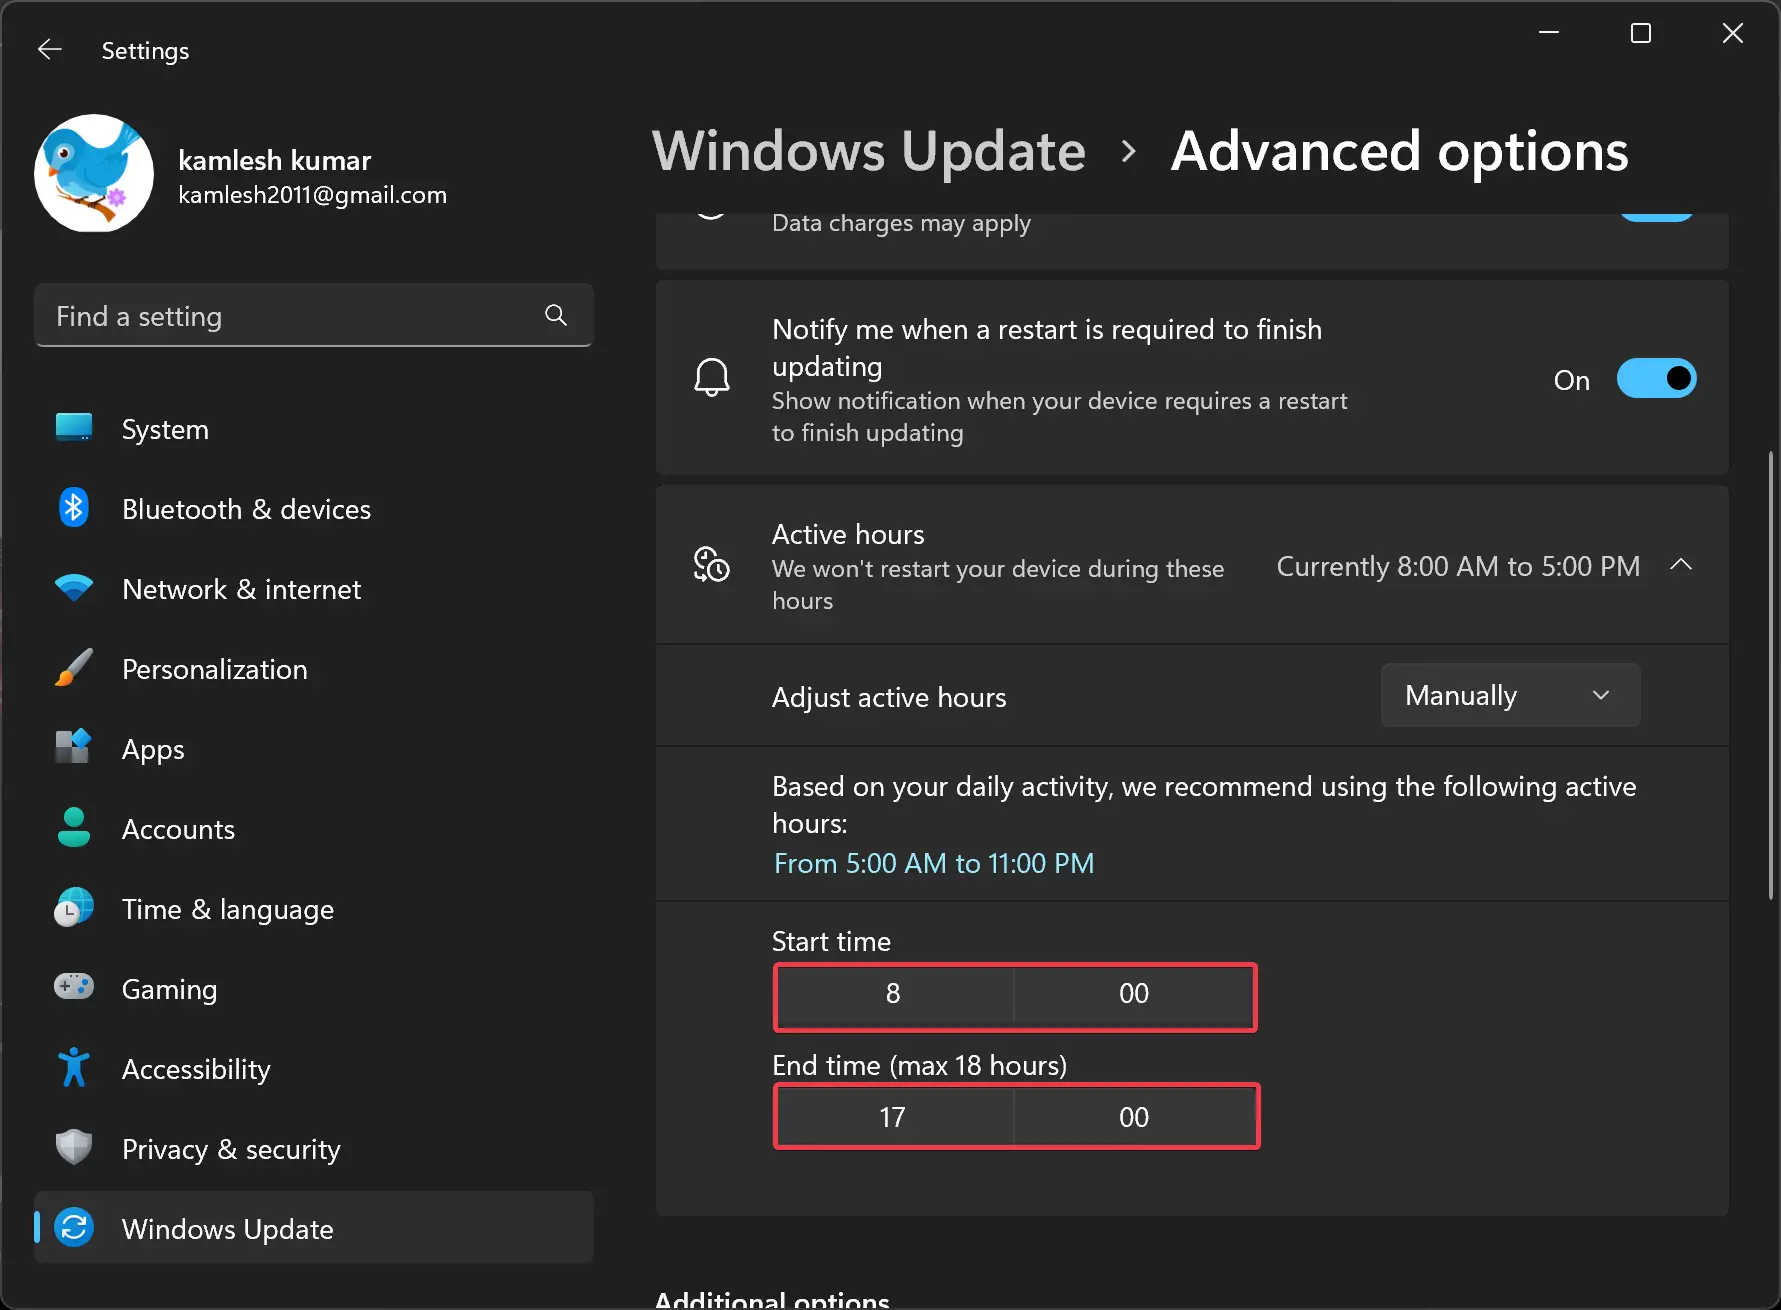
Once you complete the above steps, when a Windows update is pending for installation, Windows 11 won’t reboot the system during the start and end time range you specified in the “Active hours” feature.
To revert the changes and allow the system to decide when your computer should restart, use the instructions mentioned above, and in step 5, select the Automatic option.
How to Configure Windows 11 Active Hours through Local Group Policy Editor?
If you want to change or adjust the “active hours” settings in Windows 11 through Group Policy, use these steps:-
Step 1. First, open Local Group Policy Editor.
Step 2. Next, browse the following path on the left side of the Local Group Policy Editor window:-
Computer Configuration > Administrative Templates > Windows Components > Windows Update > Manage end user experience
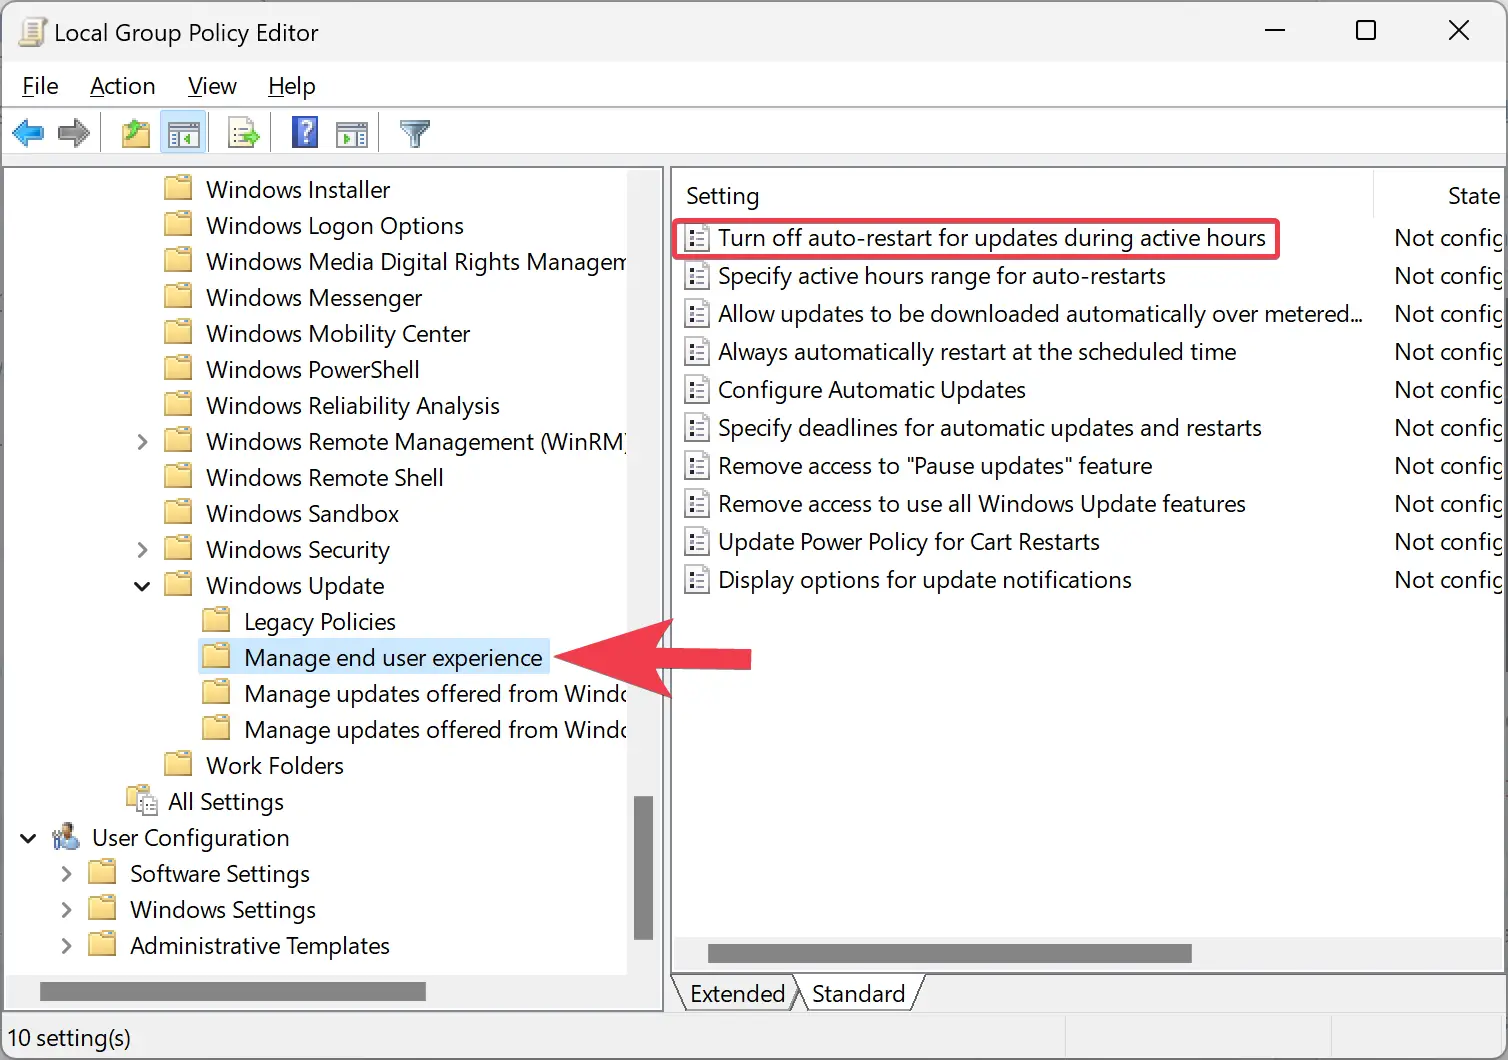
Step 3. On the opposite side of the “Manage end user experience” folder, double-click the policy name “Turn off auto-restart for updates during active hours.”
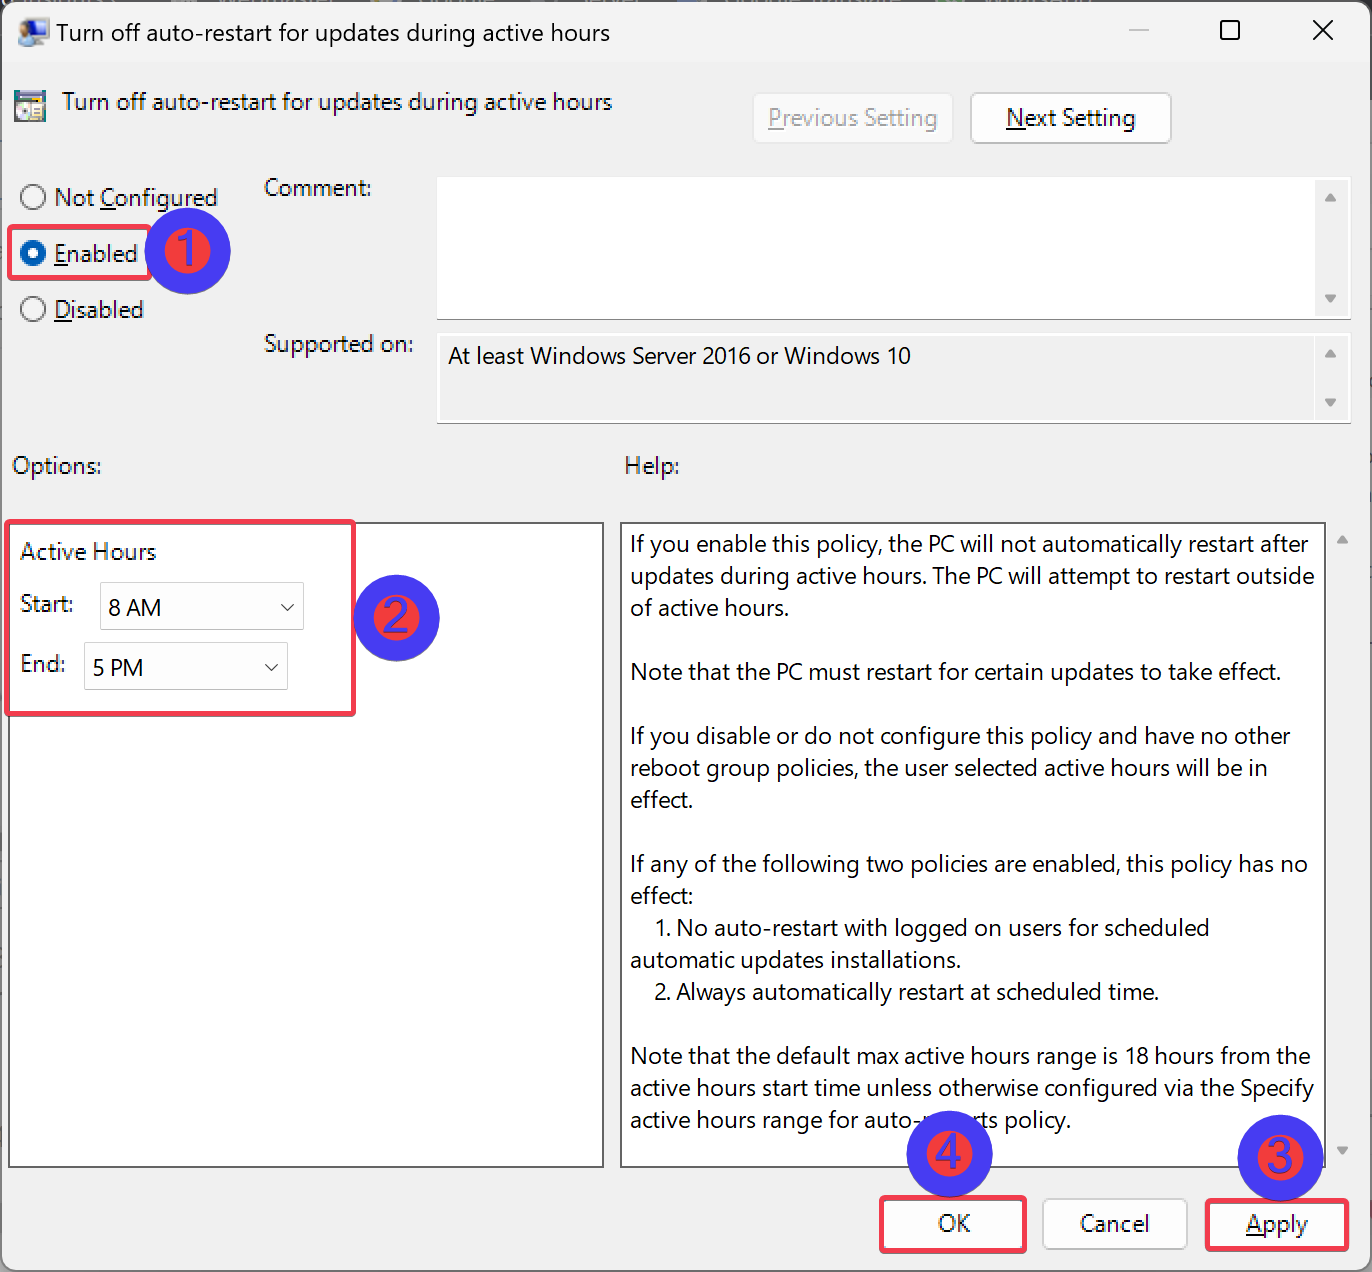
Step 4. Then, pick the Enabled option.
Step 5. After that, under the “Options” section, in the Active Hours setting, use the drop-down menu Start and End to specify when you will be using your computer and want to prevent automatic restarts for a Windows 11 update.
Step 6. Next, click the Apply button.
Step 7. Then, hit the OK button.
Step 8. At last, reboot your computer to apply the changes.
Once you complete the above steps, during the active hours you have set, your PC will not restart. Even a user account on your PC will not be able to modify the configuration through the Settings app.
To undo the changes, repeat the above steps, and in step 3 above, select the Not Configured option.
How to Set Windows 11 Active Hours by Registry Editor?
To set active hours in Windows 11 using Registry Editor, do the following:-
Step 1. Very first, open Registry Editor.
Step 2. Then, navigate to the following key on the left side of Registry Editor:-
HKEY_LOCAL_MACHINE\SOFTWARE\Microsoft\WindowsUpdate\UX\Settings
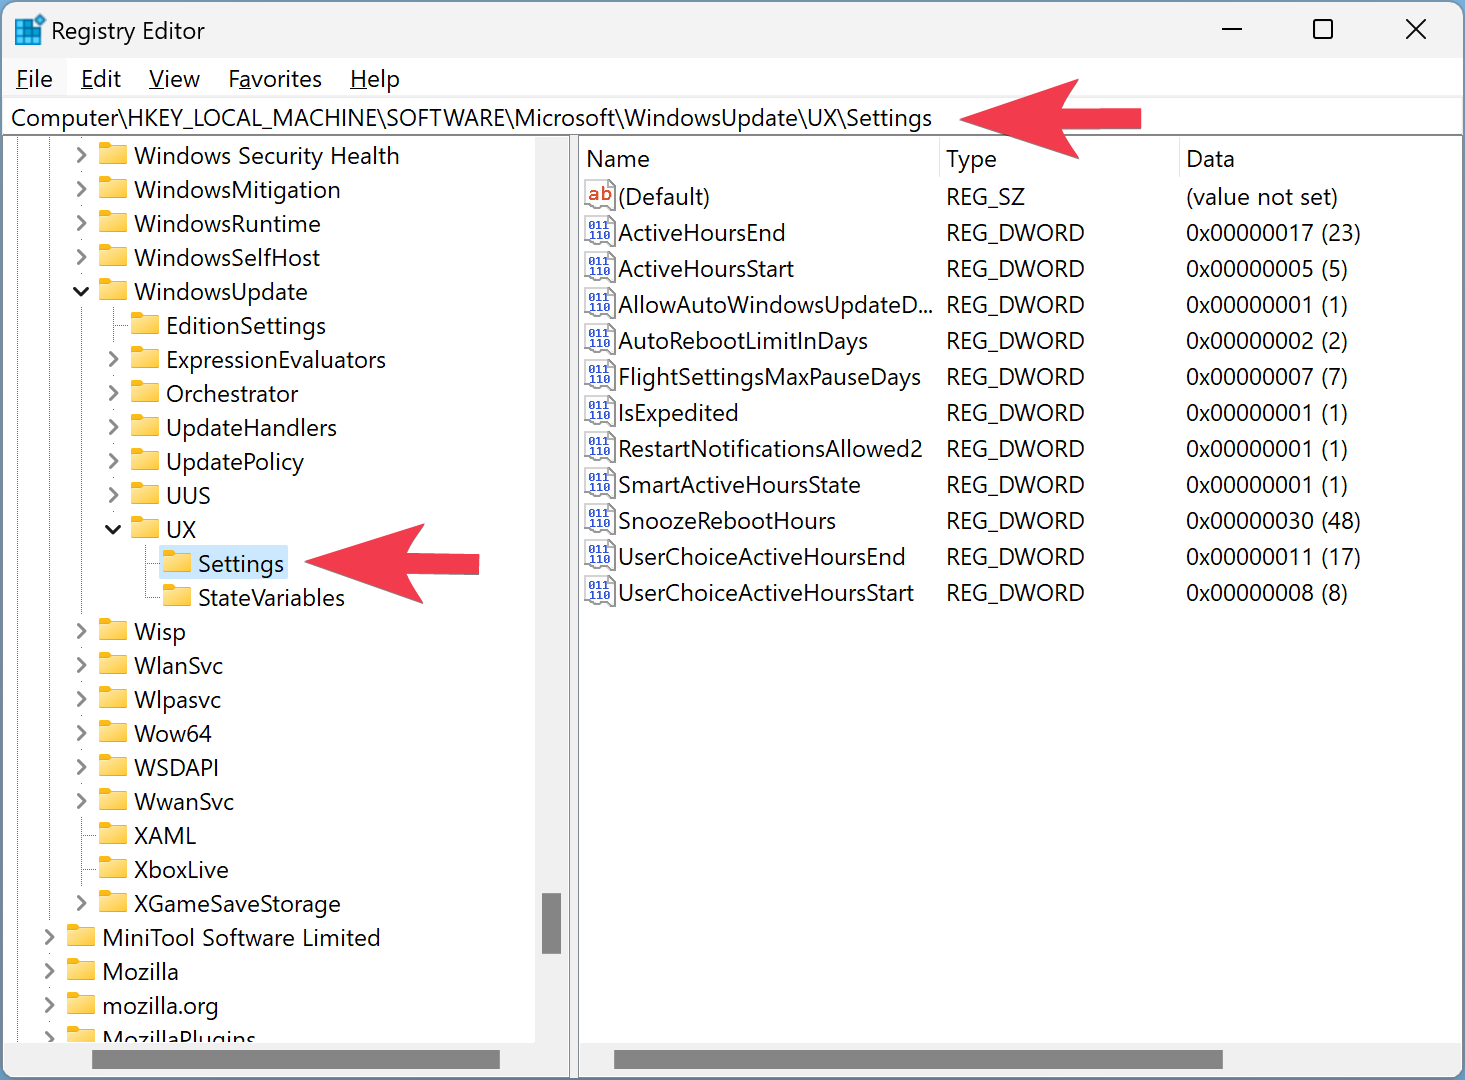
Step 3. On the right sidebar, double-click the SmartActiveHoursState REG_DWORD to modify it.
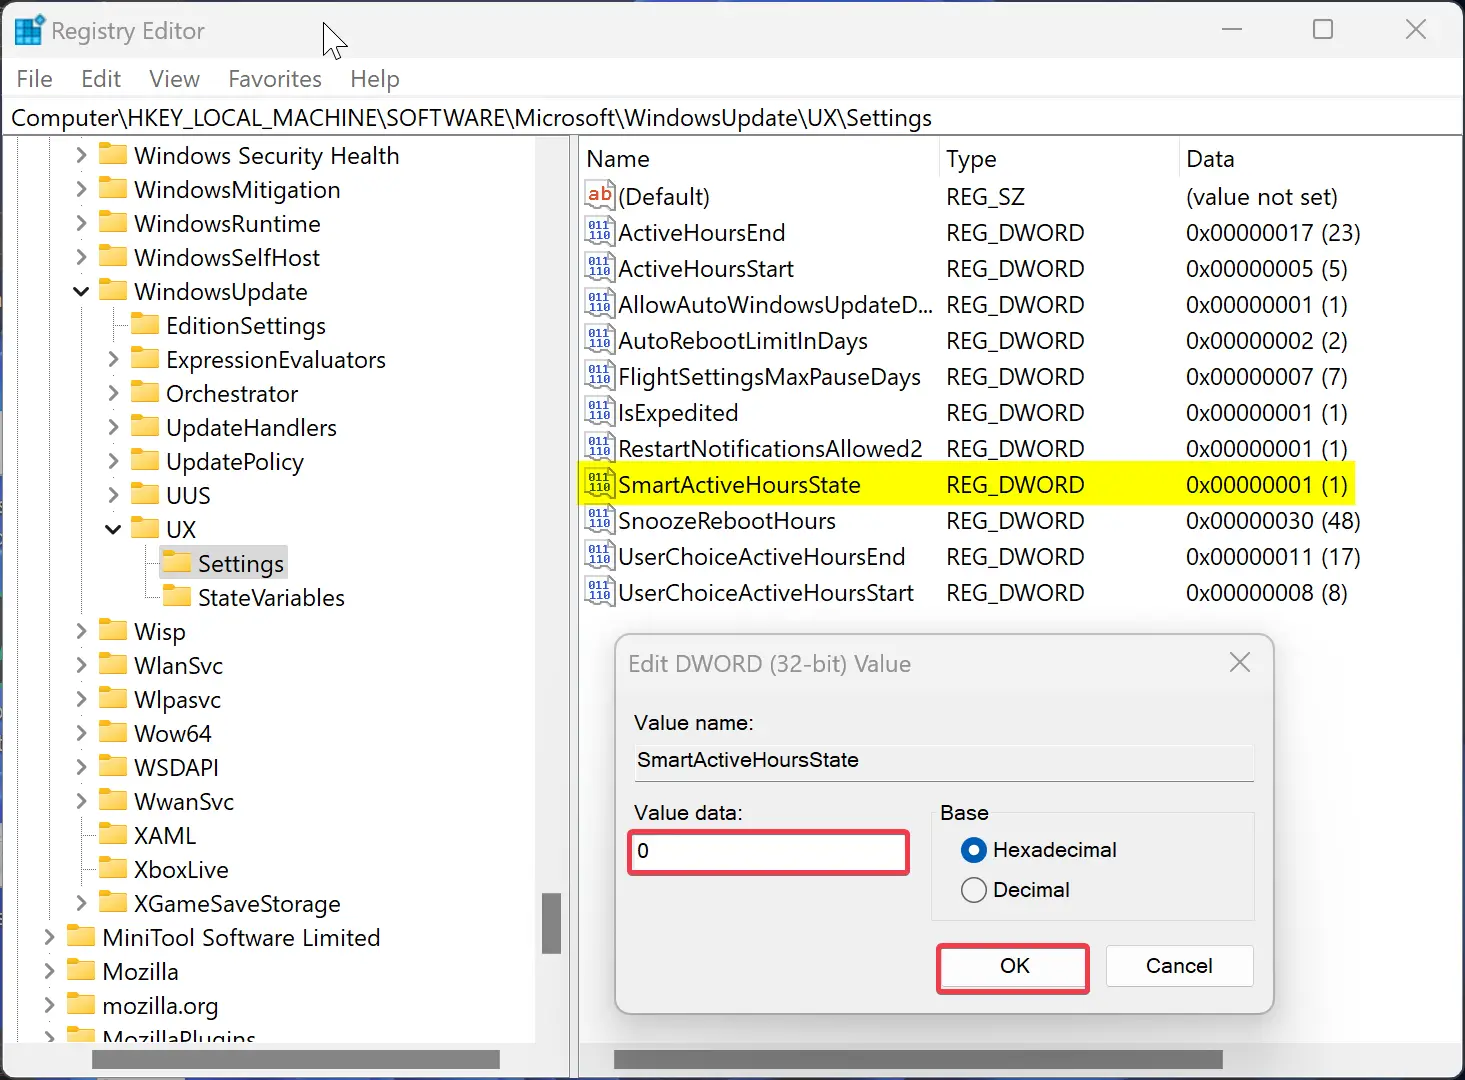
Step 4. Set the “Value data” as 0 to configure active hours manually.
Quick Note: If you want to allow Windows 11 to set active hours automatically, set the “Value data” to 1.
Step 5. Click OK.
Step 6. Now, in the Settings key’s right pane, double-click on the ActiveHoursStart REG_DWORD to modify it.
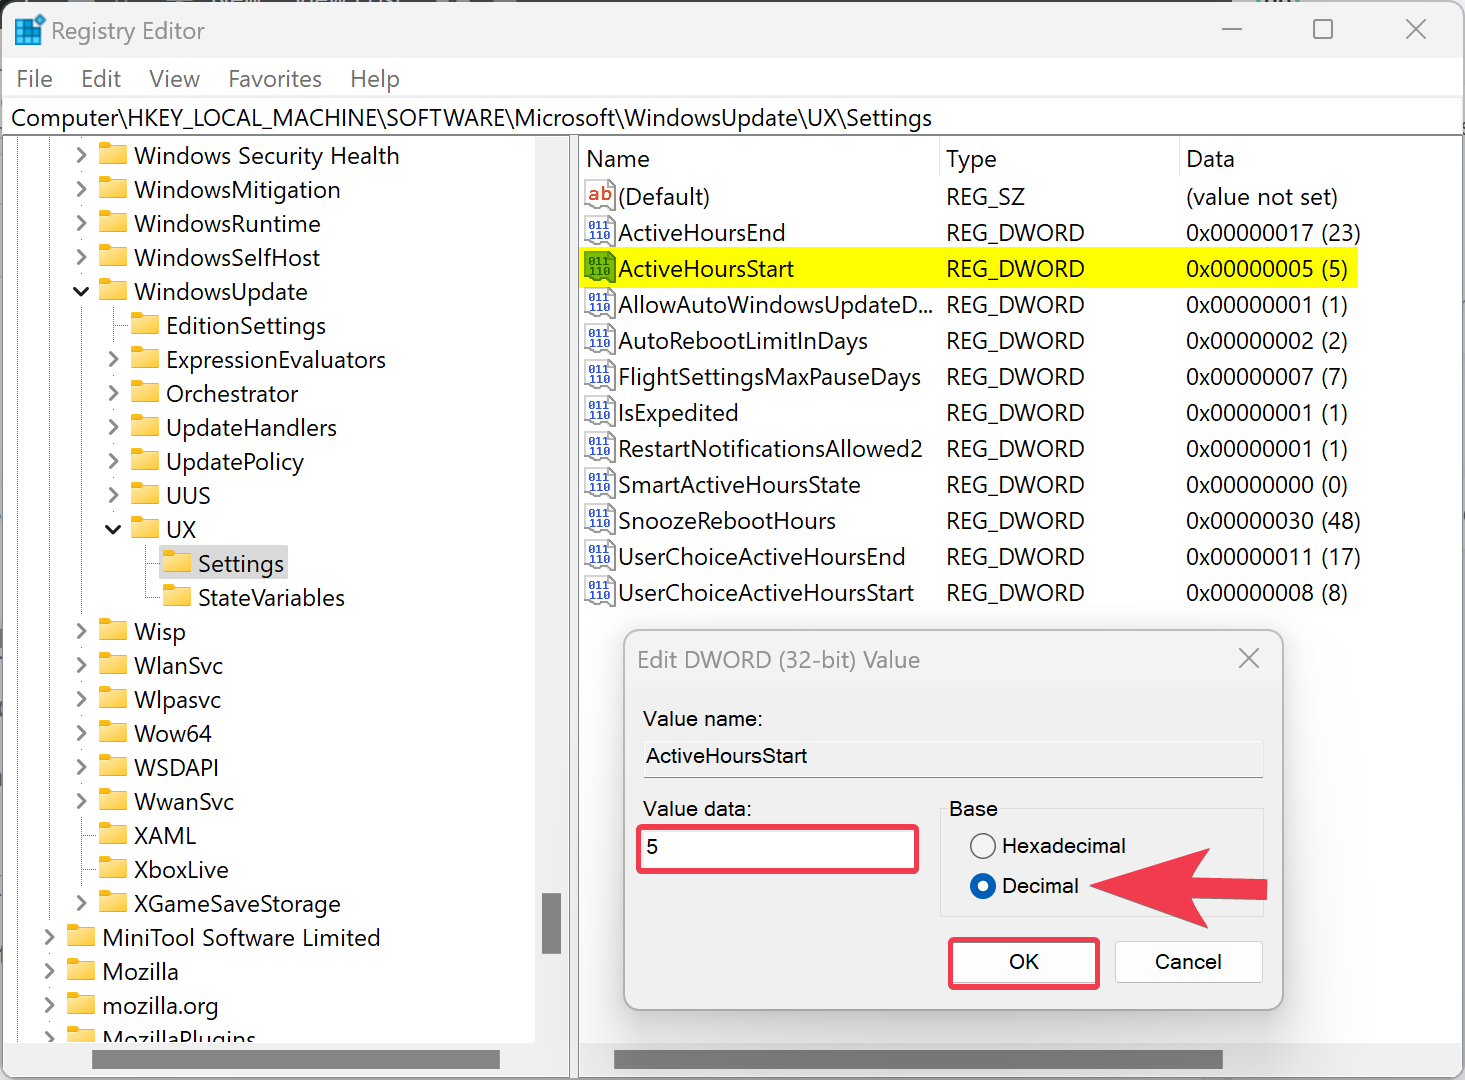
Step 7. Select Decimal under Base.
Step 8. Type in an hour (ex: 5) using the 24-hour clock format.
Step 9. Click OK.
Step 10. Then, on the right-side pane, double-click on ActiveHoursEnd REG_DWORD to modify it.
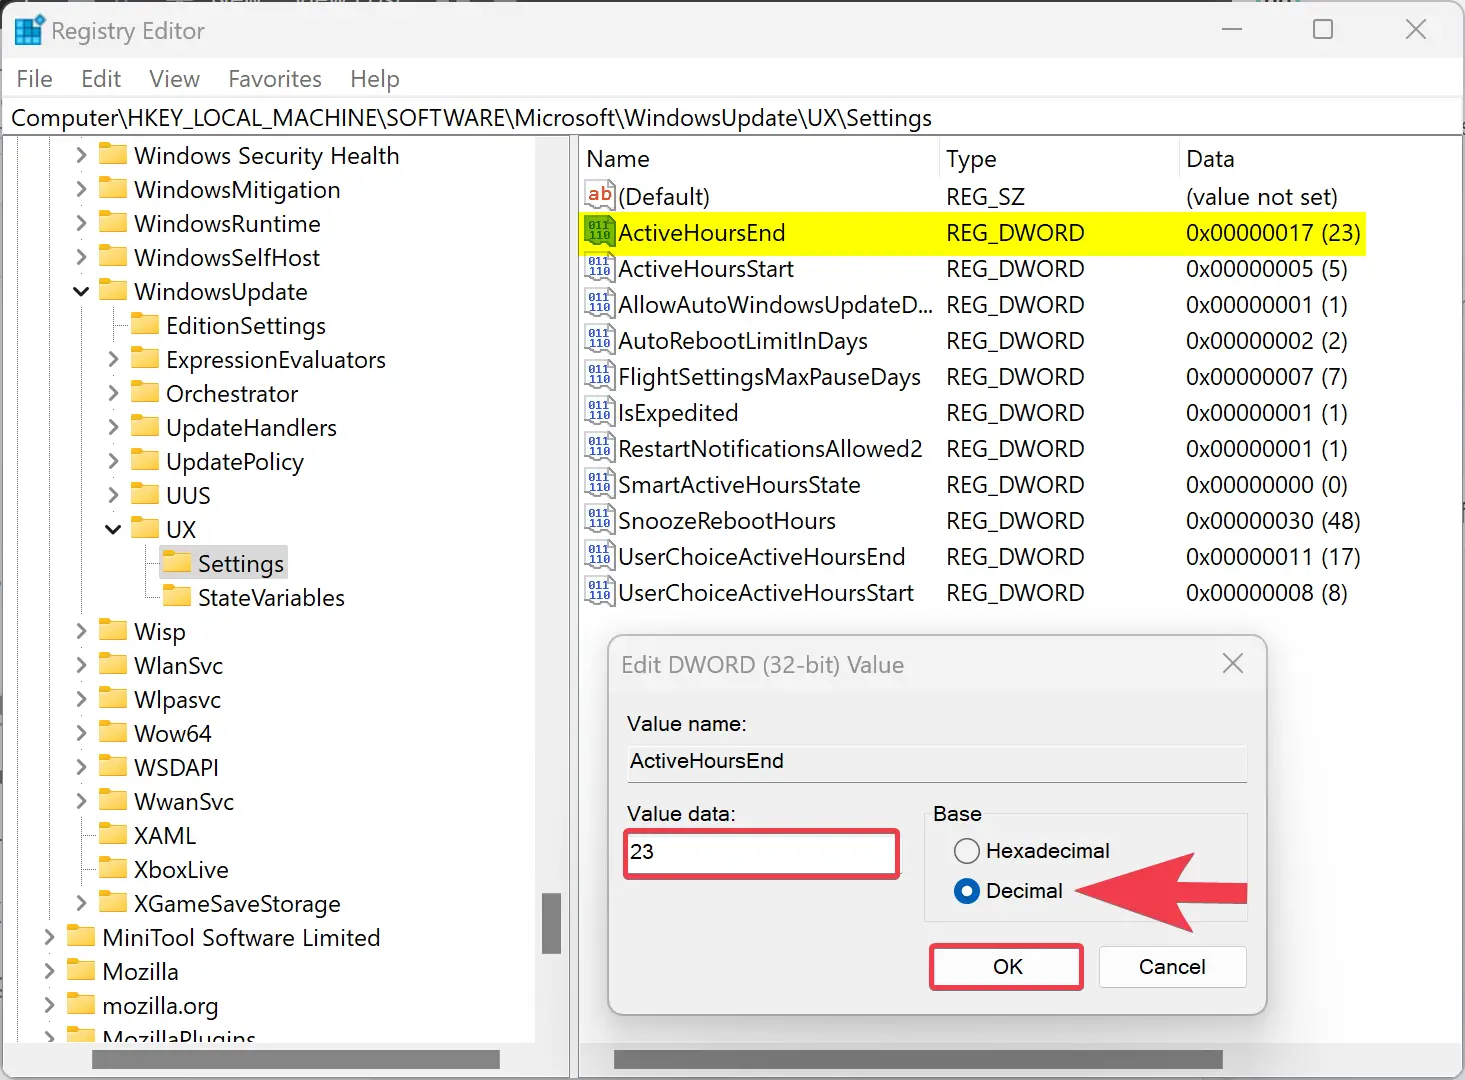
Step 11. Select Base as Decimal.
Step 12. Type an hour (ex: 23) in the “Value data” field using the 24-hour clock format.
Step 13. Click OK.
That’s it.
Conclusion
In conclusion, the Windows active hours feature is an essential tool that can prevent automatic restarts during hours set by the user. In this article, we have provided a comprehensive guide on how to set active hours using the Settings app, Local Group Policy Editor, and Registry Editor on Windows 11. By following these steps, users can prevent work disruptions and schedule updates and restarts during a time that is convenient for them. It is essential to note that the Windows Update service should remain turned on to keep the system updated with the latest updates, drivers, and hotfixes released by Microsoft.