Windows 11 and Windows 10 are popular operating systems known for their user-friendly interface and powerful features. One essential aspect of maintaining a smoothly running system is managing hardware components. Occasionally, you may need to scan for hardware changes to detect and resolve issues such as missing drivers, hardware conflicts, or unrecognized devices. In this article, we will guide you through the process of scanning for hardware changes in Windows 11 and Windows 10.
Why Scan for Hardware Changes?
Scanning for hardware changes serves several important purposes:-
- Detect New Hardware: When you add new hardware components to your computer, such as a graphics card, printer, or USB device, Windows may not immediately recognize them. Scanning for hardware changes helps the operating system identify and configure these new devices.
- Fix Driver Issues: Outdated or corrupted drivers can lead to hardware problems. Scanning for hardware changes can help Windows identify these driver-related issues and attempt to resolve them automatically.
- Resolve Hardware Conflicts: Sometimes, multiple devices may share the same resources, leading to conflicts. Scanning for hardware changes can help Windows reconfigure devices to avoid conflicts.
- Recover Missing Devices: If a previously recognized device suddenly disappears from Device Manager, scanning for hardware changes can help Windows rediscover and reconfigure the missing device.
Now, let’s walk through the steps to scan for hardware changes in Windows 11/10.
How to Scan for Hardware Changes in Windows 11/10?
Method 1: Using Device Manager
Device Manager is a built-in Windows utility that allows you to manage and configure hardware devices on your computer. Here’s how to use it to scan for hardware changes:-
Step 1. Press “Windows + X” on your keyboard to open the Quick Access Menu, and then select “Device Manager.”
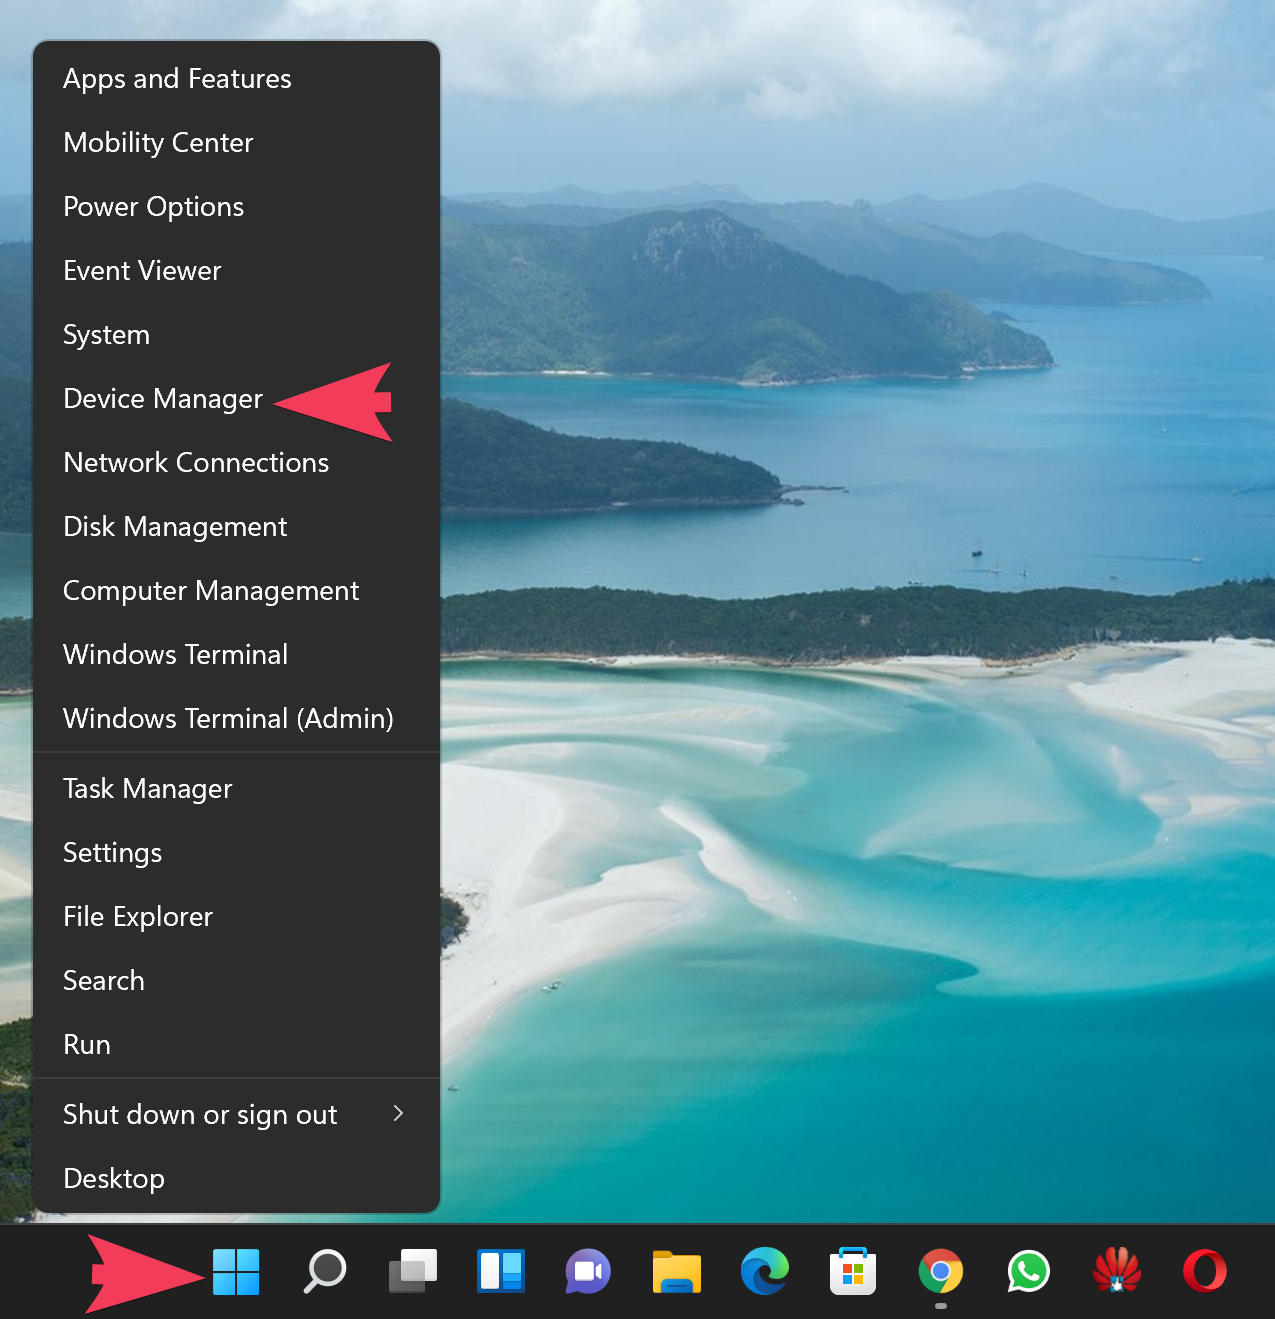
Step 2. In the Device Manager window, expand the categories to view your hardware components. To scan for hardware changes, right-click on your computer’s name at the top of the list (usually listed as your computer’s name or “This PC”) and select “Scan for hardware changes.”

Step 3. Windows will start scanning for new hardware or changes to existing hardware. It will attempt to identify and configure any newly connected devices and update drivers if needed.
Step 4. Once the scan is complete, you should see any newly recognized devices or resolved hardware issues in the Device Manager window.
Method 2: Using Windows Terminal/Command Prompt
You can also use Command Prompt to initiate a hardware scan. Here’s how:-
Step 1. Press “Windows + X” on your keyboard and select “Windows Terminal (Admin)” or “Command Prompt (Admin)” to open Windows Terminal/Command Prompt with administrative privileges.
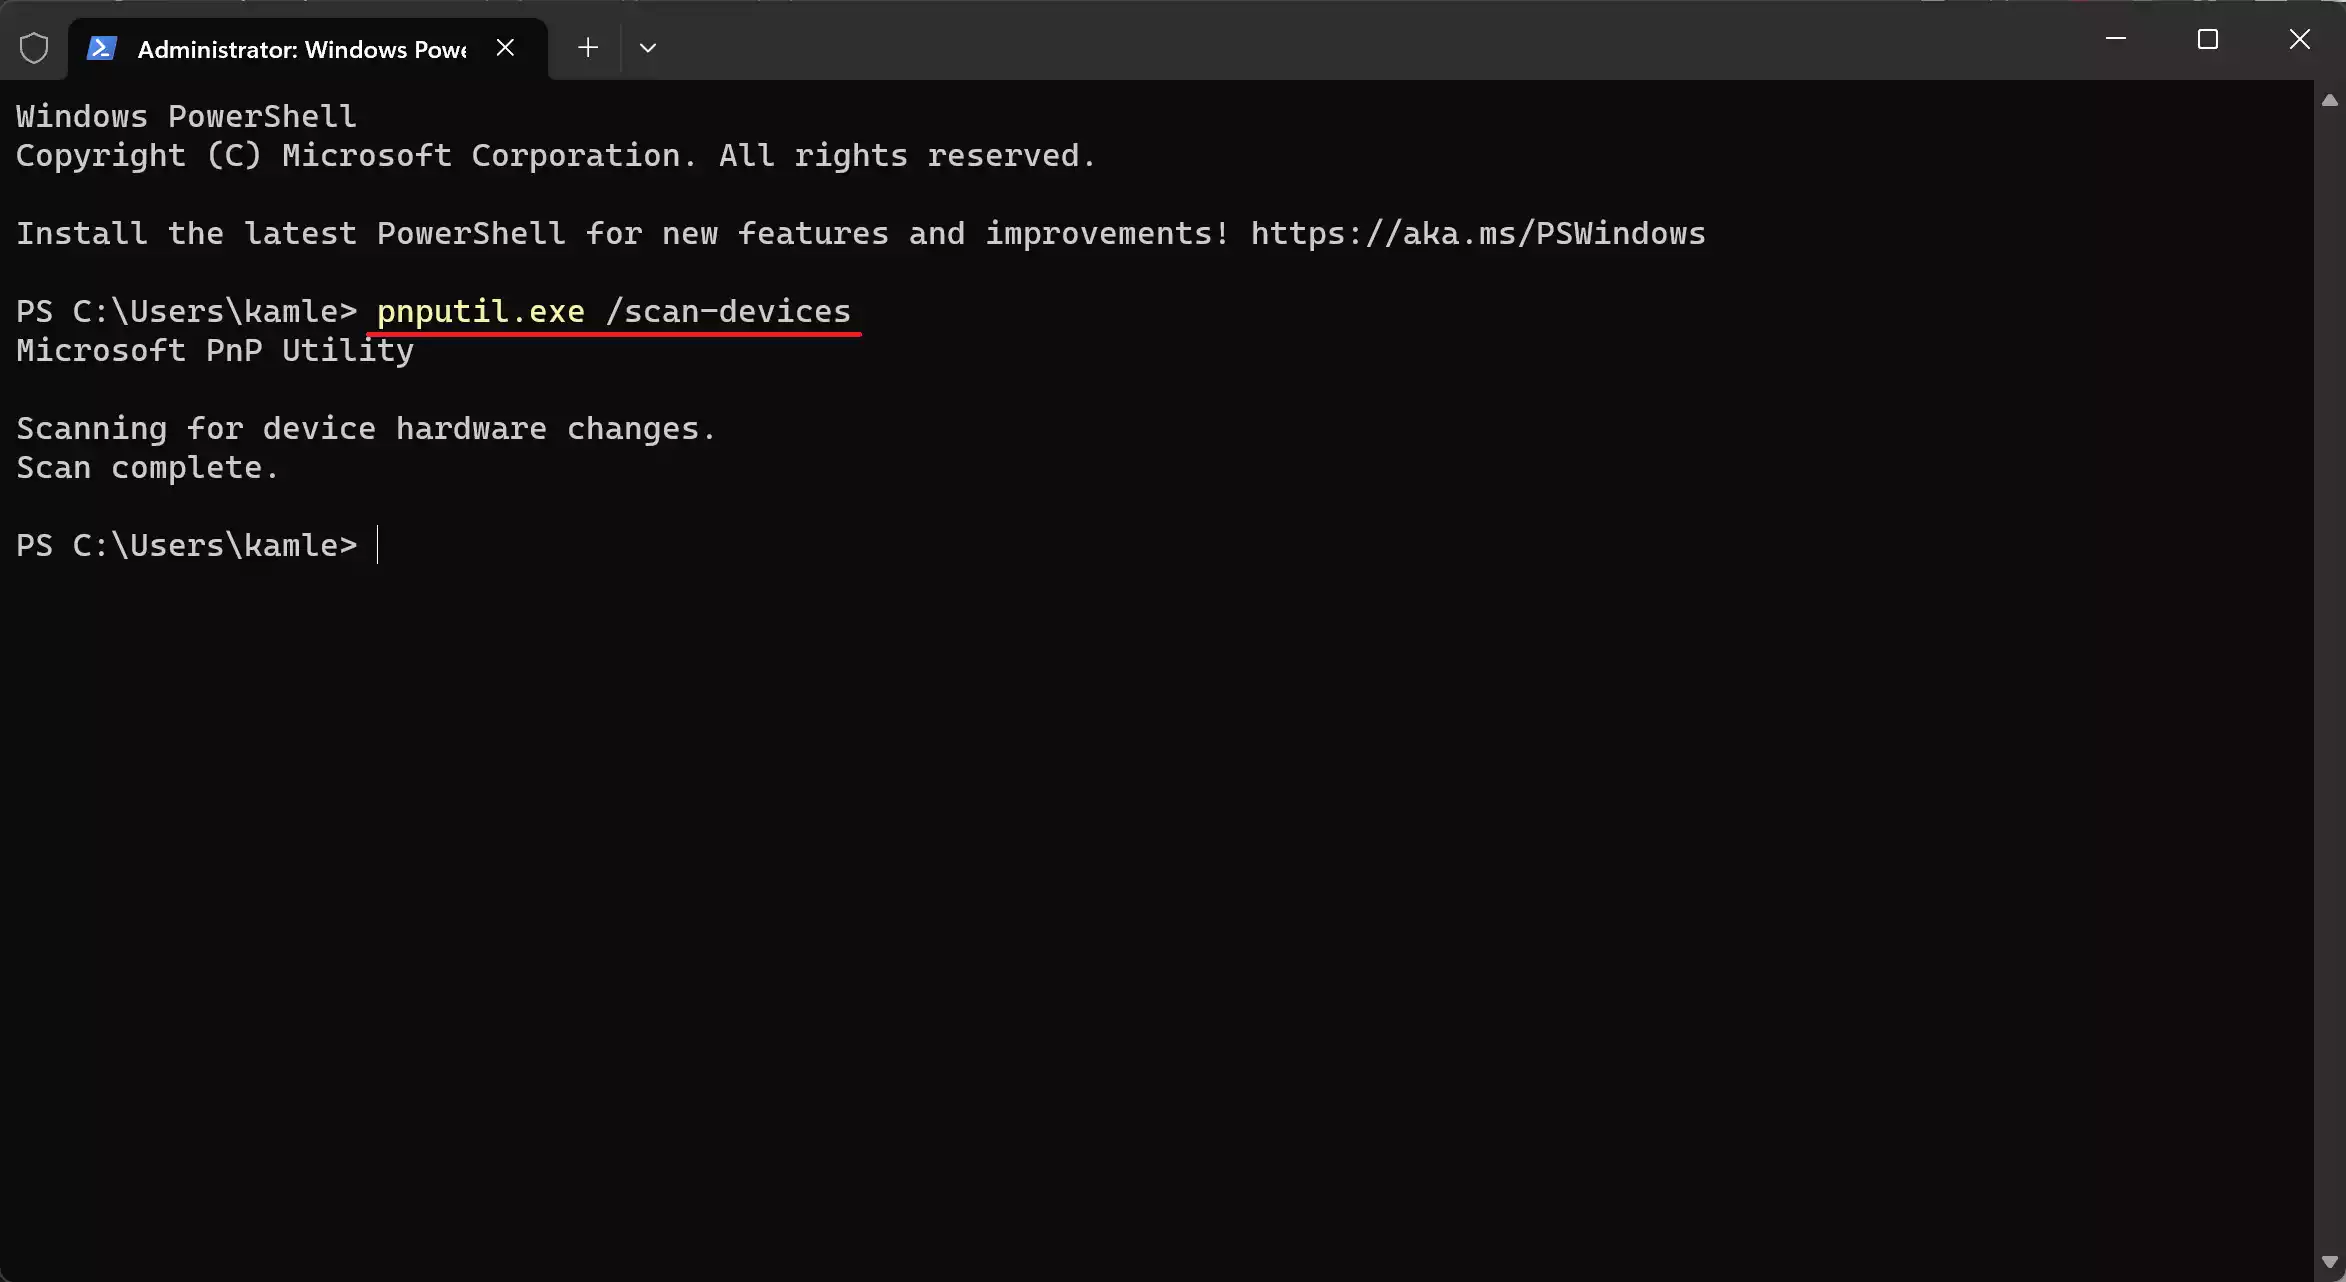
Step 2. In the Terminal or Command Prompt window, type the following command and press Enter:-
pnputil.exe /scan-devices
This command will initiate a hardware scan, and Windows will attempt to detect and resolve hardware issues.
Step 3. Wait for the scan to complete. The process may take some time, depending on your system’s configuration and the number of devices.
Step 4. After the scan is finished, you will see a message “Scan complete.”
Step 5. Now, you can close the Windows Terminal or Command Prompt window.
Conclusion
Scanning for hardware changes is a useful troubleshooting step to ensure that your computer’s hardware components are functioning correctly. Whether you use Device Manager or Command Prompt, regularly checking for hardware changes can help you keep your Windows 11/10 system running smoothly by detecting and resolving hardware-related issues. By following the methods outlined in this article, you can effectively manage your computer’s hardware and ensure it operates at its best.