The Hyper-V virtualization technology is available only in Windows 11/10 Pro, Enterprise, and Education editions. However, a small batch script can also install Hyper-V on Windows 11 and 10 Home.
By installing Hyper-V on your Windows machine, you can virtualize any operating system, including Windows, Ubuntu, or other operating systems that support Hyper-V.
How to Add Hyper-V on Windows 11 or 10 Home?
If your system support Hyper-V, follow these steps to install it on Windows 11 or 10 Home:-
Step 1. Press Windows + R keyboard shortcut to open the Run dialog box.
Step 2. Then, type notepad and click OK to launch the Notepad application.

Step 3. In the Notepad file, copy and paste the following script:-
pushd "%~dp0"
dir /b %SystemRoot%\servicing\Packages\*Hyper-V*.mum >hv.txt
for /f %%i in ('findstr /i . hv.txt 2^>nul') do dism /online /norestart /add-package:"%SystemRoot%\servicing\Packages\%%i"
del hv.txt
Dism /online /enable-feature /featurename:Microsoft-Hyper-V -All /LimitAccess /ALL
pause
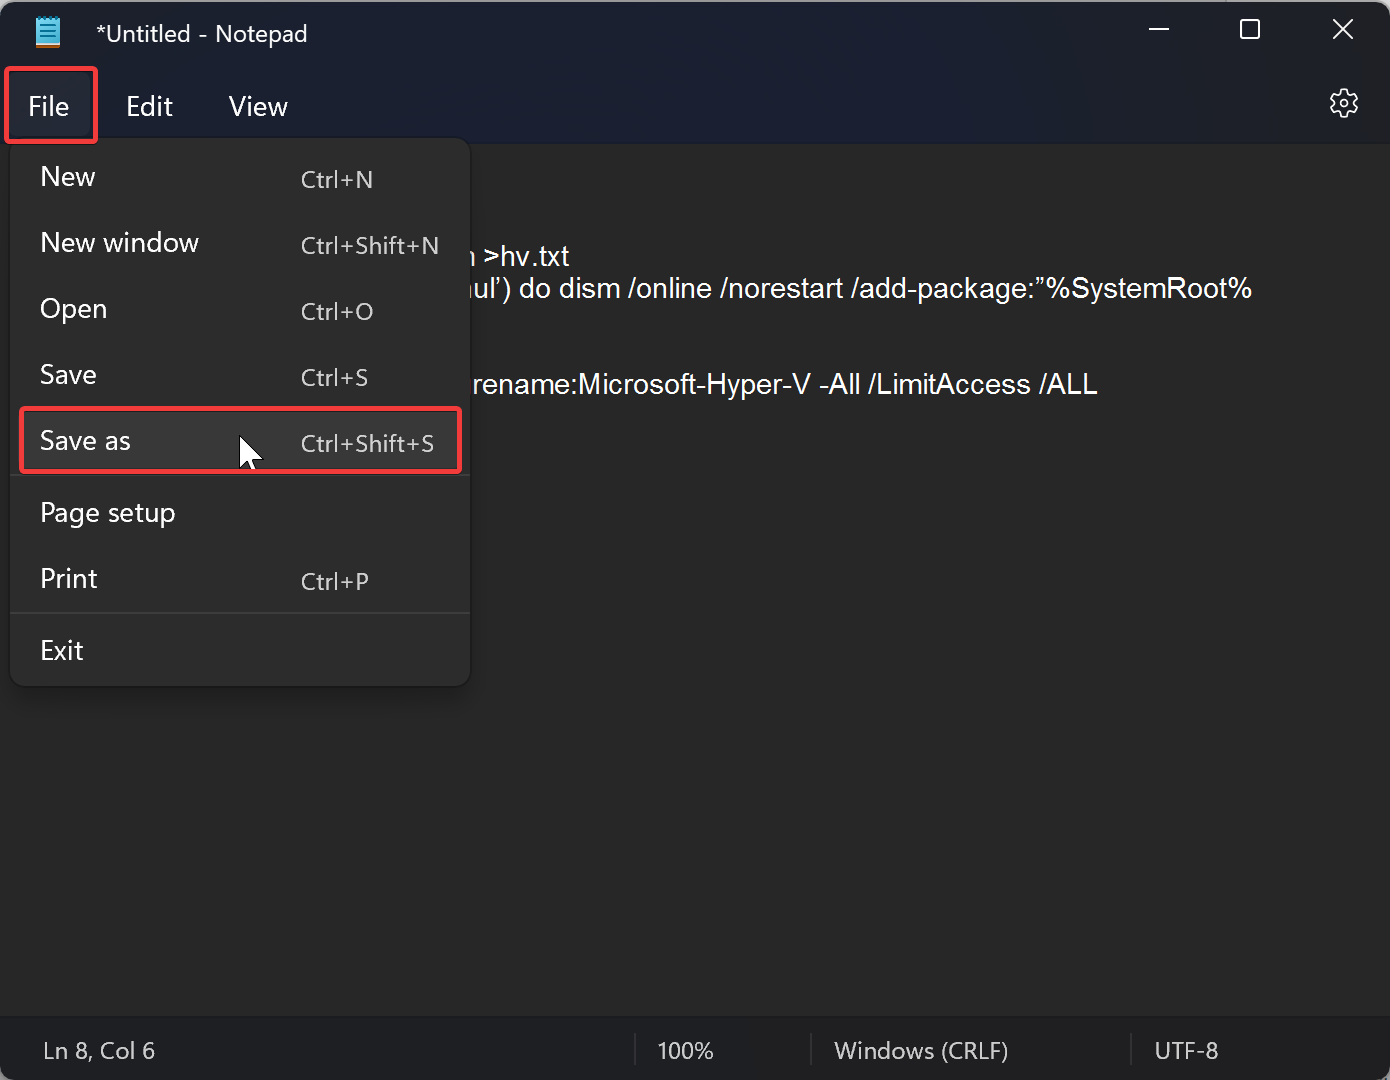
Step 4. Next, click on the File menu and select the Save as option in the drop-down menu.
Step 5. When you’re done, the “Save as” dialog will open. Select the file location where you want to save it and name it “hyper-v.bat” or “hyper-v.cmd.”
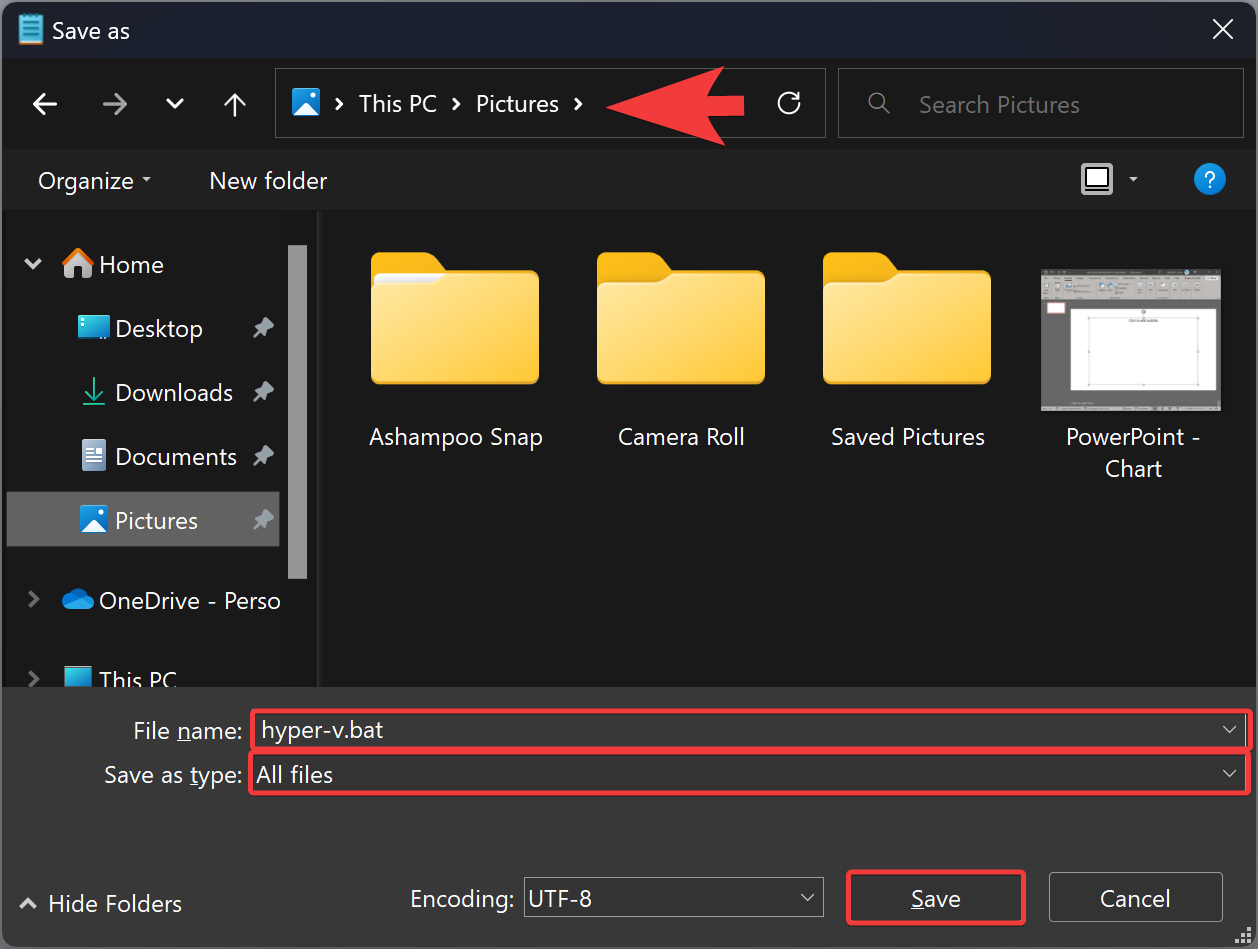
Step 6. Select All files in the drop-down menu “Save as type.”
Step 7. Finally, click the Save button to save the file.
Step 8. Now that the hyper-v.bat or hyper-v.cmd script is saved on your computer; you will need to run it to install hyper-v on your PC. To do that, right-click on the hyper-v.bat or hyper-v.cmd file and select the Run as administrator option.
Step 9. If User Account Control prompts you, click the Yes button.
Step 10. Once done, the script will open a Command Prompt and download the required files to install Hyper-V on your computer. Once completed, you’ll be prompted to restart your computer. For that, type Y to confirm and restart your PC. If you don’t want to reboot your computer, type N to exit the Command Prompt.
Once you restart your PC, Hyper-V will be installed on your Windows 11 or 10 Home. To create a new virtual machine, click the Start button and type Hyper-V. In the search results, click on Hyper-V Manager to open it.
In case, later you want to enable or disable Hyper-V on your PC, do these steps:-
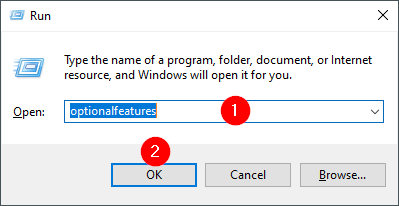
Step 1. From the keyboard, press Windows + R to open the Run dialog box.
Step 2. Next, type optionalfeatures into the Run box and click OK to open the Windows Features dialog.
Step 3. Check or uncheck Hyper-V and its components to enable or disable it.
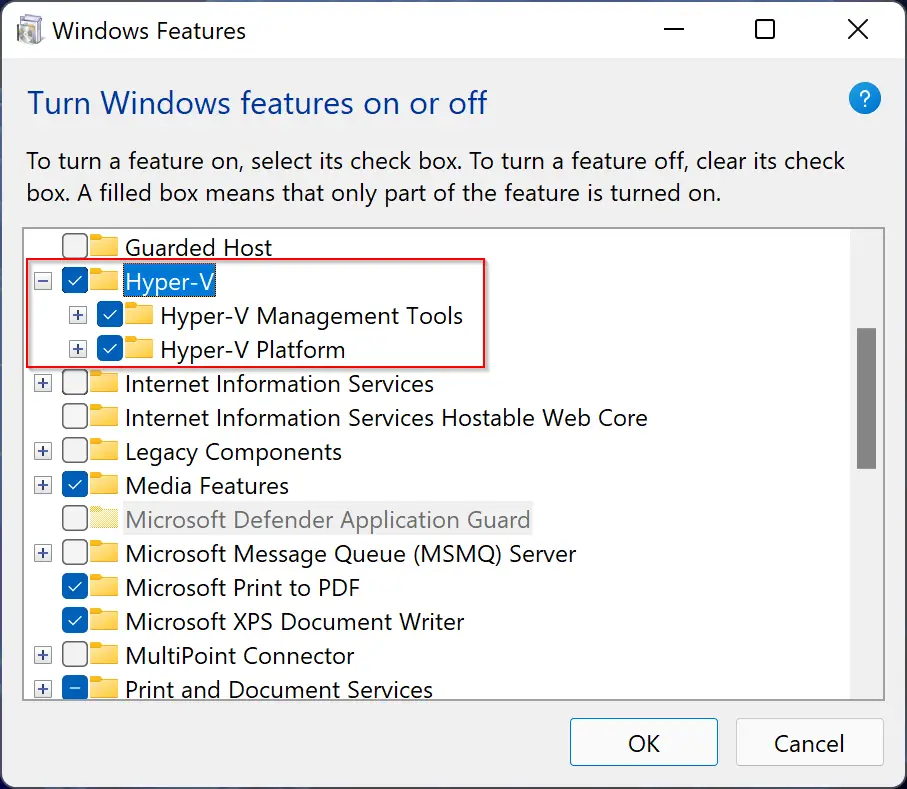
Step 4. Click on the OK button.
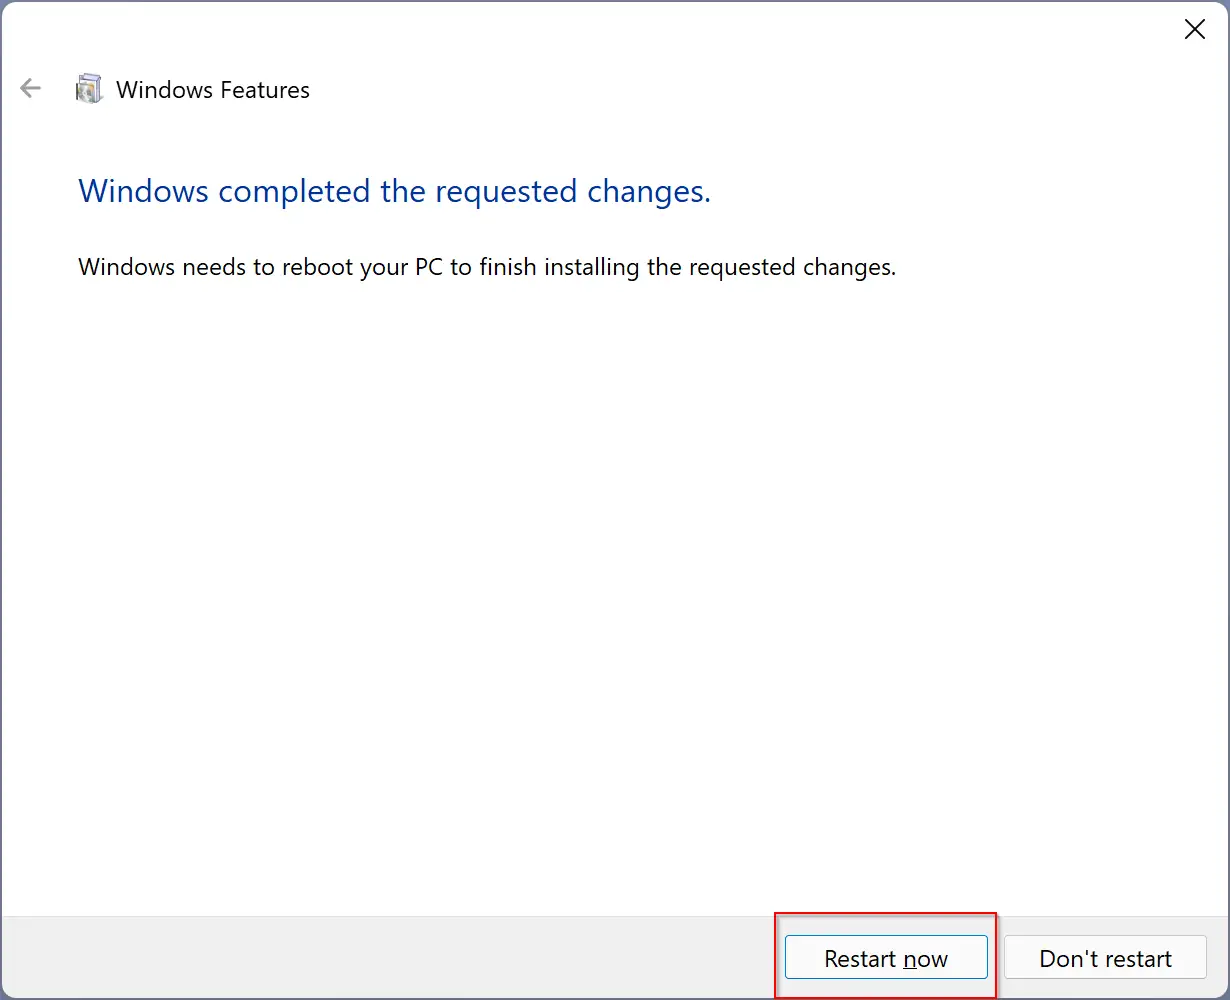
Step 5. Finally, reboot your computer to complete the Hyper-V setup by clicking the Restart now button.
That’s it.
Conclusion
In conclusion, Hyper-V virtualization technology is an incredibly useful feature that allows you to run multiple operating systems on a single machine. While it’s only available in Windows 11/10 Pro, Enterprise, and Education editions, a simple batch script can install it on Windows 11 or 10 Home. Once installed, you can create and run virtual machines with ease. Enabling or disabling Hyper-V on your PC is also straightforward, requiring just a few steps. With this guide, you can take advantage of the Hyper-V virtualization technology, regardless of the version of Windows 11 or 10 you’re running.
does nor work. hv.txt not found etc….
Pl check now, it should work.
Yep Pammi, it does work fine.
Hey… thanks a lot
You’re welcome!