Pinning frequently used applications or folders to the Windows taskbar can significantly enhance efficiency and ease of access. However, Windows 10 doesn’t provide a straightforward option to pin the Recycle Bin directly to the taskbar. In this gearupwindows guide, we’ll walk you through a simple step-by-step process to pin the Recycle Bin to the Windows 10 taskbar.
How to Pin Recycle Bin to Windows 10 Taskbar?
To pin the Recycle Bin to the Windows 10 Taskbar, follow these steps:-
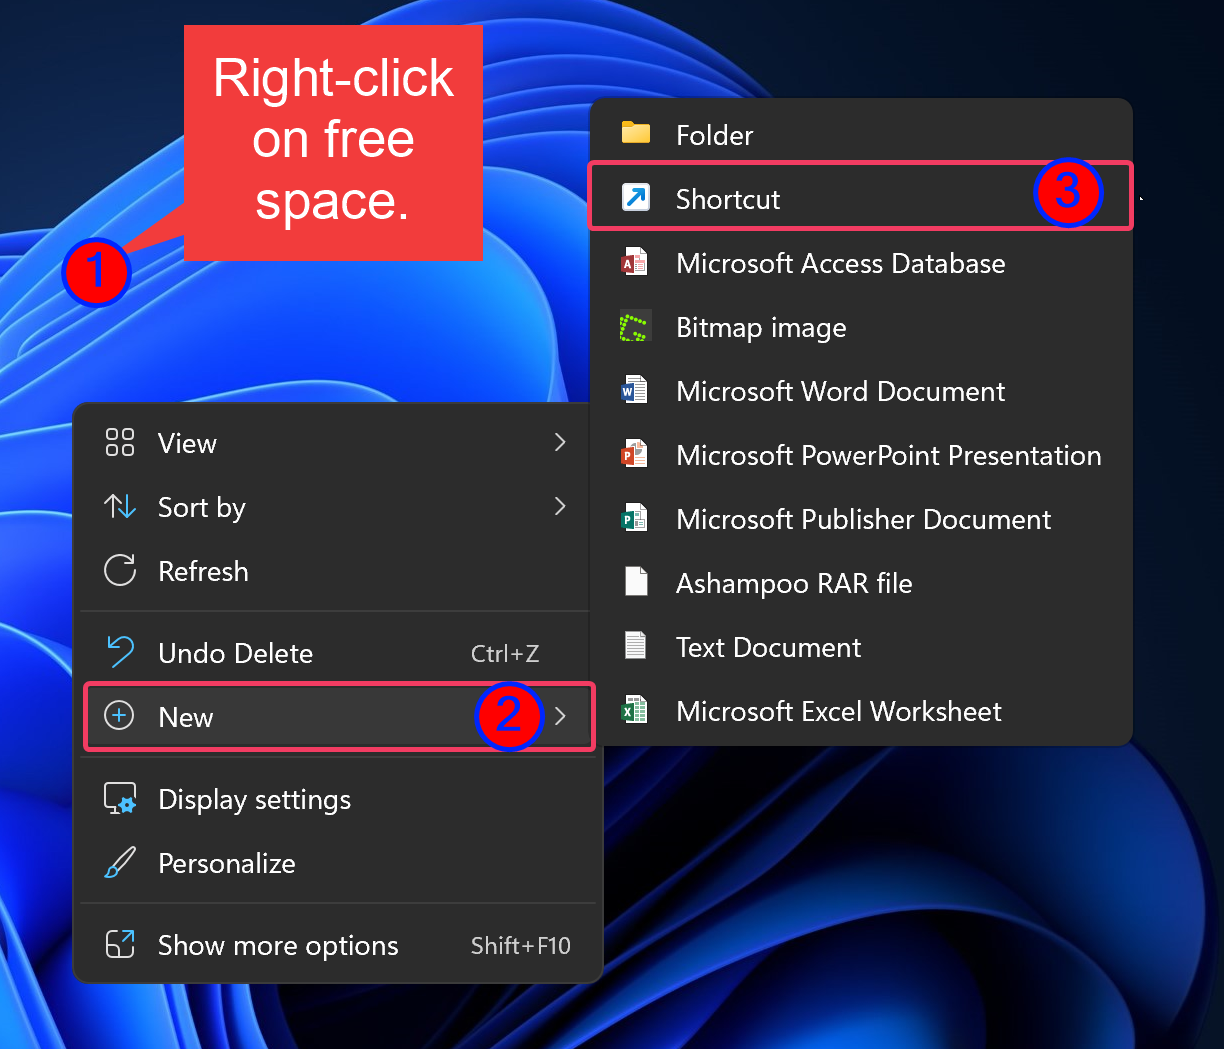
Step 1. Begin by right-clicking on an empty space on your desktop. Navigate to “New” and choose the “Shortcut” option from the context menu.
Step 2. A Create Shortcut wizard will open. In the ‘Type the location of the item‘ field, enter the following path:-
%SystemRoot%\explorer.exe shell:RecycleBinFolder

Step 3. Click “Next” to proceed.
Step 4. Assign a name to the shortcut, such as “Recycle Bin.”
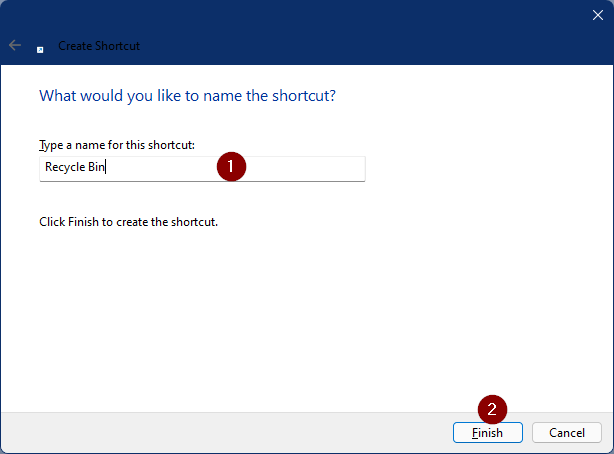
Step 5. Click “Finish” to create the shortcut on your desktop.
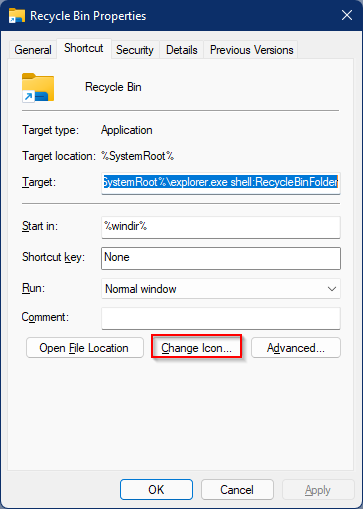
Step 6. Right-click on the newly created Recycle Bin shortcut and select “Properties.”
![]()
Step 7. Navigate to the “Shortcut” tab and click on the “Change Icon” button.
Step 8. Choose a desired icon for the Recycle Bin or select an icon file (.ico) stored on your computer.
![]()
Step 9. Click “OK” to confirm the icon selection.
Step 10. Select the newly created Recycle Bin shortcut on your desktop.
Step 11. Now, drag the shortcut from your desktop and drop it onto the taskbar.
Step 12. To confirm the pinning, right-click on the taskbar icon to confirm that the Recycle Bin is now pinned to the taskbar. You should see options like “Unpin from taskbar,” indicating the successful pinning.
Conclusion
By following these simple steps, you can easily pin the Recycle Bin to the Windows 10 taskbar, providing quick access to this essential system tool. This method eliminates the need for third-party tools and ensures a seamless experience for users looking to streamline their workflow on Windows 10.