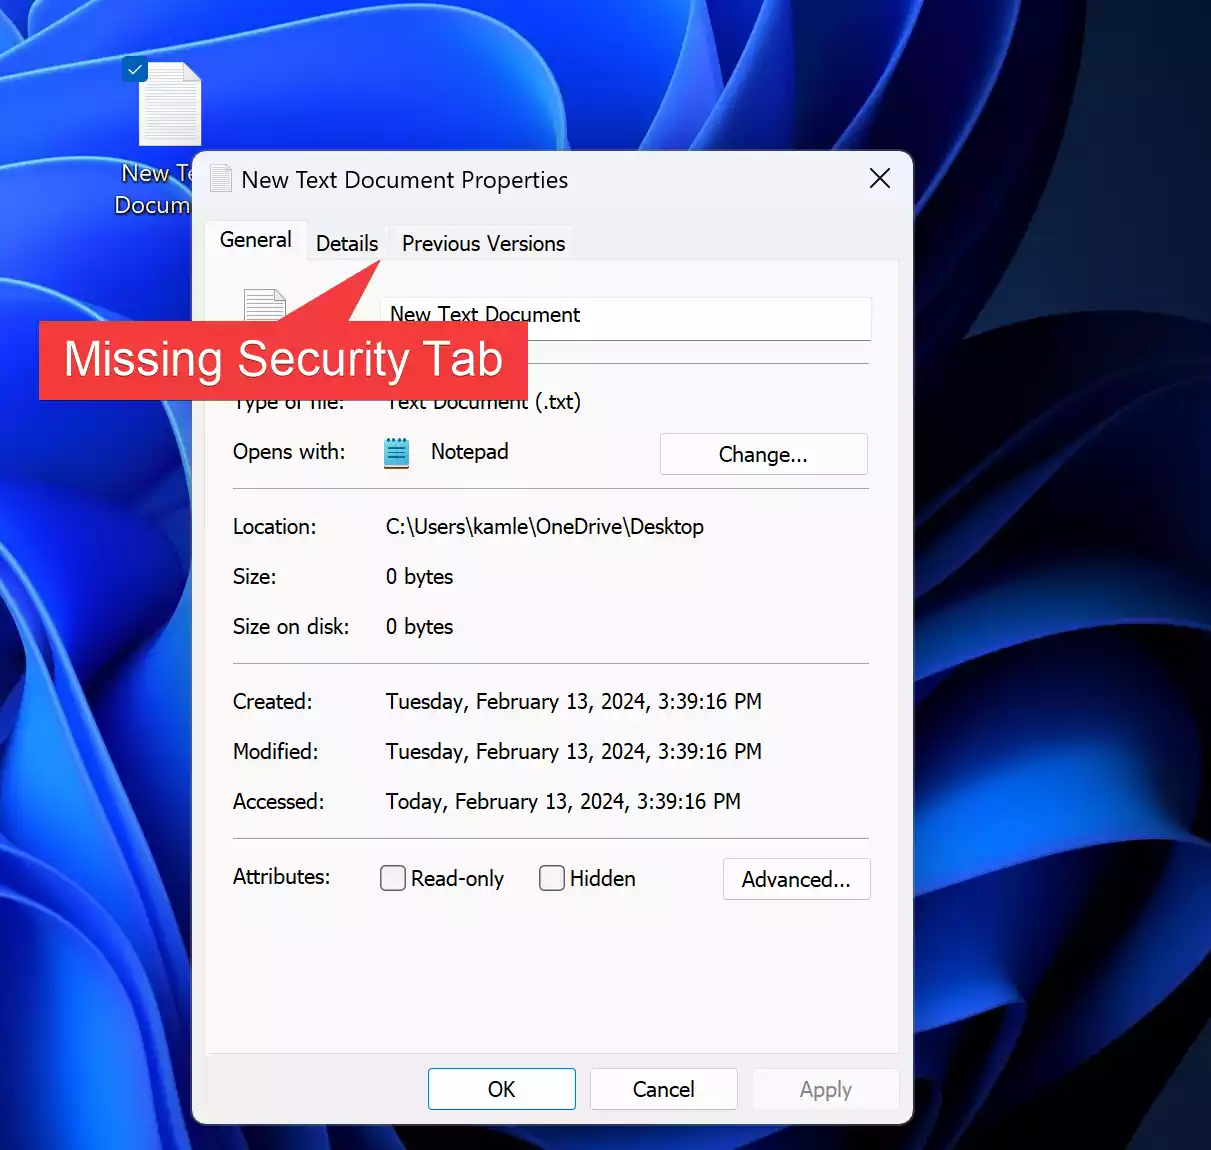
In the realm of Windows operating systems, the Properties window for files and folders serves as a hub for accessing various attributes and settings. Among these, the Security tab stands as a crucial component, facilitating users to manage permissions and access control for their files and folders. However, encountering the absence of this tab can be perplexing and frustrating for users seeking to configure their security settings. In this gearupwindows article, we delve into the possible causes behind the missing Security tab and provide comprehensive solutions to rectify this issue on Windows 11 or 10 systems.
Understanding the Issue
Before delving into solutions, it’s essential to grasp the potential reasons behind the disappearance of the Security tab. Several factors could contribute to this issue, ranging from system configurations to software conflicts. Common causes include incorrect group policy settings, registry modifications, or even malware infections. Understanding these factors aids in devising targeted solutions for resolving the problem.
Fix: Security Tab is Missing on Windows 11 or 10 File Properties
Method 1: Using Group Policy
Step 1. Press `Windows Key + R` to open the Run dialog, then type `gpedit.msc` and press Enter.
Step 2. Navigate to the following folder in the left sidebar:-
User Configuration > Administrative Templates > Windows Components > File Explorer
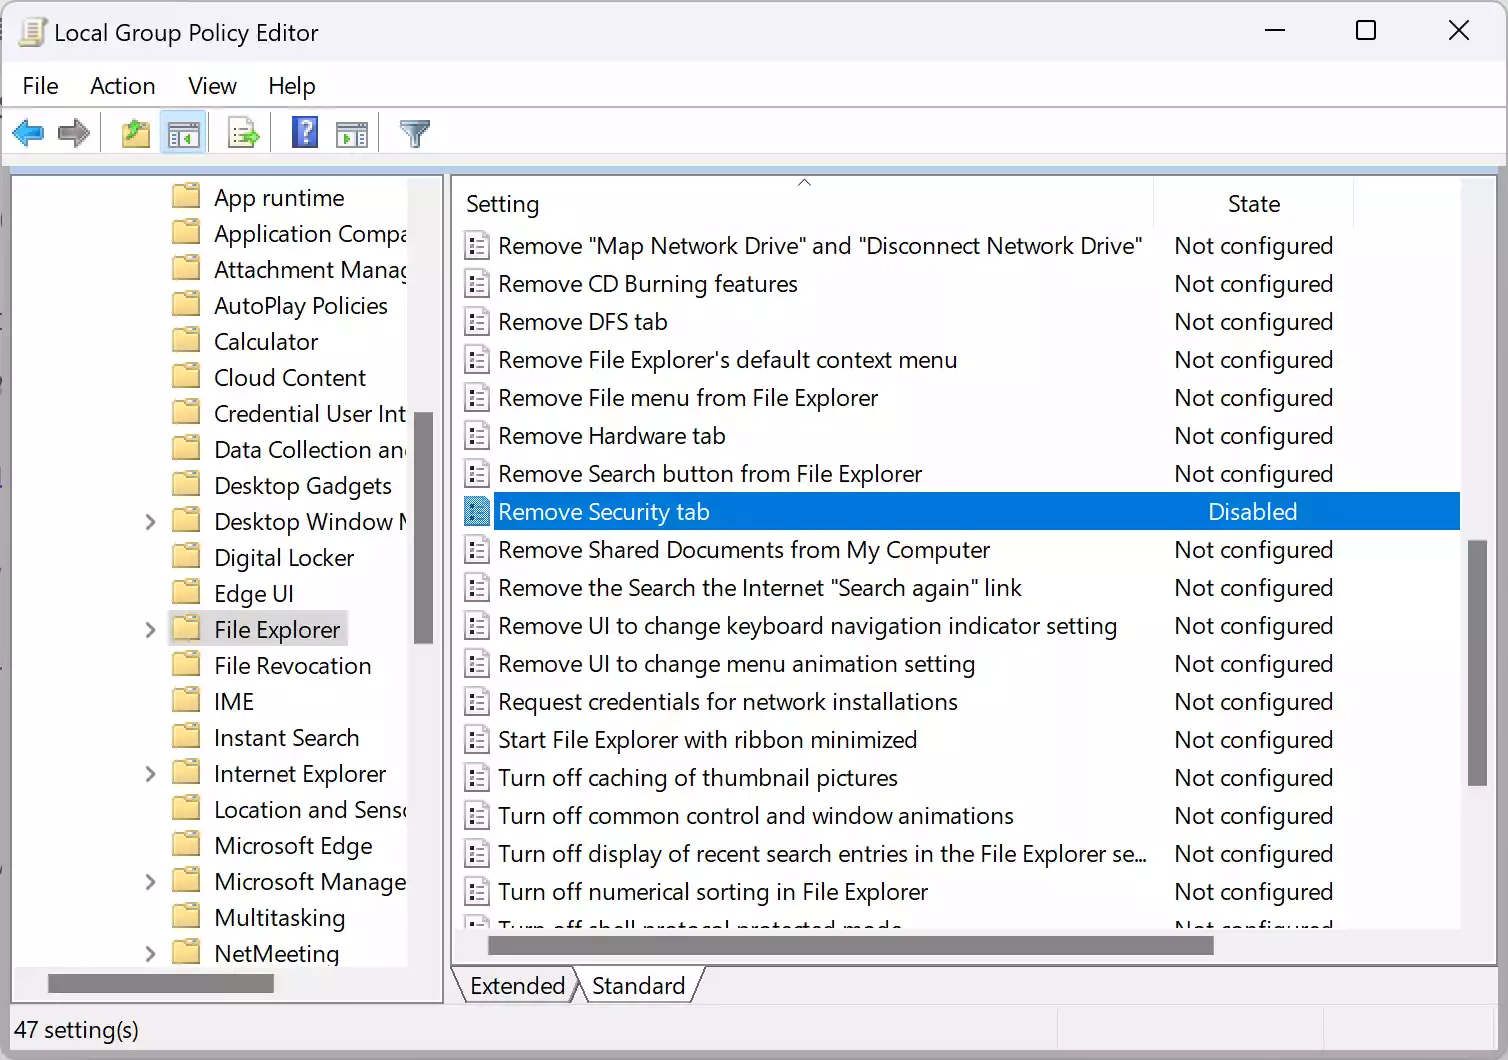
Step 3. On the right sidebar of the “File Explorer” folder, double-click on the policy “Remove Security Tab.” Ensure it is set to “Not Configured” or “Disabled“. If it’s enabled, change it accordingly and click on Apply and then the OK button.

Method 2: Through Registry Editor
Step 1. Press `Windows Key + R` to open the Run dialog, then type `regedit` and press Enter.
Step 2. Navigate to the following registry key:-
HKEY_CURRENT_USER\Software\Microsoft\Windows\CurrentVersion\Policies
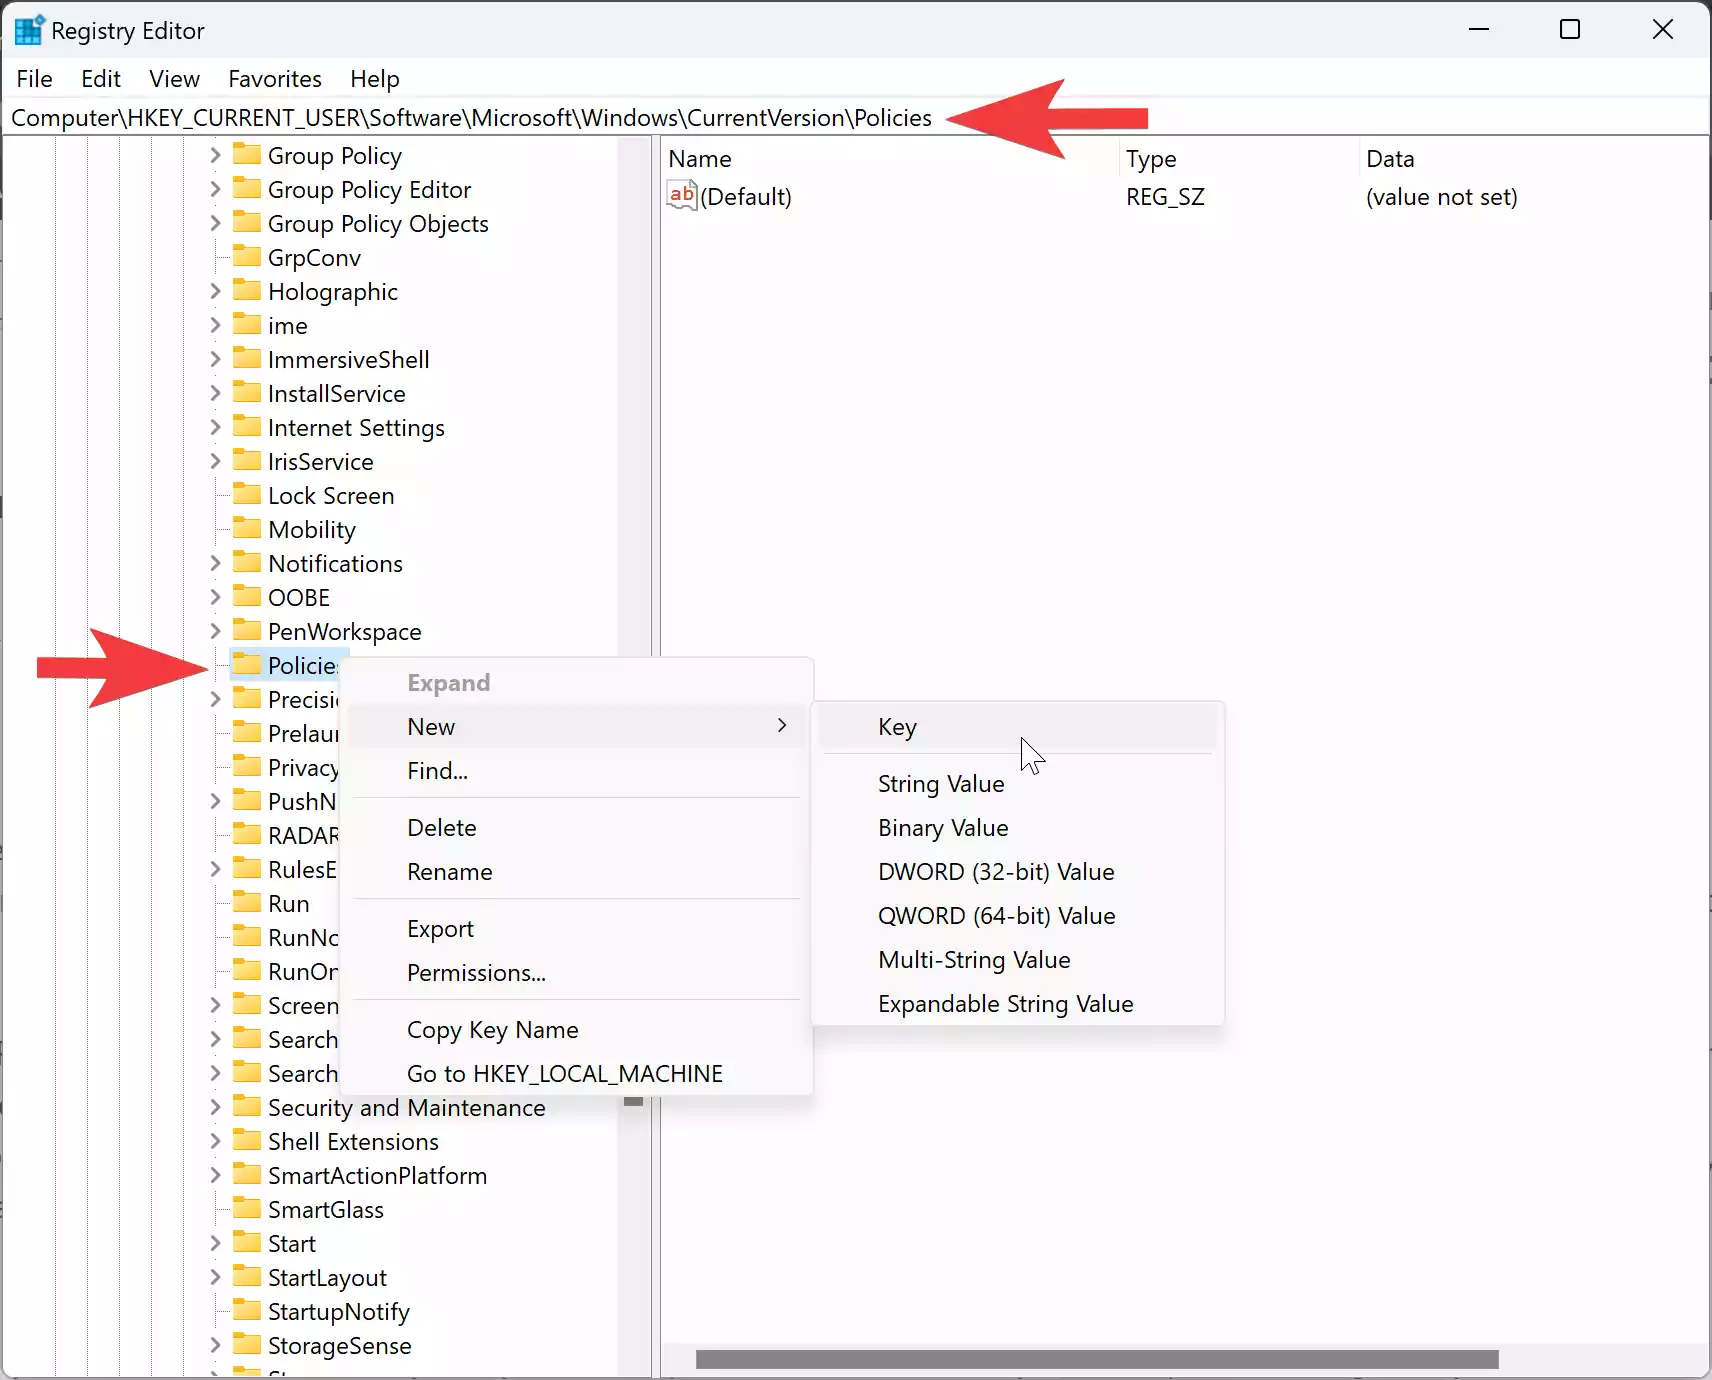
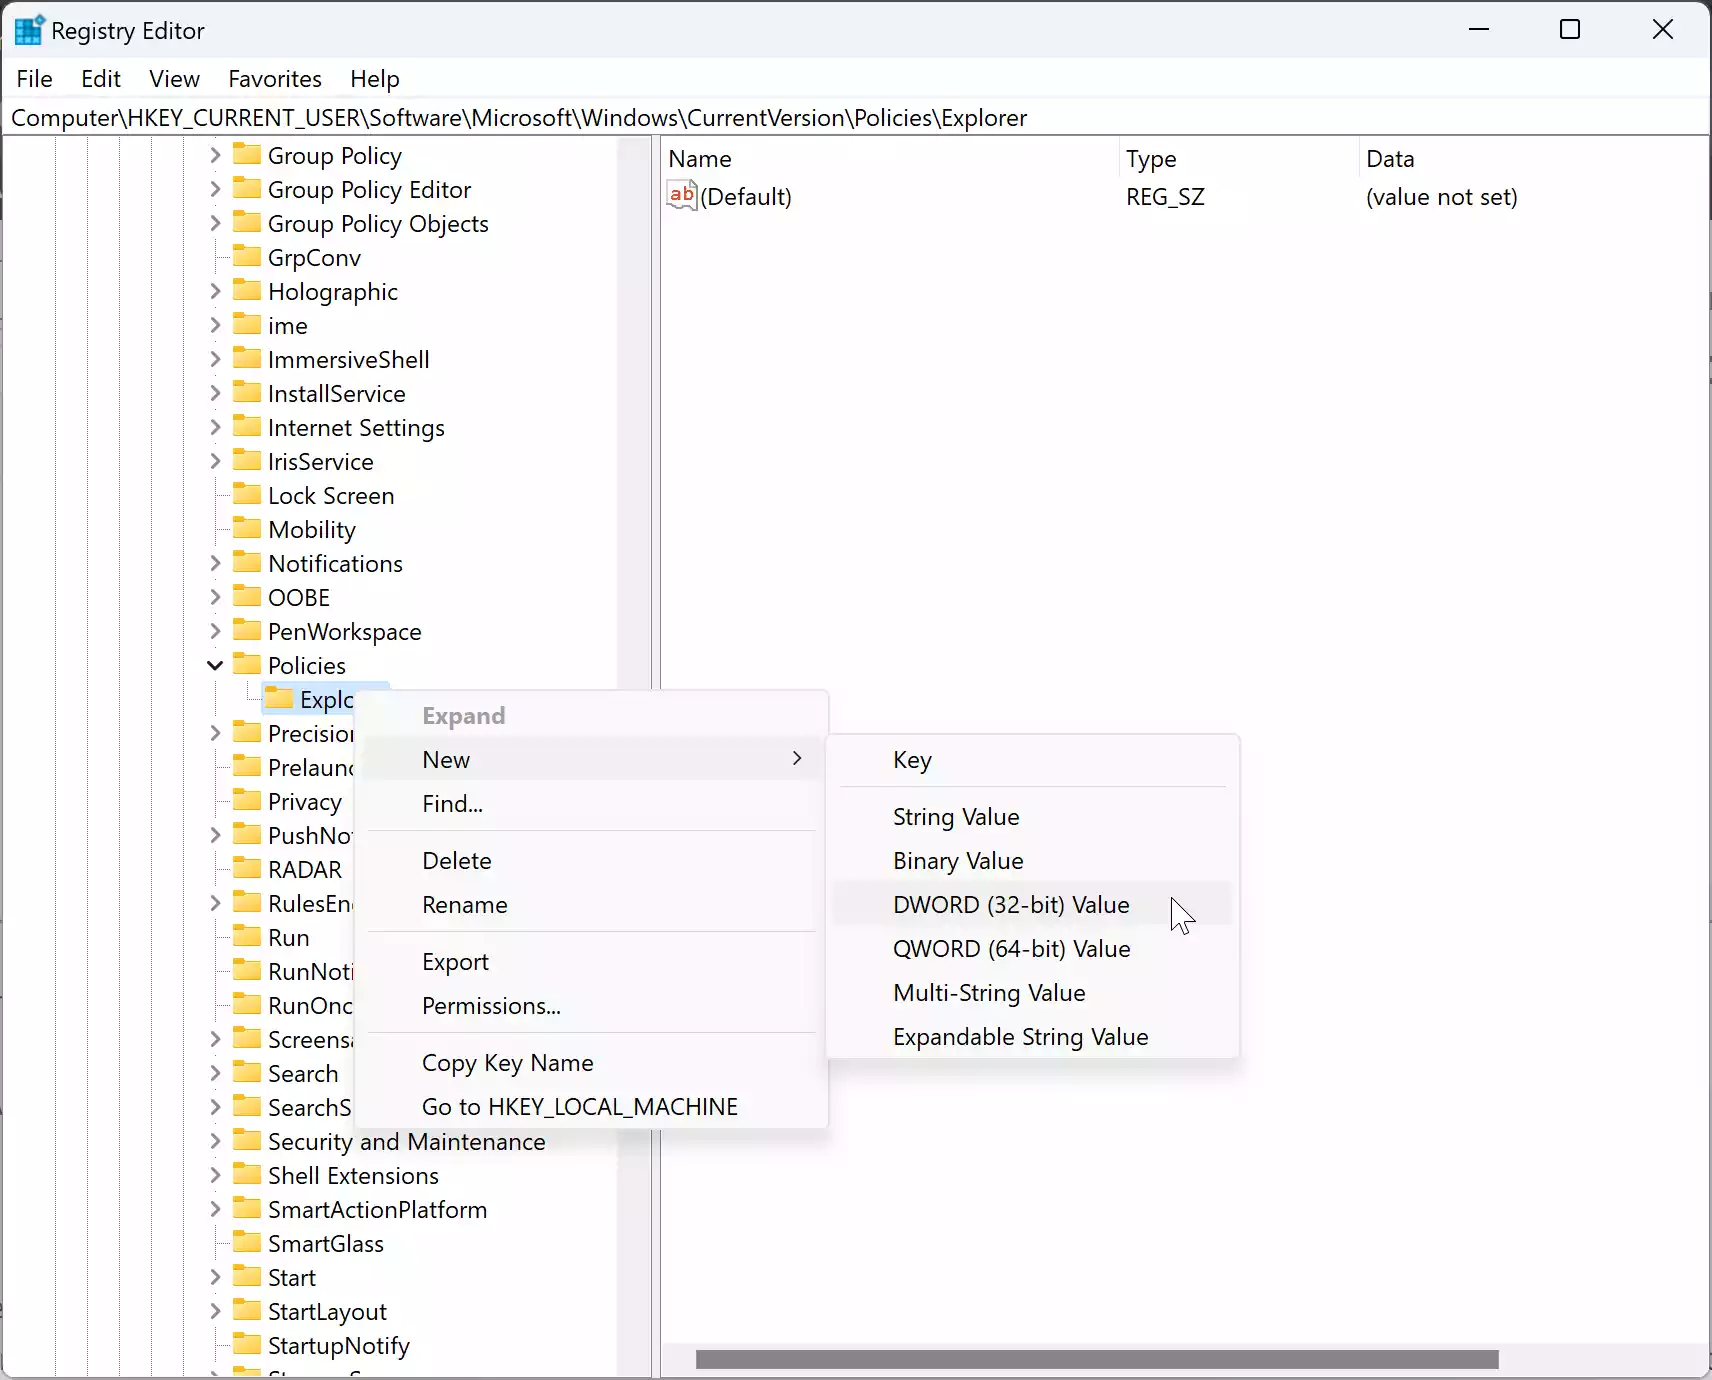
Step 3. Look for the Explorer subkey under the Policies key. If it does not exist, you need to create one. For this right-click on the Policies folder and select “New > Key.”
Step 4. Set the name to Explorer.
Step 5. Now, right-click on the Explorer folder and select “New > DWORD (32-bit) Value.”
Step 6. Set the name to `NoSecurityTab`.
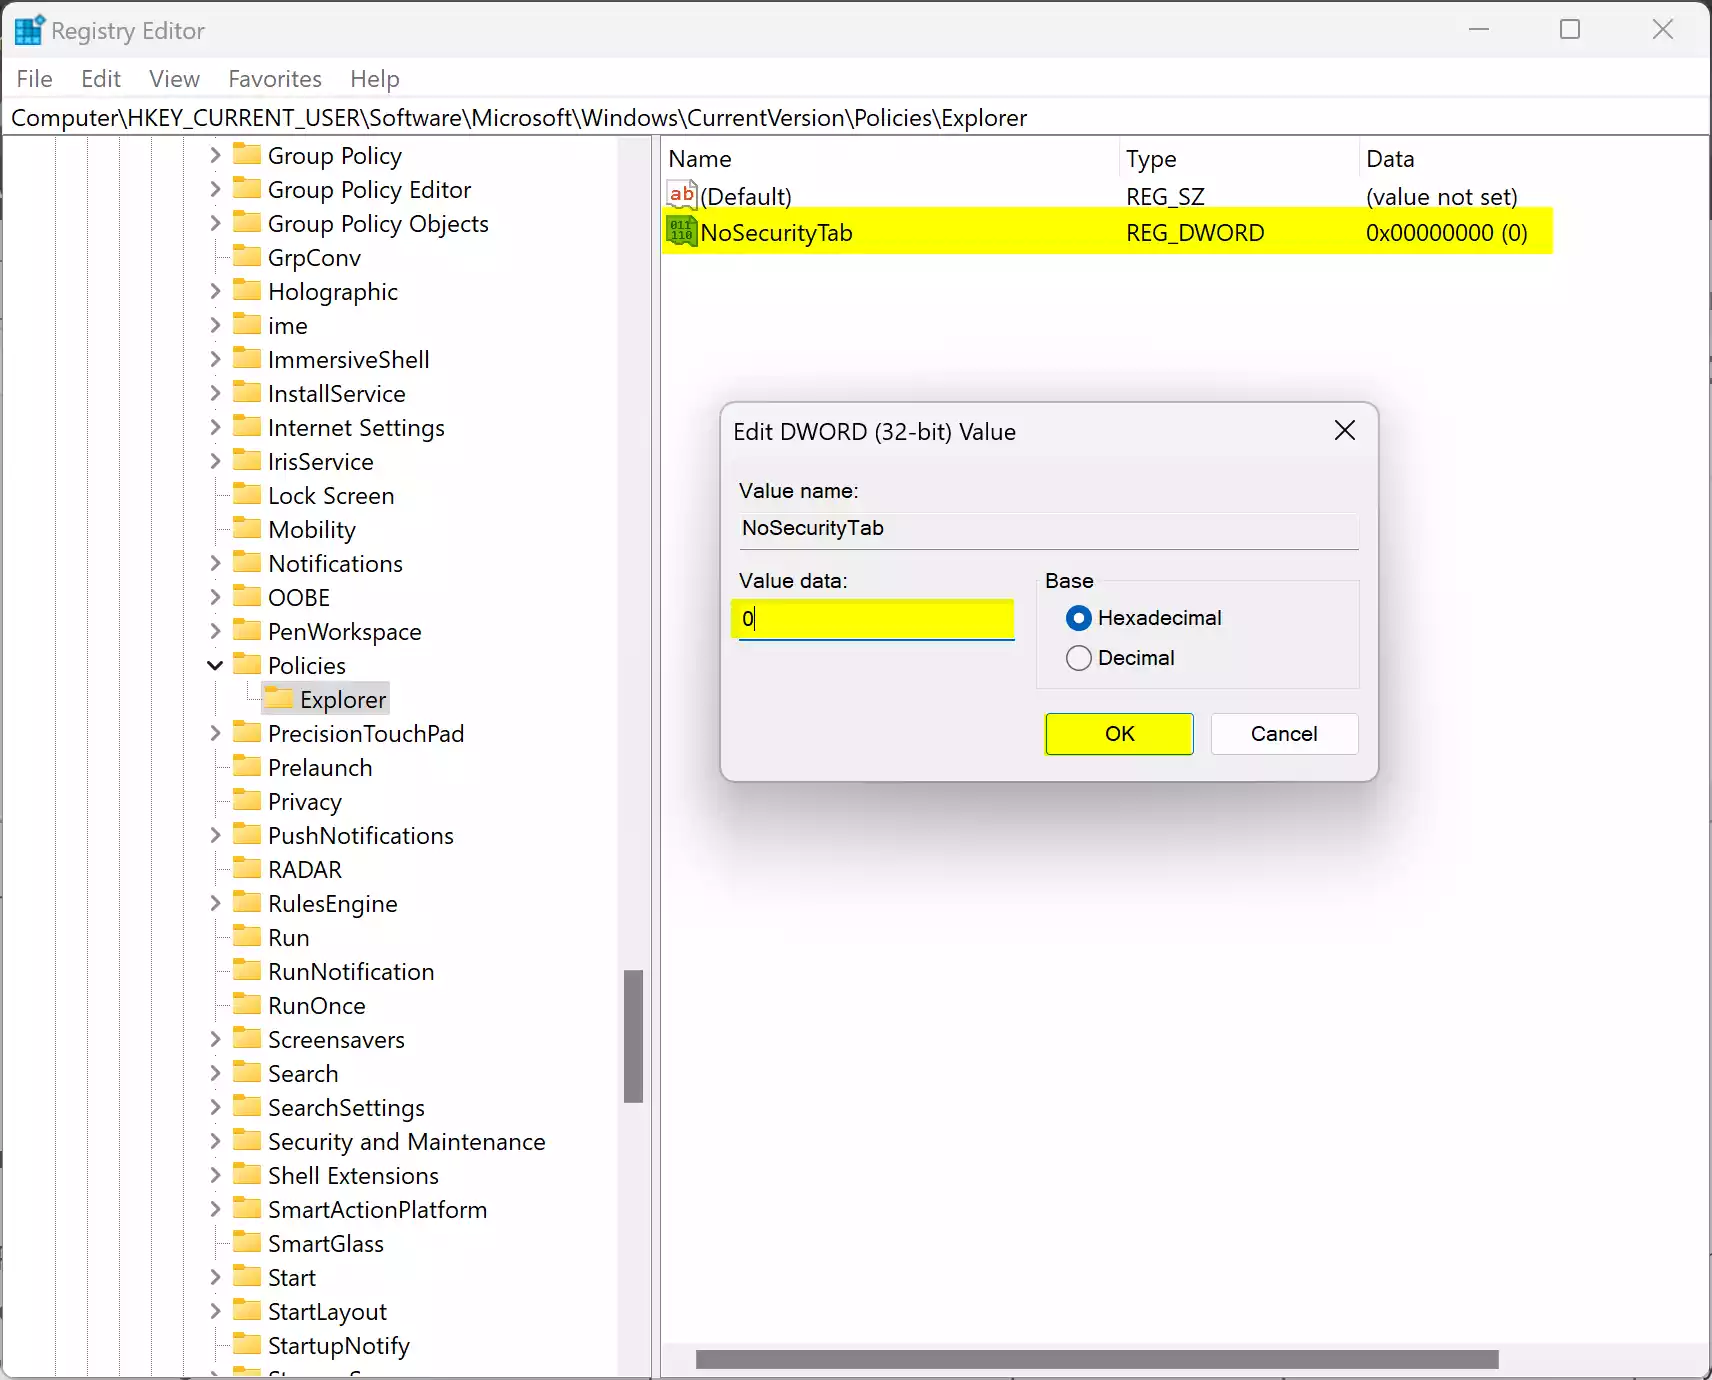
Step 7. Double-click on the `NoSecurityTab` REG_DWORD and set its “Value data” to `0`.
Step 8. Click OK to save the changes.
Method 3: Utilize Command Prompt
Step 1. Open Command Prompt as an administrator by searching for “cmd” in the Start menu, right-clicking on Command Prompt, and selecting “Run as administrator“.
Step 2. Type the following command and press Enter:-
sfc /scannow
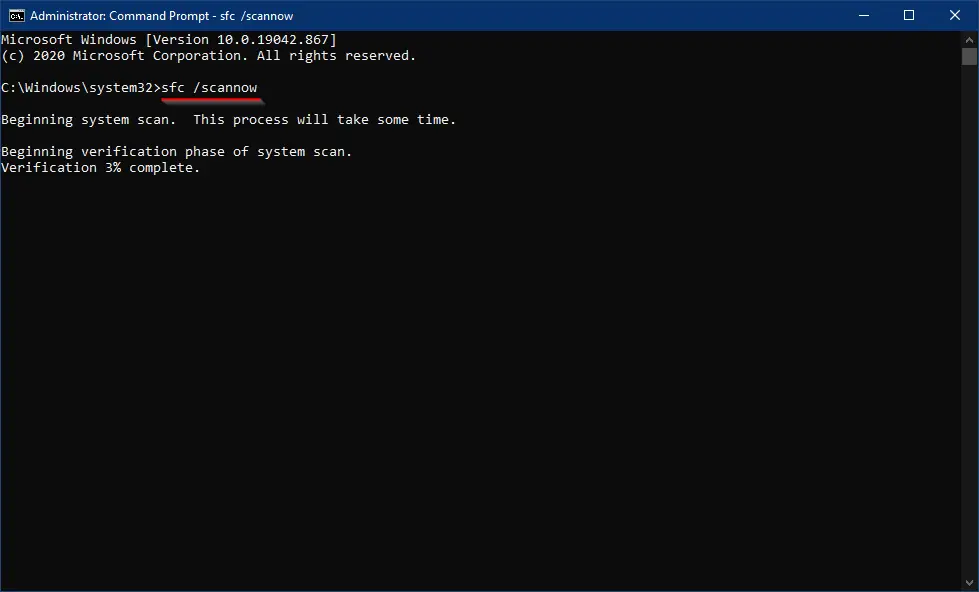
Wait for the System File Checker to scan and repair any corrupted system files. Restart your computer afterward.
Method 4: Perform Malware Scans
Use reputable antivirus software to perform a thorough scan of your system for any malware or viruses that could be causing the issue. Quarantine or remove any detected threats.
Method 5: Restore System to a Previous Point
If the issue occurred recently, you can try restoring your system to a previous restore point where the Security tab was functional. Search for “System Restore” in the Start menu to initiate the process.
Conclusion
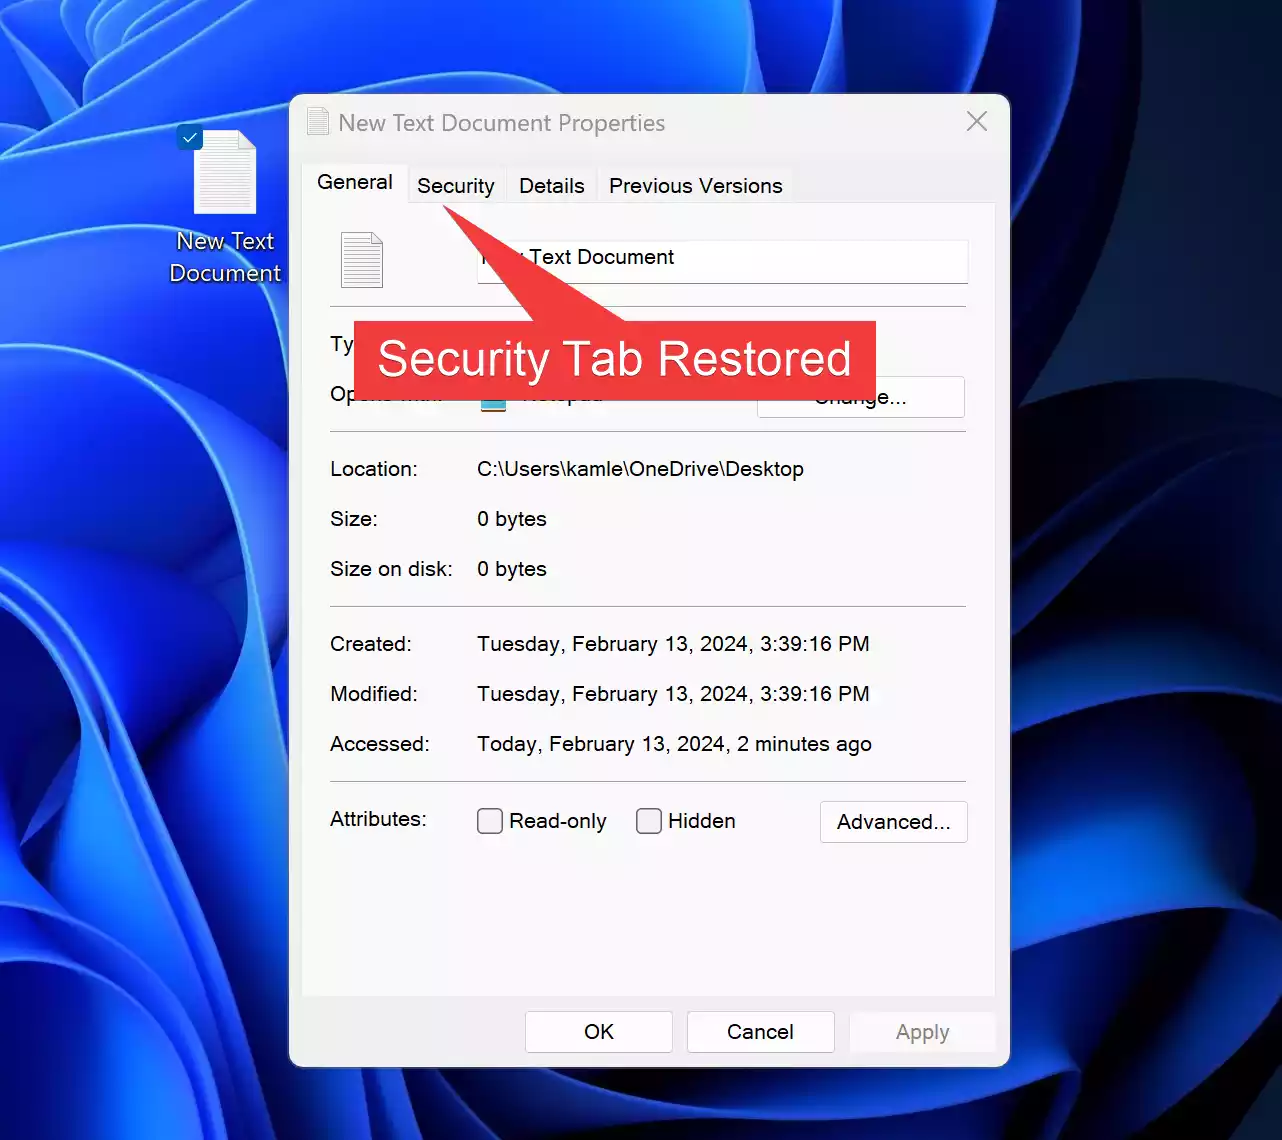
Encountering the absence of the Security tab on Windows 11 or 10 file properties can impede users from managing access permissions effectively. However, armed with a deeper understanding of the underlying causes and the appropriate solutions outlined in this article, users can swiftly address this issue and regain control over their security settings. By meticulously following these steps, users can troubleshoot and resolve the missing Security tab, ensuring a seamless computing experience on their Windows systems.
