In today’s digital age, where data security is of utmost importance, having control over file and folder permissions is crucial. Windows operating systems offer robust tools for managing these permissions, with the Security tab in file properties serving as a central hub for access control. Whether you’re an individual user looking to safeguard personal files or an IT administrator responsible for maintaining security protocols across a network, knowing how to add or remove the Security tab can empower you to tailor access rights to your specific needs.
Understanding the Significance of the Security Tab
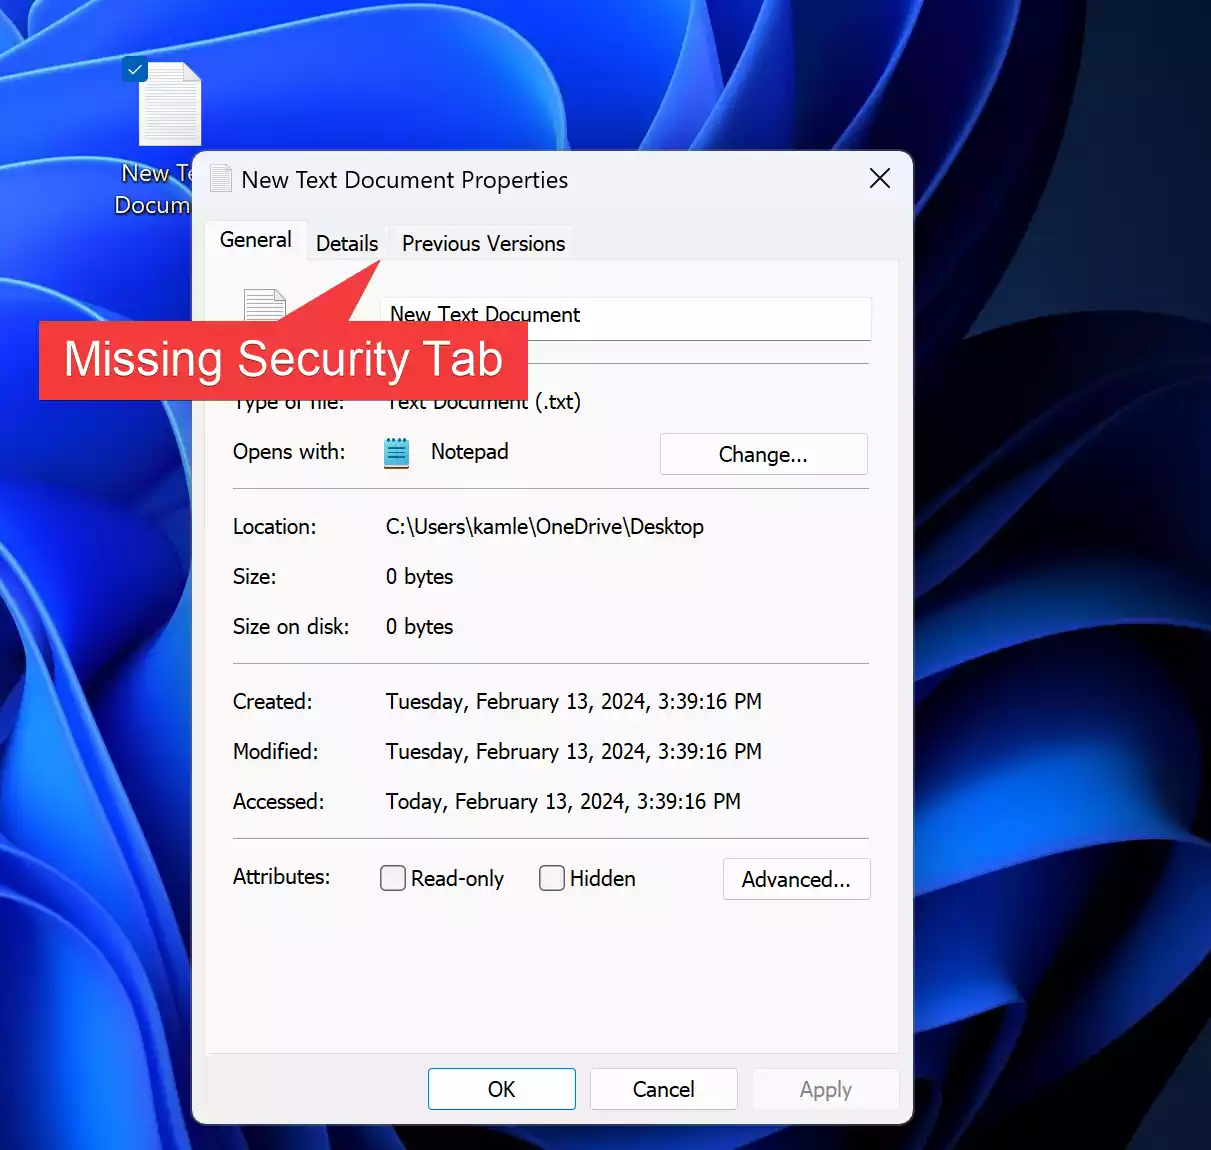
Before diving into the practical steps of adding or removing the Security tab, it’s essential to grasp its significance. The Security tab provides users with granular control over access control lists (ACLs), allowing them to define who can read, write, modify, or delete files and folders. By accessing this tab, users can assign permissions to individual users or groups, ensuring data security and integrity.
How to Add or Remove a Security Tab on Windows 11 or 10 File Properties?
There are multiple methods for adding or removing the Security tab on Windows 11 or 10 file properties. Each method offers flexibility and caters to different user preferences.
Method 1: Using Registry Editor
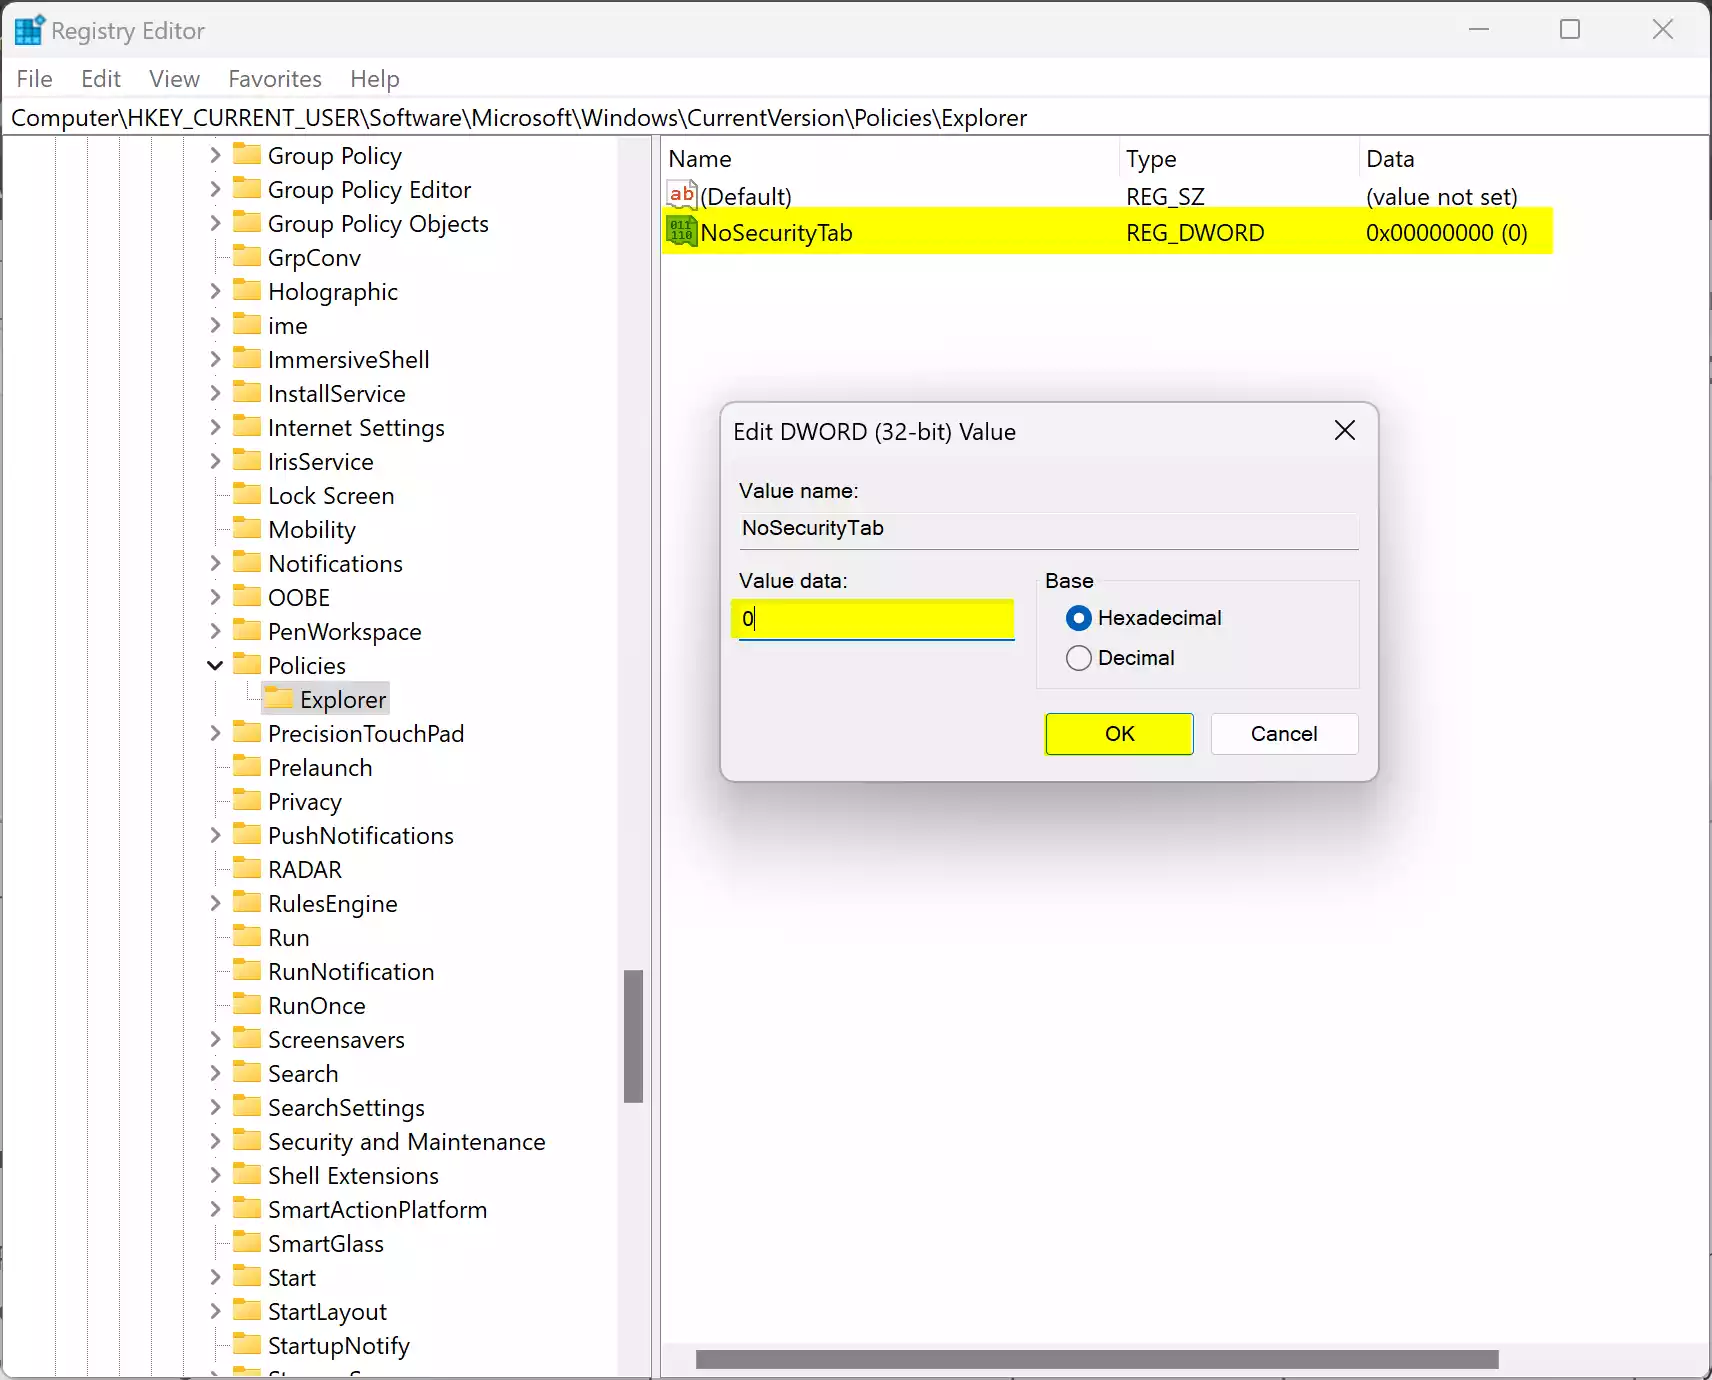
Step 1. Open the Registry Editor by pressing `Windows Key + R`, typing `regedit`, and hitting Enter.
Step 2. Navigate to the following key:-
HKEY_CURRENT_USER\Software\Microsoft\Windows\CurrentVersion\Policies
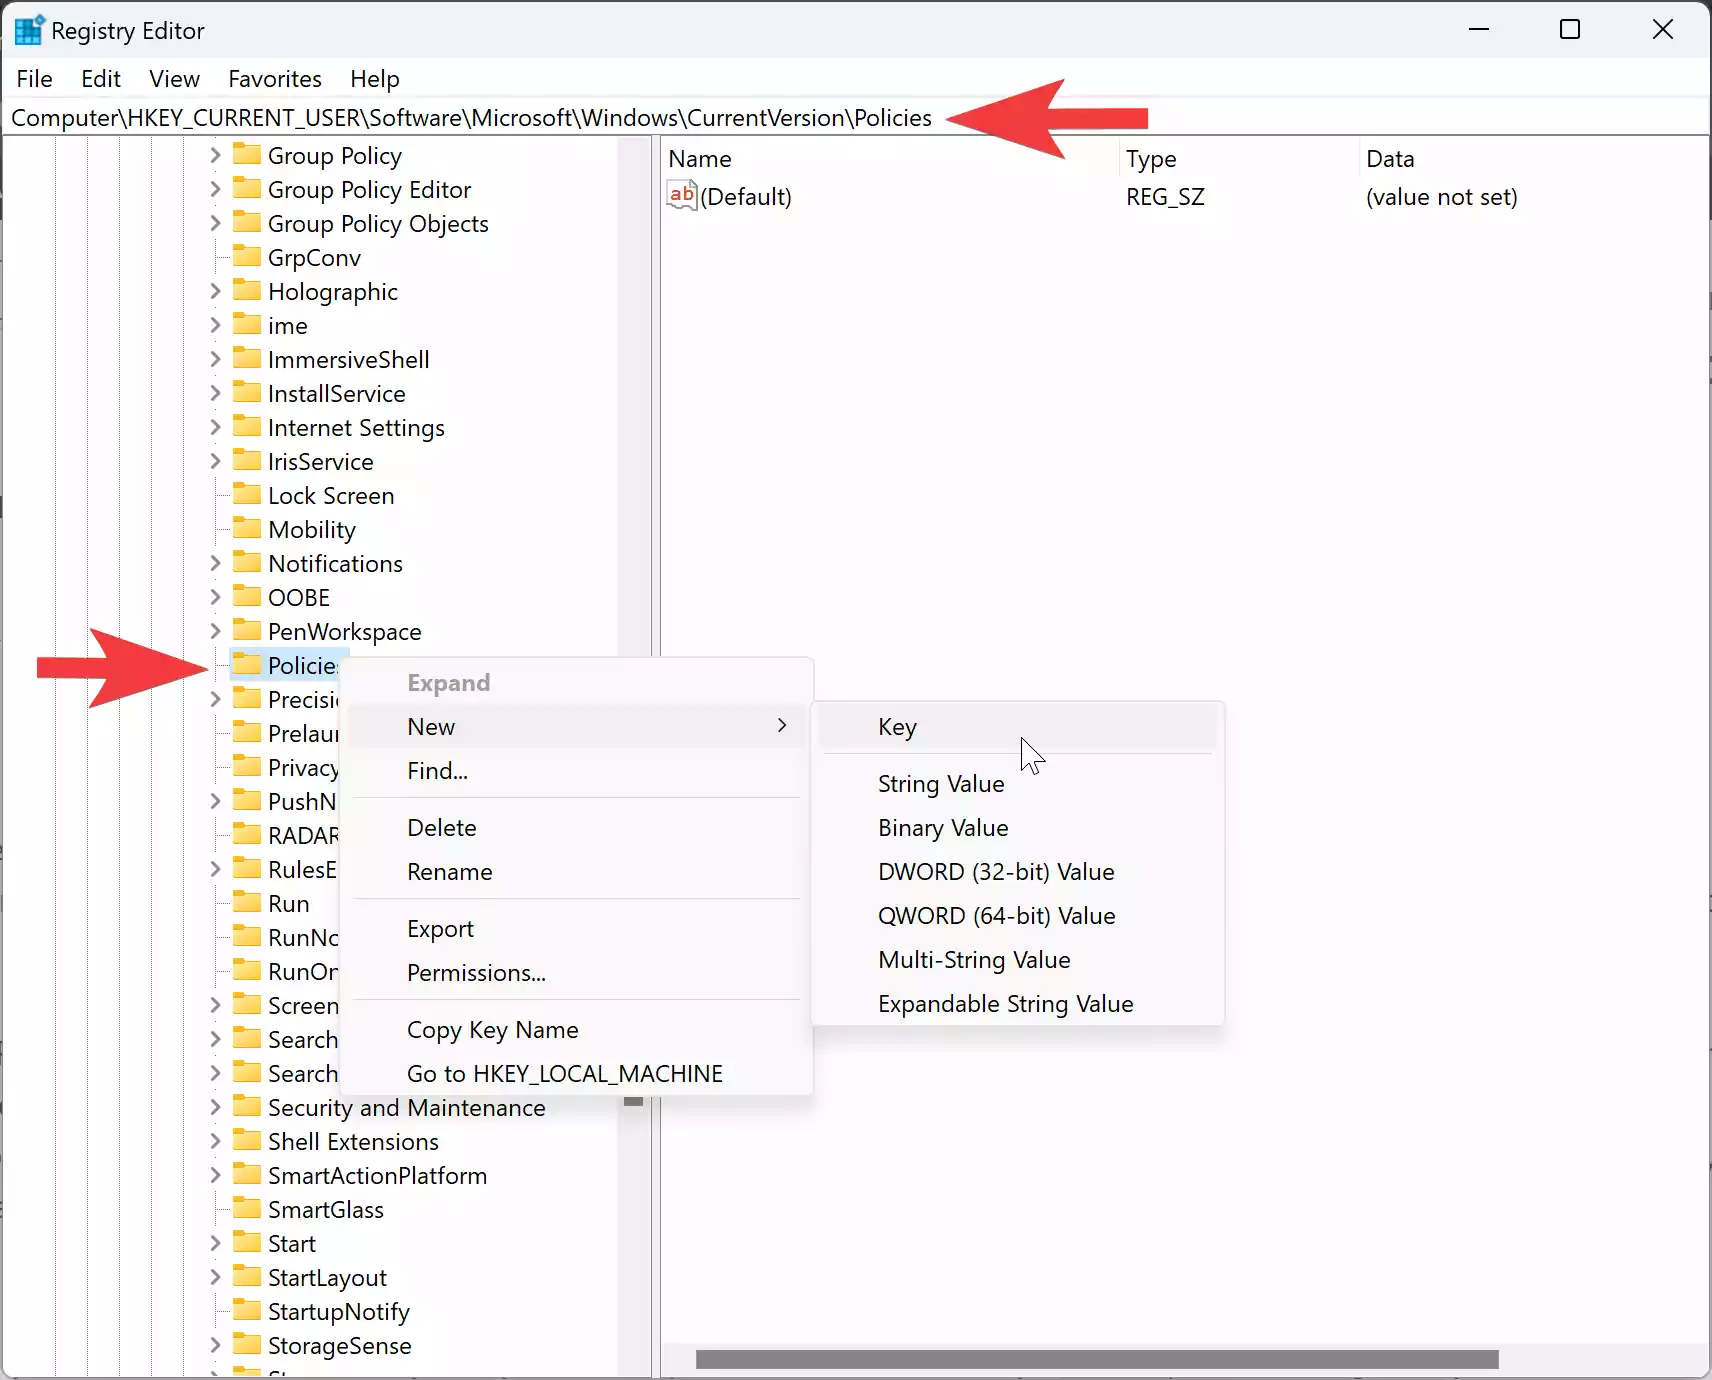
Step 3. If the Explorer subkey doesn’t exist, right-click on the Policies key, select `New > Key`, and name it “Explorer.”
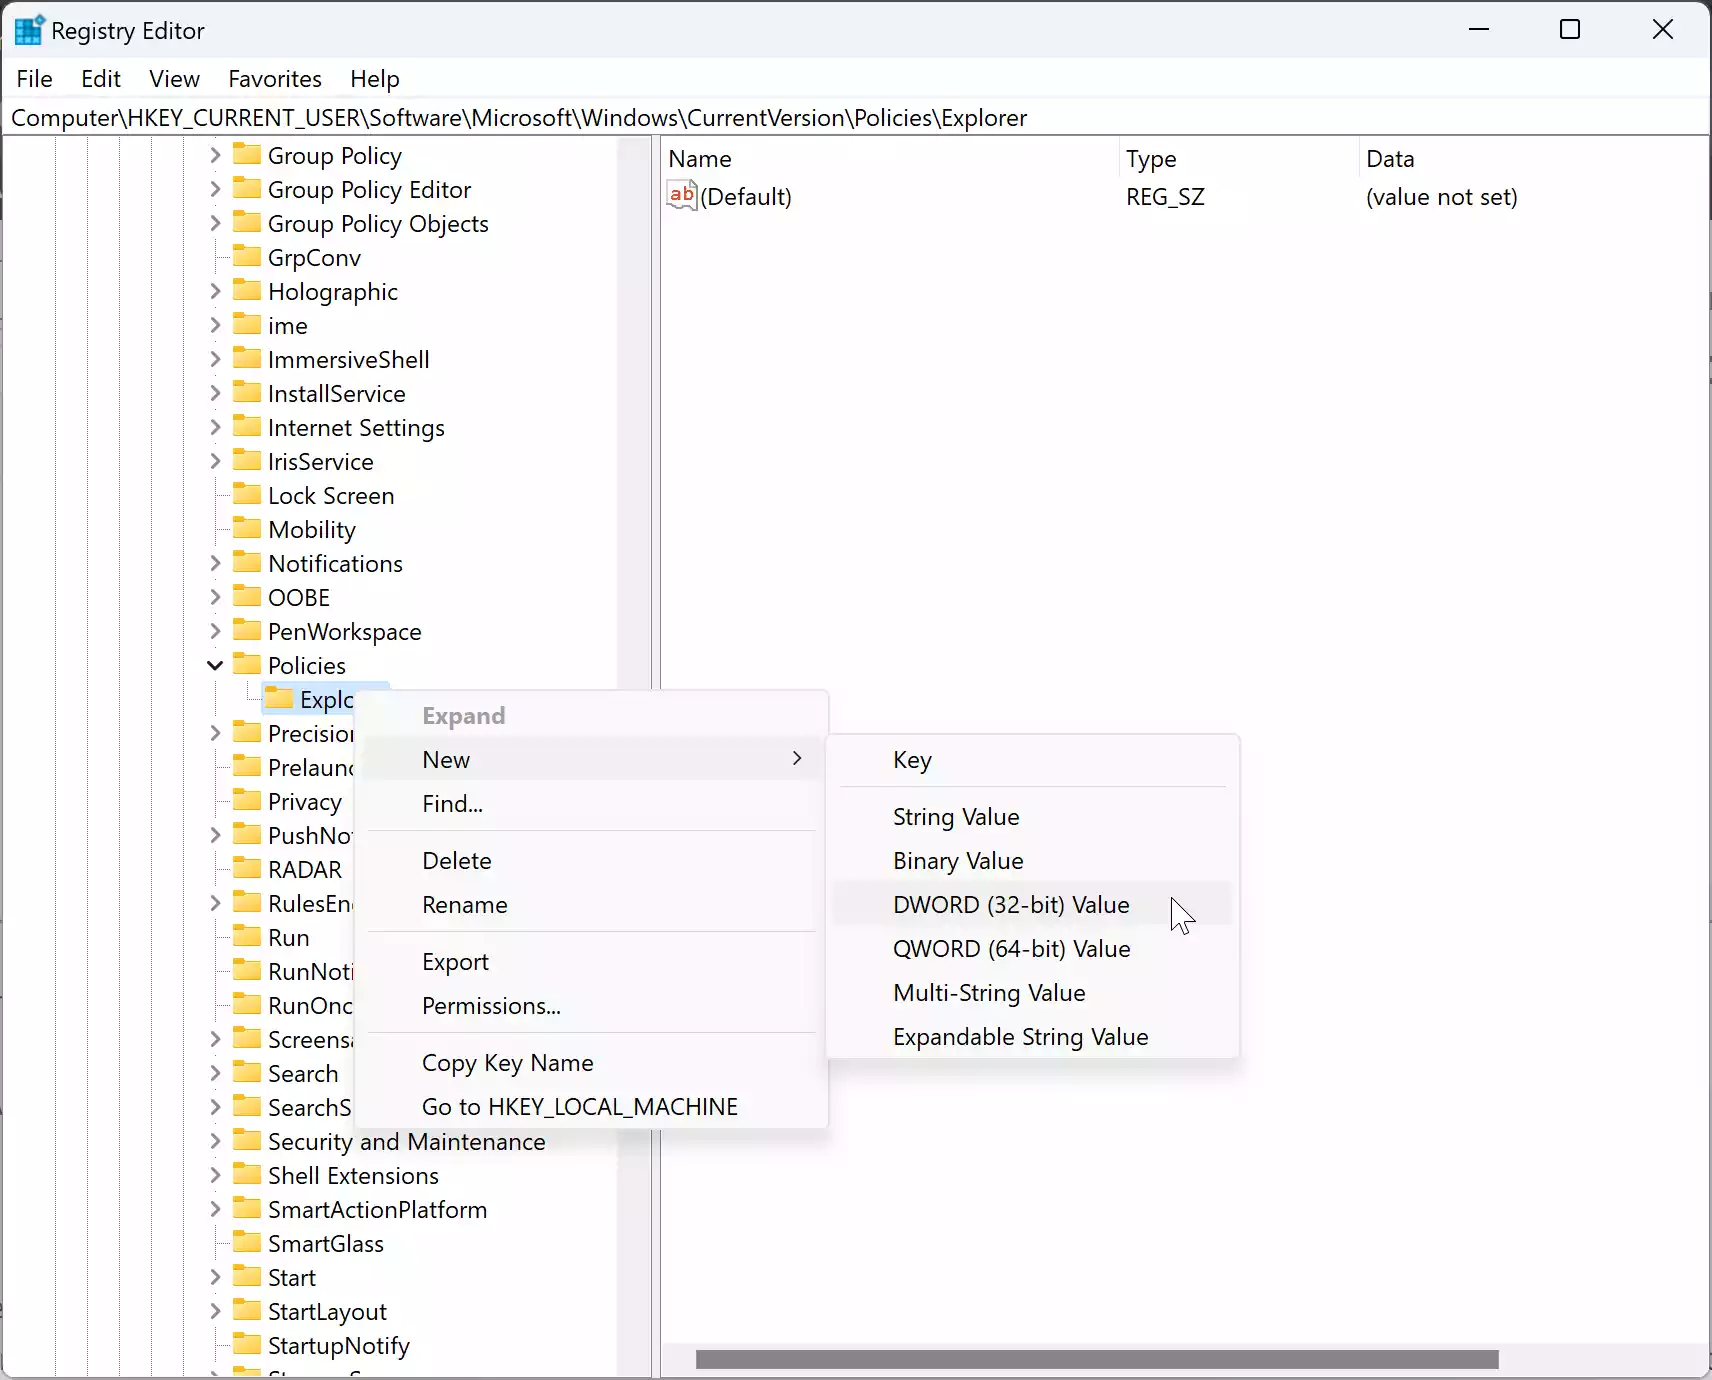
Step 4. Right-click on the “Explorer” folder, select `New > DWORD (32-bit) Value`, and name it `NoSecurityTab`.
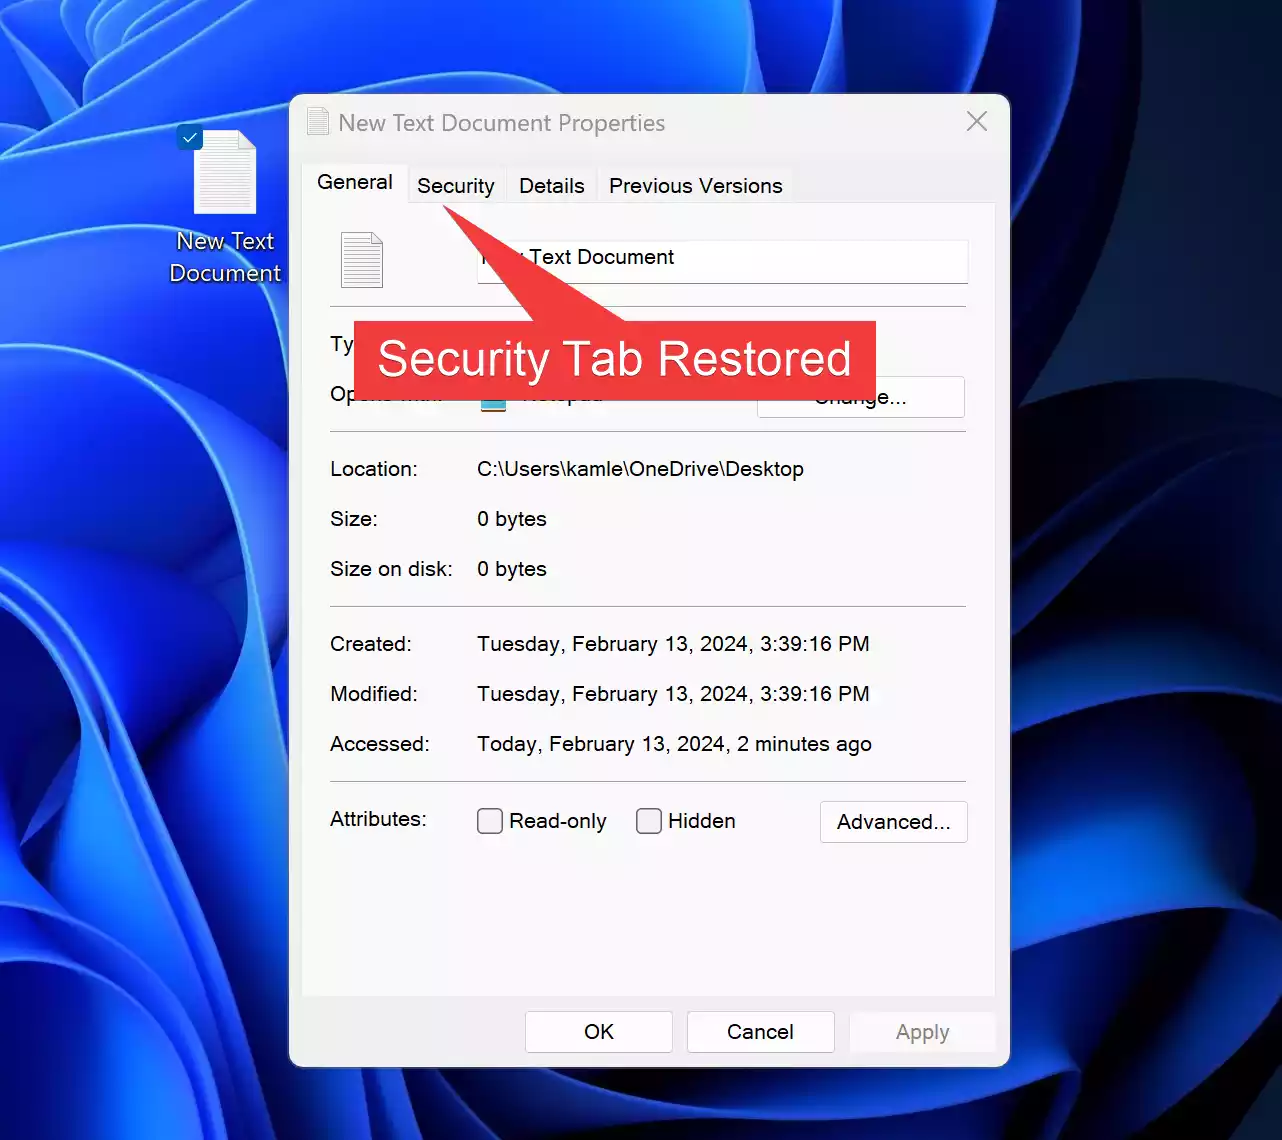
Step 5. Double-click on `NoSecurityTab`, and set its “Value data” to 0 to add the Security tab or 1 to remove it.
Step 6. Close the Registry Editor.
Method 2: Using Group Policy
Step 1. Launch the Local Group Policy Editor by pressing `Windows Key + R`, typing `gpedit.msc`, and hitting Enter.
Step 2. Navigate to the following folder:-
User Configuration > Administrative Templates > Windows Components > File Explorer
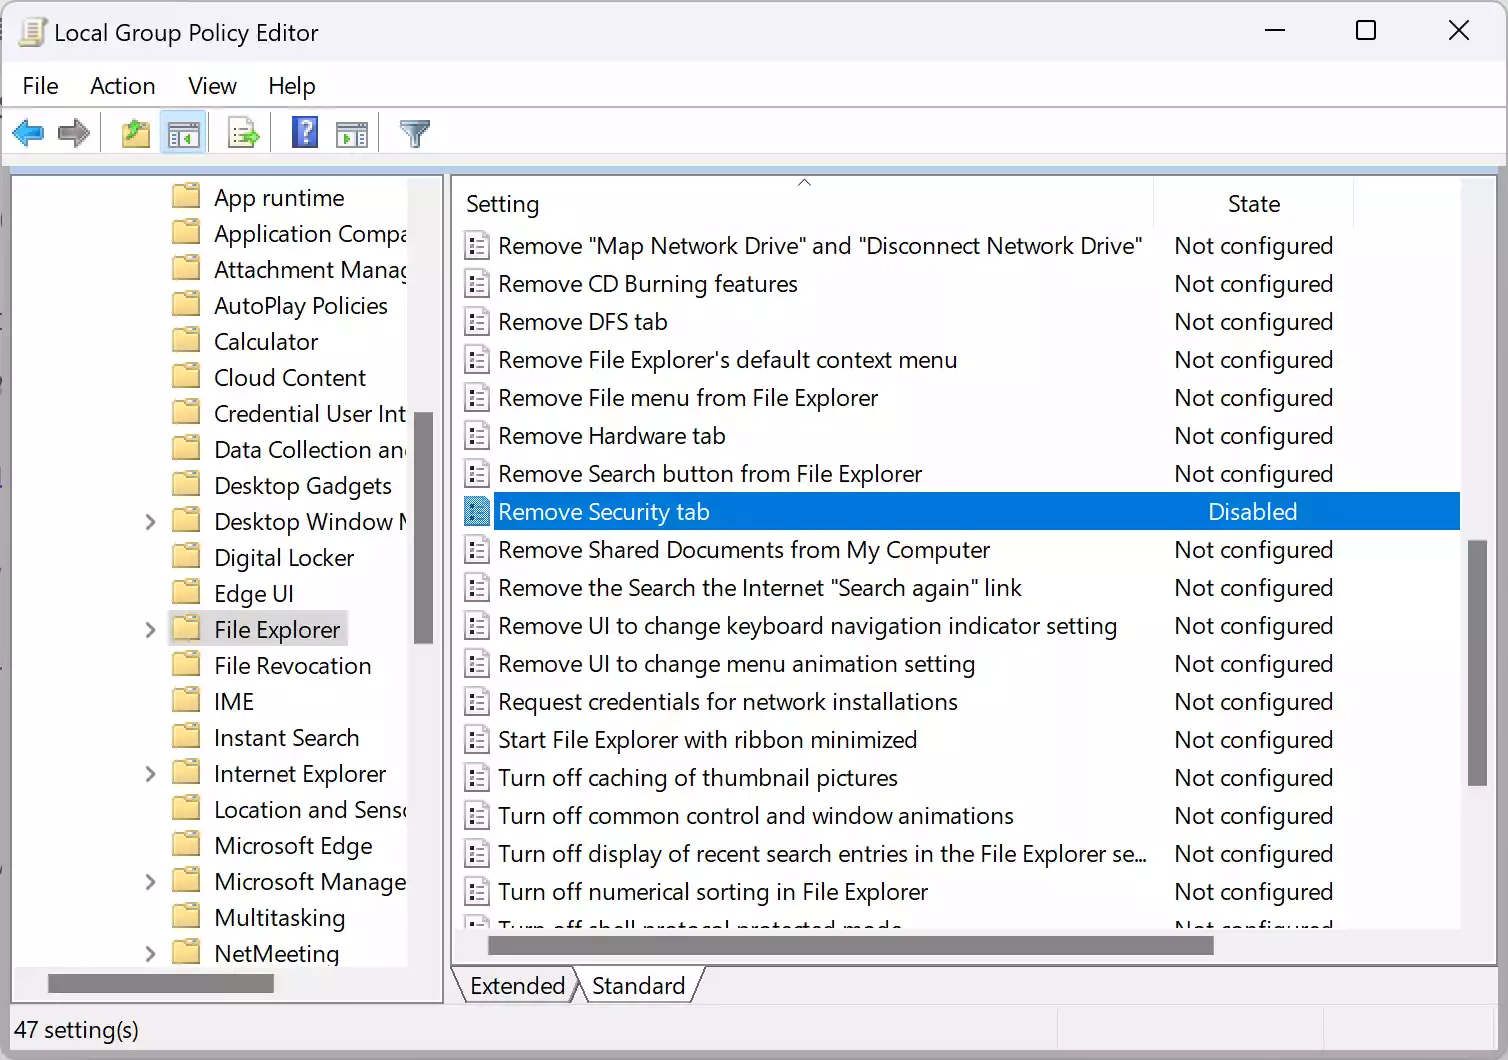
Step 3. Double-click on the policy named “Remove Security tab” to open it.

Step 4. Choose the “Not Configured” or “Disabled” option to show the Security tab. Select “Enabled” to hide it.
Step 5. Click Apply and then OK to save the changes.
Conclusion
Mastering file security on Windows 11 or 10 involves understanding how to manage access control through the Security tab in file properties. Whether you’re adding the tab to grant permissions or removing it to restrict access, these methods provide users with the tools to customize security settings according to their requirements. By following the steps outlined in this guide, users can enhance data protection and ensure the integrity of their files and folders in the Windows ecosystem.