Microsoft Excel is a powerful tool for performing various calculations and data analysis tasks. One common task that many people need to perform in Excel is calculating the number of workdays between two dates. Whether you’re tracking project timelines, scheduling employee work hours, or managing deadlines, knowing how to calculate workdays can be a valuable skill. In this gearupwindows article, we will guide you through the steps to calculate workdays in Microsoft Excel.
Note: Excel calculates the number of workdays between your dates and displays the result in the selected cell. However, this number includes both the starting date and the ending date.
How to Calculate Workdays in Microsoft Excel?
To calculate Workdays in Excel, follow these steps:-
Step 1. Before you start calculating workdays, make sure you have your Excel worksheet ready. In this example, let’s assume you have two columns, “Start Date” and “End Date,” where you want to calculate the number of workdays between these two dates.
In column A, enter your start dates, and in column B, enter your end dates. After that, your worksheet should look something like this:-
Step 2. Calculate Workdays Using NETWORKDAYS Function: Microsoft Excel provides a handy built-in function called `NETWORKDAYS` that allows you to calculate the number of workdays between two dates. Follow these steps to use this function:-
-
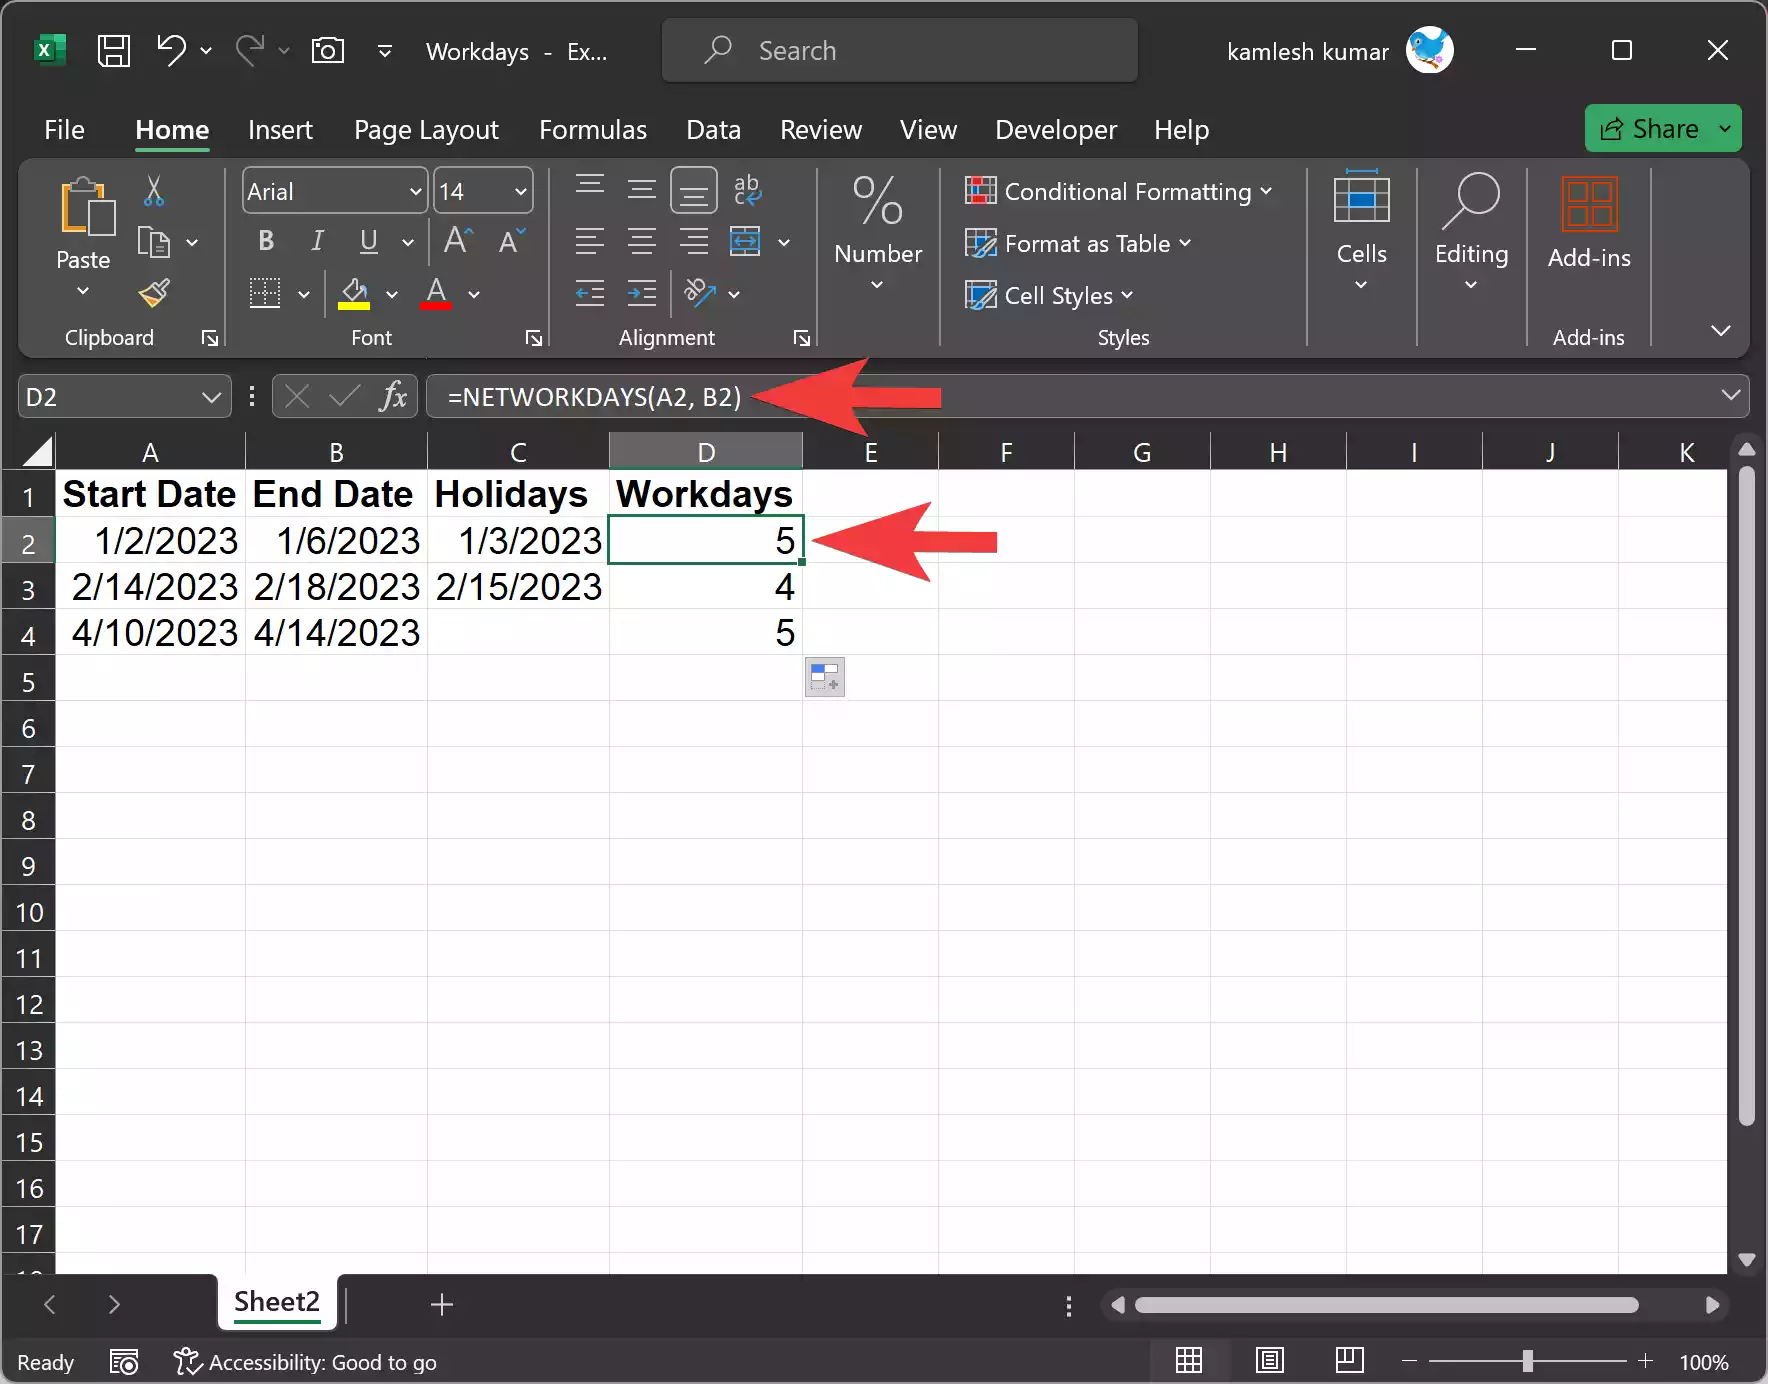
- Select the cell where you want the result to appear. In this example, we’ll place the result in column D.
- Enter the formula `=NETWORKDAYS(A2, B2)` into the selected cell.
– `A2` and `B2` are the cell references for your start and end dates. Make sure to use the cell references that match your worksheet.
-
- Press Enter, and Excel will automatically calculate the number of workdays between the two dates.
The result will be the number of workdays, excluding weekends and any specified holidays (if you provide a list of holidays as an additional argument to the `NETWORKDAYS` function).
Step 3. Customizing the NETWORKDAYS Function: You can customize the `NETWORKDAYS` function by including optional arguments to suit your specific requirements. For example, if you want to exclude certain holidays from the workday calculation, you can add a list of holiday dates as an argument. Here’s how:-
-
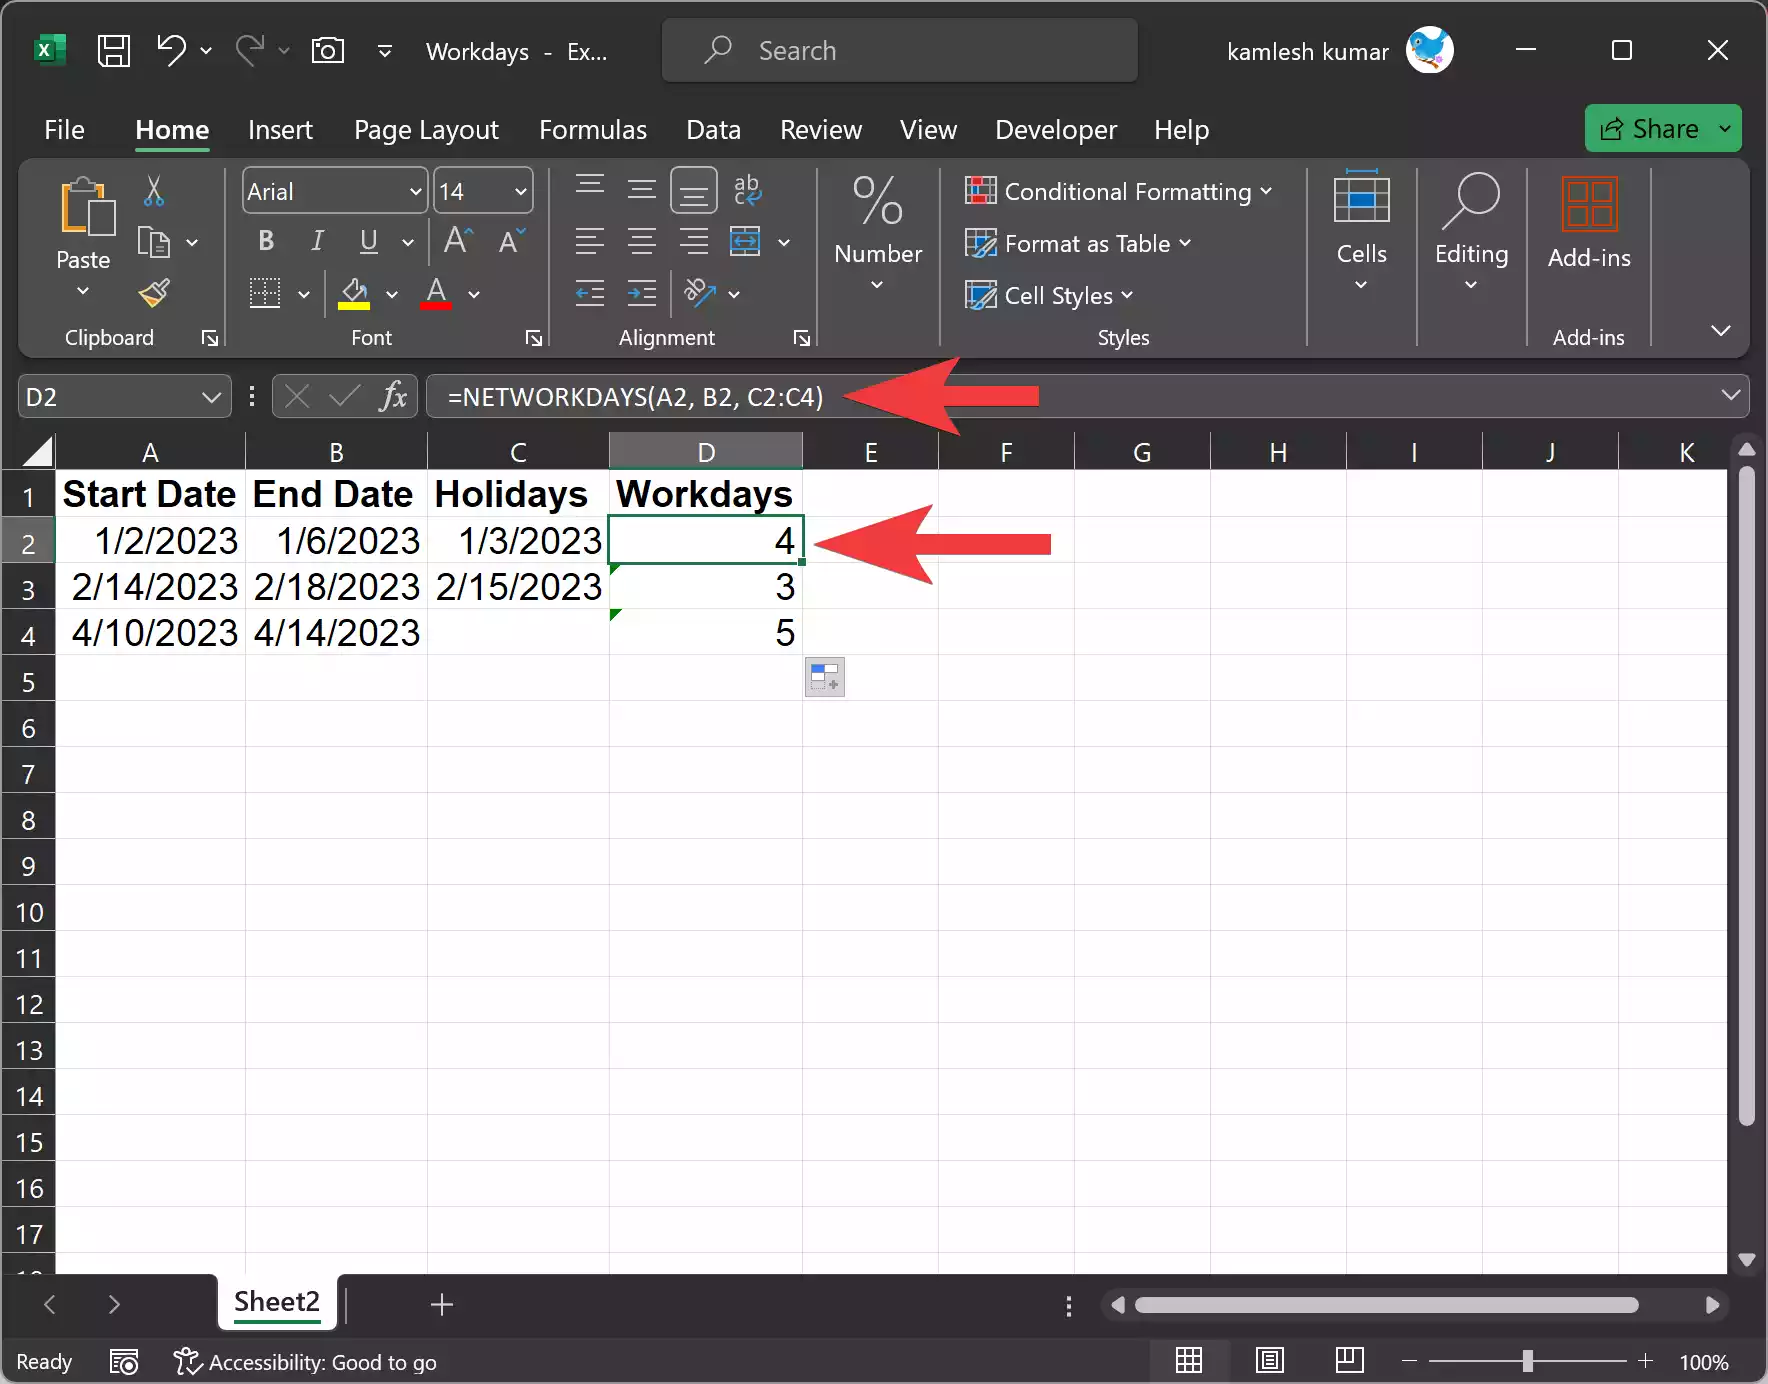
- To exclude holidays, create a separate list of holiday dates in your worksheet or define them as a range. For this example, let’s assume the holidays are listed in cells C2:C4.
- Modify the `NETWORKDAYS` formula as follows:-
=NETWORKDAYS(A2, B2, C2:C4)
– `A2` and `B2` are still the cell references for your start and end dates.
– `D1:D5` is the range that contains your holiday dates.
-
- Press Enter, and Excel will now calculate the number of workdays between the two dates, excluding the specified holidays.
Step 4. Fill Down for Multiple Calculations: If you need to calculate workdays for multiple date ranges, you don’t have to enter the formula for each row manually. Instead, you can use Excel’s Fill Down feature to quickly populate the results for all your date pairs.
-
- Select the cell with the formula you want to copy (the one in column C, for example).
- Hover your cursor over the small square in the lower-right corner of the selected cell (the fill handle).
- Click and drag the fill handle down to fill the formula for all your date pairs.
Excel will automatically calculate the workdays for each row, taking into account the respective start and end dates.
Conclusion
Calculating workdays in Microsoft Excel is a valuable skill for various professional and personal tasks. The `NETWORKDAYS` function makes this task easy and efficient. With this function, you can calculate workdays and exclude holidays. By following the steps outlined in this article, you can make the most of Excel’s capabilities for workday calculations and enhance your productivity in managing schedules, projects, and more.