The boot menu is a critical component of the Windows operating system. It enables users to choose which operating system they want to use when they start their computer. However, the default boot menu order may not always be suitable for every user. In some cases, users may want to change the order of boot menu display in Windows 11 and 10. In this article, we will guide you on how to do that step-by-step.
Why Change Boot Menu Display Order?
Before we begin with the guide, let’s understand why users may want to change the boot menu display order. The default order of the boot menu is set based on the installation order of the operating systems. However, users may want to change the order of the boot menu display for various reasons, including:-
- To set the default operating system as per their preference.
- To remove the option to boot into a specific operating system.
- To make it easier to select the operating system they want to use.
How to Change Boot Menu Display Order?
Here is a step-by-step guide on how to change the boot menu display order in Windows 11 and 10:-
Step 1. First, open the System Configuration utility.
To do that, press the Windows key + R to open the Run dialog box, type “msconfig,” and press Enter.
Step 2. In the System Configuration utility, click on the Boot tab. This tab contains all the settings related to the boot menu.
Step 3. Under the Boot tab, you will see all the operating systems that are installed on your computer. The operating system that is set as the default boot option is listed at the top. To change the boot menu display order, simply select the operating system that you want to set as the default, and click on the “Set as default” button.
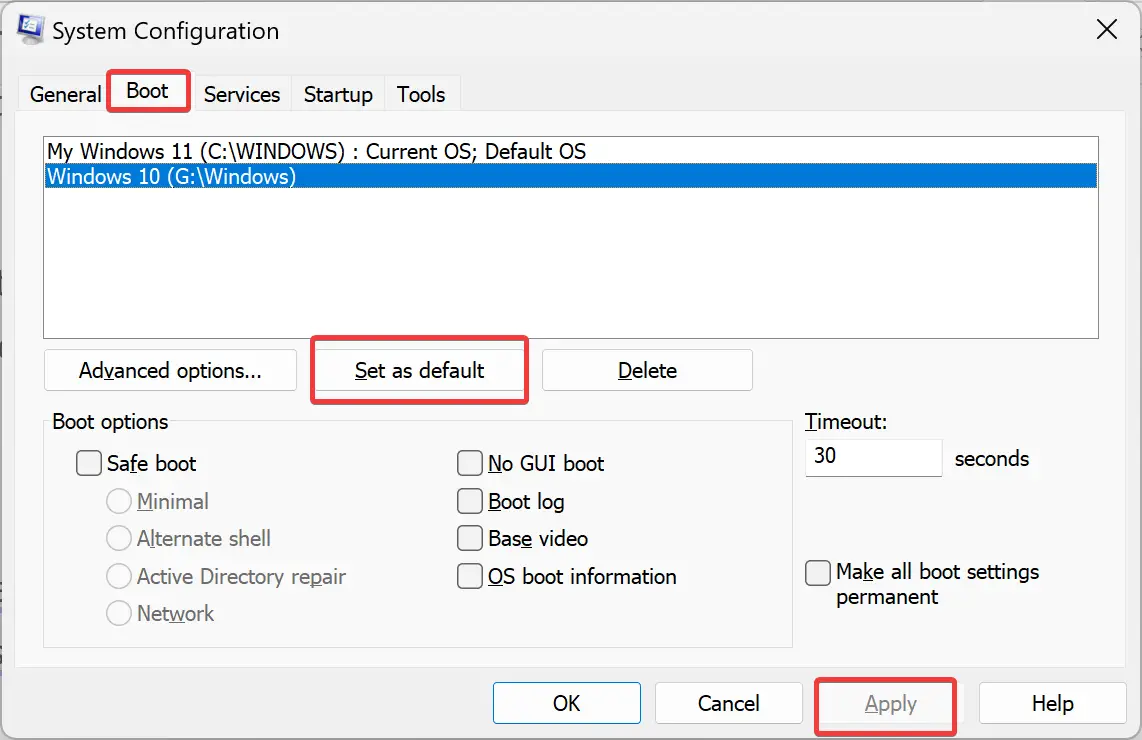
Step 4. Once you have made the changes to the boot menu display order, click on the “Apply” button to apply the changes.
Step 5. Finally, restart your computer for the changes to take effect. When your computer starts, you will see the updated boot menu display order.
Additional Tips
Here are some additional tips that can help you change boot menu display order in Windows 11 and 10:-
- If you want to remove an operating system from the boot menu, select the operating system and click on the “Delete” button.
- You can also set the timeout for the boot menu. To do that, simply change the value in the “Timeout” field under the Boot tab.
- If you want to add a new operating system to the boot menu, you can do that by installing the operating system on a new partition on your computer.
Conclusion
Changing the boot menu display order in Windows 11 and 10 is a simple process that can be done using the System Configuration utility. By changing the boot menu display order, users can set the default operating system, remove an operating system, or make it easier to select the operating system they want to use. With this step-by-step guide, you can easily change the boot menu display order on your Windows 11 or 10 computer.
