When you try to shut down, restart, or sign out of your Windows 11 or 10 computer, any app with active tasks will not shut down automatically. Instead, Windows will wait for a set period, known as the “HungAppTimeout,” before prompting you with the End Task dialog box, asking you to either cancel and close the app or proceed with the shutdown or restart. The default HungAppTimeout value is set to five seconds, but you can adjust this value to control how long your system waits after you click the End Task button before ending the task. In this article, we’ll guide you on changing the HungAppTimeout period in Windows 11 or 10 to suit your needs better.
Changing the HungAppTimeout period is a relatively simple process that involves modifying a value in the Windows Registry Editor. The registry is a central database that stores configuration settings, options, and preferences for the Windows operating system and installed applications. By adjusting the HungAppTimeout value in the registry, you can control whether your computer waits long enough after you click the End Task button before ending the task. Whether you’re a power user or a casual computer user, learning how to change the HungAppTimeout period can be a useful skill to have in your arsenal.
What is HungAppTimeout in Windows 11?
The HungAppTimeout period is the amount of time that Windows will wait for an app or process to end after you click the End task button. This value is set to 5 seconds by default. If you don’t respond to the End task prompt within this period, Windows will return to your desktop without shutting down or restarting your computer.
How to Change HungAppTimeout for all users in Windows 11 or 10?
Here are the steps to change the HungAppTimeout value for all users in Windows 11 or 10:-
Step 1. Open the Windows Registry Editor by pressing Windows key + R, typing “regedit,” and then press Enter.
Step 2. Then, navigate to the following key in the left sidebar:-
HKEY_USERS\.DEFAULT\Control Panel\Desktop
Note: If you don’t see the Desktop key, right-click on the Control Panel key, then select the New > Key option. Then, name the newly created key to Desktop.
Step 3. Now, right-click the right pane of the Desktop folder and select New > String Value.
Step 4. Next, name the newly created String value to HungAppTimeout.
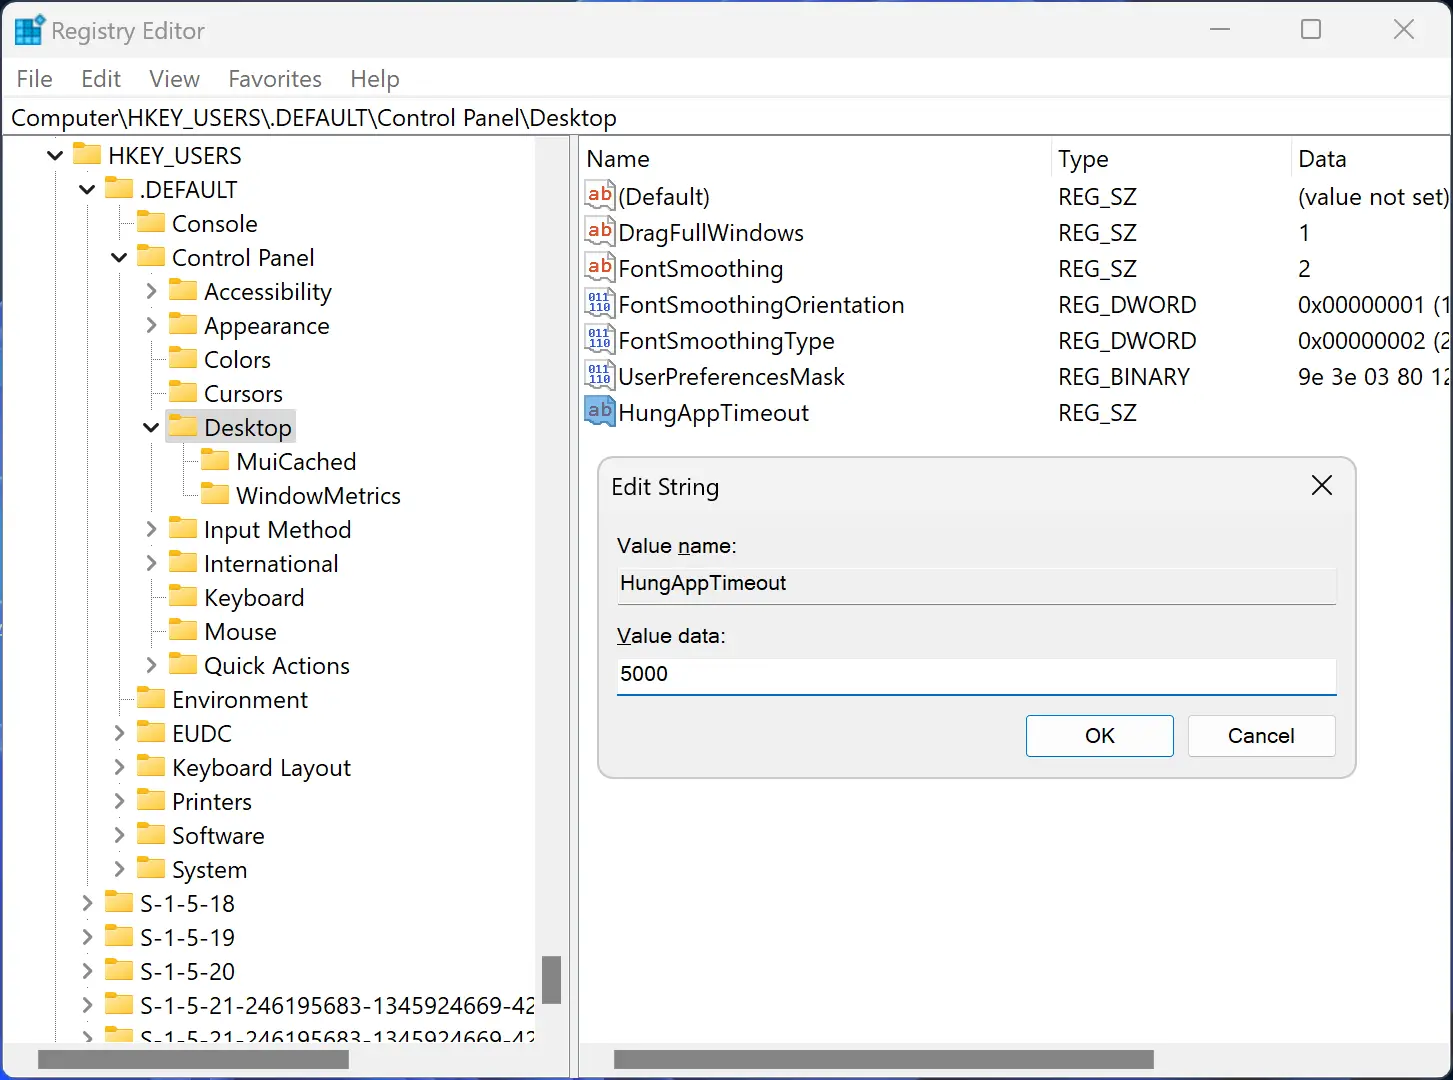
Step 5. After that, double-click the newly created HungAppTimeout and set a new value:-
- 5000 = Default value (5 seconds).
- 1000 = Minimum value (1 second).
Step 6. Click OK to save your changes.
Step 7. Finally, reboot your computer to apply the changes.
How to Change HungAppTimeout for a Specific User in Windows 11?
If you don’t want this change to apply to all users on the system, then use the registry key path: HKEY_CURRENT_USER\Control Panel\Desktop. Then follow the same steps above.
Conclusion
In conclusion, changing the HungAppTimeout period in Windows 11 or 10 is a straightforward process that can help you manage how long your system waits after the user clicks the End task button on the dialog window before ending the task. By following the steps outlined in this article, you can change the HungAppTimeout for all users or for a specific user and set a time that suits your preferences. Keep in mind that modifying the registry can be risky, so it’s essential to take precautions and back up your system before making any changes.