Windows 11/10’s System Restore feature acts as a time machine that can help you undo any problematic system changes. It takes a snapshot of your device at a specific date and time, allowing you to restore your Windows operating system to a previously stable state. Whether your system crashes after a recent update, driver or app installation, or due to an incorrect modification of system settings using the Registry or any other tool, you can quickly revert to the previously saved date and time to fix the issue without losing any files.
Even Windows 11/10 allows you to delete specific or all “System Restore Points” at once.
Although System Restore is a handy troubleshooting tool, it remains disabled by default, which means you must enable it before you or Windows 11/10 can create restore points.
In this post, we will learn the following:-
- Enable the System Restore Point
- Create a System Restore point manually
- Recover Windows 10 using System Restore
How to Enable System Restore Point on Windows 11/10?
Follow these steps to turn on System Restore Point on Windows 11/10:-
Step 1. Open the Start menu and search for Create a restore point.
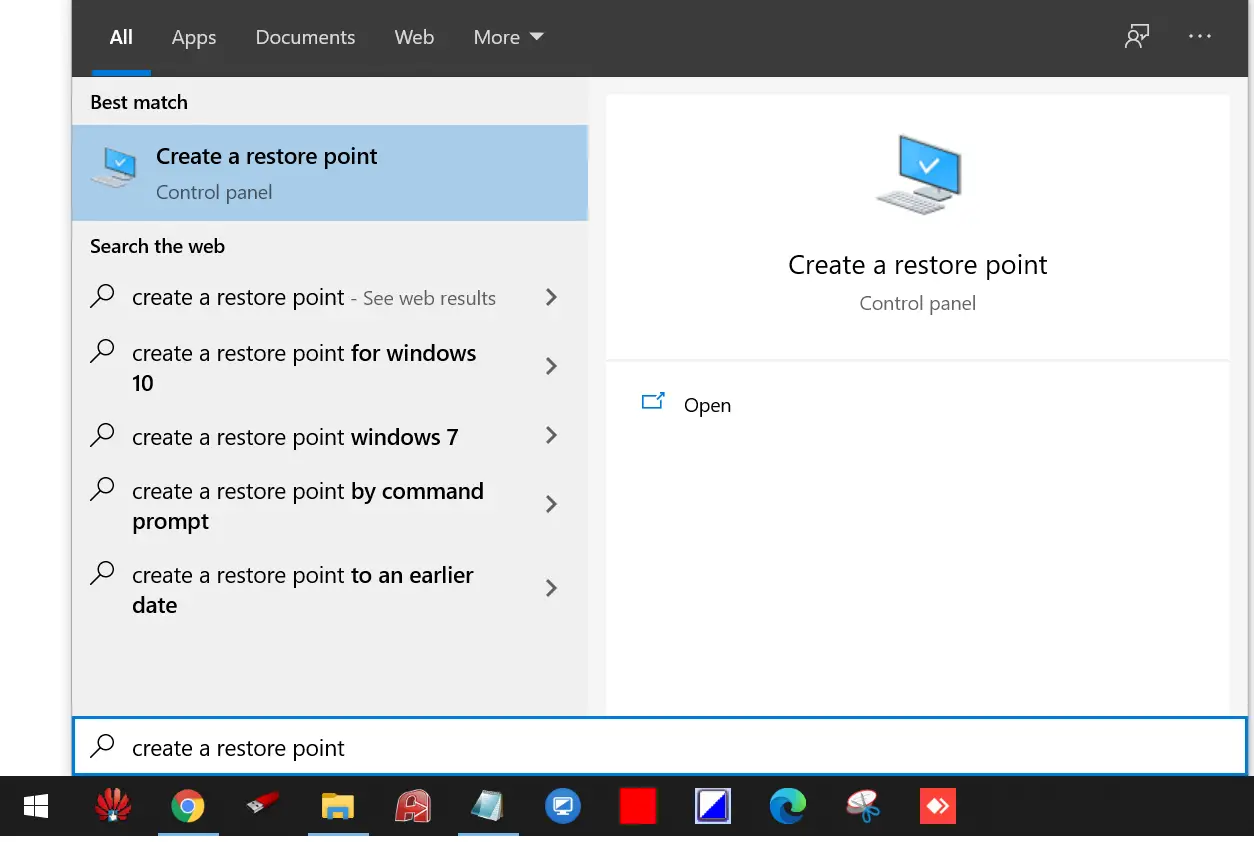
Step 2. Click on the Create a restore point app from the results to open System Properties.
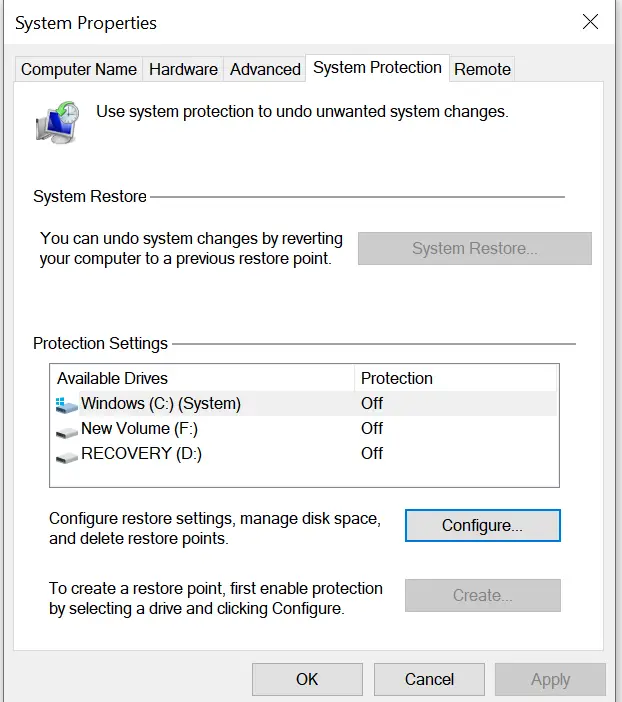
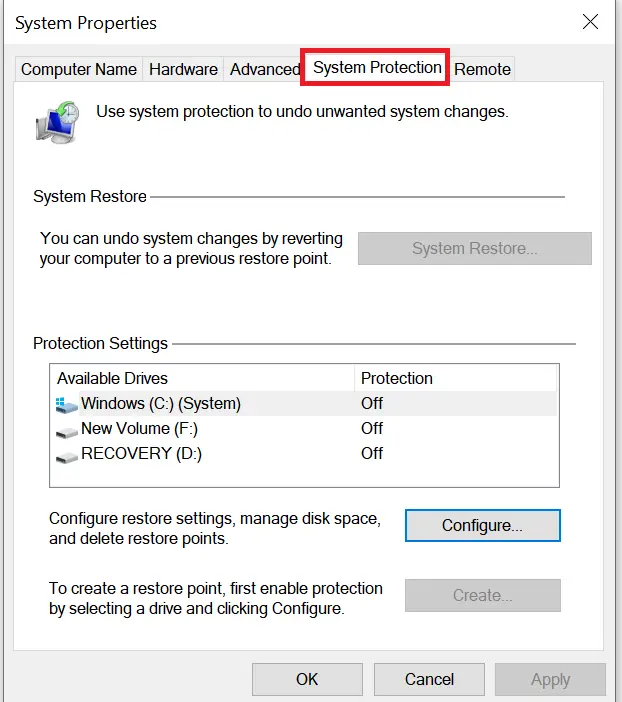
Step 3. Then, click on the System Protection tab.
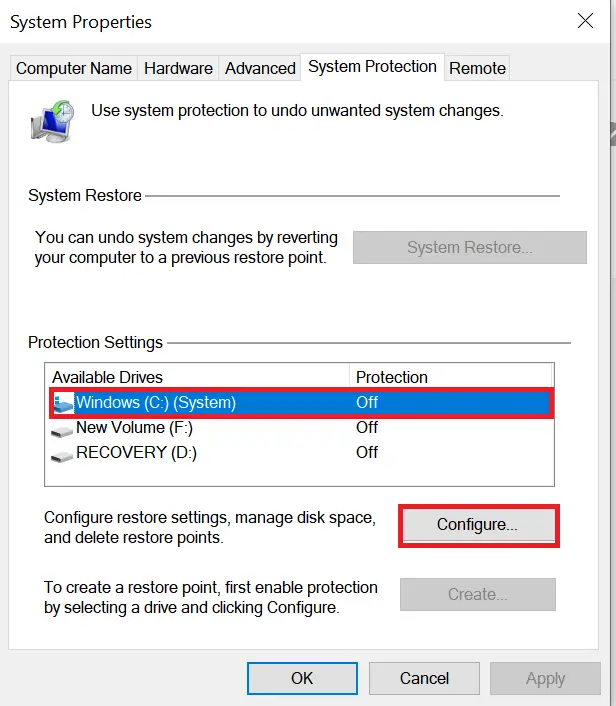
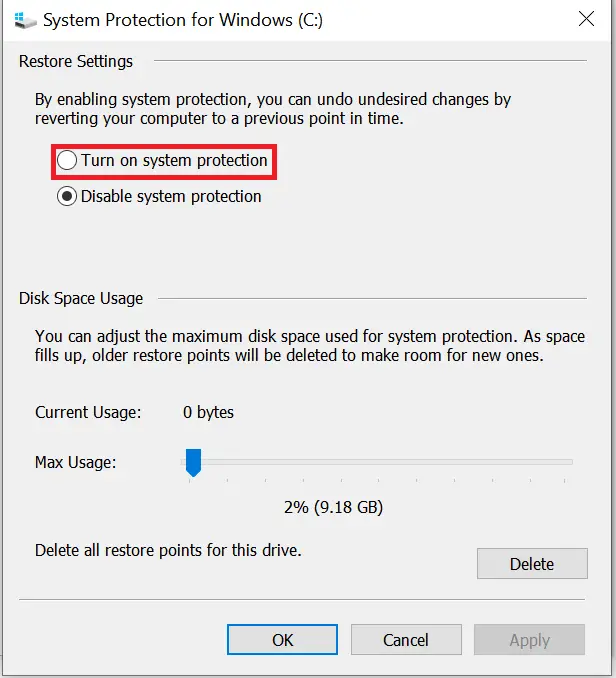
Step 4. After that, under the “System Protection” section, select the primary “System” drive and click the Configure button.
Step 5. Select Turn on system protection from the available options.
Step 6. Finally, click on Apply and then the OK button.
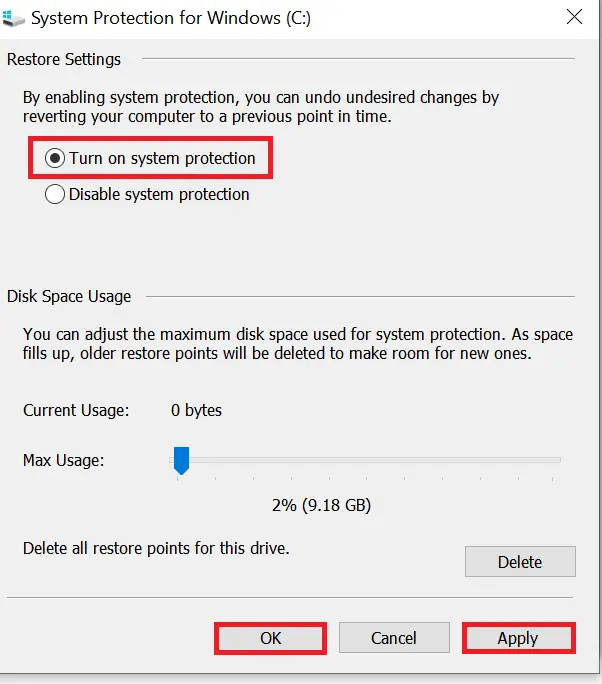
Quick Tips: Windows 11/10 can automatically manage the space; however, under the “Disk Space Usage” section, you can also use the slider to specify the maximum storage capacity to reserve for System Restore.
Once you complete the above steps, Windows 10 will automatically start creating a restore point when a new update or specific system changes are made.
Note: The System Restore feature is only available for system drives (on which drive your OS is installed).
How to Create a System Restore Point Manually on Windows 11/10?
Follow these steps to create a System Restore Point manually on Windows 11/10:-
Step 1. Open the Start menu and search for Create a restore point.
Step 2. Click on the Create a restore point app to open System Properties from the results.
Step 3. Under the “System Protection” tab, click the Create button.
Step 4. Type a descriptive name when prompted.
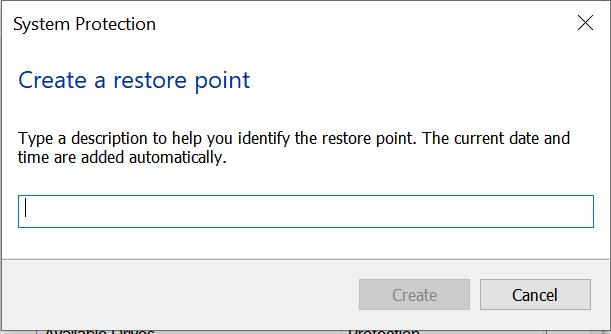
Step 5. Once you have entered the system restore point name, click the Create button.

Step 6. It will start creating a system restore point on demand.

Step 7. After a few minutes, you should receive a message, “The restore point was created successfully.”

Step 8. Now, you can close the system protection window.
How to Recover Windows 11/10 using System Restore?
Once you run into trouble after making system changes, you can undo the changes using a previously created restore point without spending more time troubleshooting the problem. You can restore your Windows 10 by accessing the desktop or even if your computer won’t boot correctly.
Undo system changes using desktop.
If you still have access to the desktop, you can revert system changes using a restore point:-
Step 1. Open the Start menu and search for Create a restore point.
Step 2. Click on the Create a restore point app from the results to open System Properties.
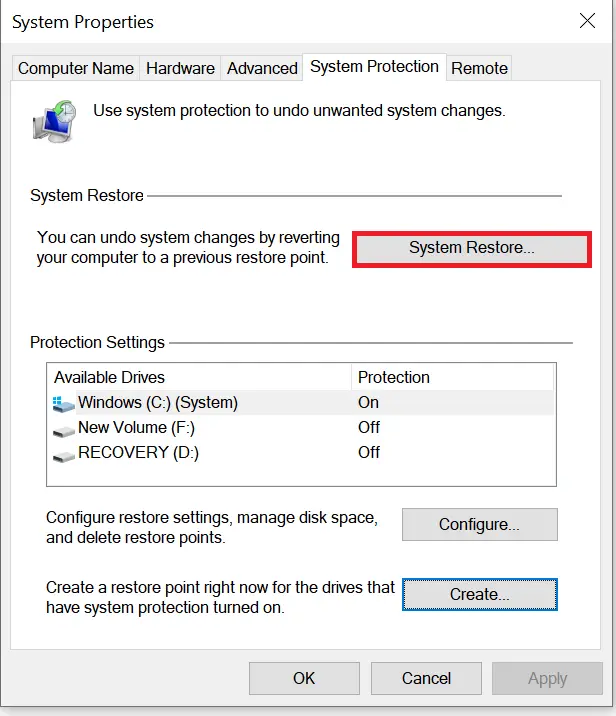
Step 3. Under System Protection, click on the System Restore button.
Step 4. The System Restore window will open; click on the Next button.
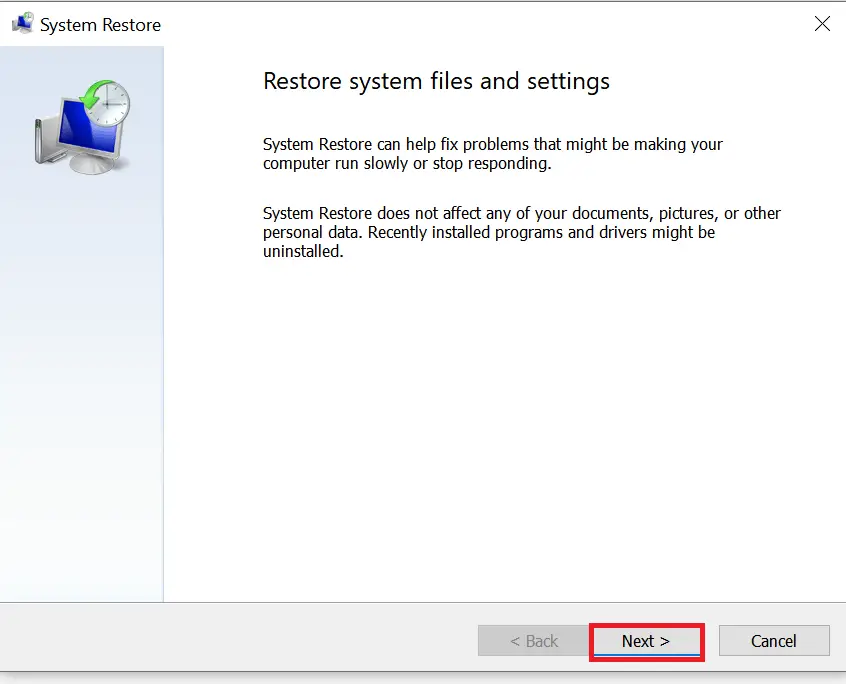
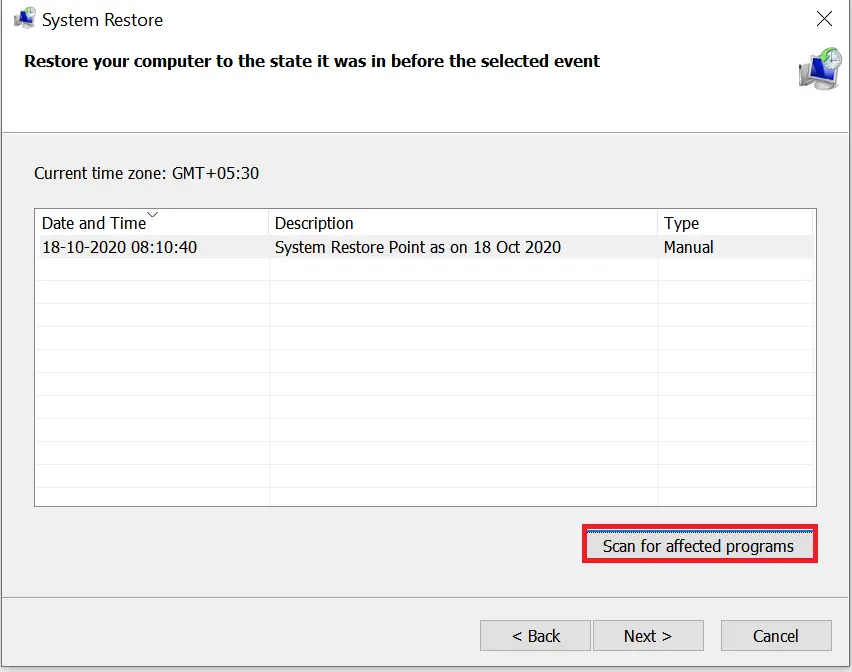
Step 5. Select the restore point that you want to use on your computer.
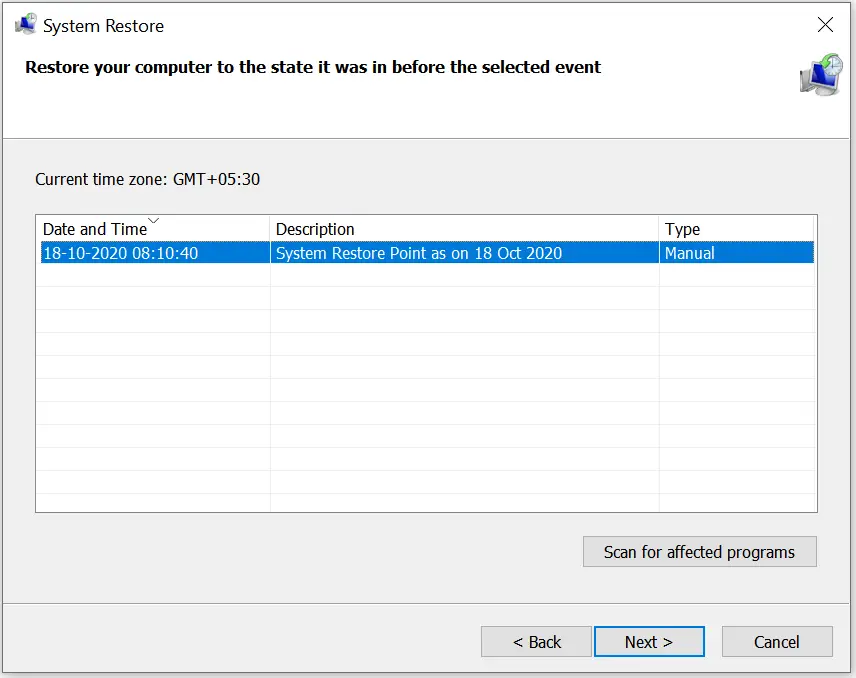

Step 7. It will start scanning affected apps.
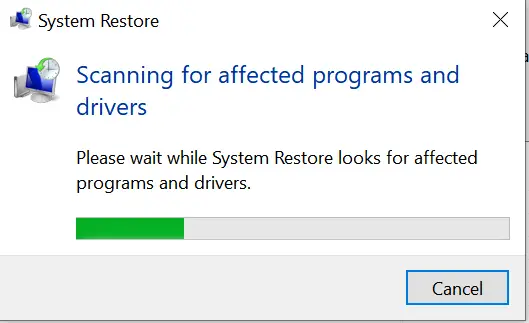
Step 8. It will list the affected apps and drivers, which will not be available after Windows restore.
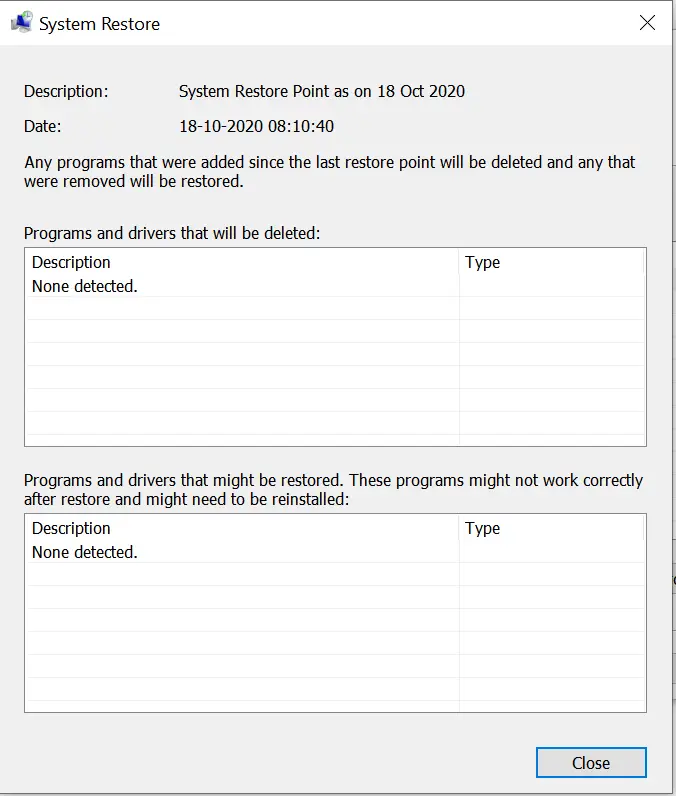
Step 9. Once you have seen the list of apps/drivers which will not be available after the system restore, note down and click the Close button.
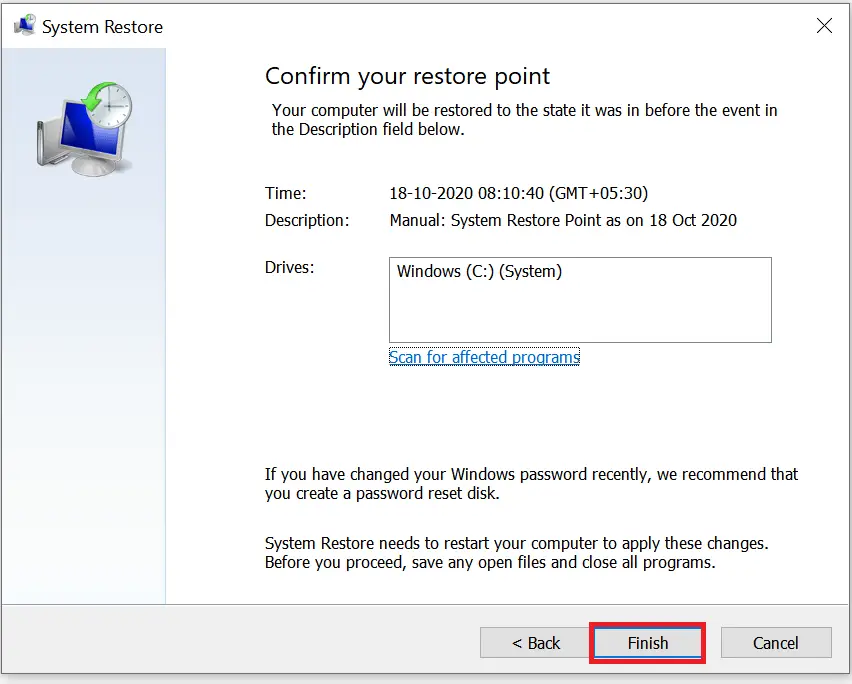
Step 10. Click on the Next button to continue restoring the system.
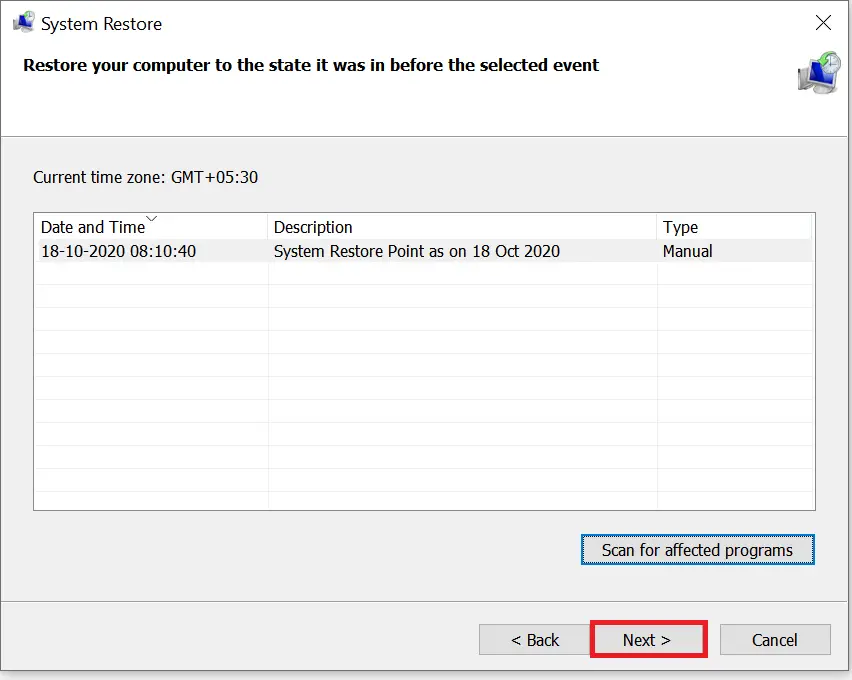
Step 11. Once you have completed the above steps, click on the Finish button.

Now, the System Restore feature will return your computer to the previous working state.
Undo system changes using Advanced startup.
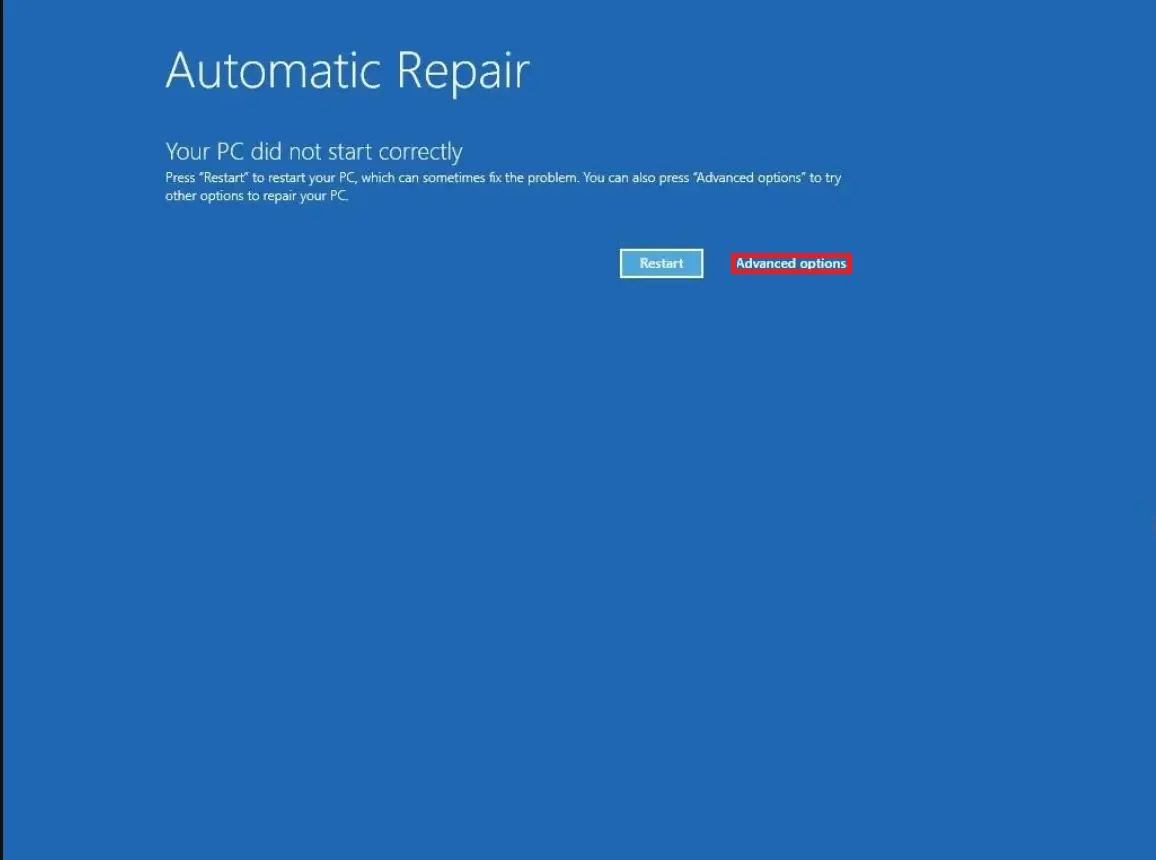
If Windows 11/10 does not boot up correctly, it will automatically repair it. Even you can launch an Advanced startup manually to access System Restore.
Step 1. Turn on your PC.
Step 2. As soon as the Windows logo appears on the screen, interrupt the boot by pressing the power button.
Step 3. Repeat the steps from 1 to 2 until the device boots into the recovery.
Step 4. Click the Advanced options button.
Step 5. Click Troubleshoot.
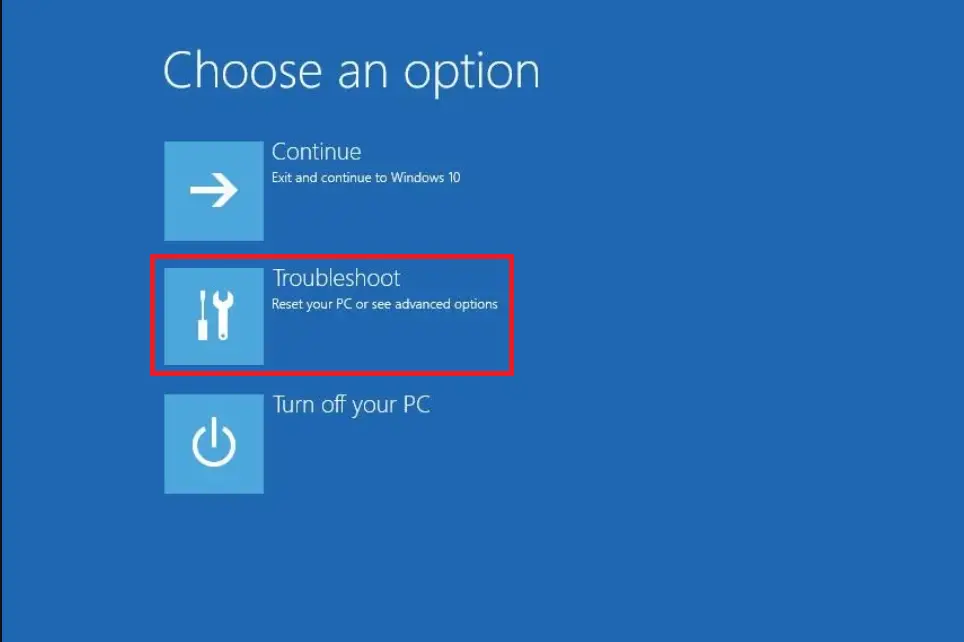
Step 6. Click Advanced options.

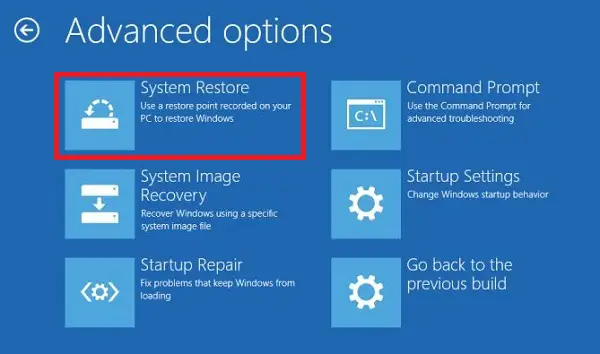
Step 8. Under the System Restore window, click the Next button.
Step 9. Click the restore point that you want to use on your computer.

Step 10. Click Scan for affected programs if you want to see the list of apps/drivers that will not be available after restoration.
Step 11. It will start scanning affected apps.
Step 12. You will get a list of affected apps and drivers, which will not be available after Windows restore.
Step 13. Once you have seen the list of apps/drivers which will not be available after the system restore, note down and click the Close button.
Step 14. Click on the Next button to continue restoring the system.
Step 15. Once you have completed the above steps, click on the Finish button.
Conclusion
In conclusion, System Restore is an essential troubleshooting tool in Windows 11/10 that can help users revert to a previous state when the system crashes due to any problematic changes, whether caused by updates, drivers, or applications. This feature acts like a time machine and takes a snapshot of the device at a specific time, allowing users to undo system modifications without losing any files. It is important to note that the System Restore feature is disabled by default, so users must enable it to create restore points. Additionally, users can create restore points manually and specify a descriptive name for them. To access the System Restore feature, users can either use the desktop or access it via Advanced startup options. Overall, System Restore is an excellent tool that can save time and effort by quickly recovering the Windows operating system to a previously stable state.
