The “Send to” menu on Windows is a lesser-known feature. This “Send to” is a unique feature of Windows that allows you to quickly send a find to another location without navigating through File Explorer. In the earlier version of Windows, when you right-click a file/folder on the context menu, “Send To” appears. In the latest Windows 11, it is buried under “Show more options.”
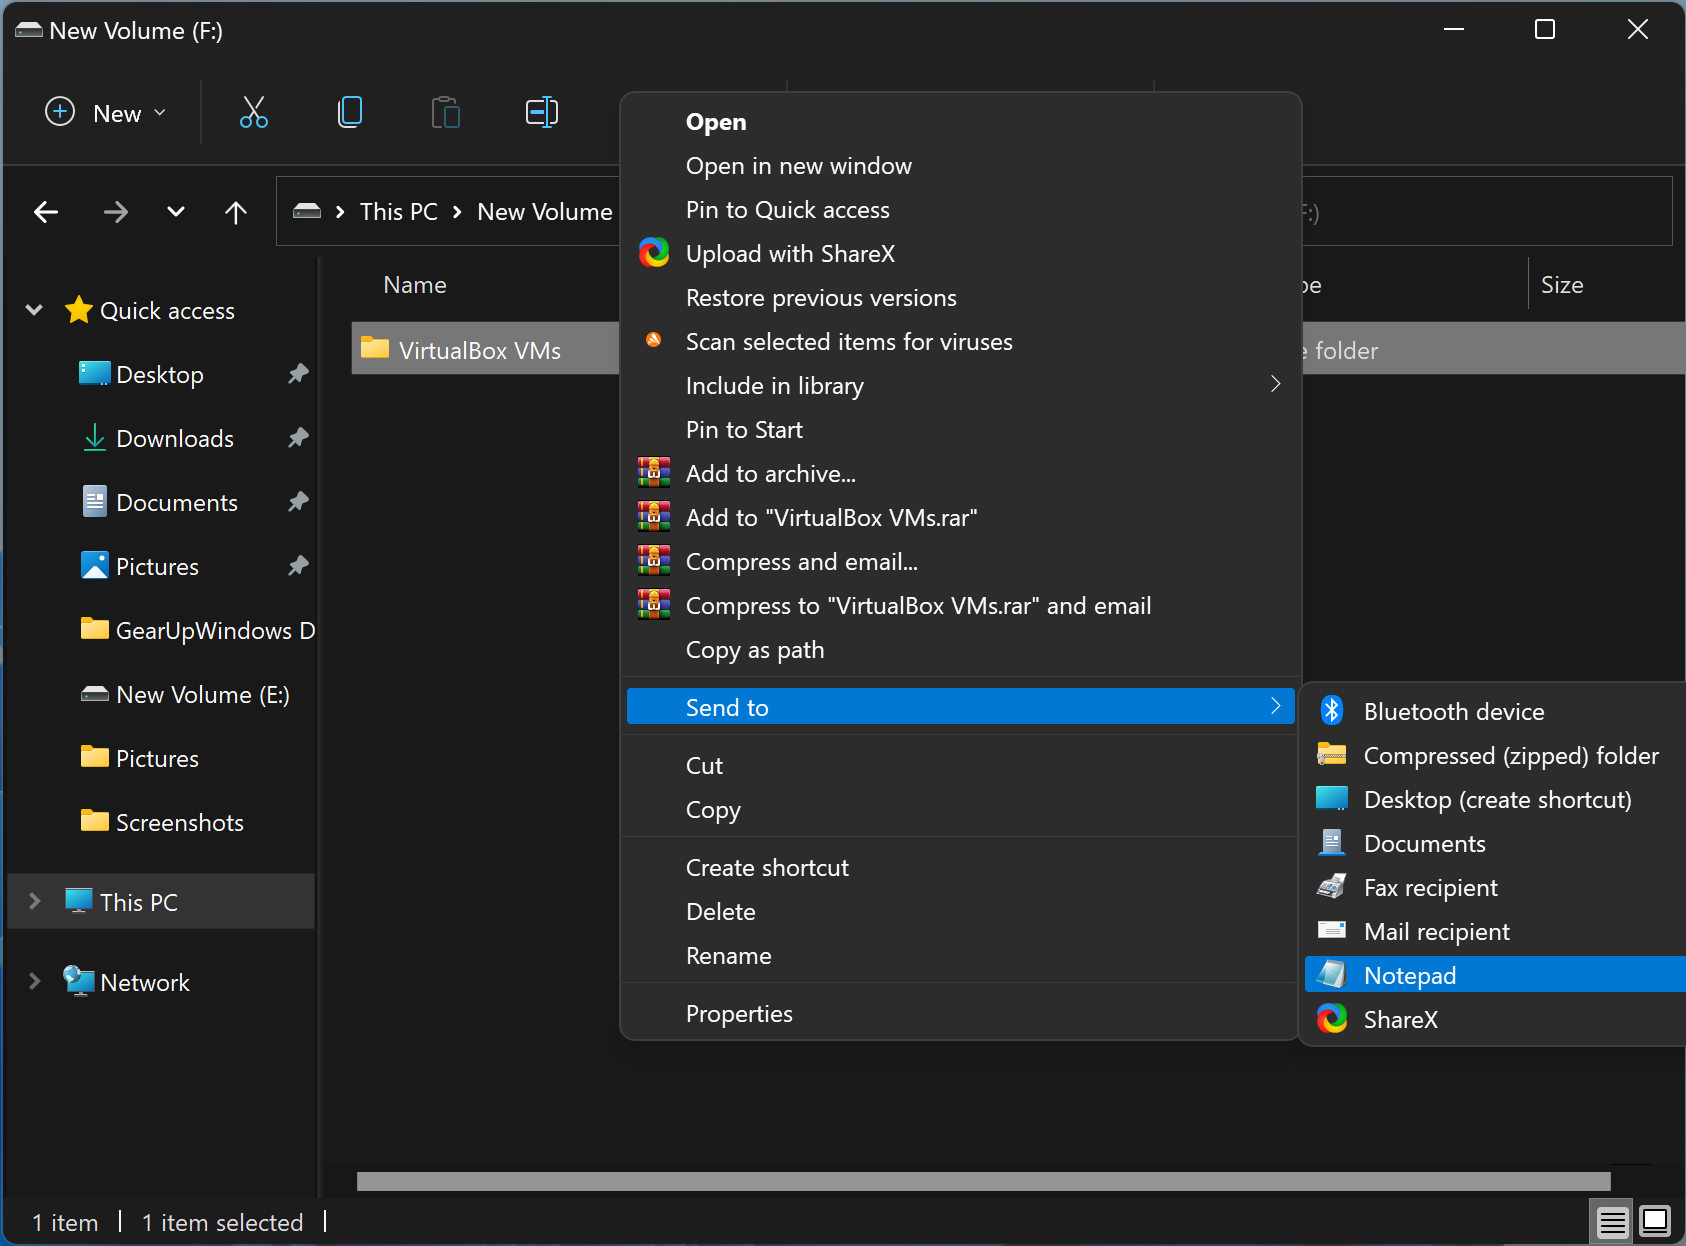
When you right-click a file/folder and choose “Send to” from the menu, you should see something that looks like this:-
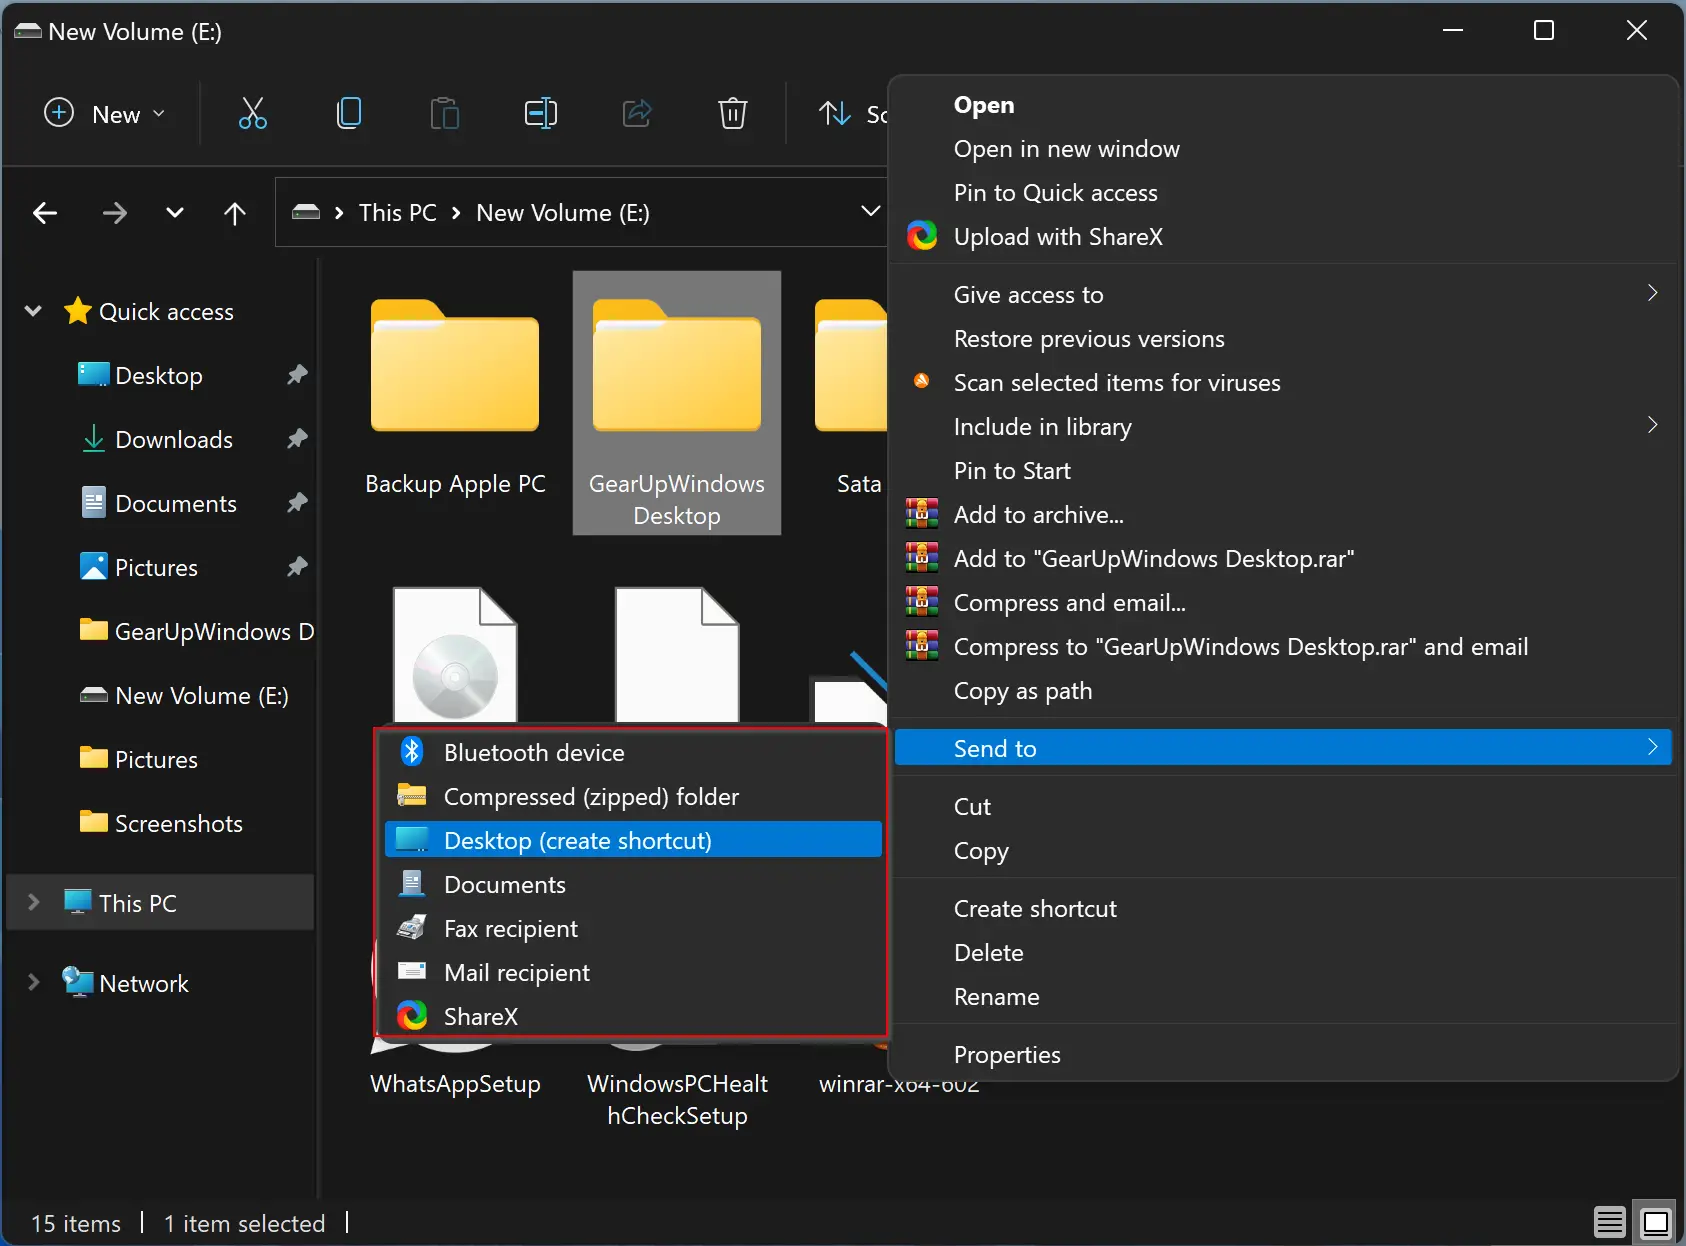
By default, in the “Send to” menu, you will find the following options:-
- Bluetooth device (if Bluetooth exists on your PC)
- Compressed (zipped) folder
- Desktop (create shortcut)
- Documents
- Fax recipient
- Mail recipient
Apart from the above list, a third-party app can add you, as seen in the above screenshot. Also, when you connect a USB drive to your PC, it will also appear here. That means you can quickly send a file or folder to any location without actually doing a copy-and-paste job.
Now that you have seen the importance of the “Send to” menu on Windows PCs. If you need, you can customize the shortcut options under the “Send to” menu. The below-mentioned method is applicable for all Windows OS, including Windows 11, 10, 8, 7, and Vista.
How to Add or Remove Items from the Send To Menu in Windows 11, 10, 8, 7, or Vista?
If you would like to add or remove any item from the Send to menu on your computer, do the following:-
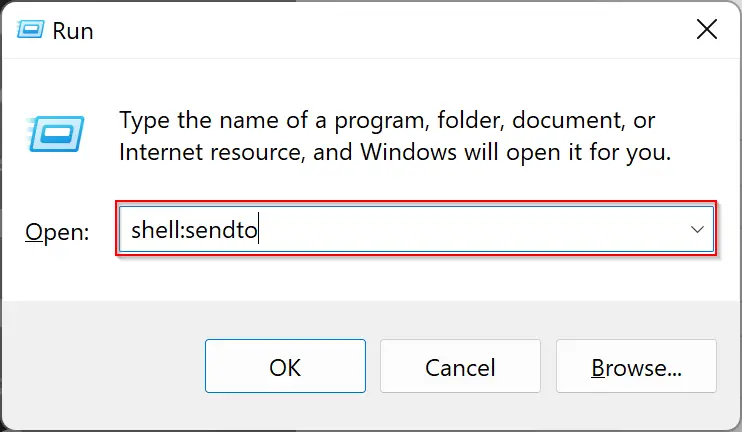
Step 1. Press Windows + R keys from the keyboard to launch the Run dialog box.
Step 2. Type shell:sendto in the Run box and then hit Enter from the keyboard.
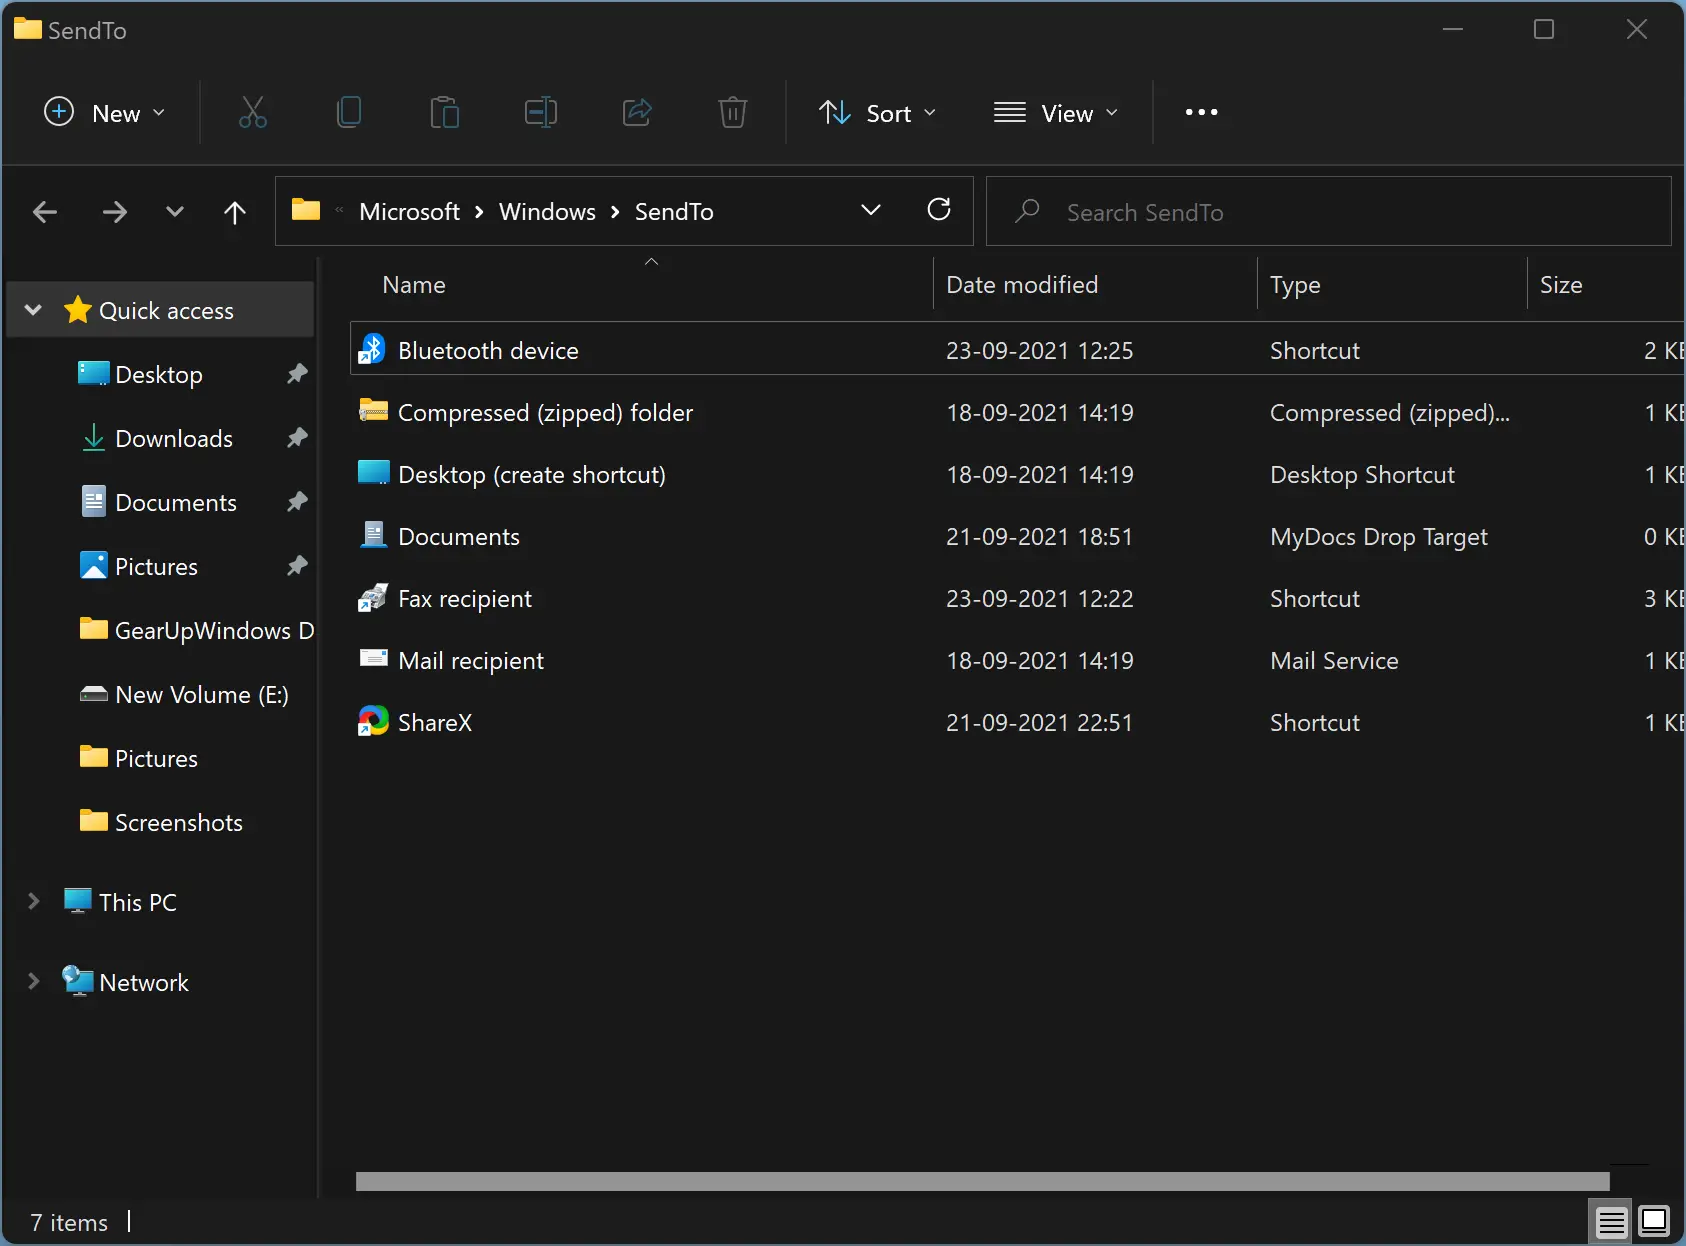
Step 3. When you’re done, it will open up the following folder where you can see a lot of shortcuts:-
C:\Users\<yourusername>\AppData\Roaming\Microsoft\Windows\SendTo
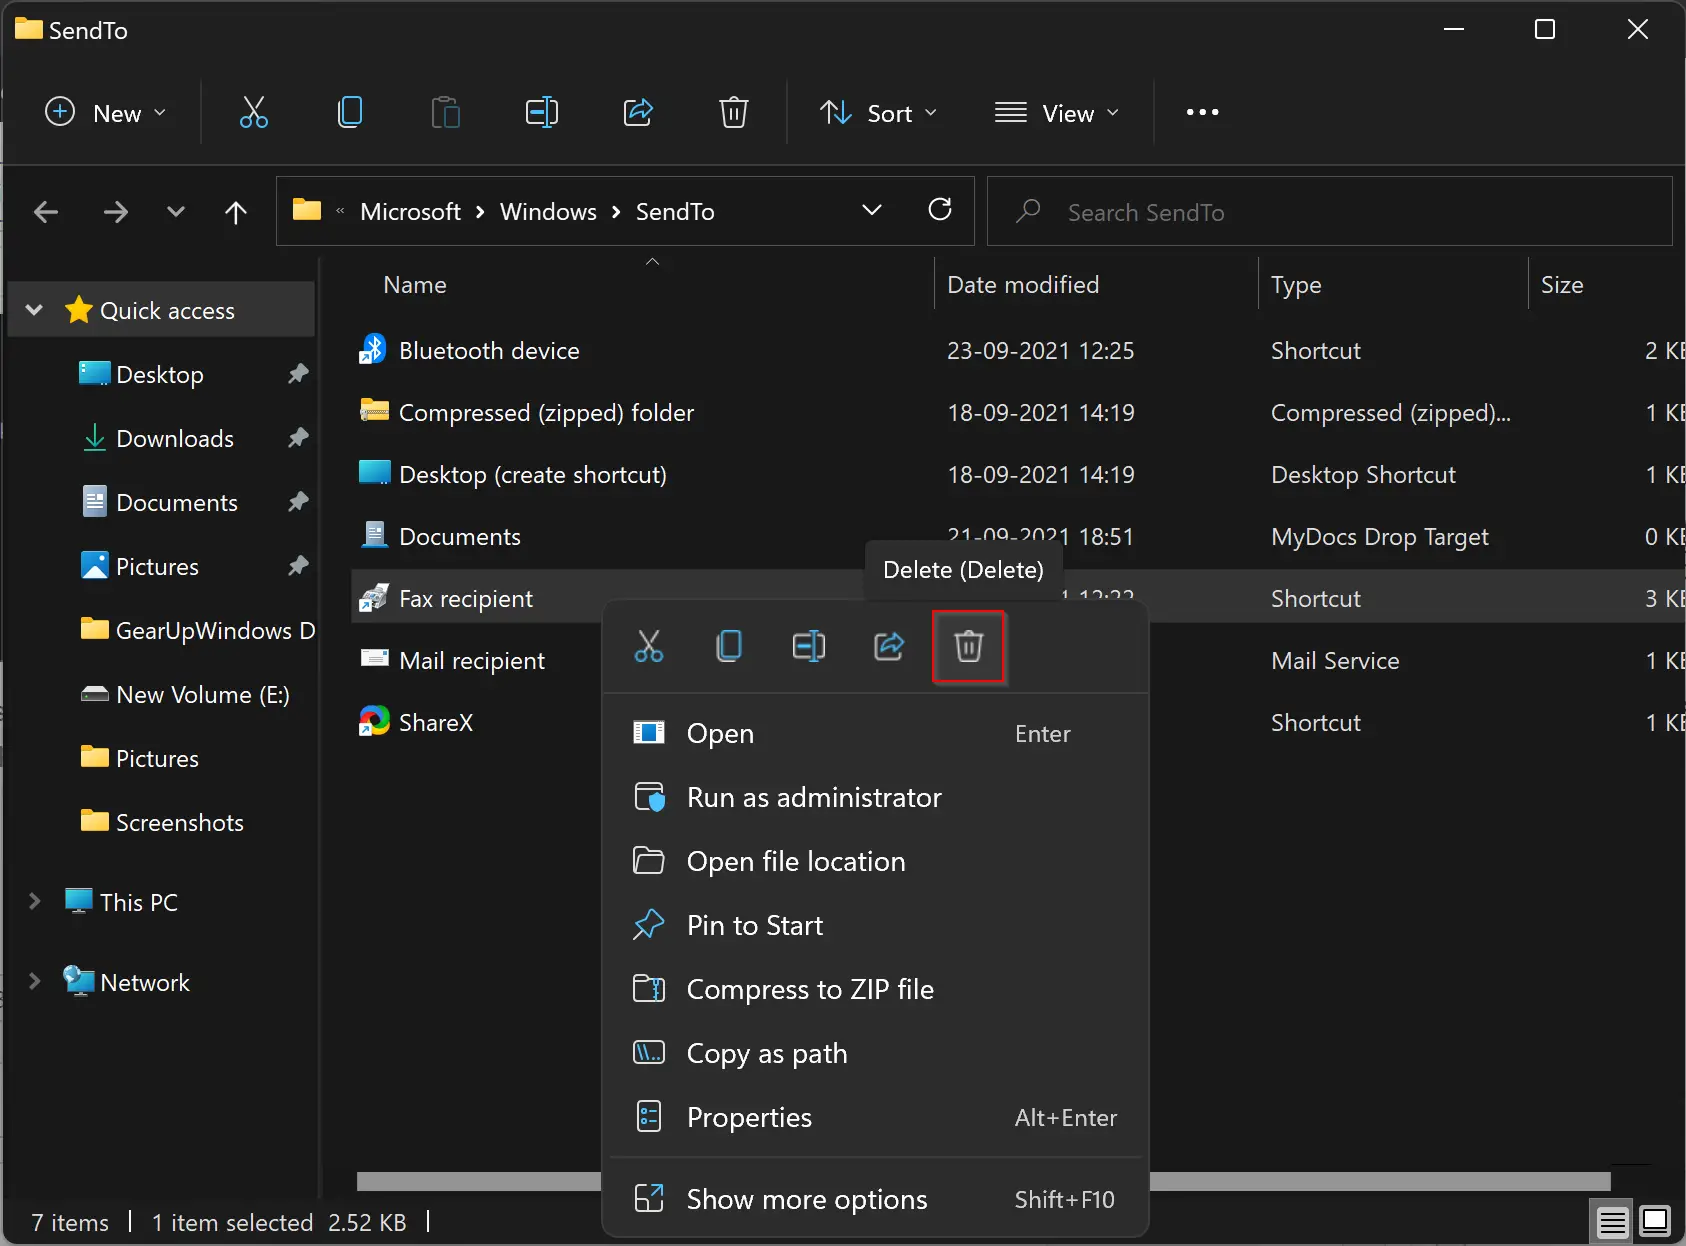
Step 4. Those applications you don’t need, you can safely delete from here. For example, if you don’t need the “Fax recipient” option under the “Send to” menu, right-click on it and select the Delete option from the context menu.
Step 5. Similarly, if you want to add any application to the “Send to” menu, drag the shortcut of that application to this folder. That application is added to the “Send to” menu. For example, if you want to add Notepad to the “Send to” menu, create a Notepad shortcut icon on the desktop. Then copy and paste that shortcut under the “Send to” folder. Now, when you right-click on File/Folder and select the “Send to” option, Notepad will appear in this app’s list.
Conclusion
In conclusion, the “Send to” menu on Windows is a useful and often overlooked feature that allows you to quickly send files and folders to various locations without navigating through File Explorer. While it may not be as prominent in Windows 11 as it was in earlier versions, it can still be accessed and customized to suit your needs. By following the simple steps outlined in this article, you can add or remove items from the “Send to” menu to make it more useful and convenient for you. So next time you need to send a file or folder to another location quickly, give the “Send to” menu a try!
Thankyou. I was looking for the Send To in Windows 11 and could no find it- until your excellent article showed me where it was.