IPv4 (Internet Protocol version 4) is the standard used for connecting devices to the Internet. In some situations, you may need to enable or disable IPv4 on your Windows 11 or 10 computer. This could be due to network configuration changes or troubleshooting purposes. If you’re unsure about how to do it, don’t worry; we’ve got you covered! In this user-friendly guide, we’ll walk you through the steps to enable or disable IPv4 using the Control Panel.
Before we begin, please note that these steps are for Windows 11 and Windows 10 users. The process might be slightly different for other Windows versions.
How to Turn On or Off IPv4 on Windows 11 or 10?
Follow these simple steps to enable or disable IPv4 on Windows 11 or 10:-
Step 1. To start, click on the “Start” button in the Taskbar of your desktop. Then, type “Control Panel” in the search bar and select the Control Panel app from the search results.
Step 2. In the Control Panel, set the “View by” option to “Category.”
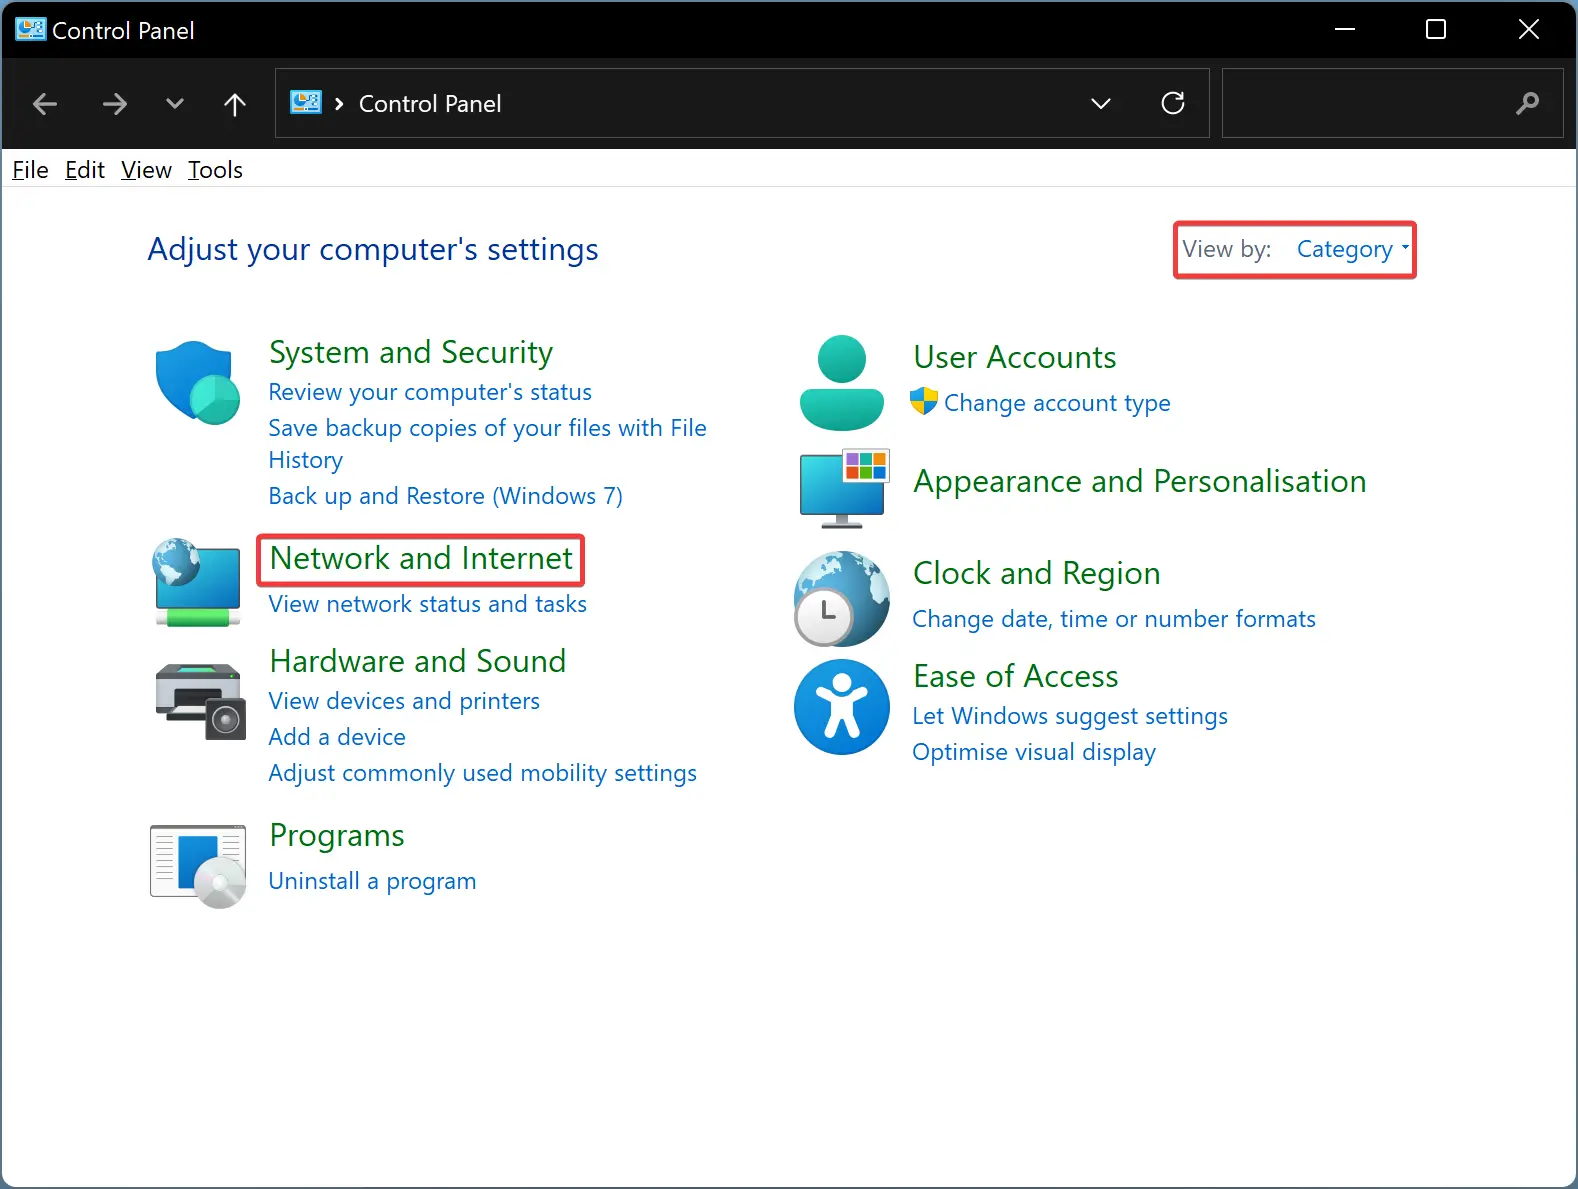
Step 3. Then, locate and click on the “Network and Internet” category. Under this category, you will find “Network and Sharing Center“; click on it.

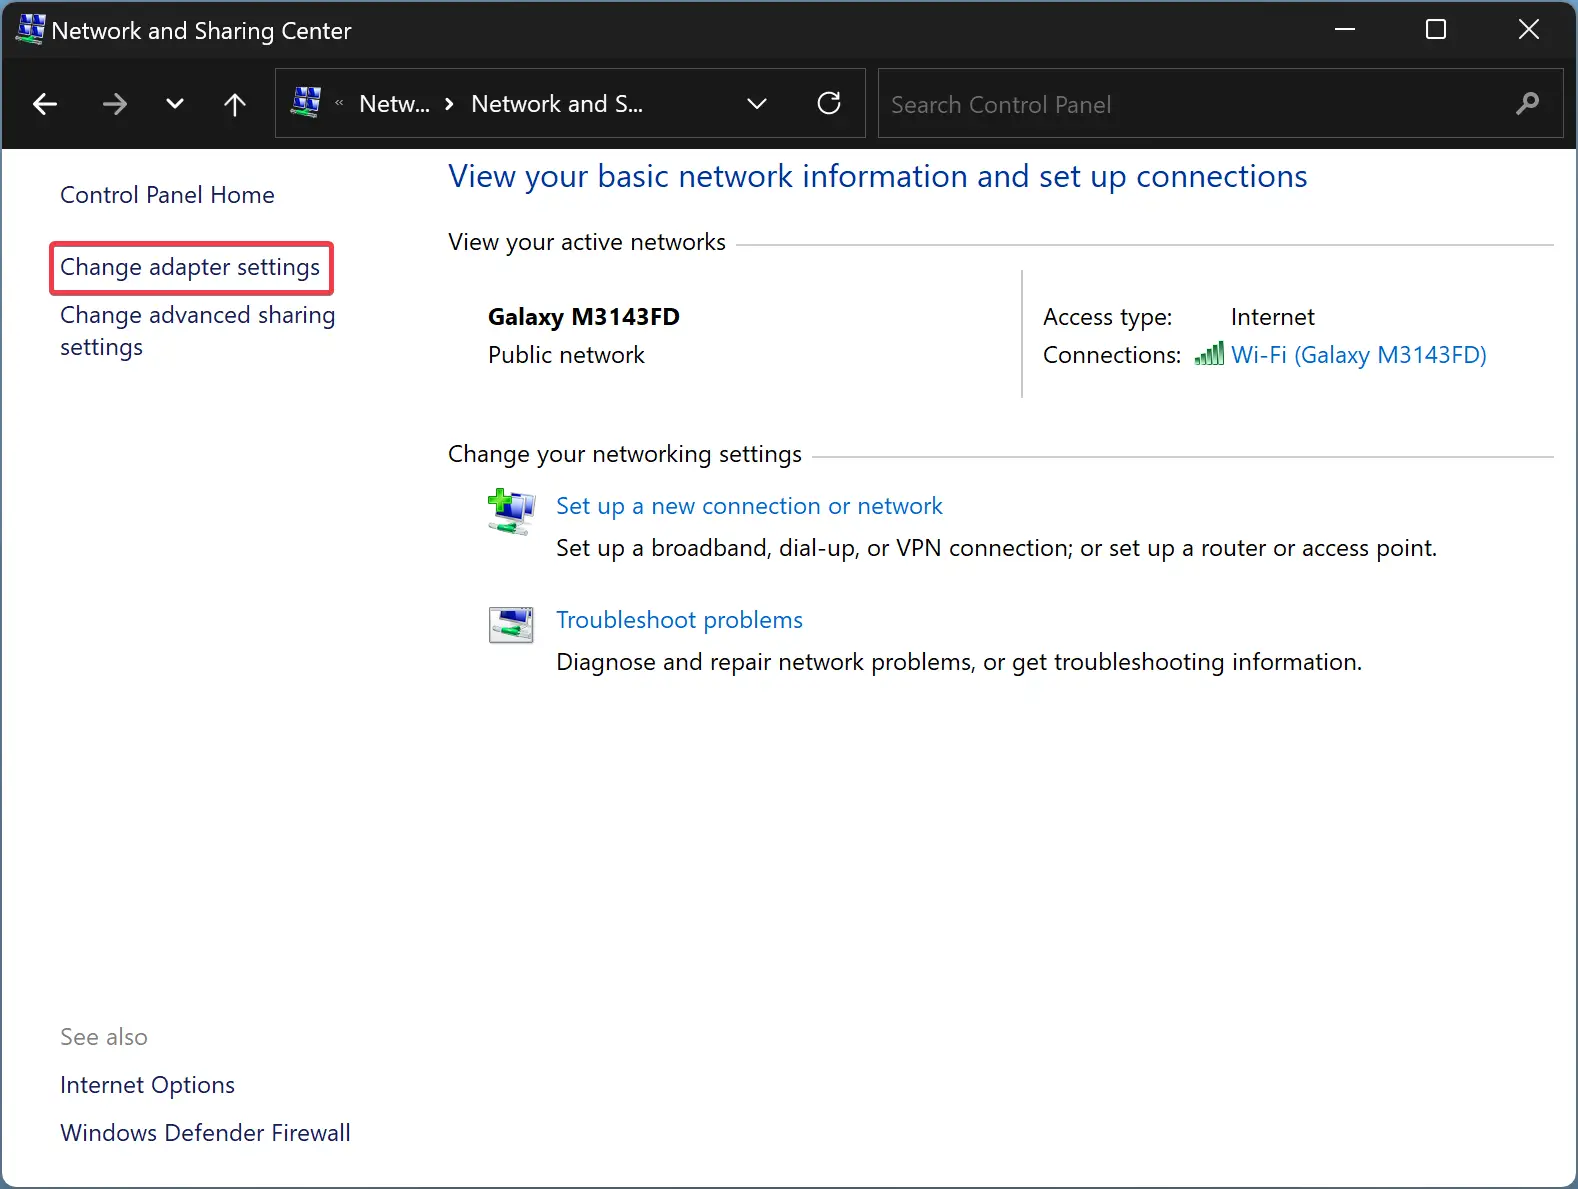
Step 4. In the Network and Sharing Center, you’ll see various options related to your network connections. Look for “Change adapter settings” on the left-hand side of the window and click on it.
Step 5. In the “Network Connections” window, you’ll see a list of all your network adapters. These adapters allow your computer to connect to networks such as Ethernet or Wi-Fi. Identify the network adapter for which you want to enable or disable IPv4. It might be labeled as “Local Area Connection” or “Ethernet” for wired connections or “Wi-Fi” for wireless connections.
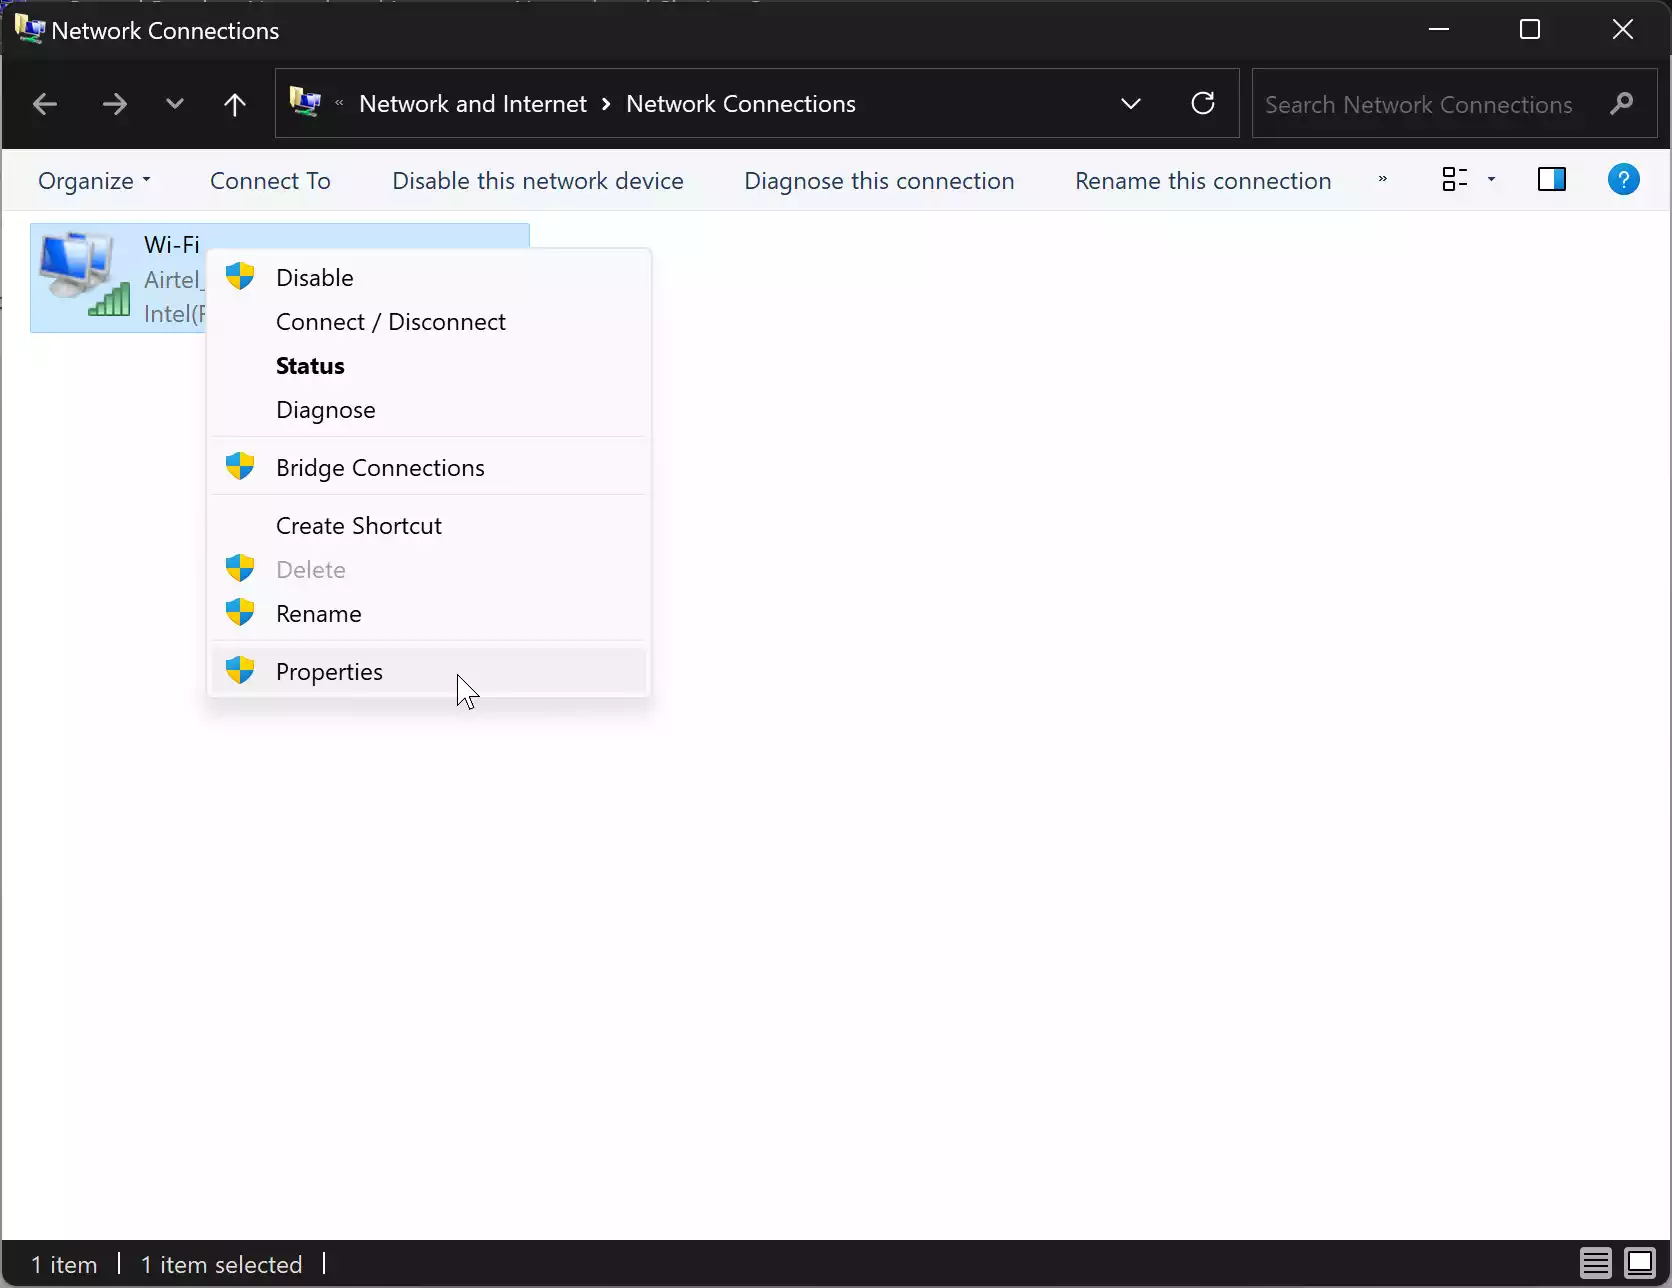
Step 6. Once you’ve located the correct network adapter, right-click on it and select “Properties” from the context menu.
Step 7. In the Properties window, you will see a list of items related to your network adapter. Scroll down until you find “Internet Protocol Version 4 (TCP/IPv4).” This is the option responsible for IPv4 settings.
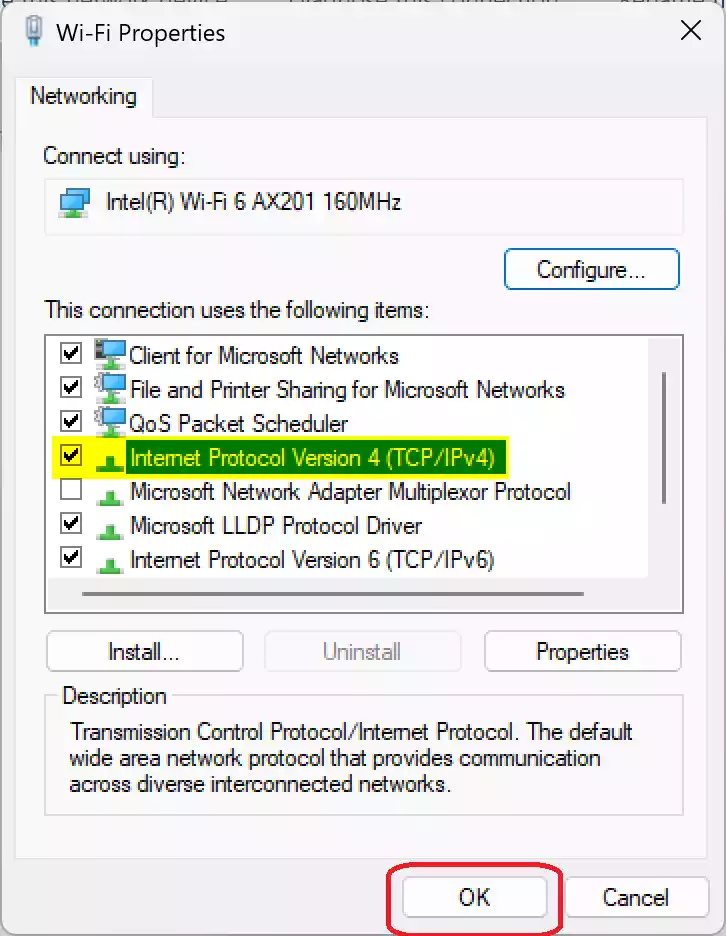
Step 8. To enable IPv4, check the box next to “Internet Protocol Version 4 (TCP/IPv4)” if it’s not already checked. Then, click on the “OK” button to save the changes.
Step 9. To disable IPv4, uncheck the box next to “Internet Protocol Version 4 (TCP/IPv4).” Next, click on the “OK” button to save the changes.
Step 10. Once you have enabled or disabled IPv4, close all the windows and restart your computer to apply the changes effectively.
That’s it! You’ve successfully enabled or disabled IPv4 on your Windows 11 or 10 computer using the Control Panel. Remember that IPv4 is an essential component of internet connectivity, so make sure to enable it if you need internet access. On the other hand, disabling IPv4 might be necessary for specific network configurations or advanced troubleshooting, but it’s generally not recommended for regular use.
If you ever need to revert the changes, follow the same steps above and enable “Internet Protocol Version 4 (TCP/IPv4)” for the network adapter you want to use with IPv4.
Always exercise caution when making changes to your network settings, and ensure you know the implications of any adjustments you make. If you’re unsure about a setting, it’s best to consult with a knowledgeable individual, or IT support professional.
Conclusion
In conclusion, enabling or disabling IPv4 on Windows 11 or 10 using the Control Panel is a straightforward process that can be accomplished with a few simple steps. Whether you need to adjust network configurations or troubleshoot connectivity issues, being able to manage IPv4 settings gives you more control over your network connections. However, it’s essential to exercise caution and only make changes when necessary, as IPv4 is a fundamental component of internet connectivity. Always remember to consult with knowledgeable individuals or IT support professionals if you have any doubts or concerns about network settings to ensure a seamless and secure internet experience.
