The taskbar in Windows 10 serves as a convenient hub for accessing your frequently used applications and programs. By default, Windows 10 groups similar taskbar icons together to save space and keep things organized. However, you might prefer to have each icon displayed individually for easier access. Fortunately, Windows 10 offers several methods to customize how your taskbar icons are displayed. In this gearupwindows article, we’ll walk you through the process of both grouping and ungrouping taskbar icons.
How to Group or Ungroup Taskbar Icons in Windows 10?
By default, Windows 10 groups taskbar icons based on their application or program. For example, if you have multiple instances of File Explorer or Microsoft Edge open, their icons will be grouped together on the taskbar.
To group or ungroup Taskbar icons on Windows 10, follow these methods:-
Method 1. Using Settings
Step 1. Right-click on any blank area of the taskbar.
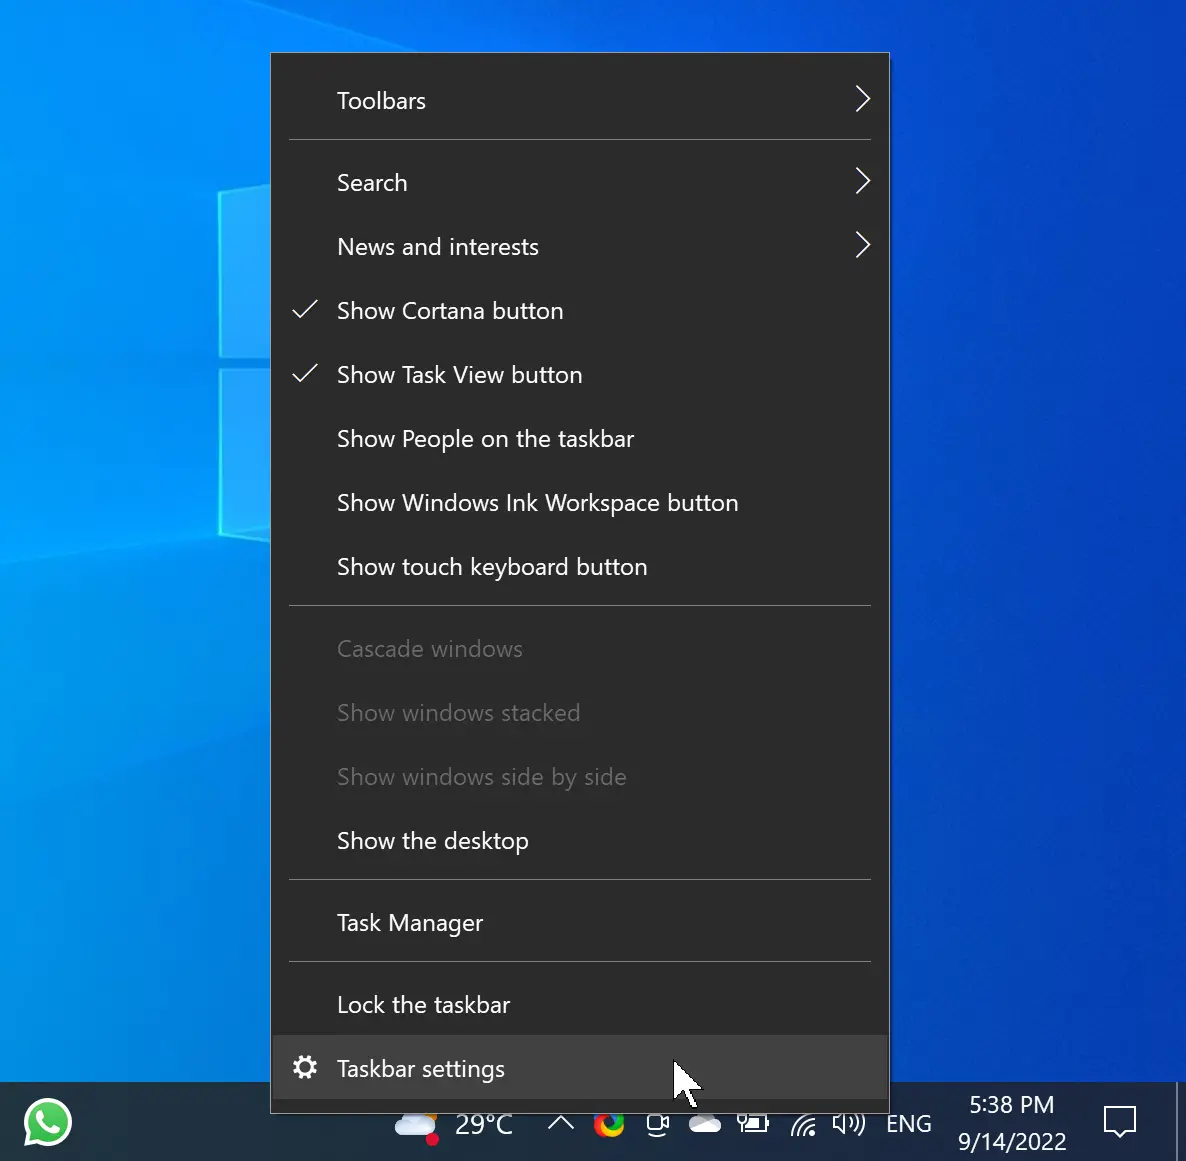
Step 2. Select “Taskbar settings” from the menu.
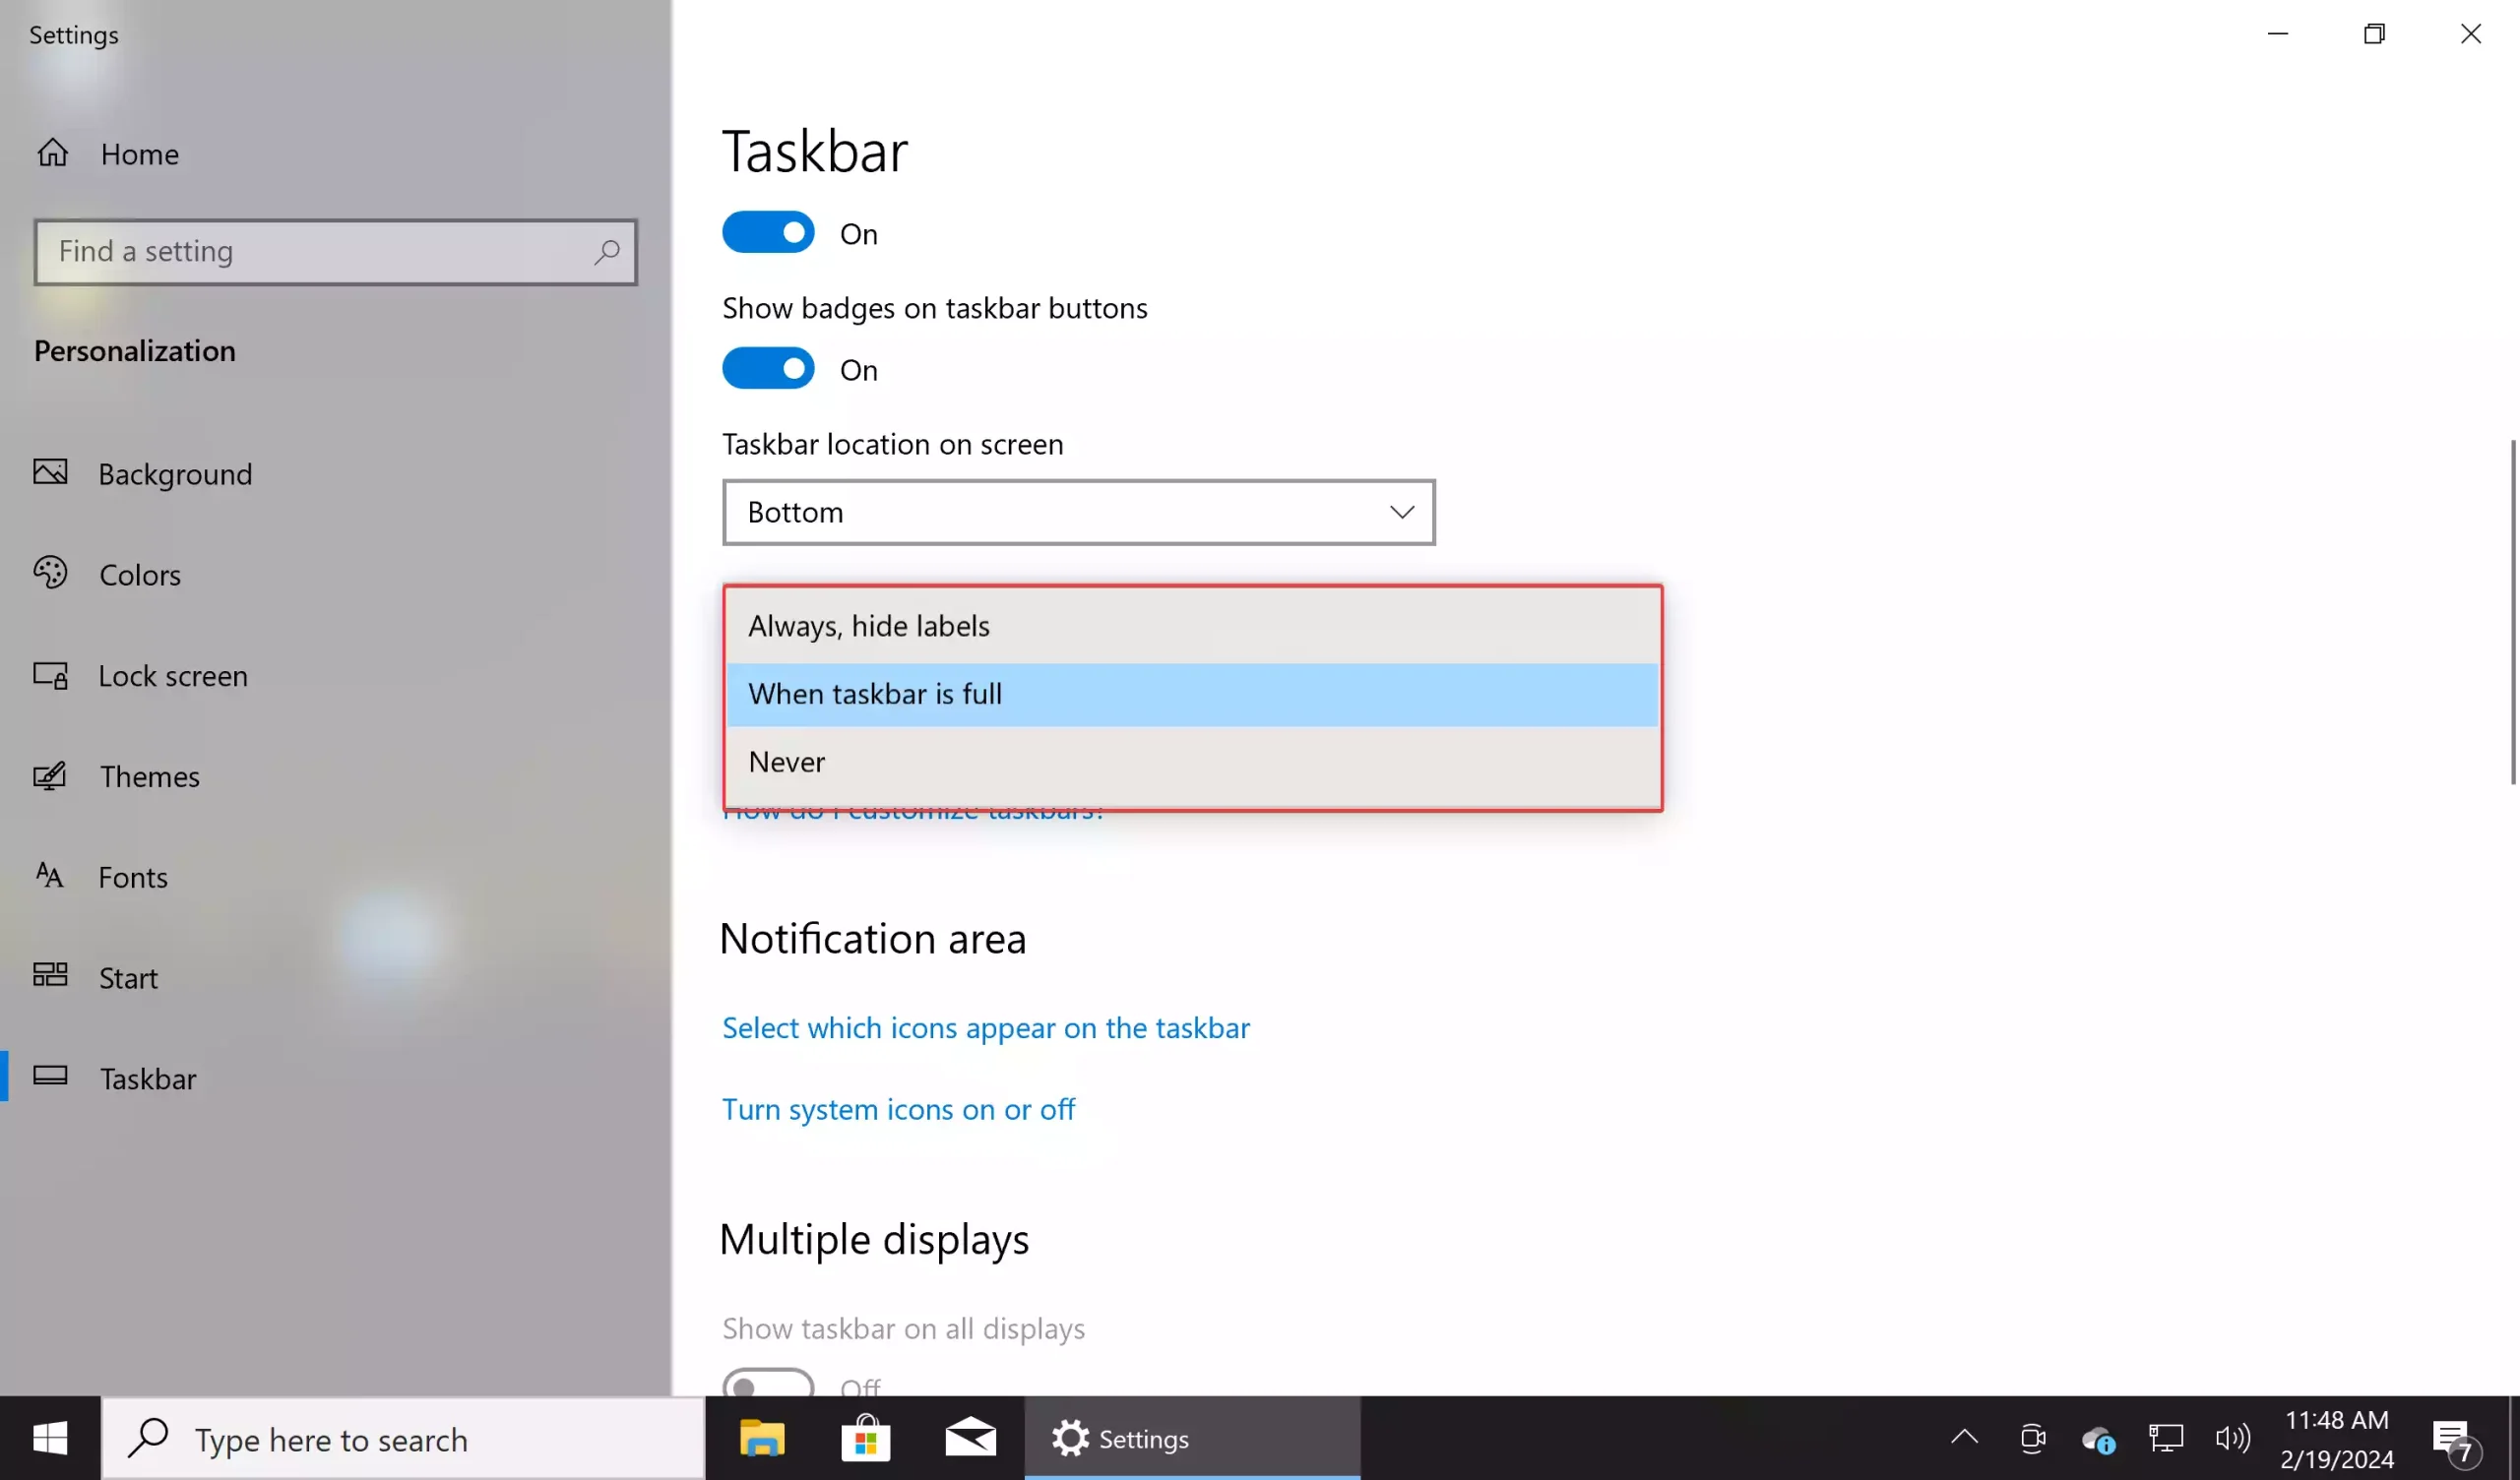
Step 3. Scroll down to the “Combine taskbar buttons” section.

Step 4. Here, you can choose how taskbar buttons are displayed:-
– “Always, hide labels” displays only the icons.
– “When taskbar is full” automatically combines icons when space is limited.
– “Never” displays each icon individually without grouping.
Method 2. Registry Editor
Step 1. Press the Windows + R keys on the keyboard to open the Run dialog box.
Step 2. Type “regedit” in the Run dialog box and press Enter.
Step 3. Then, navigate to the following key in the left sidebar of Registry Editor:-
Computer\HKEY_CURRENT_USER\SOFTWARE\Microsoft\Windows\CurrentVersion\Policies\Explorer
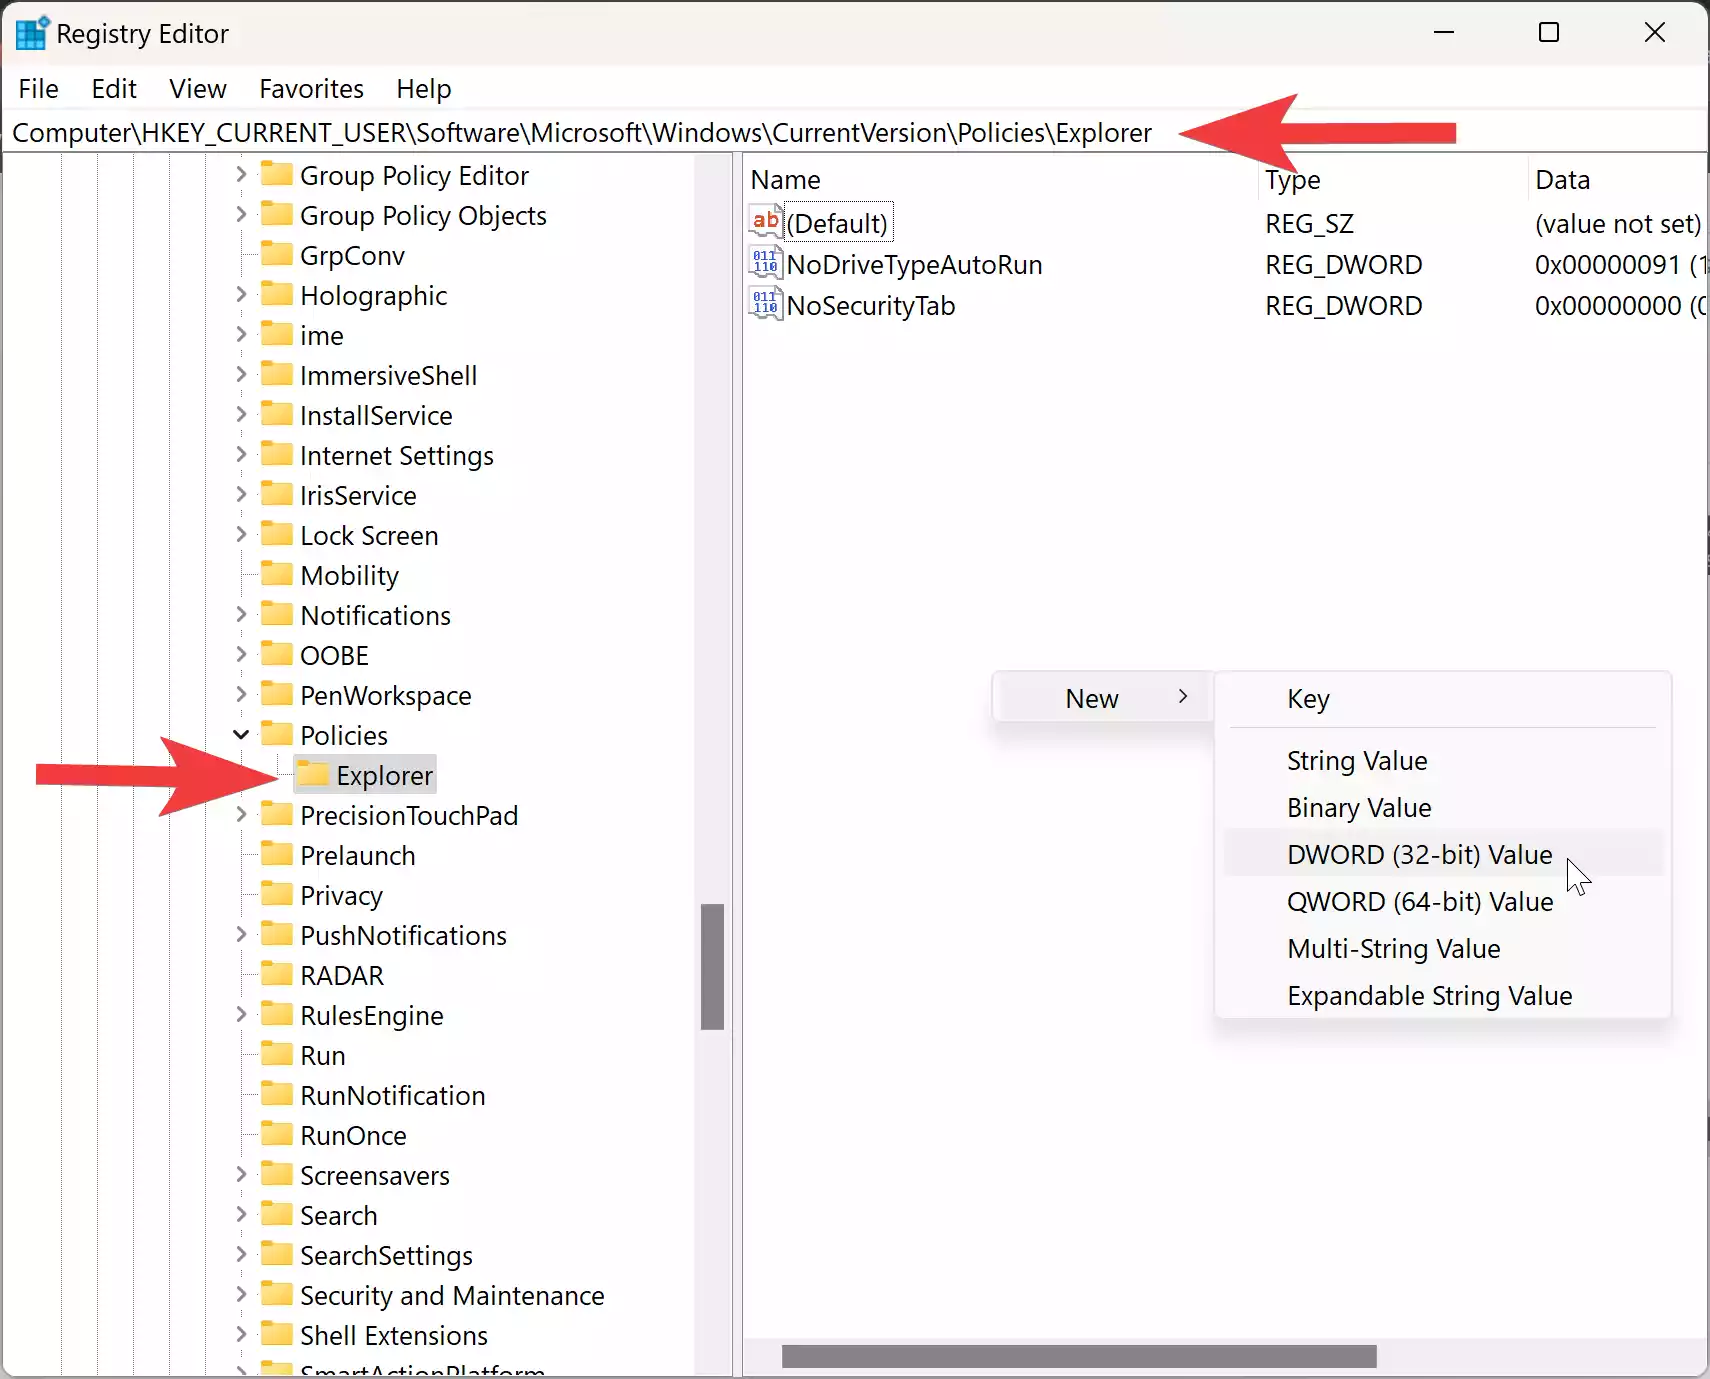
Step 4. Right-click in the right panel and select “New” > “DWORD (32-bit) Value.”
Step 5. Name the new value “NoTaskGrouping.”
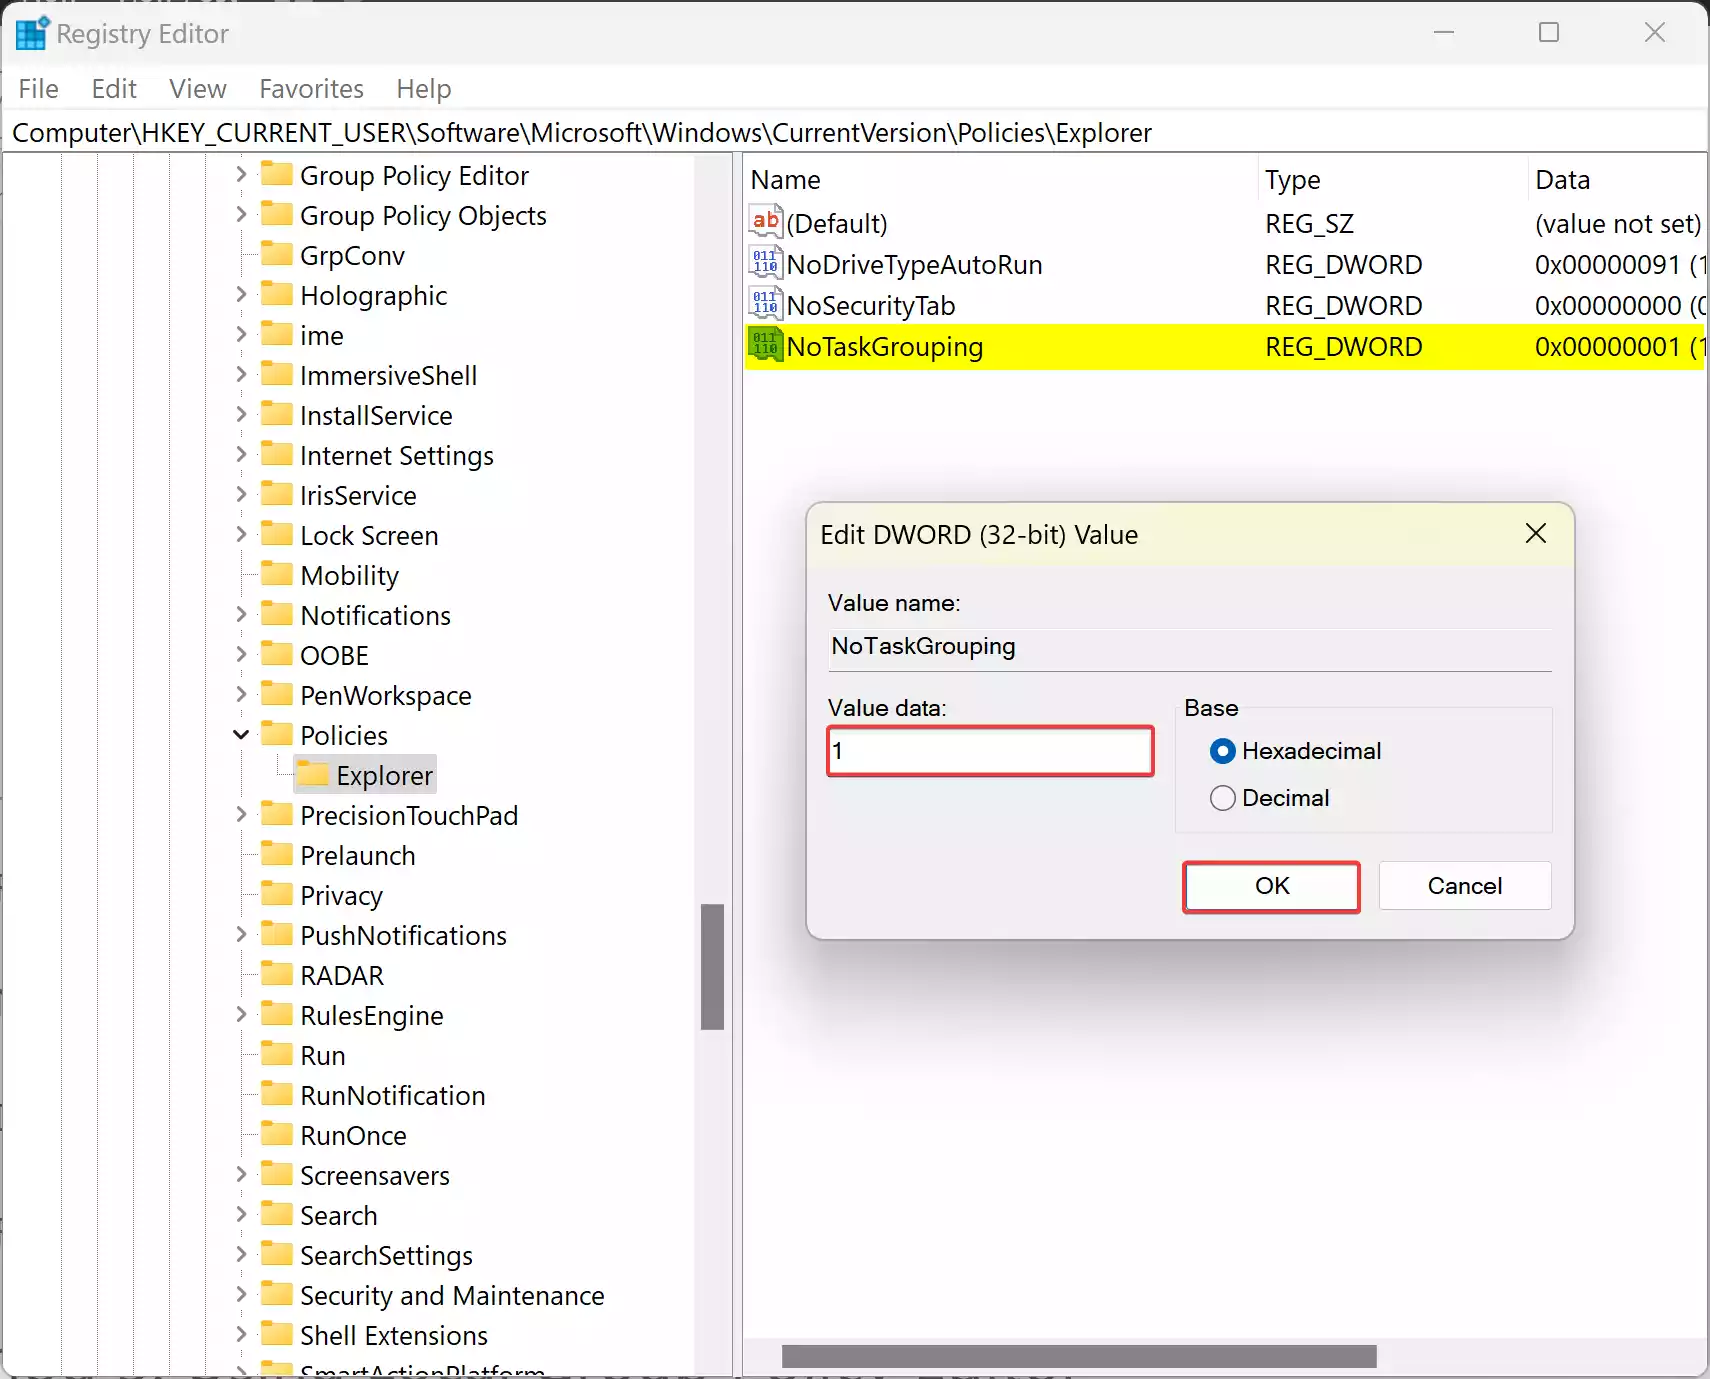
Step 6. Double-click on “NoTaskGrouping” and set its “Value data” to 1. This will prevent the grouping of taskbar icons. To ungroup, just delete the newly created REG_DWORD.
Step 7. Click OK.
Step 8. Restart your computer to apply the changes.
Method 3. Using Local Group Policy Editor
Step 1. Open the Local Group Policy Editor by searching for it in the Windows search box.
Step 2. Navigate to the following folder in the left sidebar:-
User Configuration > Administrative Templates > Start Menu and Taskbar

Step 3. Find and double-click “Prevent grouping of taskbar items.”

Step 4. Select the “Enabled” option and click Apply > OK. This will disable taskbar icon grouping. To ungroup, select the “Not Configured” or “Disabled” option instead.
Conclusion
Customizing your taskbar icons in Windows 10 allows you to tailor your desktop experience to suit your preferences. Whether you prefer grouped icons for better organization or individual icons for quick access, Windows 10 provides the flexibility to adjust your taskbar settings with ease. By following the simple steps outlined in this guide, you can effortlessly group or ungroup taskbar icons to create a workspace that works best for you.
