With the default configuration of Windows 11, you don’t have to worry about its updates when you connect your computer to the internet. By default, Windows 11 checks for updates and installs them automatically for you. But what if you don’t want to receive updates temporarily? Microsoft has provided an option that lets you pause automatic updates so your PC will not get them automatically.
We all know Microsoft ships buggy updates many times, and it is better to wait for a stable build and temporarily on our PC from getting them. If it comes to your notice that some buggy updates have been released, Windows lets you pause automatic updates for one week at a time. That means you can stop the automatic updates that aren’t convenient for you.
In this gearupwindows article, we will guide you on pausing and resuming the Windows 11 updates. Here is how you can do it.
How to Pause Windows 11 Updates?
Follow these steps to pause Windows 11 updates:-
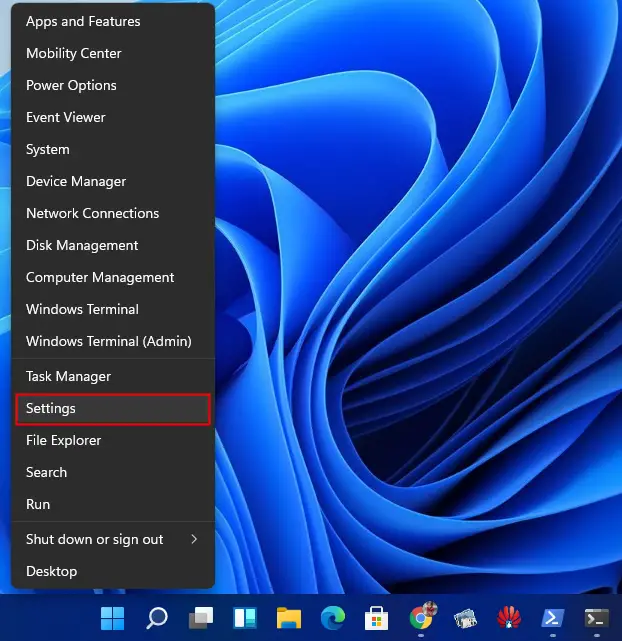
Step 1. First, you need to open the Settings app.
To do that, press Windows + I shortcut keys from the keyboard. Alternatively, right-click on the Start button on the taskbar and select Settings from the available options.
Step 2. After performing the first step, click the Windows Update category from the left sidebar in the Windows Settings that opens.
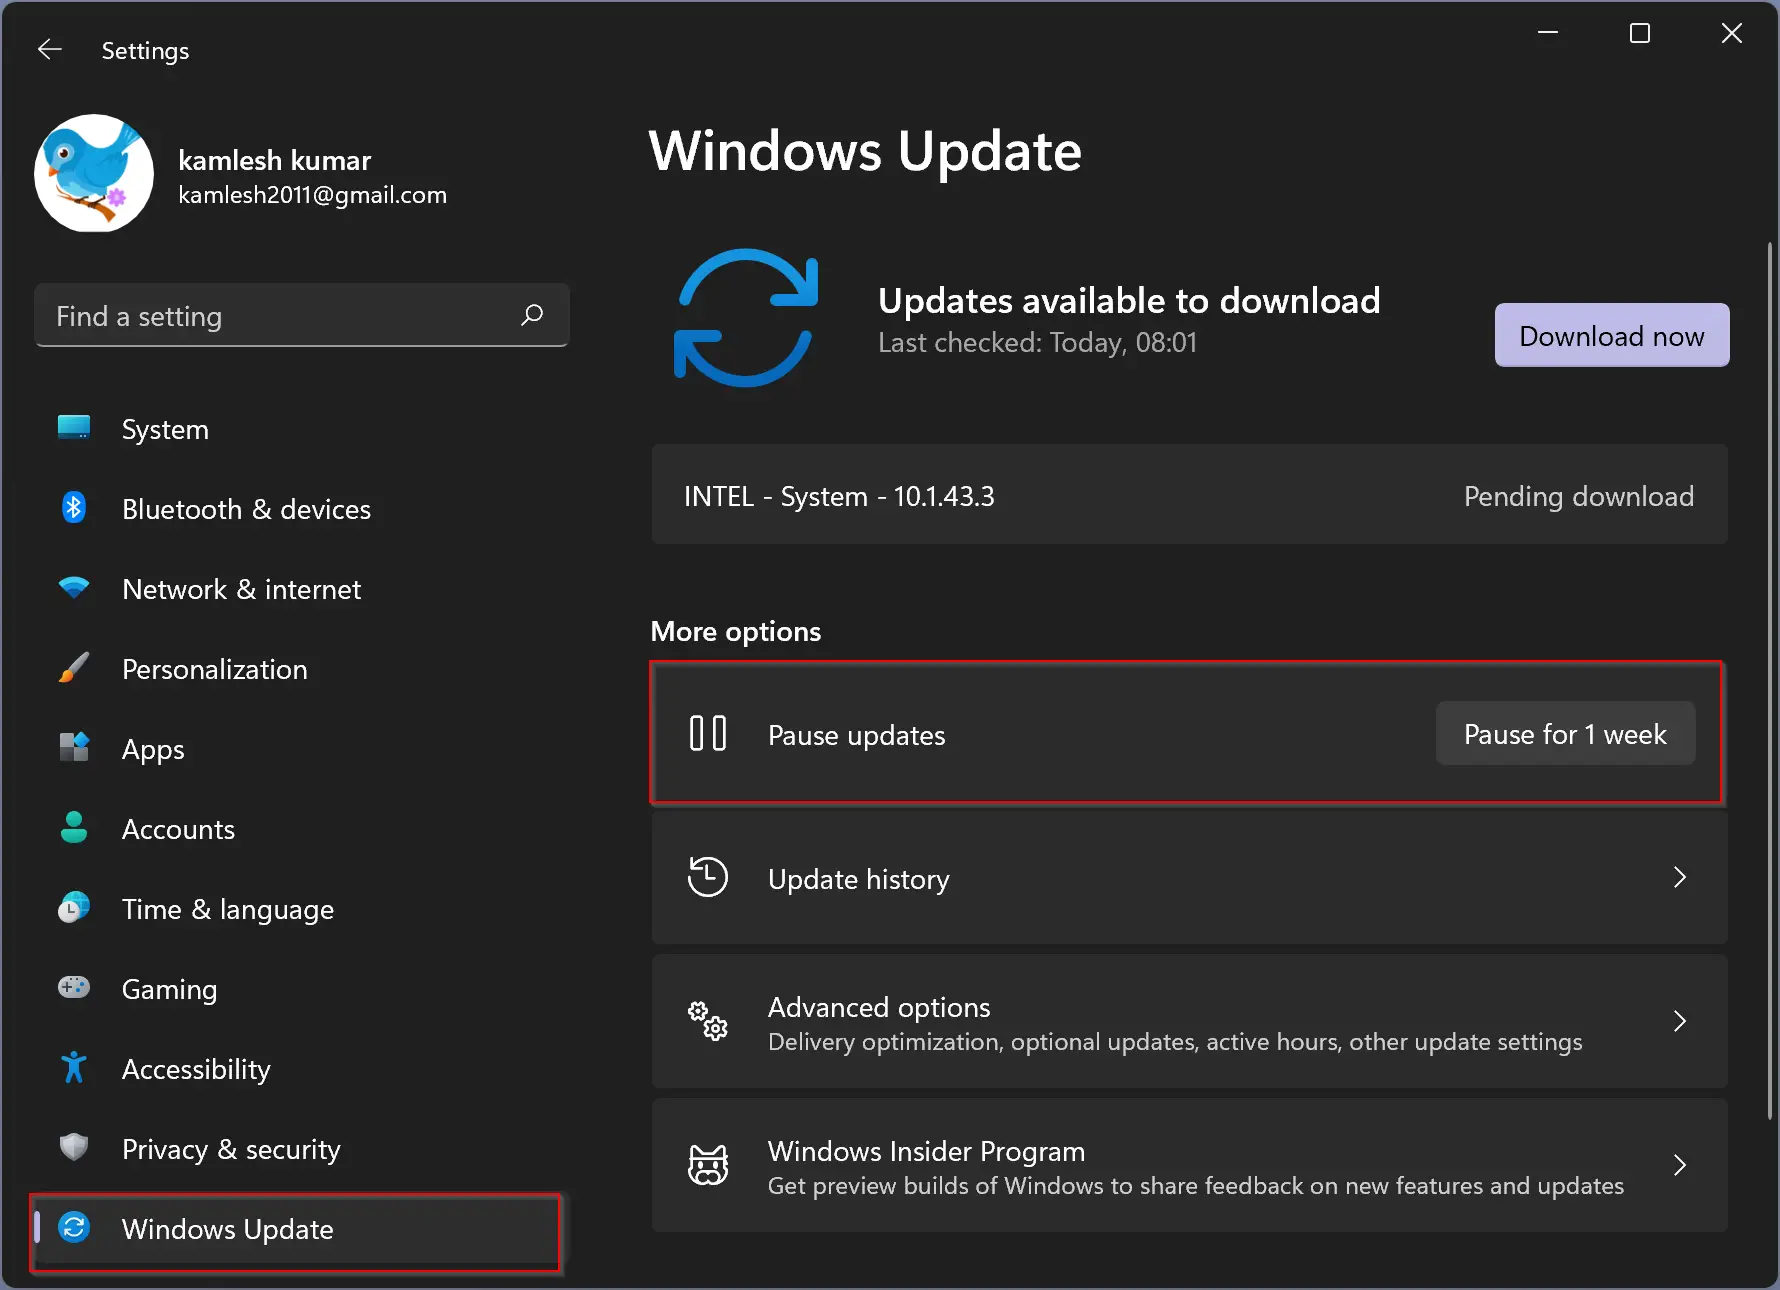
Step 3. On the right-side pane under the More options section, click on the Pause for 1 week option next to the Pause updates option.
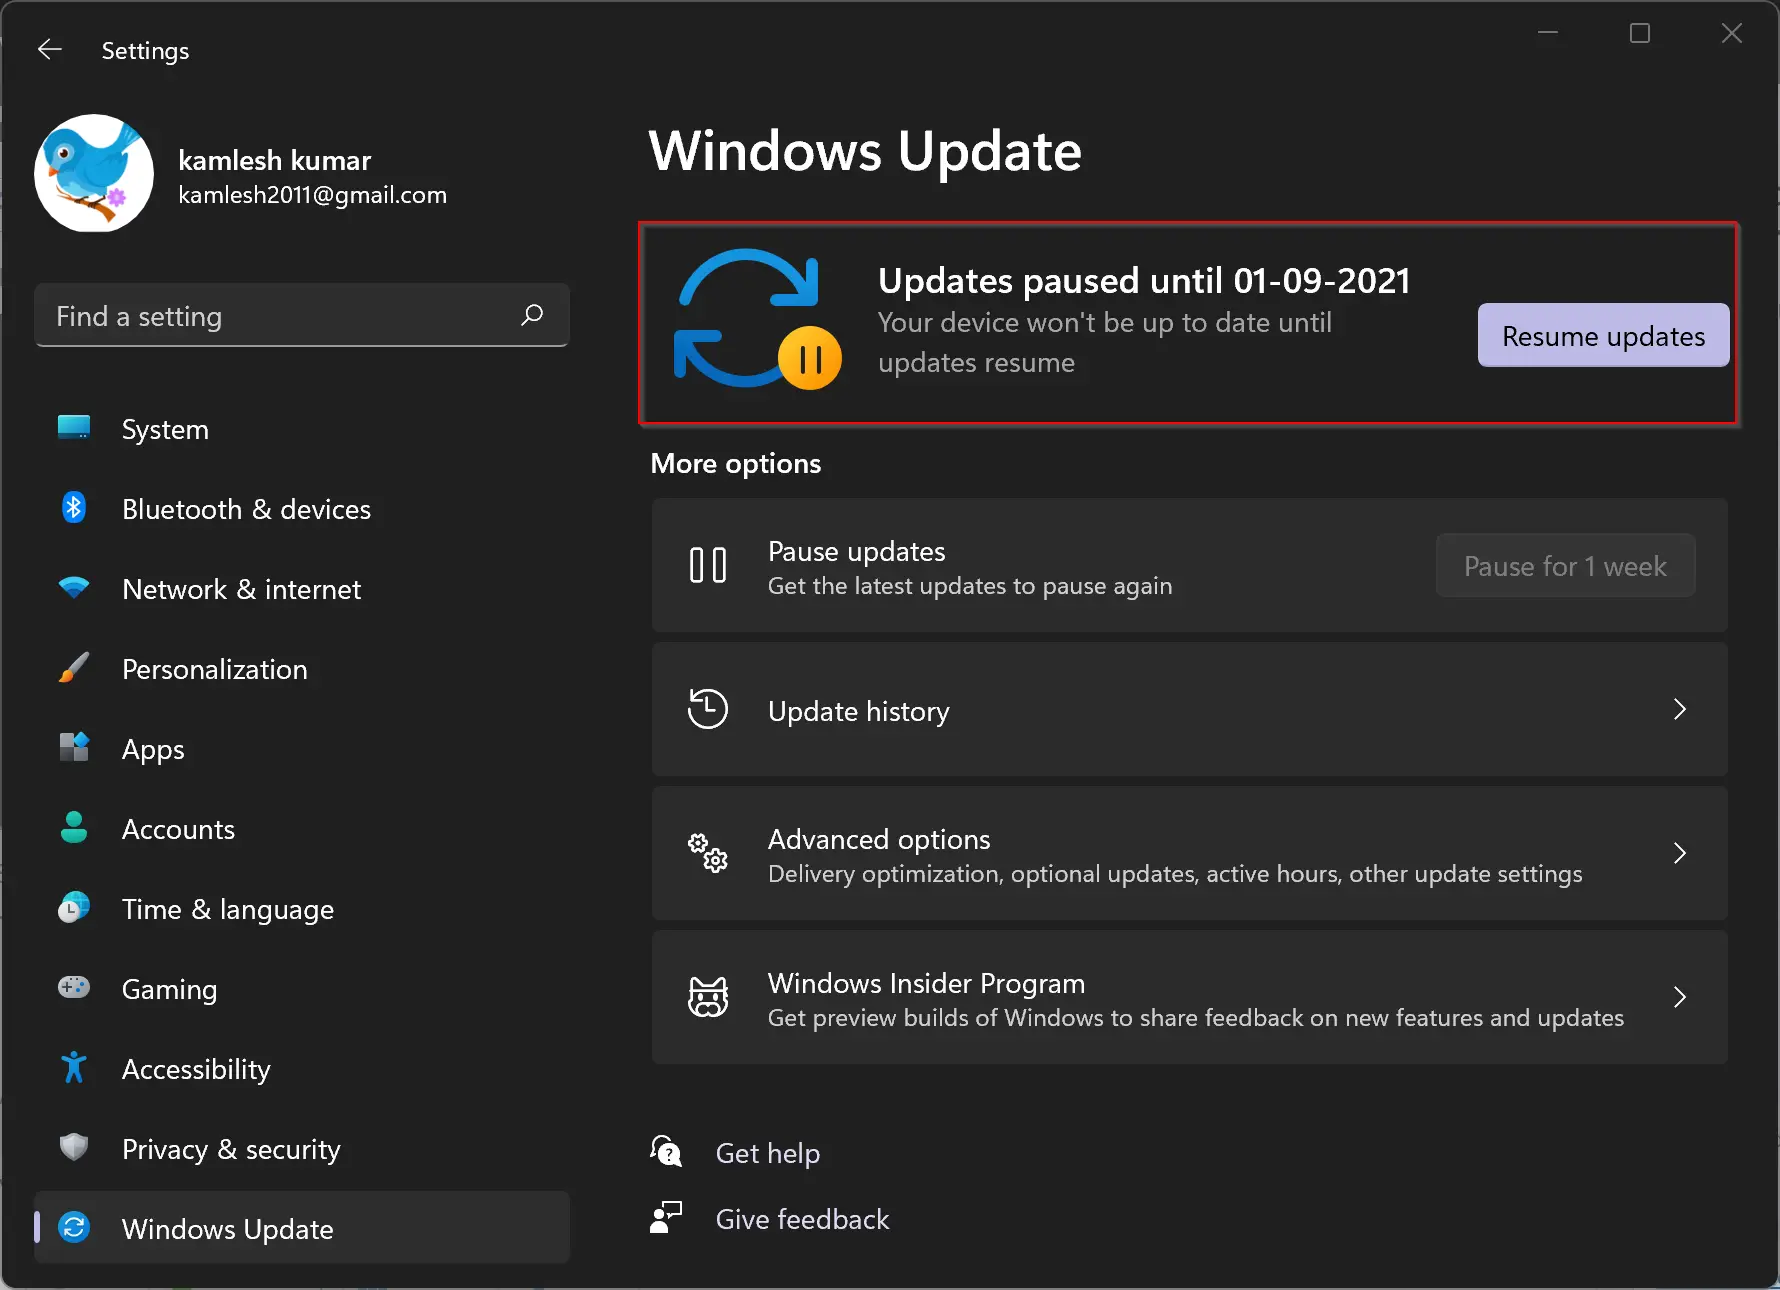
That’s it! Once you complete the above steps, in Windows Update settings, you will see “Updates paused until [date],” where [date] is a date one week from when you clicked the pause button. Windows updates will resume automatically when that date comes.
How to Resume Automatic Updates in Windows 11?
Follow these steps to resume automatic updates in Windows 11:-
Step 1. First, you need to open the Settings app.
To do that, press Windows + I shortcut keys from the keyboard. Alternatively, right-click on the Start button on the taskbar and select Settings from the available options.
Step 2. After performing the first step, click the Windows Update category from the left sidebar in the Windows Settings that opens.
Step 3. Click the Resume updates button under Windows Update on the right-side pane.

That’s it! After clicking the Resume updates button, Windows will start checking for new updates. If it finds any, it will download and install for you.
How to Check Updates Manually in Windows 11?
Sometimes, you might want to check Windows updates manually, for that do the following:-
Step 1. First, you need to open the Settings app.
To do that, press Windows + I shortcut keys from the keyboard. Alternatively, right-click on the Start button on the taskbar and select Settings from the available options.
Step 2. After performing the first step, click the Windows Update category from the left sidebar in the Windows Settings that opens.
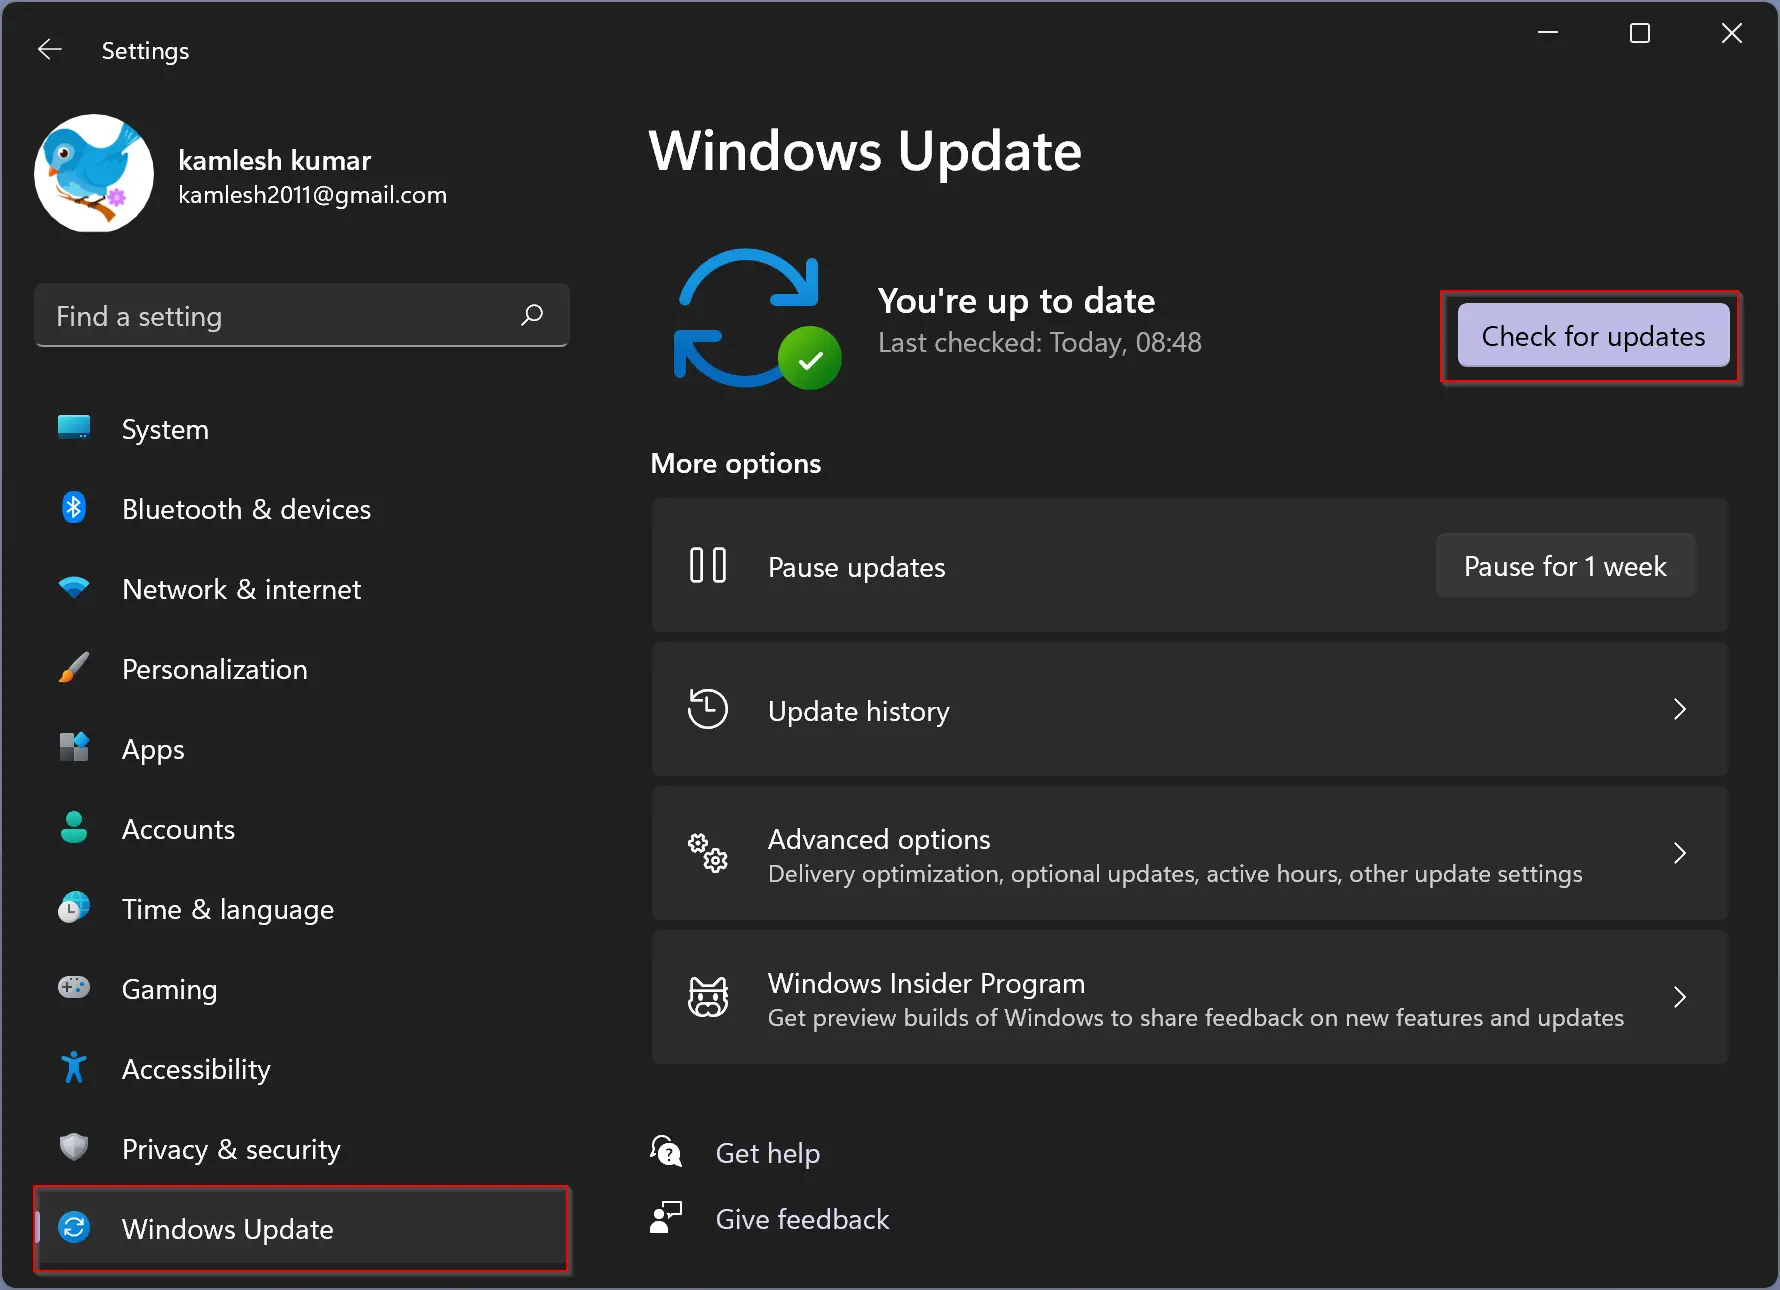
Step 3. Click the Check for updates button under Windows Update on the right-side pane.
Conclusion
In conclusion, while automatic updates are an essential feature of Windows 11, there may be situations where you want to pause them temporarily. By following the simple steps outlined above, you can pause updates for up to one week and then resume them when it’s convenient for you. Additionally, if you prefer to check for updates manually, you can also do that easily using the Windows Update settings. Overall, Windows 11 offers flexible options for managing updates that allow you to balance the need for security and stability with your personal preferences and convenience.