Windows 11 Terminal has emerged as a versatile tool for power users, developers, and enthusiasts alike. Its customizable nature allows users to tailor their experience to suit their workflow seamlessly. One such customization feature is the ability to control the visibility of the scrollbar within the Terminal window. Whether you prefer a clutter-free interface or need constant access to the scrollbar, Windows 11 Terminal offers the flexibility to accommodate your needs. In this gearupwindows article, we’ll delve into the step-by-step process of showing or hiding the scrollbar in Windows 11 Terminal, empowering you to personalize your Terminal experience effortlessly.
Understanding Scrollbar Visibility Options
Before diving into the customization process, it’s essential to grasp the scrollbar visibility options available in Windows 11 Terminal. There are three primary visibility states to choose from:-
1. Visible (Default): In this mode, the scrollbar remains hidden until you hover your mouse cursor near the edge of the Terminal window. Upon hovering, the scrollbar gracefully appears, providing quick access to scroll through content.
2. Hidden: Opting for the hidden scrollbar mode ensures a clutter-free interface, as the scrollbar remains concealed at all times. While this option offers a clean aesthetic, users must rely on alternative methods, such as keyboard shortcuts or mouse gestures, to navigate through Terminal content.
3. Always Visible: As the name suggests, this mode keeps the scrollbar perpetually visible within the Terminal window. Users who prefer constant access to the scrollbar for seamless navigation can opt for this setting.
Now that we’ve outlined the scrollbar visibility options let’s delve into the step-by-step process of customizing these settings in Windows 11 Terminal.
How to Show or Hide Scrollbar in Windows 11 Terminal?
Follow these easy steps to customize Scrollbar visibility:-
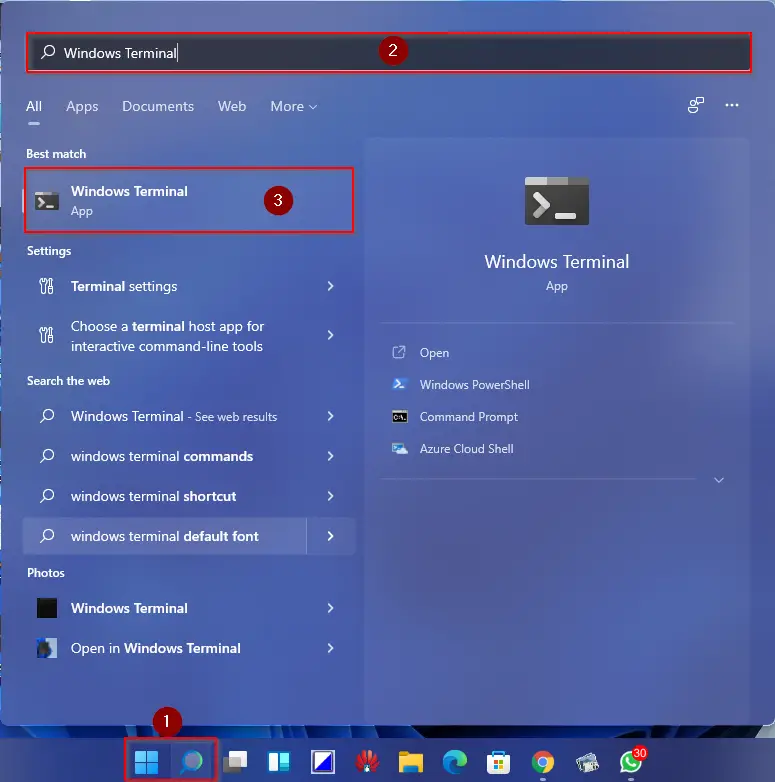
Step 1. Begin by locating the Windows Terminal app in your Start menu and launch it with a single click.
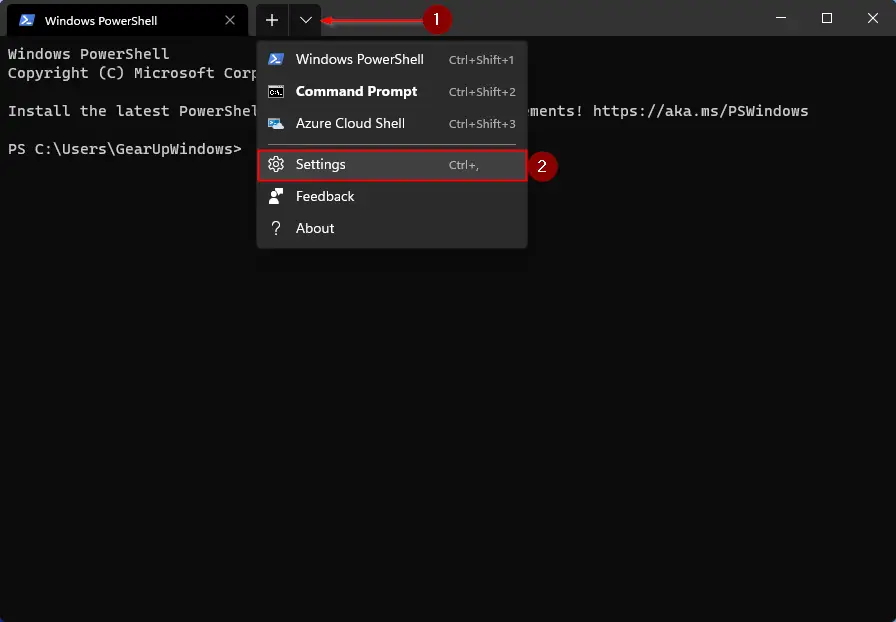
Step 2. Once the Terminal window opens, navigate to the top bar and click on the downward arrow icon to reveal a dropdown menu. From the menu, select “Settings” or use the keyboard shortcut Ctrl + , to access the Settings window.
Step 3. Within the Settings window, locate and click on the “Defaults” tab situated on the left-hand side. This tab contains various customization options related to the Terminal’s visual appearance.
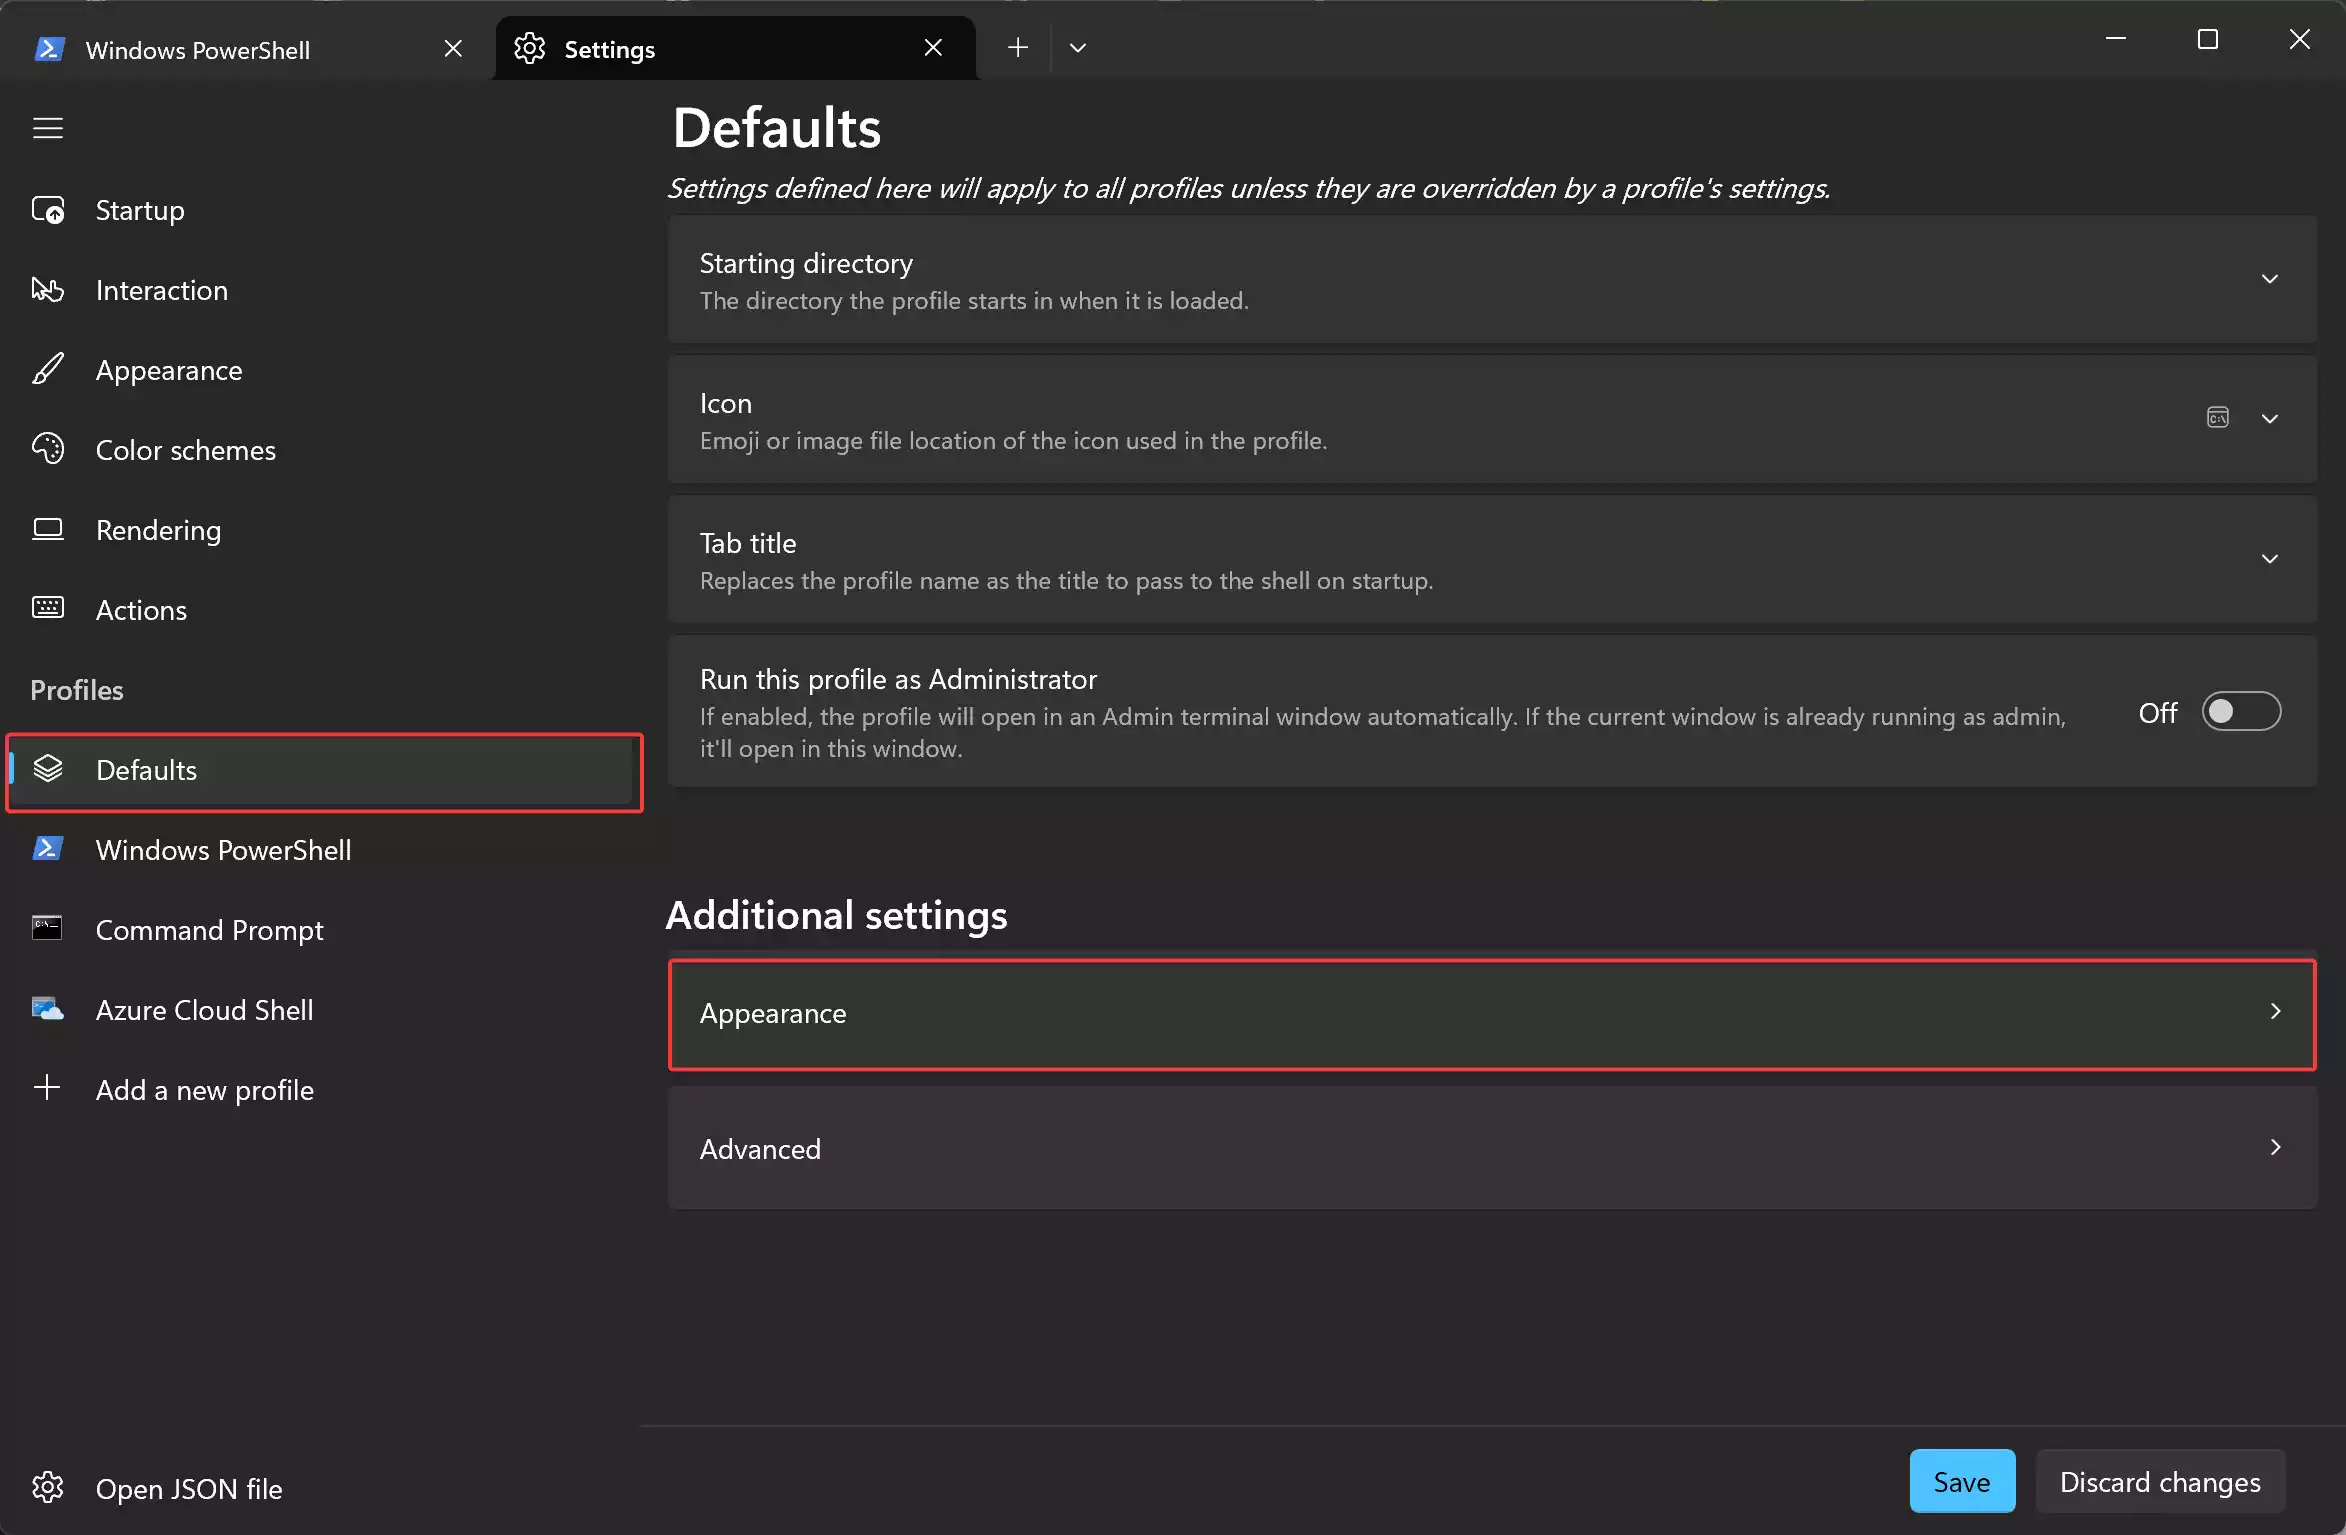
Step 4. On the right hand, scroll down and click on “Appearance” under “Additional settings.”
Step 5. Under the “Appearance” tab, locate the “Scrollbar visibility” option. Click on this setting to reveal a dropdown menu presenting the available scrollbar visibility options: “Visible” (default), “Hidden,” and “Always.”
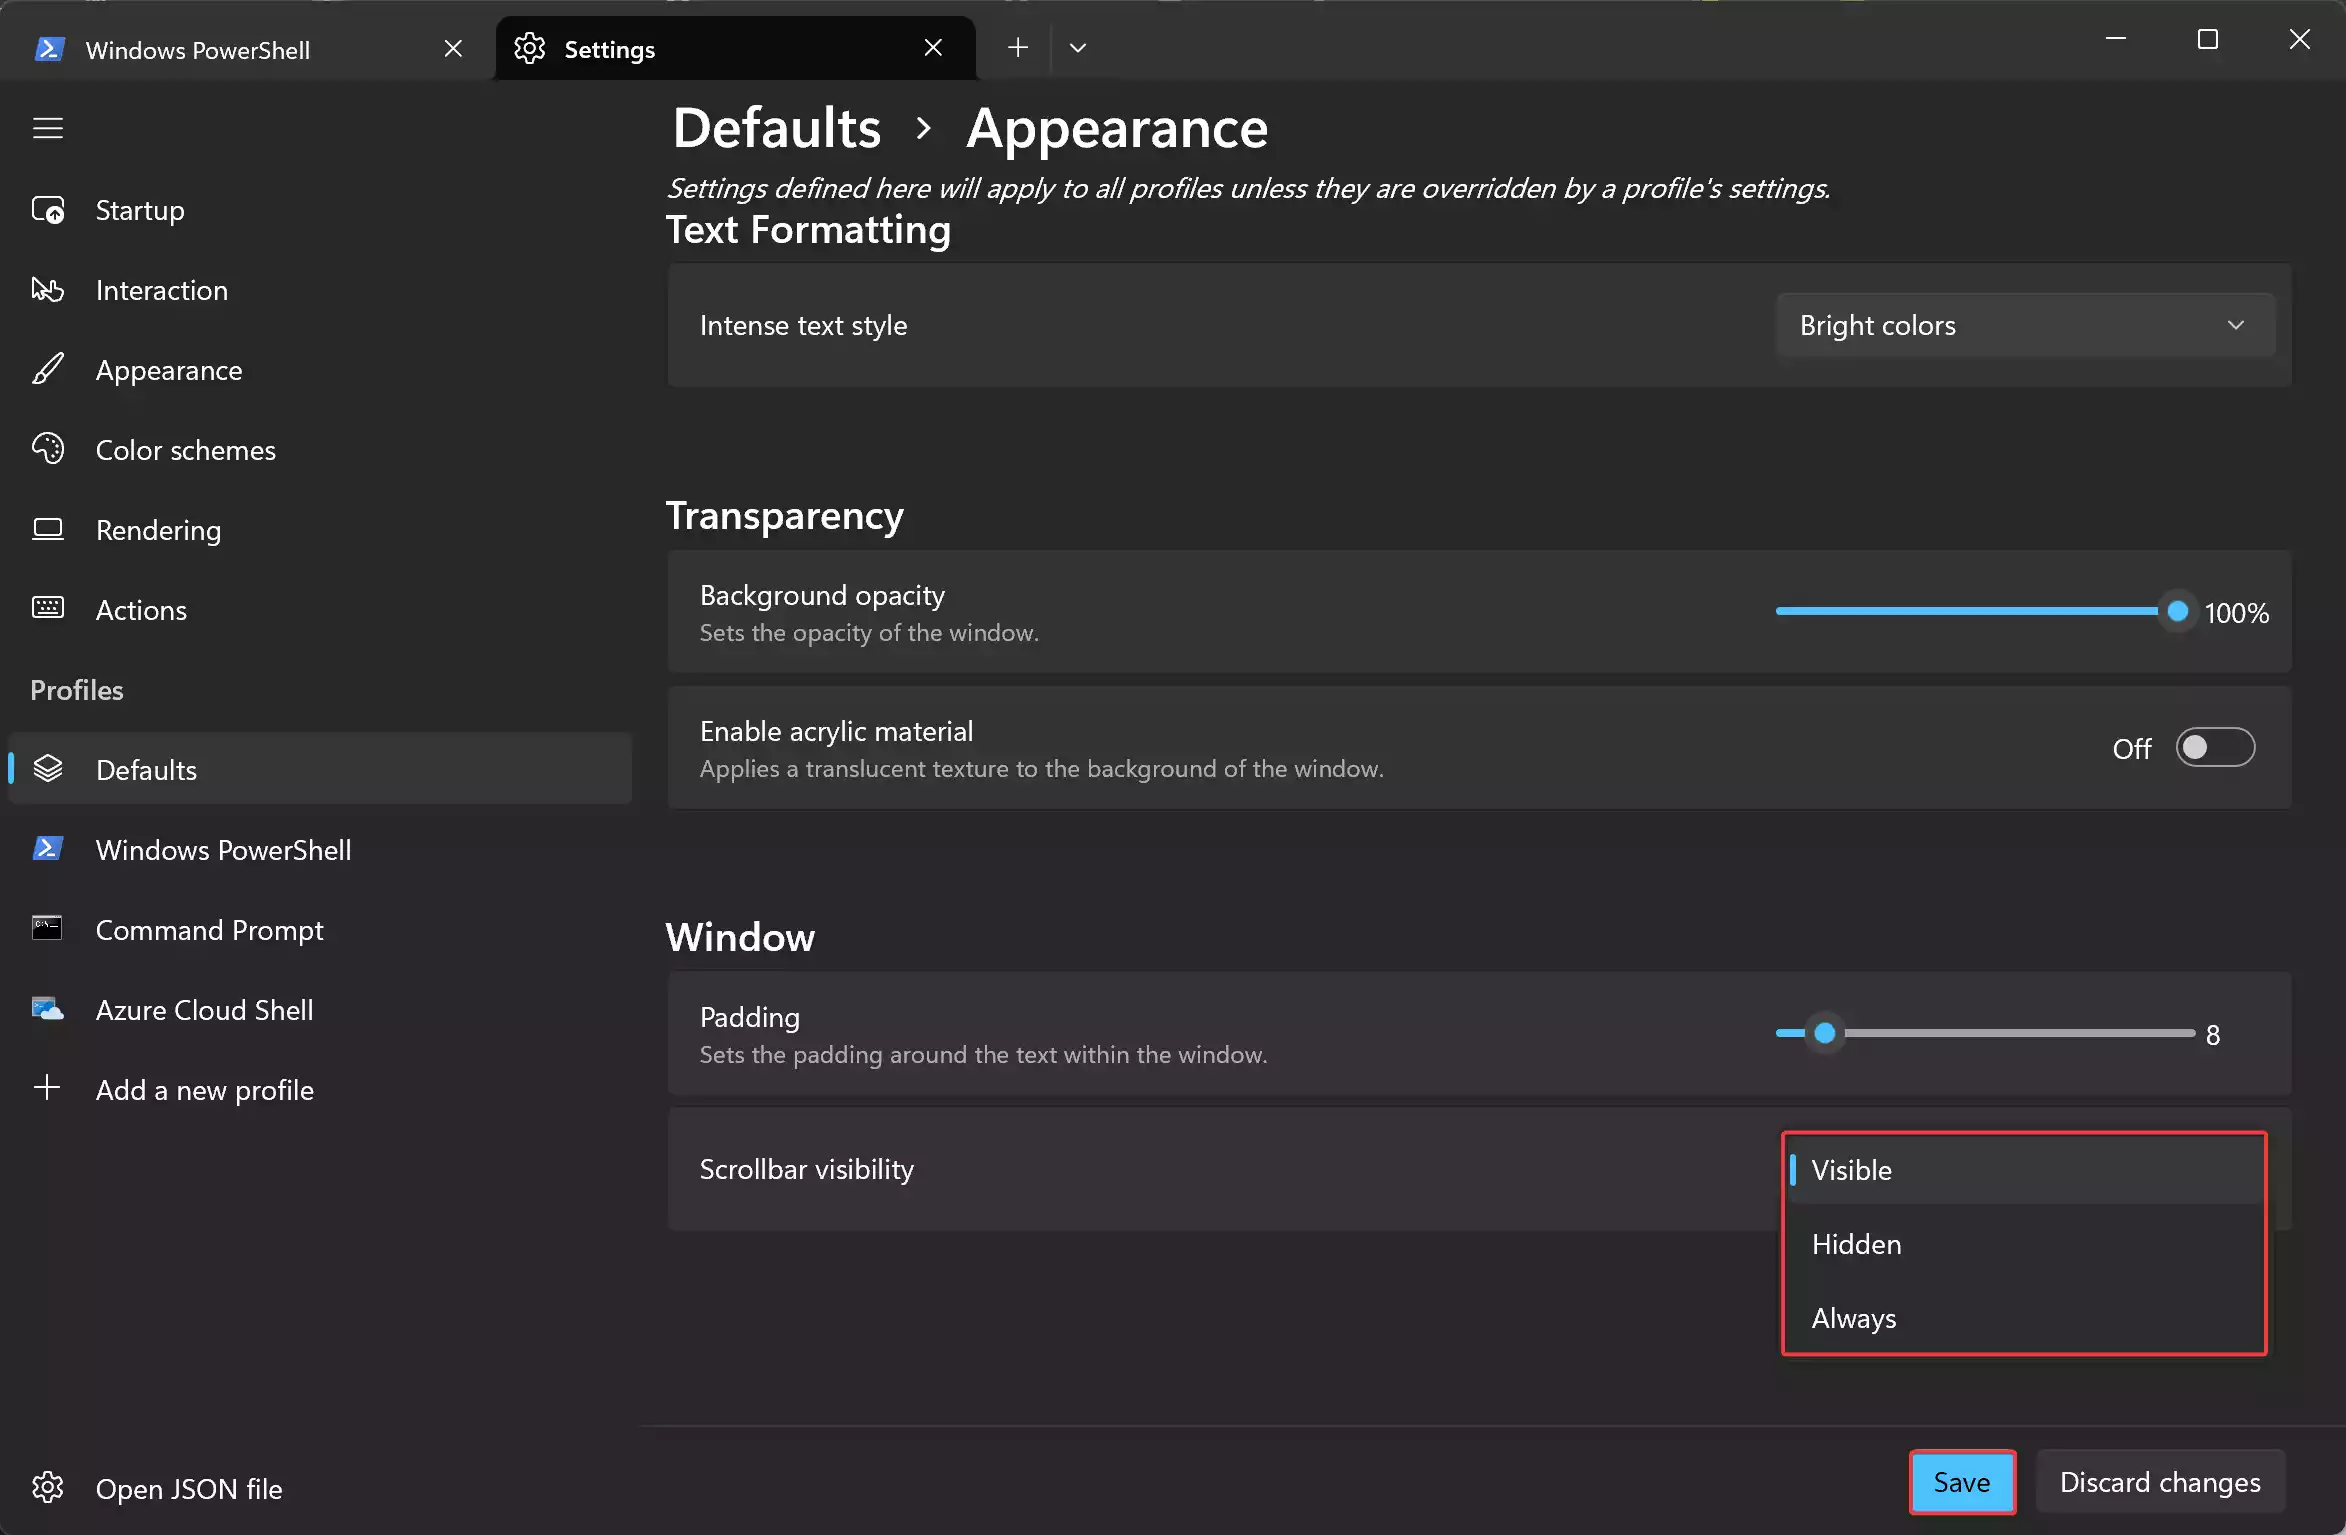
Step 6. Select your desired scrollbar visibility mode from the dropdown menu. Whether you opt for the default visibility, choose to hide the scrollbar entirely, or prefer it always visible, Windows 11 Terminal empowers you to customize your Terminal experience according to your preferences.
Step 7. Once you’ve selected your preferred scrollbar visibility mode, ensure to save your settings by clicking the “Save” button located at the bottom of the Settings window. Your chosen visibility mode will now be applied to the Terminal window, offering a tailored experience that aligns with your workflow.
Conclusion
Customizing scrollbar visibility in Windows 11 Terminal is a simple yet impactful way to personalize your Terminal experience. Whether you prioritize a clutter-free interface or require constant access to the scrollbar for seamless navigation, Windows 11 Terminal offers the flexibility to accommodate your preferences. By following the step-by-step guide outlined in this article, you can effortlessly show or hide the scrollbar in Windows 11 Terminal, empowering you to master your Terminal workflow with ease.
