Windows 11, the latest operating system from Microsoft, is designed to download and install updates automatically to ensure your computer stays secure and performs at its best. However, updates can sometimes cause issues, which is why users may want to have control over which updates get installed. Fortunately, Windows 11 provides several ways to show or hide updates, including using the “Show or hide updates” troubleshooter tool.
The “Show or hide updates” troubleshooter tool is a built-in Windows 11 utility that allows users to selectively hide or unhide updates. This tool can be particularly useful for users who are experiencing issues with a specific update and want to prevent it from being installed until a fix is available. Here’s how to use the “Show or hide updates” troubleshooter tool to show or hide updates on Windows 11.
How to Hide Updates on Windows 11 using Troubleshooter?
To hide a specific update on Windows 11 using the “Show or hide updates” troubleshooter tool, follow these steps:-
Step 1. Download the “wushowhide.diagcab” file on your computer from the
Step 2. Double-click the downloaded file to launch the “Show or hide updates troubleshooter” tool.
Step 3. Click the “Next” button.
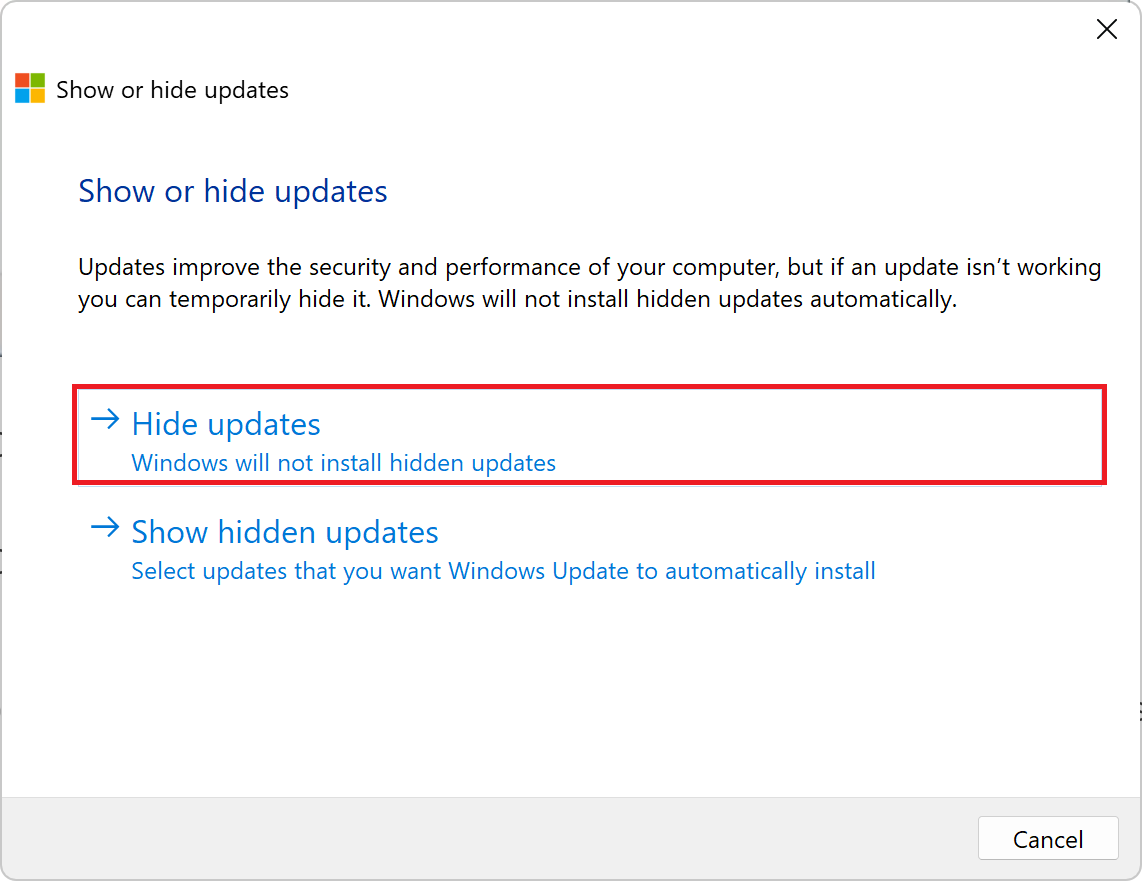
Step 4. Select the “Hide updates” option.
Step 5. Windows 11 will now scan for available updates.
Step 6. Select the update you want to hide from the list.

Step 7. Click the “Next” button.
Step 8. The tool will now hide the selected update.
Step 9. Click the “Close” button to exit the tool.
After completing these steps, Windows 11 will no longer download or install the update you have hidden. Note that this method only hides the update and does not uninstall it from your system.
How to Show Updates on Windows 11 using Troubleshooter?
If you want to unhide a previously hidden update and make it available for installation on Windows 11, use these steps:-
Step 1. Download “wushowhide.diagcab” file on your computer from the Microsoft Download Center page.
Step 2. Double-click the downloaded file to launch the “Show or hide updates troubleshooter” tool.
Step 3. Click the “Next” button.
Step 4. Select the “Show hidden updates” option.
Step 5. Windows 11 will now scan for hidden updates.
Step 6. Select the update you want to unhide from the list.
Step 7. Click the “Next” button.
Step 8. The tool will now make the selected update available for installation.
Step 9. Click the “Close” button to exit the tool.
After completing these steps, Windows 11 will download and install the update you have unhidden.
Conclusion
In conclusion, the “Show or hide updates” troubleshooter tool is a useful utility for Windows 11 users who want more control over the updates that are installed on their system. By following the steps outlined in this guide, you can easily hide or unhide specific updates on Windows 11 to improve system stability and performance.