You should always keep your Amazon Fire Stick updated if you want your device to perform optimally. A new update may come with bug fixes that prevent apps from crashing, or even sometimes; it may come with new features. While Amazon Fire TV devices install these updates automatically, you can also manually check and install the update if available.
In this gearupwindows article, we will guide you on how to update an Amazon Fire TV Stick.
How to Update the Amazon Fire TV Stick?
Since Amazon rolls out new software versions almost every month, it is good to check for updates periodically and manually install them. It is very simple. Just use these steps:-
Step 1. Ensure you have active internet and connect your Amazon Fire TV Stick to your TV.
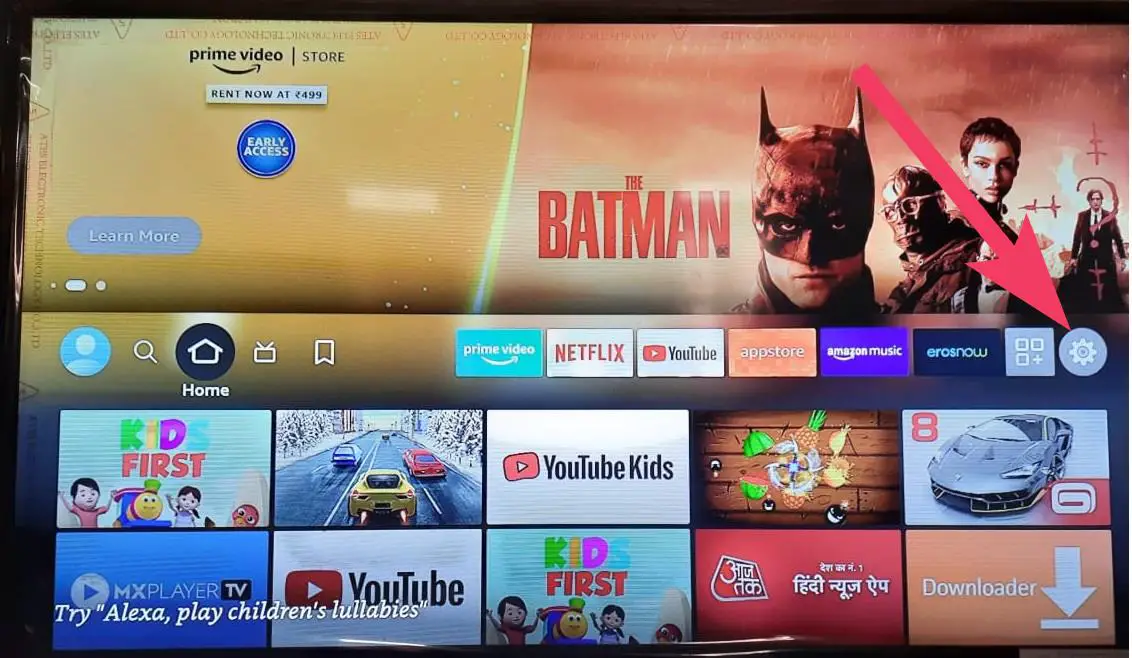
Step 2. To begin the update process, access your Fire TV Stick’s home screen.
Step 3. Then, select “Settings” (gear icon).
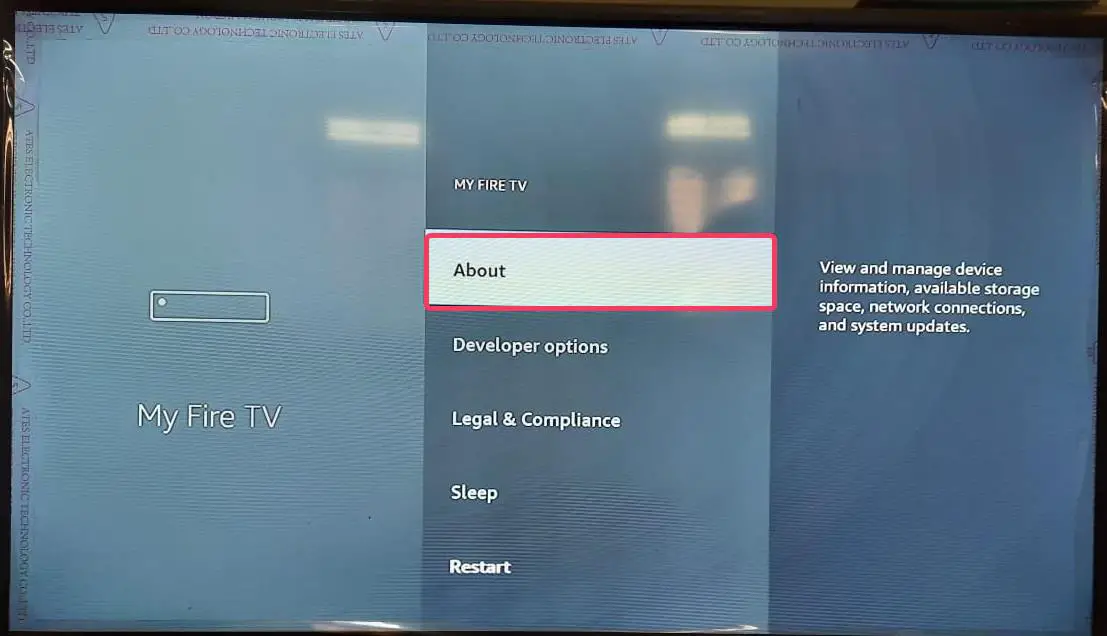
Step 4. Next, on the “Settings” screen, select My Fire TV.

Step 5. After that, on the “My Fire TV” screen, choose About.
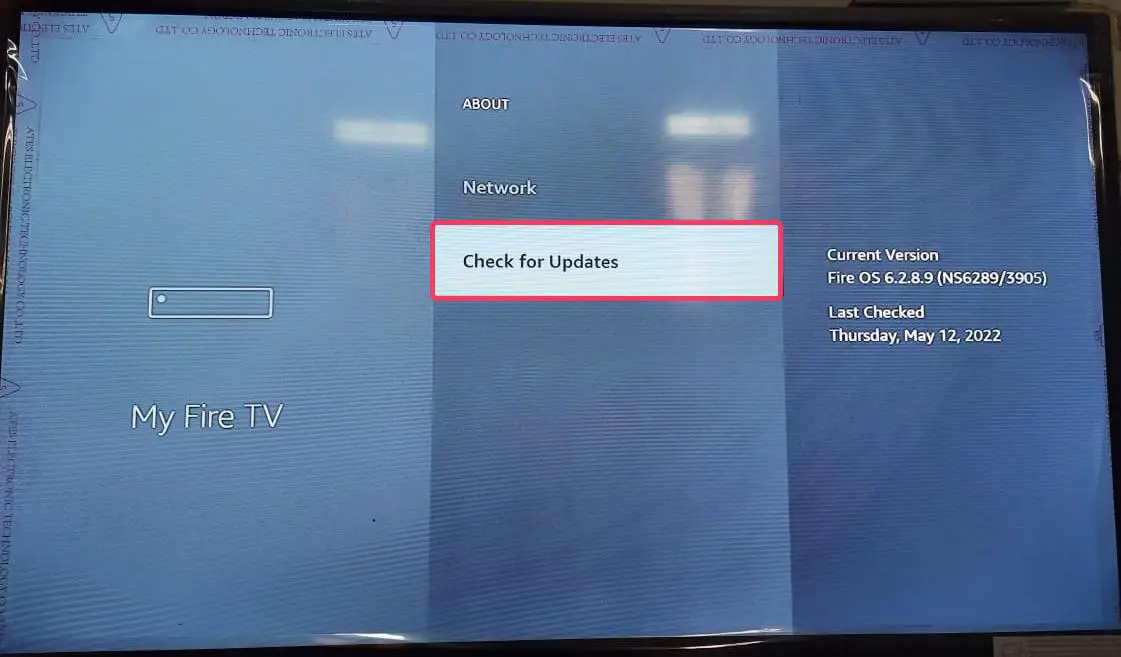
Step 6. When you’re on the “About” page, choose Check for Updates to find and download if a software update is available.
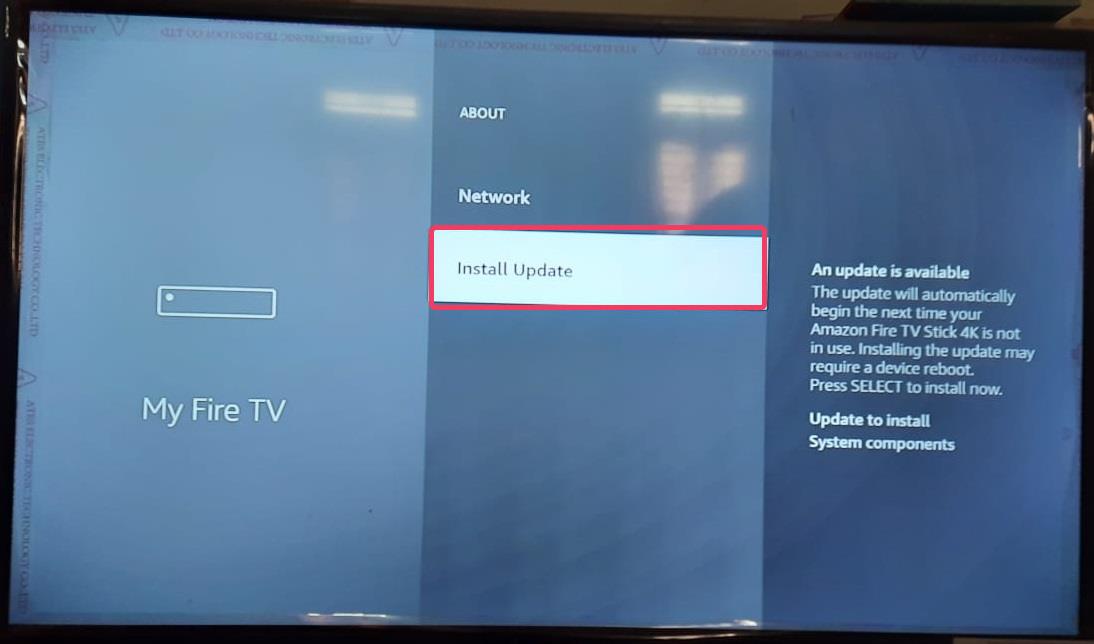
Step 7. If an update is available, download and install it by selecting Install Update.
Once the update is installed on your Amazon Fire TV Stick, it will run with the most recent version of the software.
Conclusion
In conclusion, keeping your Amazon Fire TV Stick updated is essential to ensure optimal performance and stability. Regular updates not only fix bugs and issues but also bring new features and improvements. By following the simple steps mentioned in this gearupwindows article, you can easily check for and install the latest software update available for your Fire TV Stick. With the most recent version of the software installed, you can enjoy the best streaming experience without any interruptions or glitches.