Windows 11 provides regular updates to ensure the smooth functioning of your system. However, downloading these updates can consume a significant amount of your bandwidth, especially if you have a limited internet connection. Fortunately, Windows 11 allows you to monitor your update bandwidth usage, which can help you optimize your internet usage accordingly. In this article, we will guide you through the steps to view Windows update bandwidth usage in Windows 11.
How to View Windows Update Bandwidth Usage in Windows 11?
Step-by-Step Guide to View Windows Update Bandwidth Usage in Windows 11:-
Step 1. First, open the Windows Settings app.
To do that, click on the Start menu and select Settings. Alternatively, you can press the keyboard shortcut (Windows key + I) to launch the Settings app.
Step 2. When the Setting app opens, click the Windows Update option on the left.
Step 3. On the right, select the Advance options tile.
Step 4. Then, select the Delivery Optimization option.
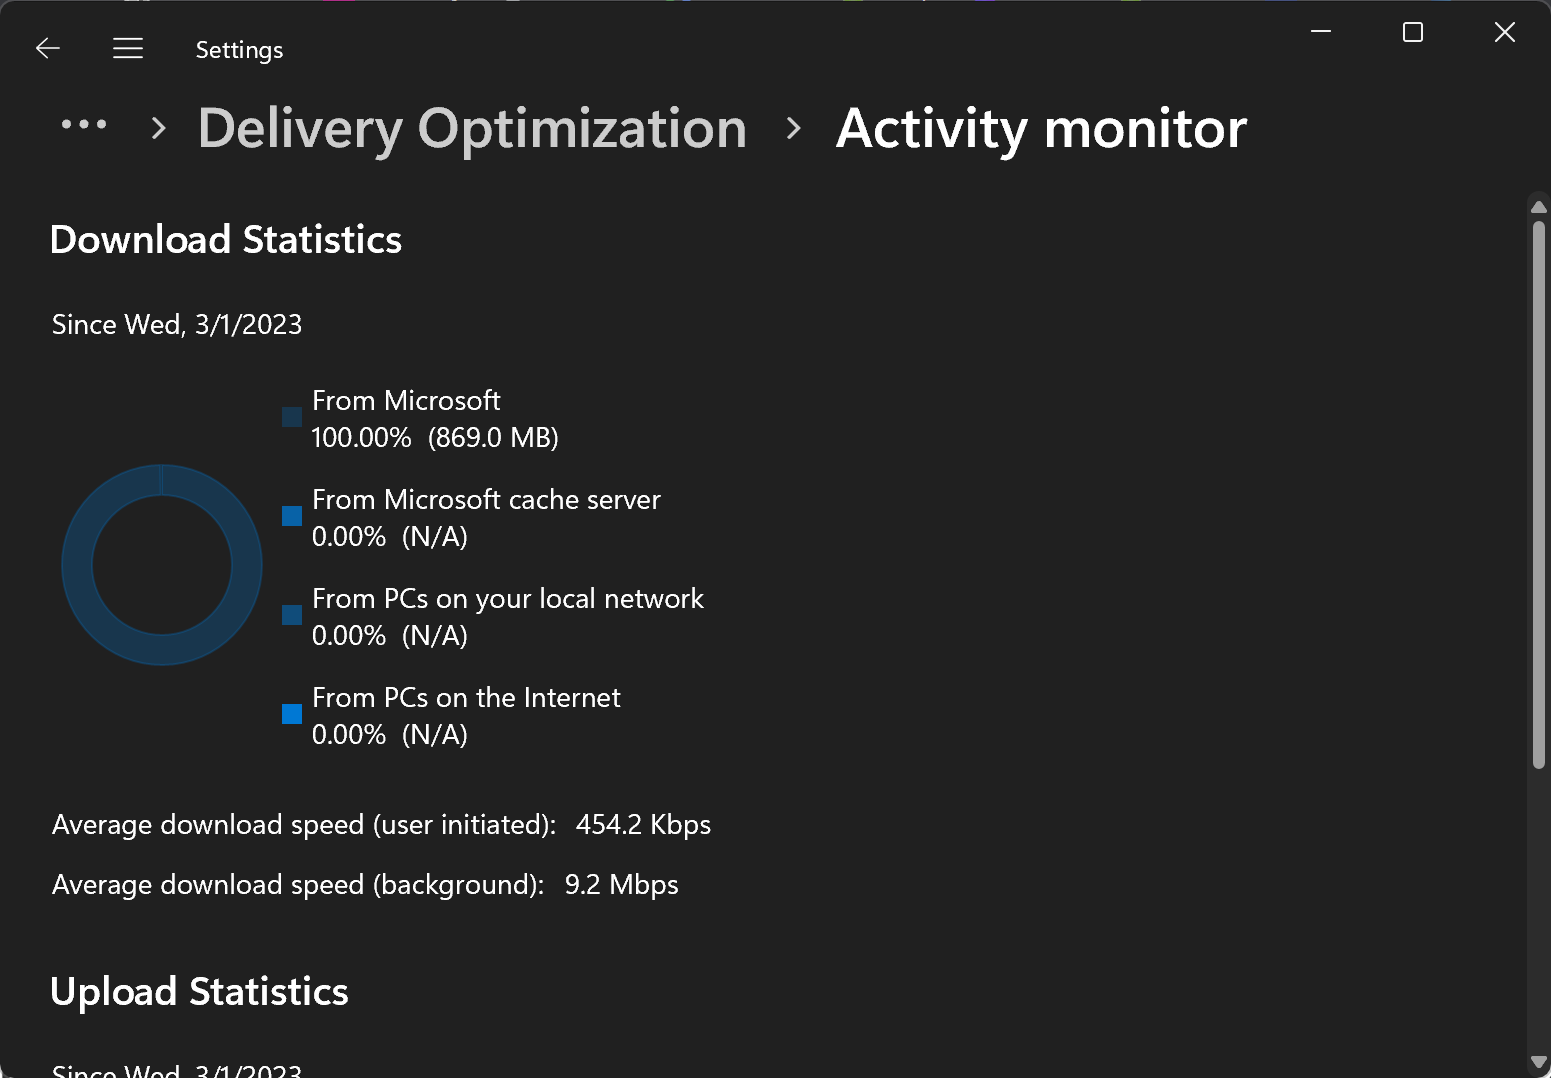
Step 5. Now, select the Activity monitor option.
Here, on the Activity monitor settings pane, you should see the overall bandwidth usage and speed your computer used to download updates for your PC.
By following these simple steps, you can easily monitor your Windows update bandwidth usage in Windows 11. This can be particularly useful if you have a limited internet connection or if you want to optimize your bandwidth usage for other tasks while Windows is updating in the background.
Conclusion
In conclusion, keeping your system updated is important for its smooth functioning, but it can also consume a significant amount of your bandwidth. Windows 11 allows you to view your updated bandwidth usage, which can help you optimize your internet usage and minimize disruptions. The above step-by-step guide can help you access this feature and monitor your update bandwidth usage in Windows 11.
