In Windows 11, the “Active hours” feature is a convenient way to tell your computer when you are typically using it, so it can avoid updating or restarting during that time. By default, Windows 11 will automatically adjust the active hours based on your activity patterns; however, if you want to take more control over when your computer updates and restarts, you can turn off this feature or manually adjust the active hours.
If you want to adjust the Active Hours on your Windows computer, there are a couple of ways to do it. In this article, we will guide you through two different methods to turn on or off the “Automatically adjust active hours” feature.
How to Turn On or Off Automatically Adjust Active Hours in Windows 11 using Settings app?
Follow these steps to enable or disable Automatically Adjust Active Hours in Windows 11 using Settings app:-
Step 1. Open the Windows Settings app.
You can do that by clicking on the Start button and selecting Settings. Or press the keyboard shortcut (Windows key + I) to launch the Settings app.
Step 2. When the Settings app opens, click the Windows Update category on the left.
Step 3. On the right, select the Advanced options tile.
Step 4. On the Advanced options settings pane, click the Active hours tile. Then use the drop-down menu to select Automatically.
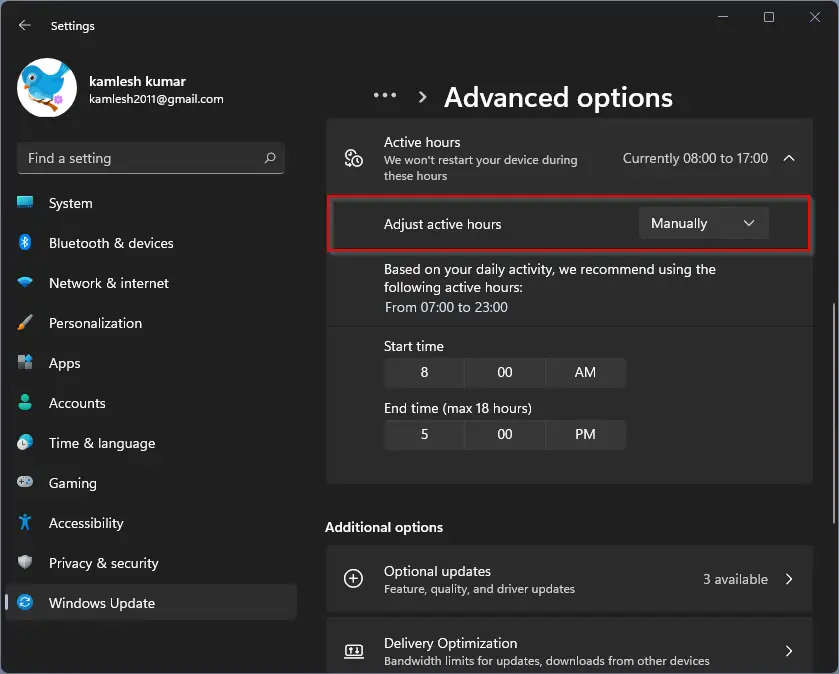
Step 5. Now, close the Settings app.
How to Enable or Disable Automatically Adjust Active Hours in Windows 11 using the Registry Editor?
To turn On or Off Automatically Adjust Active Hours in Windows 11 using the Registry Editor, do these steps:-
Step 1. Open Registry Editor.
Step 2. Then, navigate to the following key in the left sidebar:-
HKEY_LOCAL_MACHINE\SOFTWARE\Microsoft\WindowsUpdate\UX\Settings
Note:- If you don’t see the Settings folder under the UX key, right-click on the UX key and select the New > Key option. Then, name the newly created key to Settings.
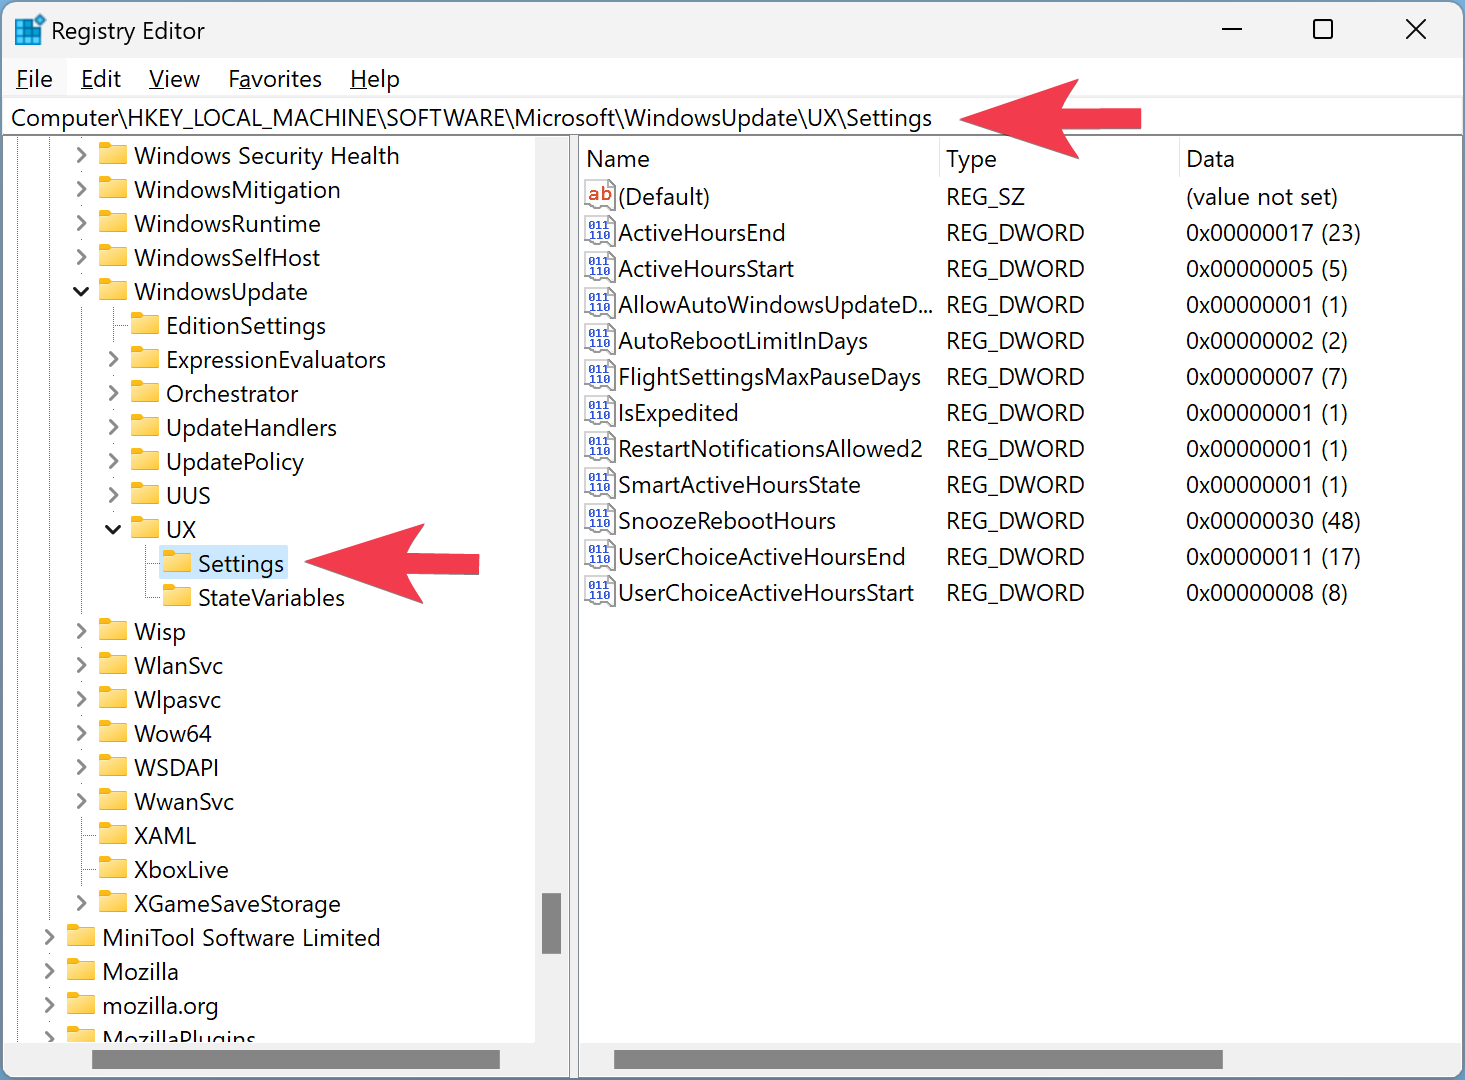
Step 3. Now, on the opposite side of the Settings folder, right-click on the free space and select New > DWORD (32-bit) Value.
Step 4. Next, name the newly created REG_DWORD to SmartActiveHoursState.
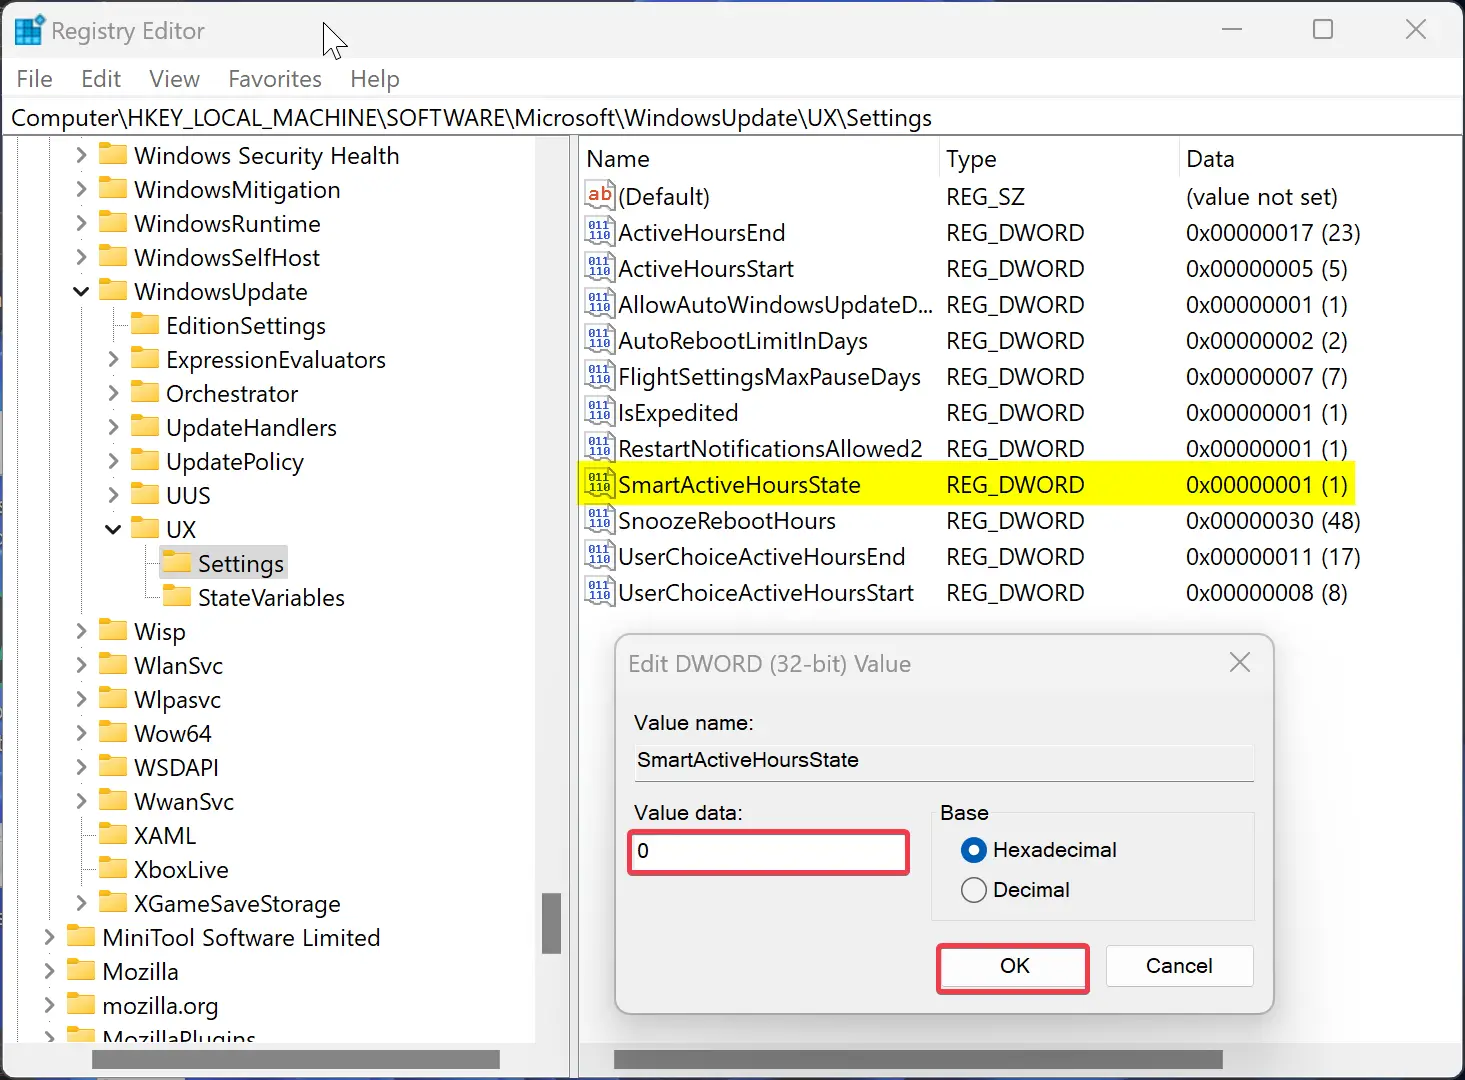
Step 5. Now, double-click the SmartActiveHoursState REG_DWORD and make sure the Base option is Decimal, and enter the following in the “Value data” field:-
- 1 = Enable the feature.
- 0 = Disable the future.
Step 6. Click the OK button.
Step 7. Finally, restart your computer to apply the changes.
Conclusion
Adjusting the Active Hours on your Windows computer can be done using the Windows Settings app or the Windows Registry Editor. Both methods are easy to follow and will allow you to turn on or off the “Automatically adjust active hours” feature according to your needs. So, choose the method that suits you the best and enjoy a smoother experience while using your Windows computer.
