In today’s fast-paced digital world, a stable and high-speed internet connection is essential for smooth browsing, streaming, gaming, and productivity. With the evolution of wireless technology, newer frequency bands like the 6GHz spectrum offer faster and more reliable connections, especially in densely populated areas where traditional 2.4GHz and 5GHz bands can become congested. However, by default, Windows may not always prioritize connecting over the 6GHz band. In this guide, we’ll delve into how you can leverage the Device Manager option to force your WiFi to connect over the 6GHz frequency in Windows 11/10, thus optimizing your internet experience.
Understanding 6GHz WiFi
The 6GHz band, also known as Wi-Fi 6E, is relatively new compared to the more commonly used 2.4GHz and 5GHz bands. It offers several advantages, including wider channels and less interference, leading to faster speeds and better performance, especially in environments with numerous connected devices. However, not all devices and routers support this band out of the box, and even if they do, your operating system might not prioritize connecting to it automatically.
Why Force WiFi to Connect Over 6GHz?
For users who have devices and routers capable of utilizing the 6GHz band, manually configuring their Windows settings to connect over this frequency can yield significant benefits. These include:-
- Improved Speeds: 6GHz WiFi offers faster speeds and lower latency, ideal for bandwidth-intensive activities like streaming 4K/8K videos or online gaming.
- Reduced Interference: With fewer devices operating on the 6GHz band compared to 2.4GHz and 5GHz, you’re less likely to experience interference, leading to a more stable connection.
- Enhanced Performance in Crowded Areas: In densely populated areas where multiple WiFi networks are present, the 6GHz band provides a cleaner spectrum for your devices to operate, minimizing congestion and maximizing throughput.
How to Force WiFi to Connect Over 6GHz?
To force your Windows 11/10 device to connect over the 6GHz frequency, follow these step-by-step instructions:-
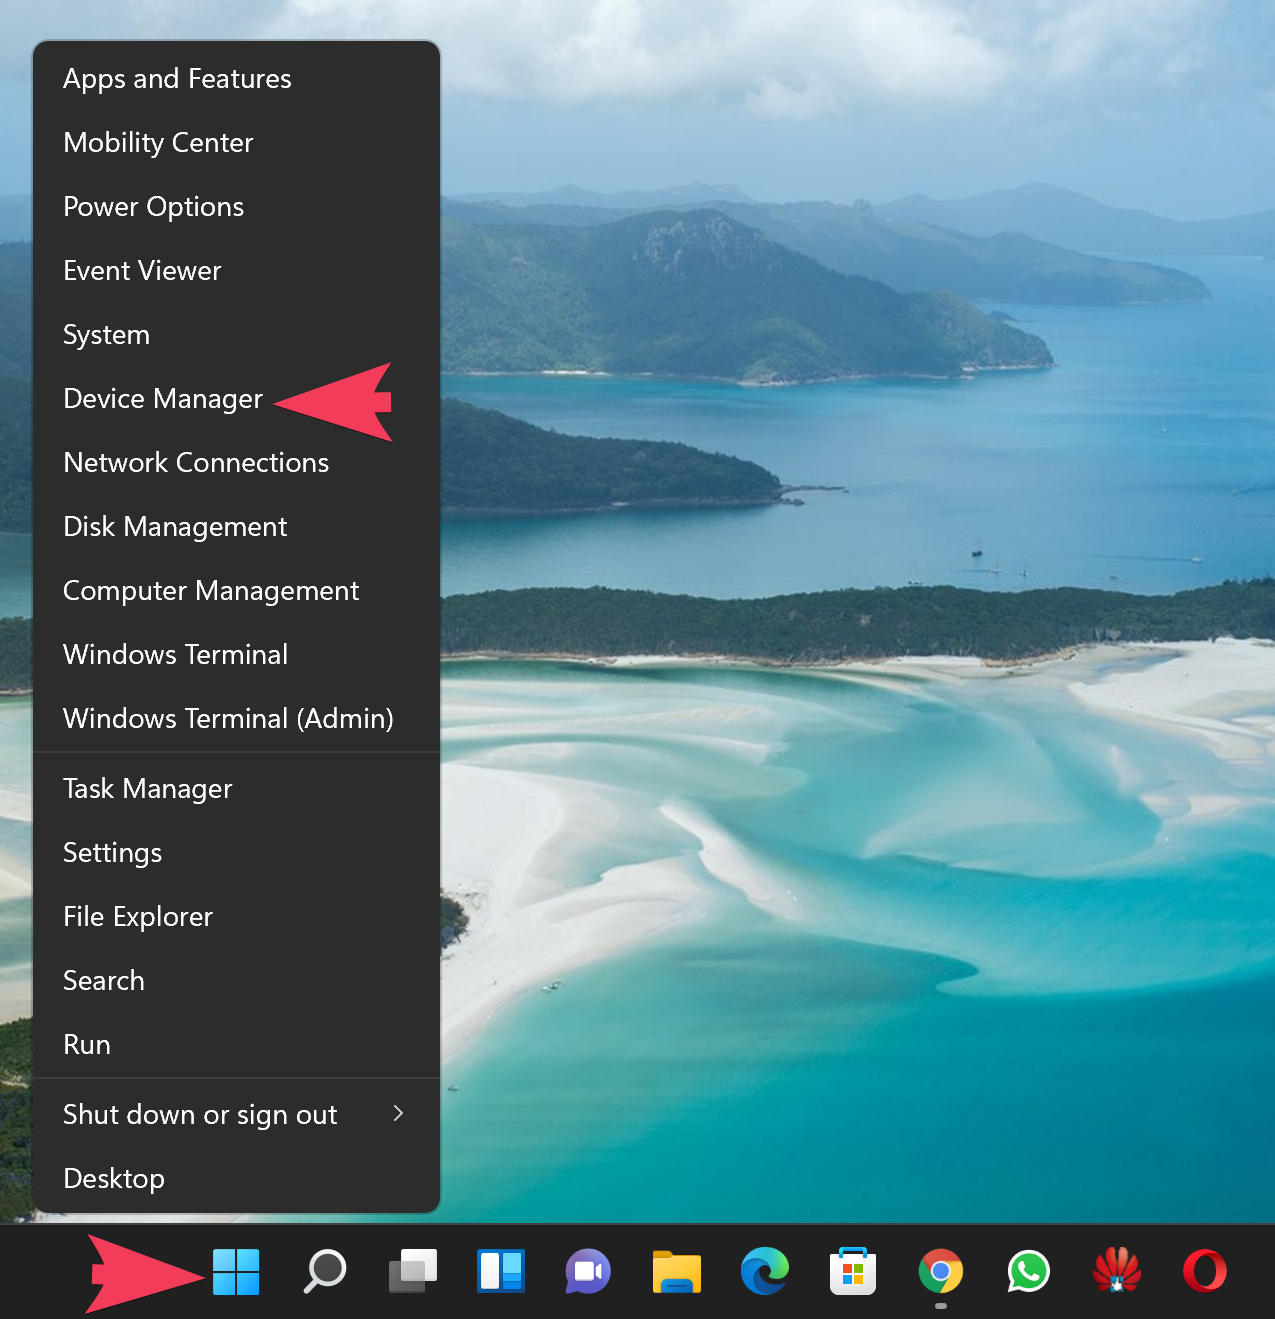
Step 1. Open Device Manager. To do that, right-click on the Start menu and select “Device Manager” from the list of options.
Step 2. In the Device Manager window, expand the “Network adapters” section to view a list of installed network adapters.
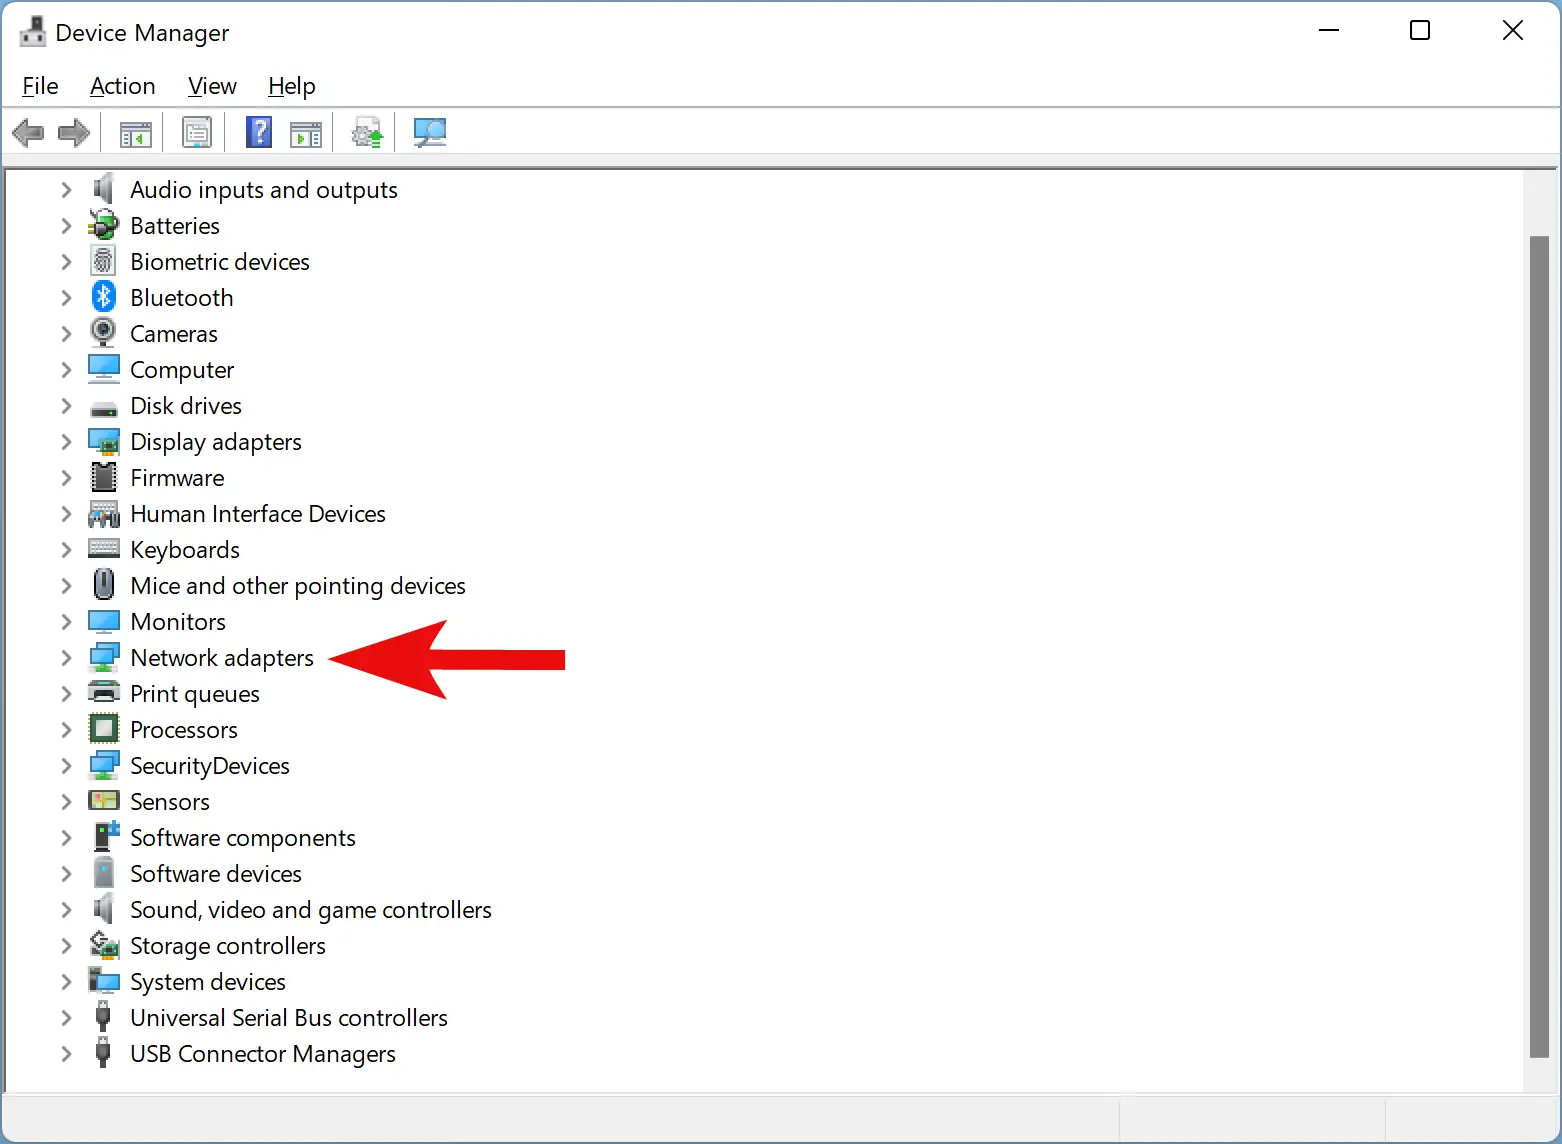
Step 3. Look for your WiFi adapter in the list. It’s typically labeled with the manufacturer’s name and model number, such as “Intel(R) Wi-Fi 6E AX211 160MHz” or “Qualcomm Atheros Wireless Network Adapter.”
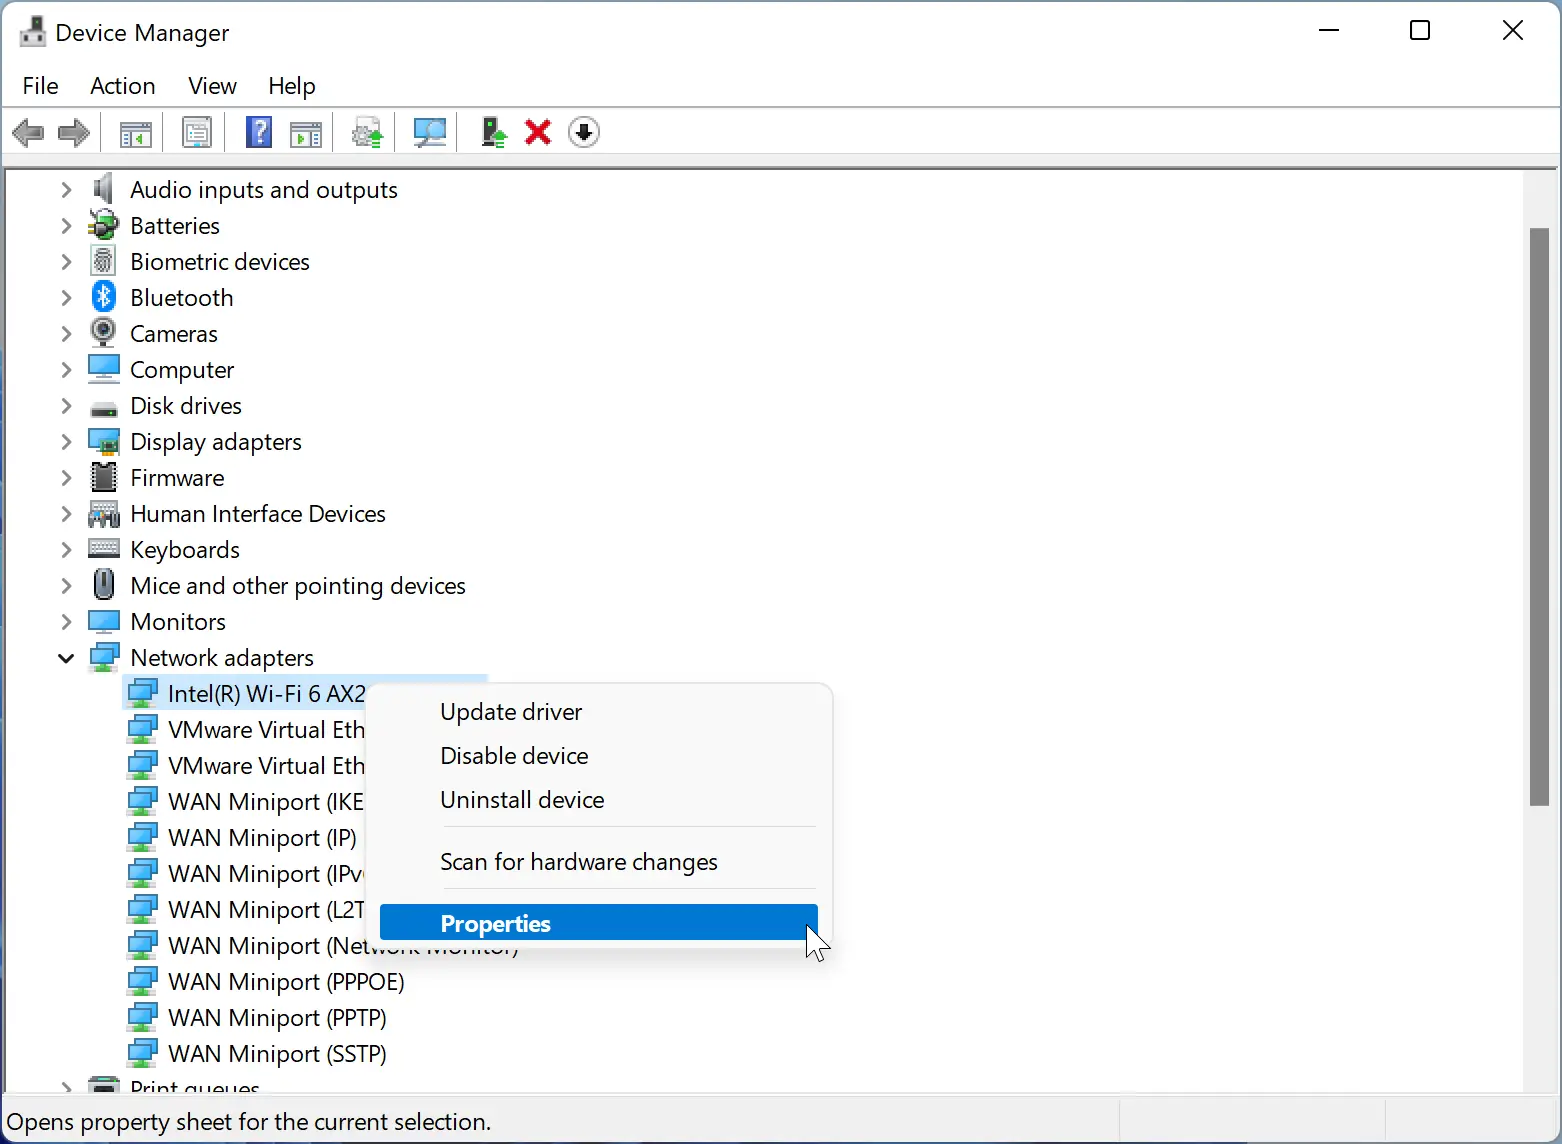
Step 4. Right-click on your WiFi adapter and select “Properties” from the context menu.
Step 5. In the Properties window, switch to the “Advanced” tab.
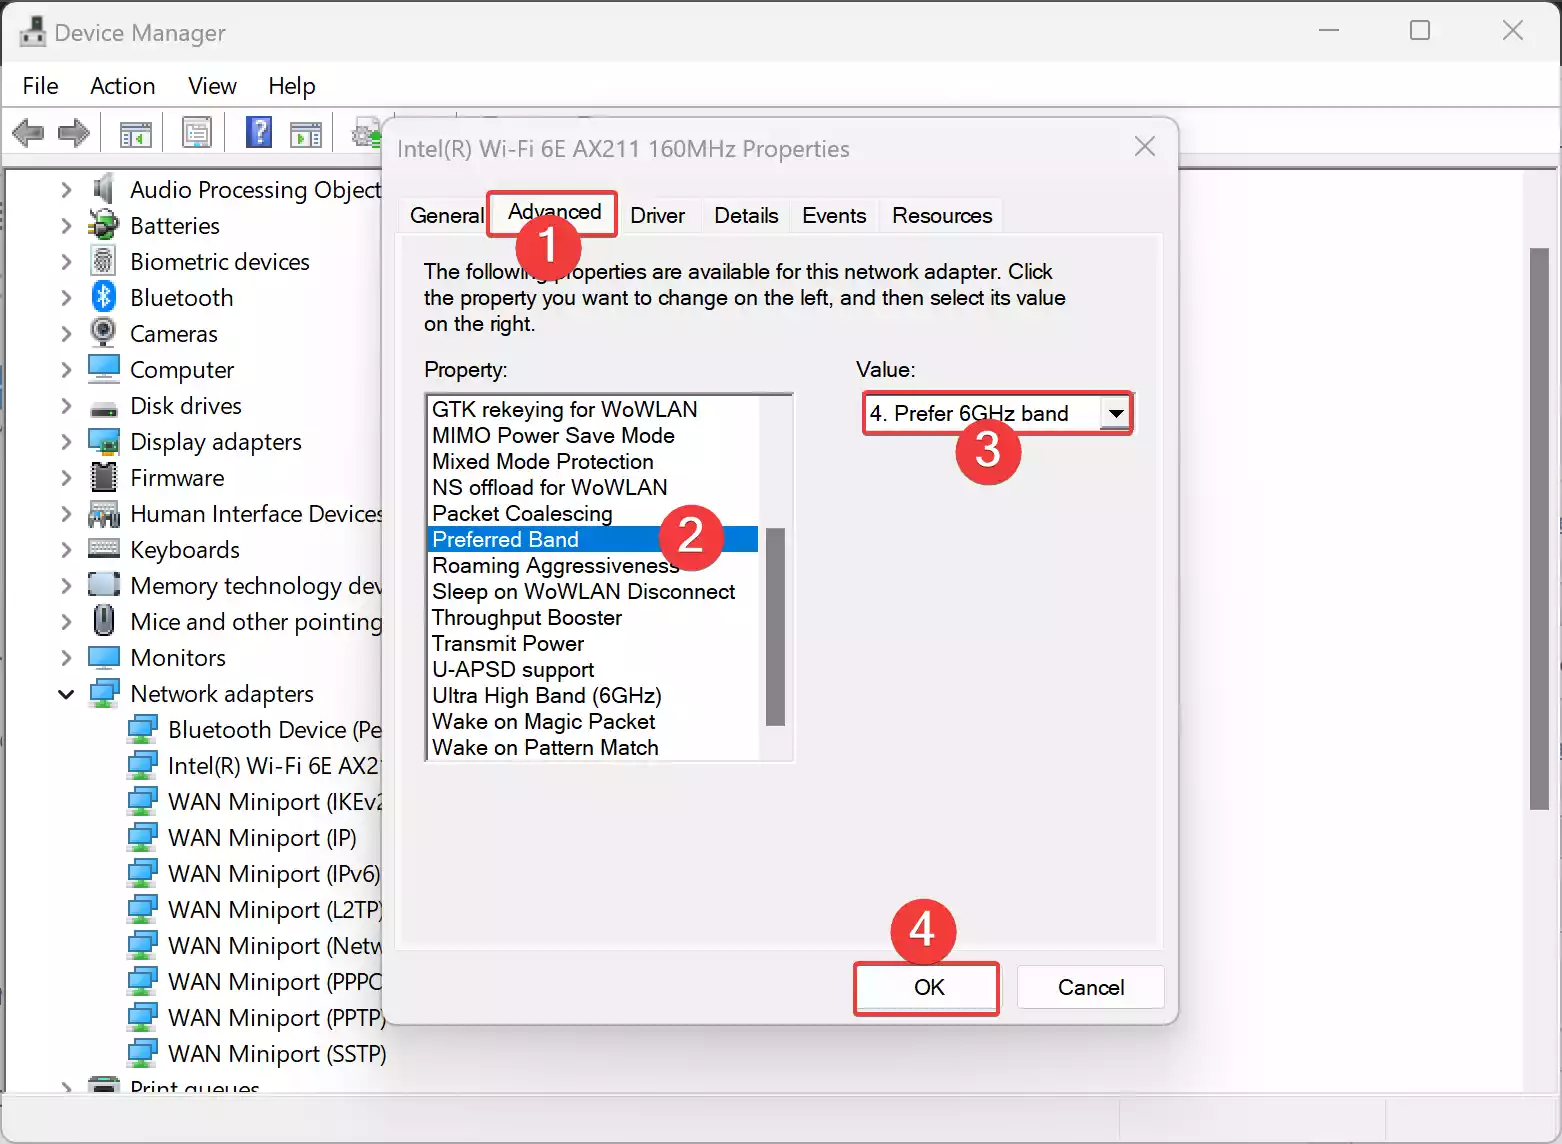
Step 6. Scroll through the list of advanced settings until you locate an option related to band preference or frequency bands. This setting might vary depending on your specific WiFi adapter.
Step 7. Select the option that allows you to specify the preferred band or frequency, and choose “6GHz,” “Wi-Fi 6E,” or “Prefer 6GHz band” from the dropdown menu.
Step 8. Once you’ve selected the 6GHz band as the preferred option, click “OK” or “Apply” to save your changes and exit the Properties window.
Step 9. To ensure that the changes take effect, it’s recommended to restart your computer.
Conclusion
By following these steps and configuring your Windows 11/10 device to prioritize connecting over the 6GHz frequency, you can harness the full potential of your WiFi network. Whether you’re looking to achieve faster speeds, reduce interference, or enhance performance in crowded areas, forcing your WiFi to connect over 6GHz can significantly improve your internet experience. Remember to check your device and router specifications to ensure they support the 6GHz band before making any changes. With a few simple adjustments through Device Manager, you can enjoy smoother browsing, streaming, gaming, and productivity on your Windows PC.