Windows 11 has introduced several new accessibility features, including Live Captions, which can provide automatic transcription for a movie or audio. This feature is especially useful for people who are deaf or hard of hearing. In this gearupwindows article, we will discuss two simple methods to enable or disable Live Captions in Windows 11.
How to Enable or Disable Live Captions in Windows 11?
Method 1: Enable or Disable Live Captions via Settings App
The first method to enable or disable Live Captions in Windows 11 involves using the Settings app. Here are the step-by-step instructions:-
Step 1. Open the Settings app.
Press the Windows key + I on your keyboard to launch the Settings app.
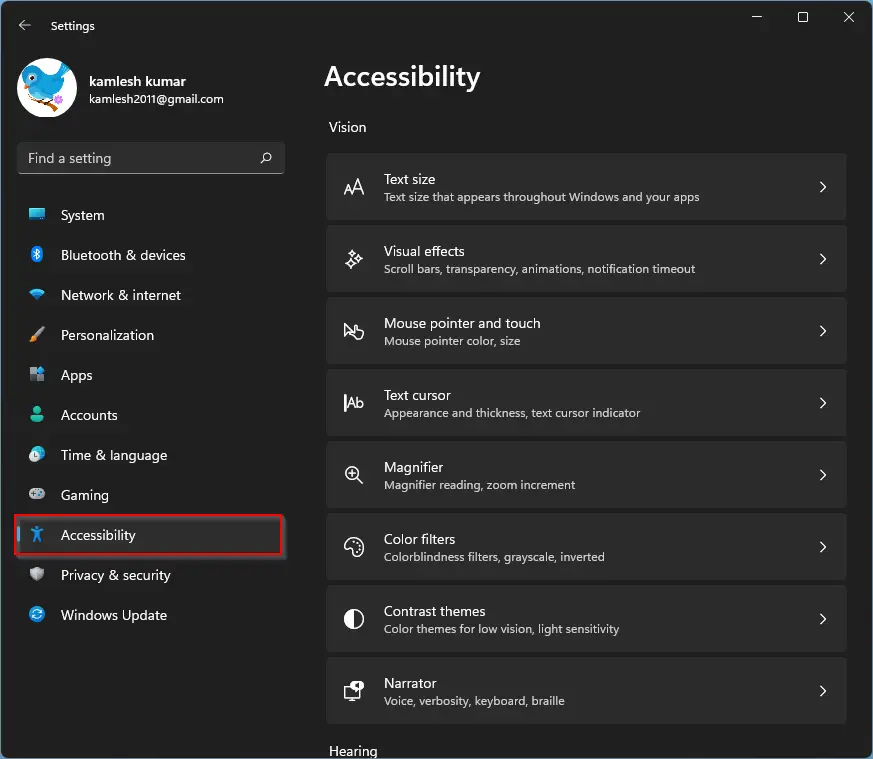
Step 2. In the Settings app, select Accessibility on the left-hand side of the screen.
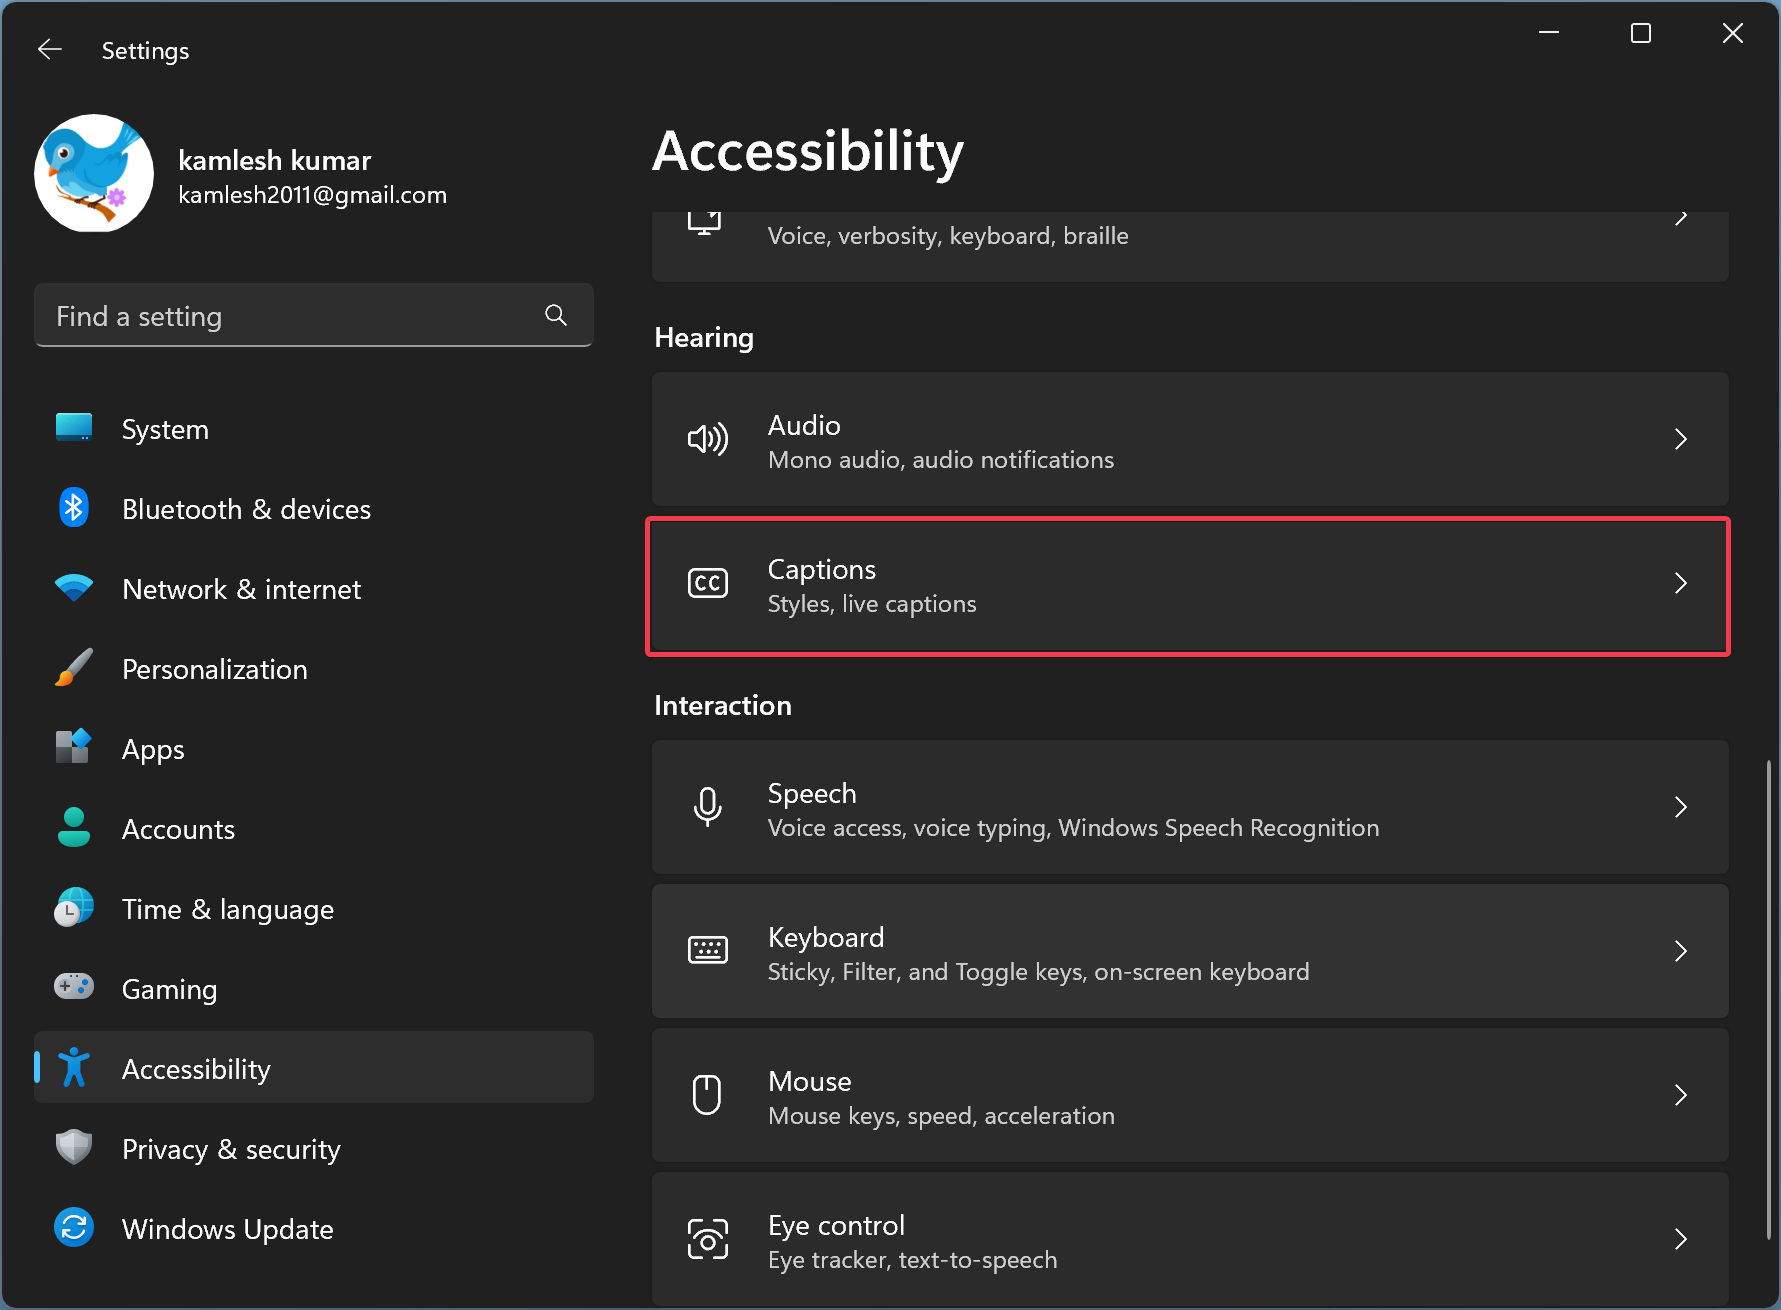
Step 3. Then, on the right-hand side of the screen, click on Captions.
Step 4. You will see the toggle switch for Live captions. Toggle it to the On position to enable Live Captions, or toggle it to the Off position to disable Live Captions.
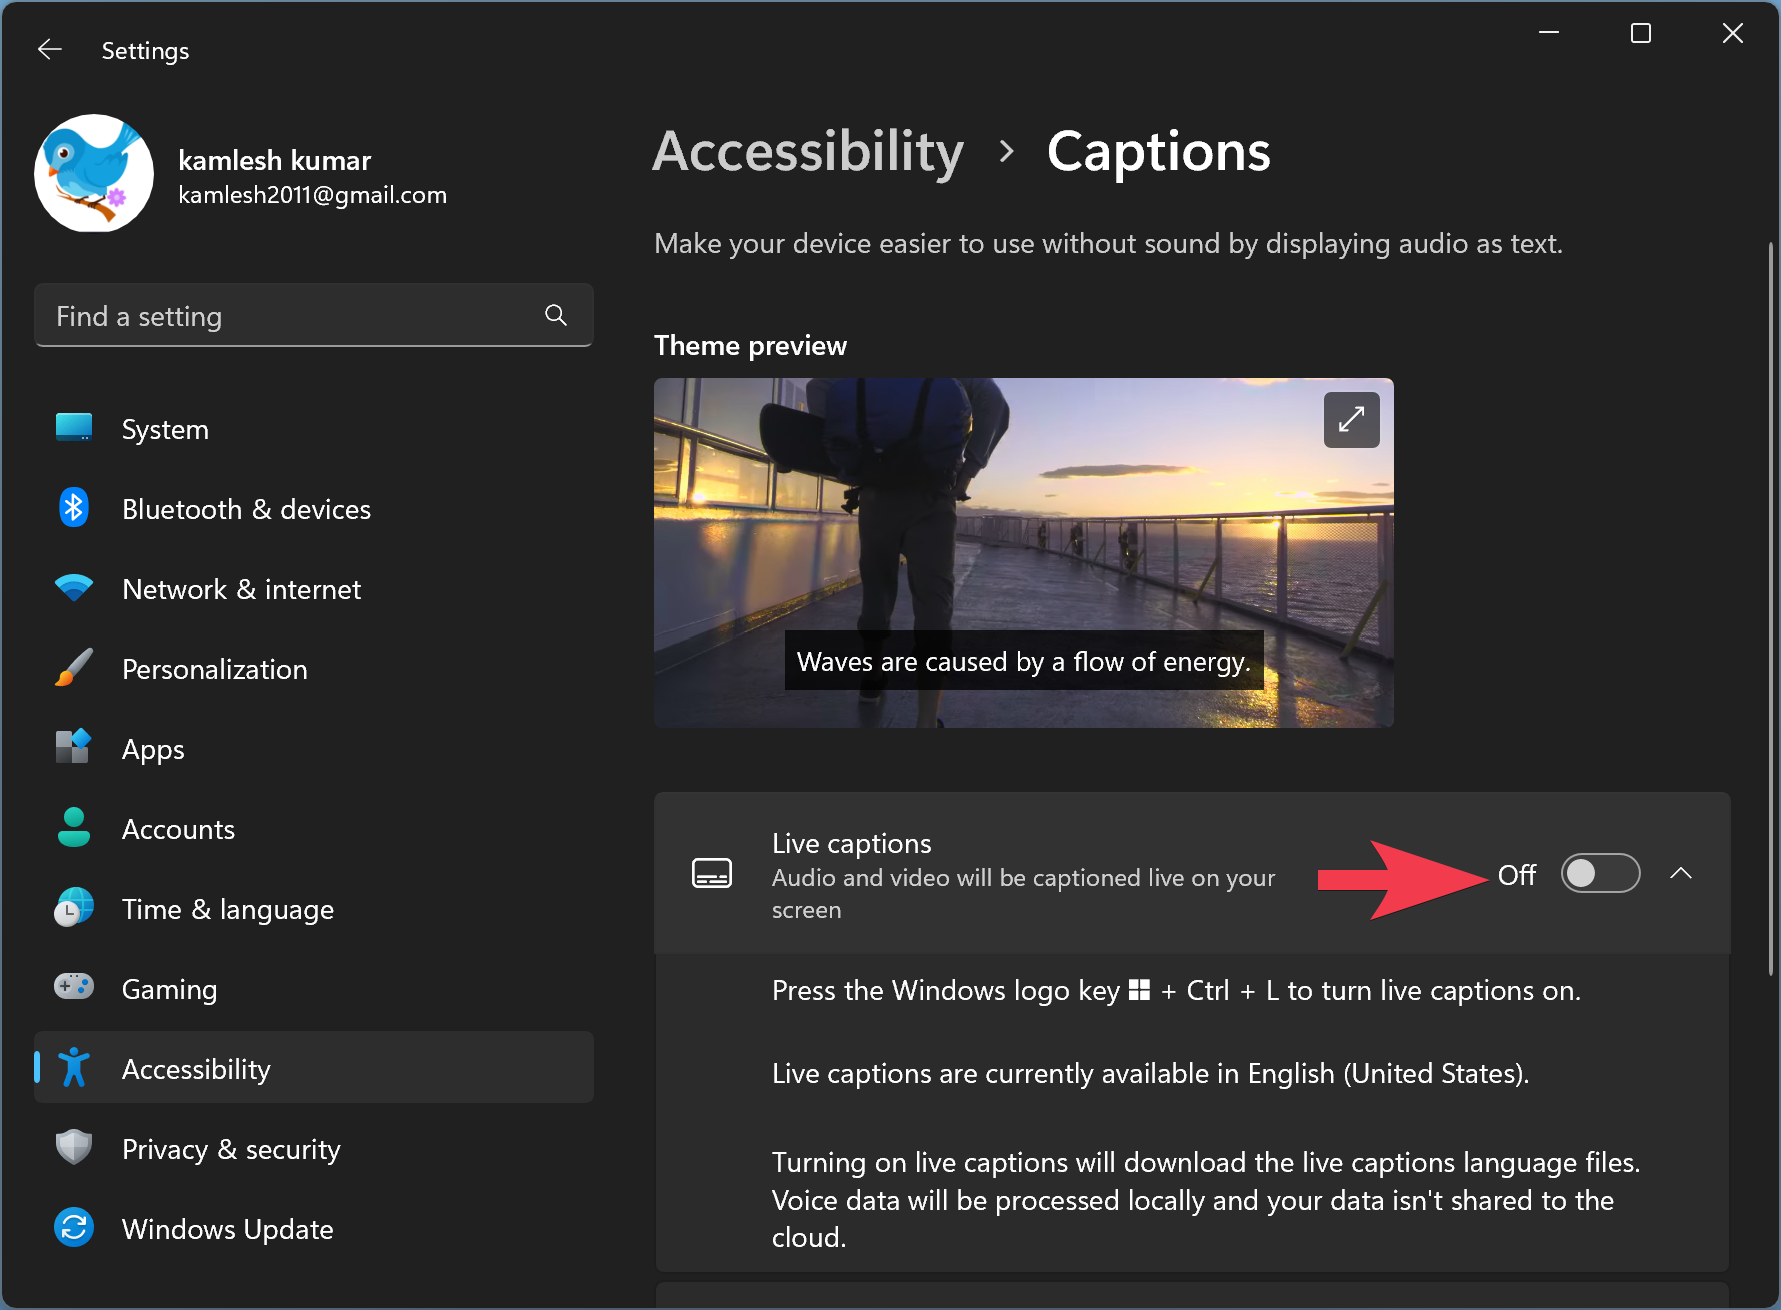
Step 5. If it’s the first time you are turning on Live Captions, Windows 11 will prompt you to download the live captions language files (about 98.3Mb).
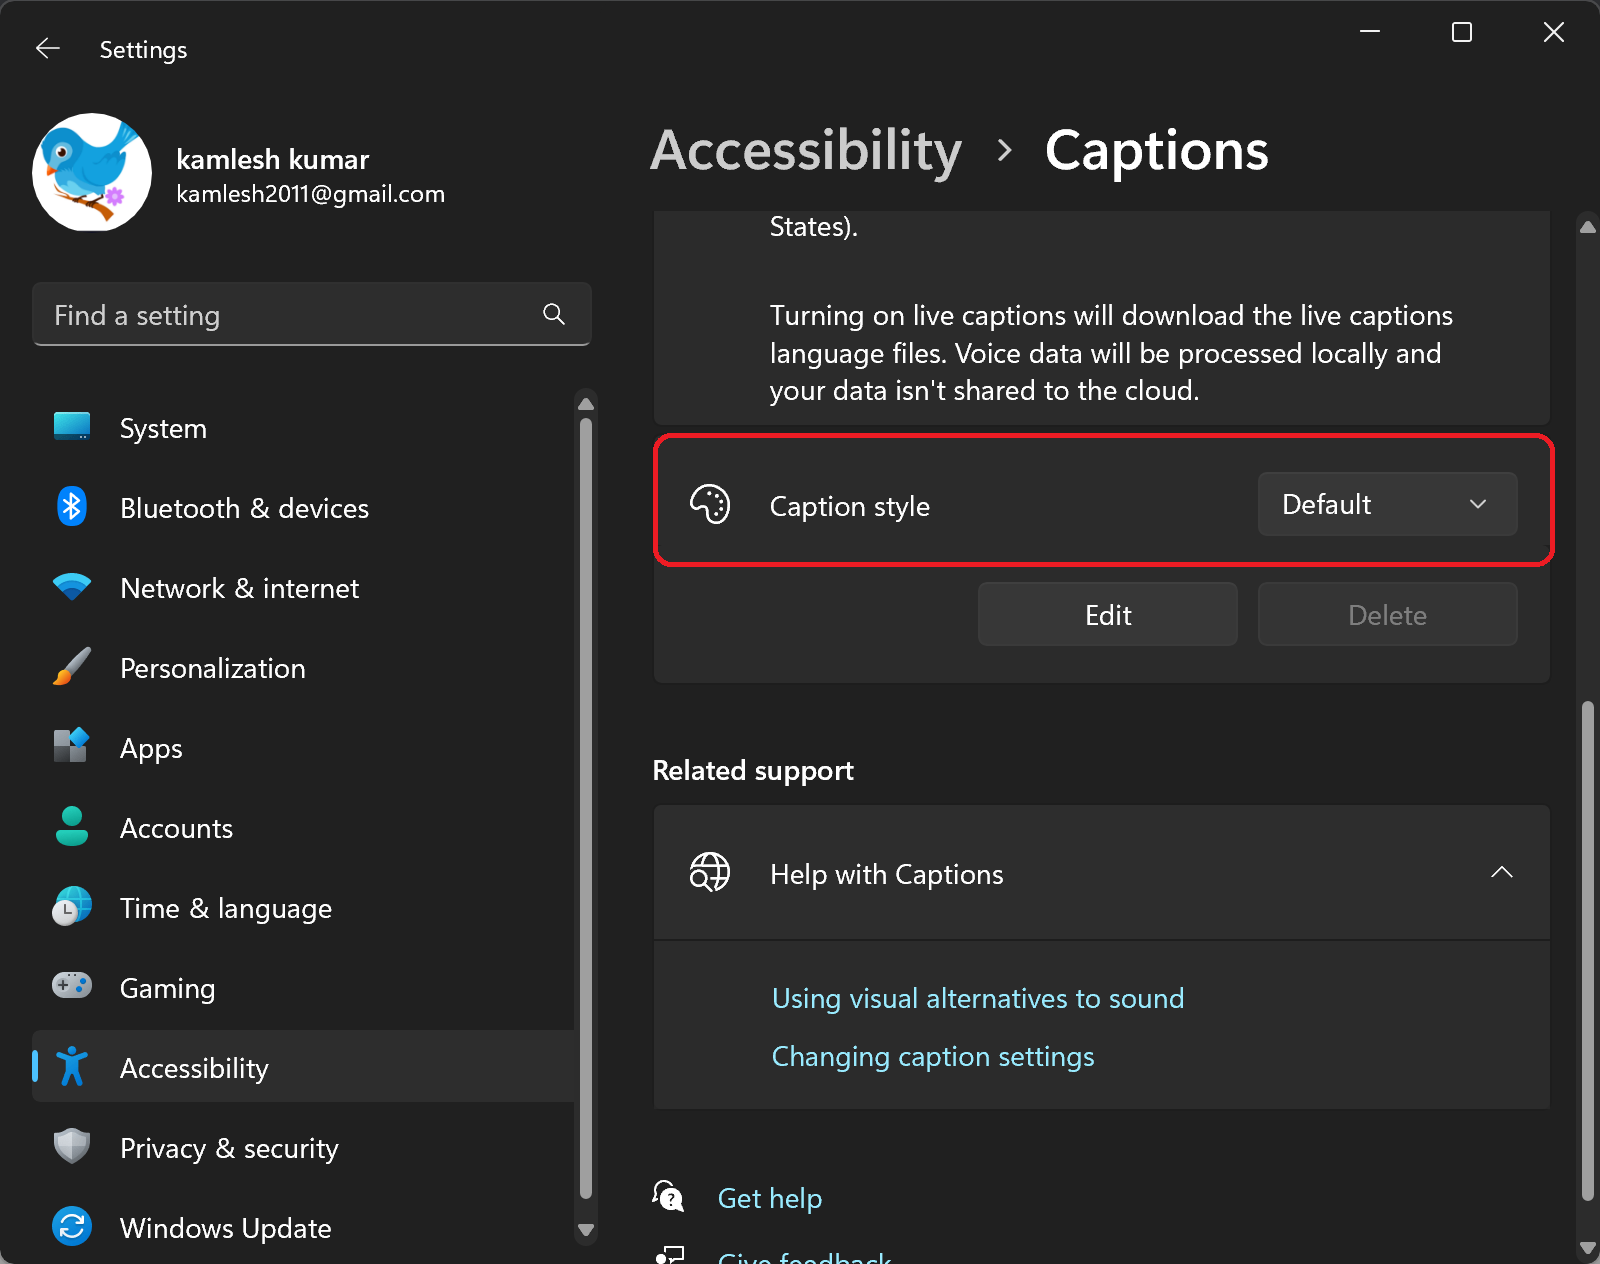
Step 6. If you want to change the style of the captions, click the “Caption style” drop-down list and select your preferred style from the options provided. You can choose from “White on black,” “Yellow on blue,” “Small caps,” or “Large text.”
Step 7. When Live Captions are turned on, they will automatically convert any video or audio being played on your computer into easily readable text. With Live Captions enabled, you can now enjoy captions for any audio or video played on your computer.
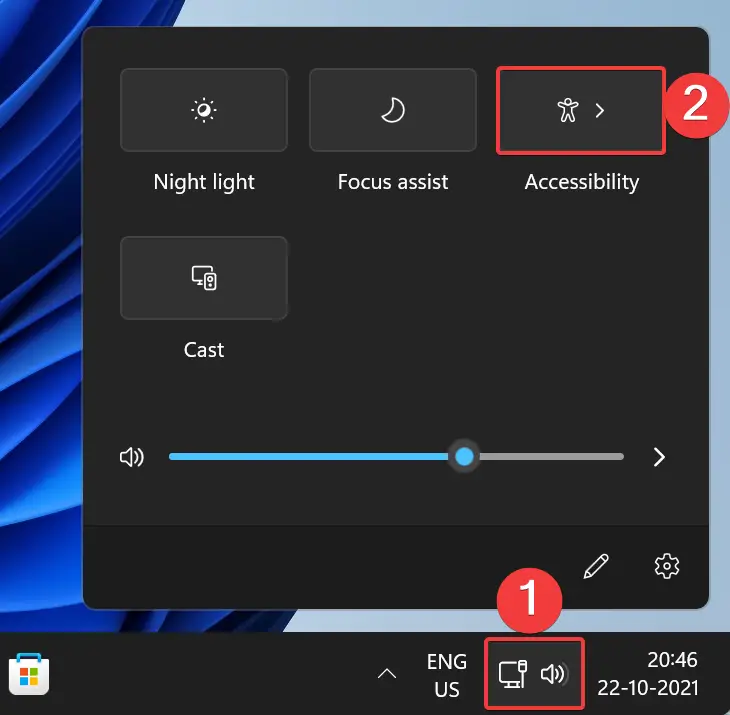
Method 2: Enable or Disable Live Captions via Action Center
The second method to enable or disable Live Captions in Windows 11 involves using the Action Center. Here are the step-by-step instructions:-
Step 1. Open the Action Center.
Press the Windows key + A on your keyboard (or click the WiFi, Volume, or Battery icons in the system tray) to open the Action Center pane.
Step 2. In the Action Center pane, click the Accessibility icon.
Step 3. In the next pane, you can click the toggle next to Live captions to enable or disable the Live captions feature.

By turning on Live Captions, any video or audio playing on your computer will be automatically converted into easily readable text. With Live Captions enabled you can enjoy captions for any audio or video played on your computer.
Conclusion
Live Captions is a valuable accessibility feature in Windows 11 that can make it easier for people who are deaf or hard-of-hearing to enjoy audio and video content. With the two simple methods discussed in this article, you can easily enable or disable Live Captions in Windows 11. Whether you prefer to use the Settings app or the Action Center, you can quickly and easily turn Live Captions on or off to suit your needs.
