There are a few options to lock your PC screen on Windows 10, which we have seen in the previous post. Today, in this post, we will show how to add a Lock option to the Start and Taskar on Windows 10. Built-in Windows logo + L keyboard shortcut is the perfect way to lock your Windows 10 computer, and there is nothing wrong with this. This post is dedicated to those who prefer using a mouse or a touch device and want to add the Lock option to the Start and taskbar for quick and easy access.
To add the Lock option feature in the Start menu and taskbar, you need to create a shortcut of the Lock option and pin the shortcut to the taskbar and the Start.
How to add a Lock option to the Start and Taskbar on Windows 10?
To add a Lock option to the Start and Taskbar on Windows 10, perform the following steps:-
Step 1. Right-click on the empty area on the Windows 10 desktop.
Step 2. Select New and then click Shortcut.
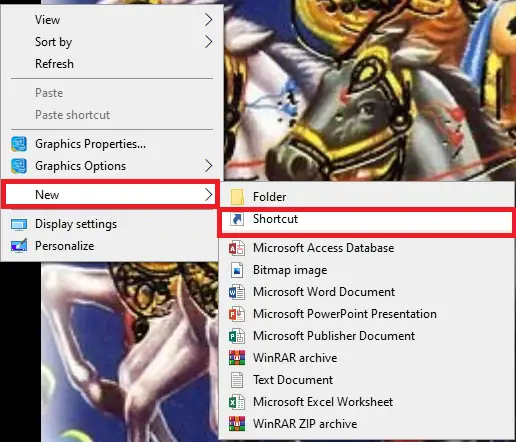
Step 3. Once you click on the Shortcut option, it will open the Create Shortcut wizard.
Step 4. On the text file below the “Type the location of the item,” copy and paste the following path:-
Rundll32.exe user32.dll,LockWorkStation
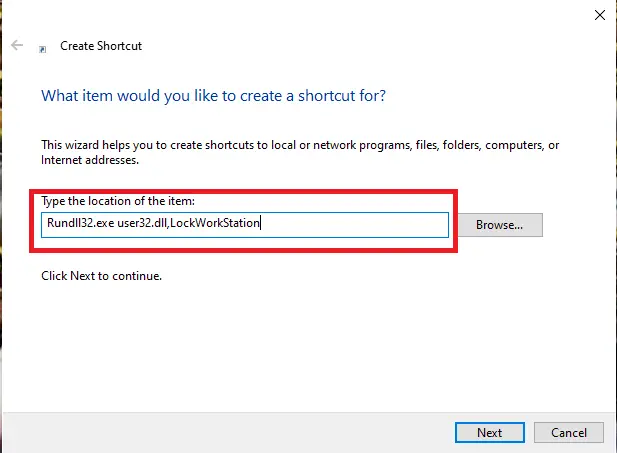
Step 5. Click on the Next button to continue with the shortcut.
Step 6. On the “Type a name for this shortcut” field, type Lock.
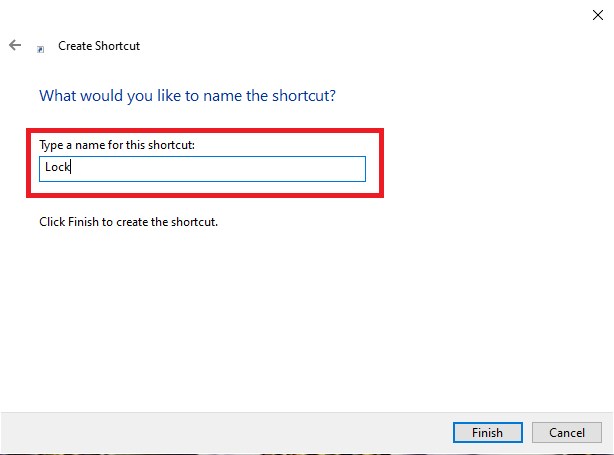
Step 7. Click on the Finish button to create the shortcut on the desktop with Lock’s name.
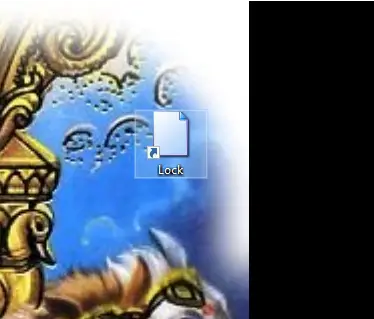
You have just created a Lock shortcut. To test it, double-click on the Lock shortcut icon from the desktop, and your Windows 10 PC will be locked immediately.
![]()
Step 9. Click on the Shortcut tab of the Lock Properties window and then click on the “Change Icon” button.
Step 10. Browse for icon packs (the default location of Windows 10 icon pack is C:\Windows\System32\shell32.dll) and select the icon you want to use.
Step 11. Click OK, Apply, then OK to use the selected icon.
Now you have successfully changed the Lock’s icon. Now, we will proceed to add the newly created Lock shortcut to the Start and Taskbar.
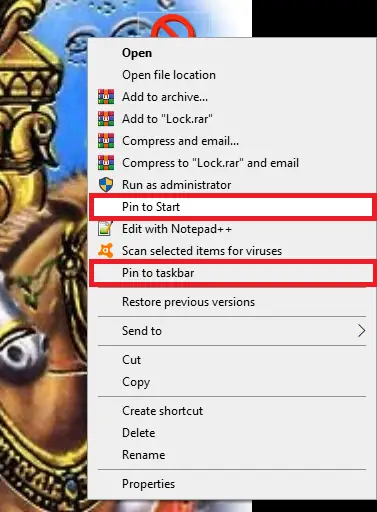
Step 12. Right-click on the Lock shortcut on the desktop and then click the Pin to Start or Pin to Taskbar to pin it to the Start menu or Taskbar, respectively.
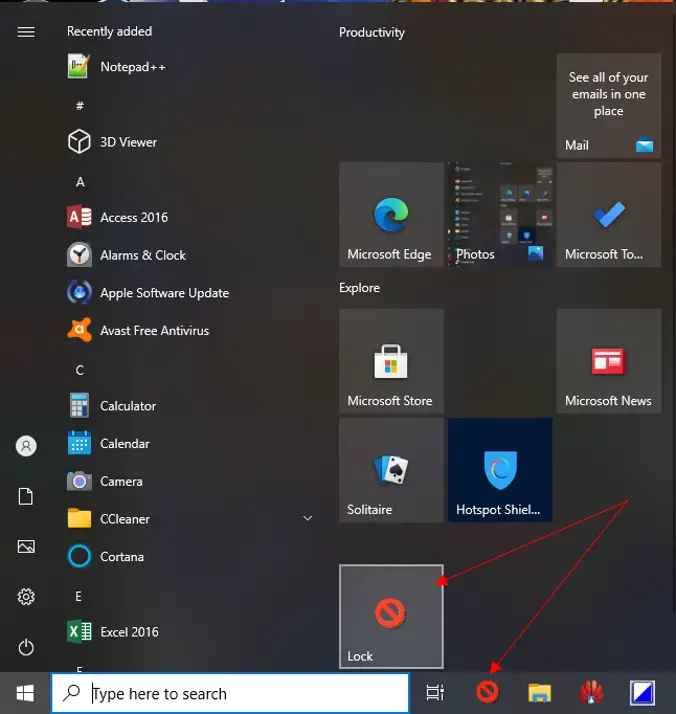
Now you can access Lock from the Start menu as well as Taskbar.
Conclusion
In conclusion, adding a Lock option to the Start and Taskbar on Windows 10 can be a convenient way to quickly lock your computer without having to use the built-in keyboard shortcut. By following the steps outlined in this guide, you can create a Lock shortcut and pin it to both the Start menu and the Taskbar. This will allow you to access the Lock feature using a mouse or touch device, making it easier to use for those who prefer not to use keyboard shortcuts. With this added feature, you can now lock your Windows 10 PC with just a few clicks.
