Whenever you open an application on a Windows 11 PC, it begins with standard permissions by default. You can always open an application with elevated rights by right-clicking on it and selecting the “Run as administrator” option from the context menu. It is not difficult, but it consumes a few seconds.
If you frequently need to open some particular program on your PC with administrative privilege, then there is a way to make your life easier. If you use an application that requires elevation daily, you can curtail this complicated process and save extra steps. Luckily, it’s possible to configure an app to always run as an administrator to save unnecessary steps.
This gearupwindows article will guide you on always opening apps as an administrator on Windows 11.
How to Always Open Apps as Administrator on Windows 11?
Follow these steps to Always Open Apps as an Administrator on Windows 11:-
Step 1. First, locate the executable file of the app or app’s desktop shortcut you want to always open with elevated privileges.

Step 2. Then, right-click on it to display its context menu. In the context menu, select the Properties option. Alternatively, select the application and just press Alt + Enter on the keyboard to open its “Properties” dialog.
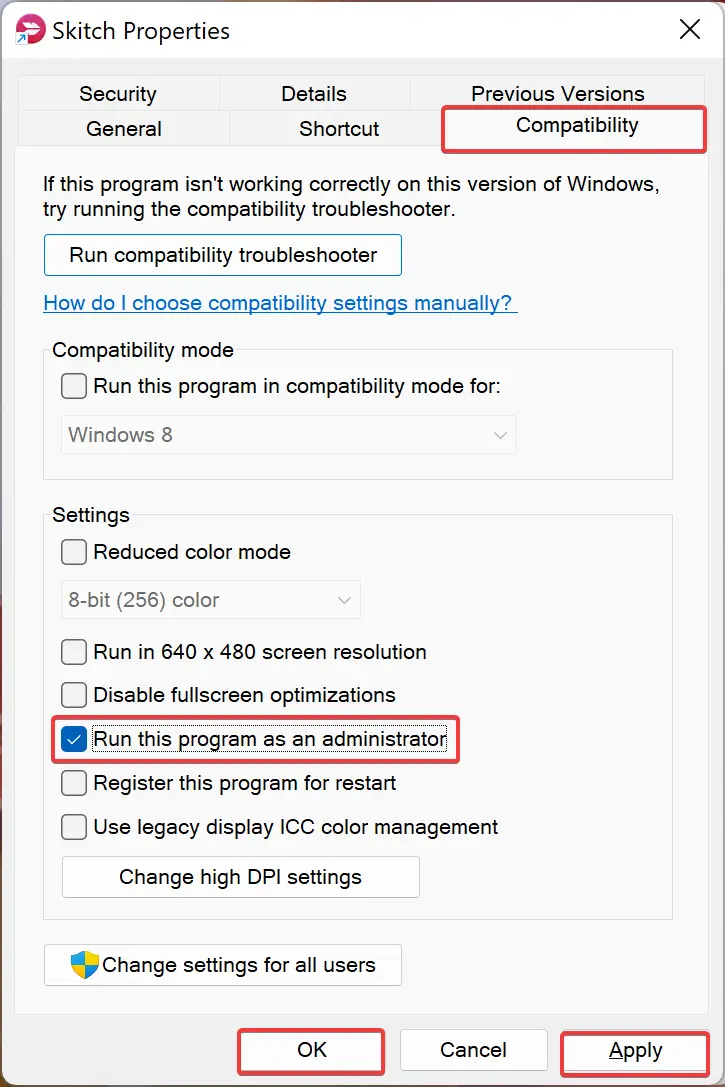
Step 3. When the app’s Properties menu appears, click the Compatibility tab.
Step 4. In the Settings group of the Compatibility tab, check the checkbox beside “Run this Program as an Administrator.”
Step 5. After that, click the Apply button.
Step 6. Finally, hit the OK button to exit the Properties windows.
Once you complete the above steps, wherever you open that specific application next time, that will open with admin rights by default.
Conclusion
In conclusion, running applications with elevated privileges is sometimes necessary to perform certain tasks on a Windows 11 PC. While it is easy to open an app with administrator rights by right-clicking and selecting the option, it can be time-consuming if you need to do it frequently. Fortunately, Windows 11 offers a way to configure an application to always run with elevated privileges, saving you time and effort. By following the steps outlined in this guide, you can easily set up an app to always open as an administrator on your Windows 11 PC.