With the release of Windows 11, Microsoft introduced a sleek and modern right-click context menu, aiming to enhance user experience and streamline interactions. However, for those accustomed to the classic context menu found in earlier Windows versions, this change may feel unfamiliar or lacking in functionality. Fortunately, Windows 11 offers the flexibility to revert to the classic context menu, providing users with a sense of familiarity and access to a broader range of options. In this gearupwindows guide, we’ll walk you through the steps to bring back the classic context menu on Windows 11.
How to Bring Back Classic Context Menu on Windows 11?
Method 1: Using Registry Editor
The first method in restoring the classic context menu involves accessing the Registry Editor. Follow these instructions:-
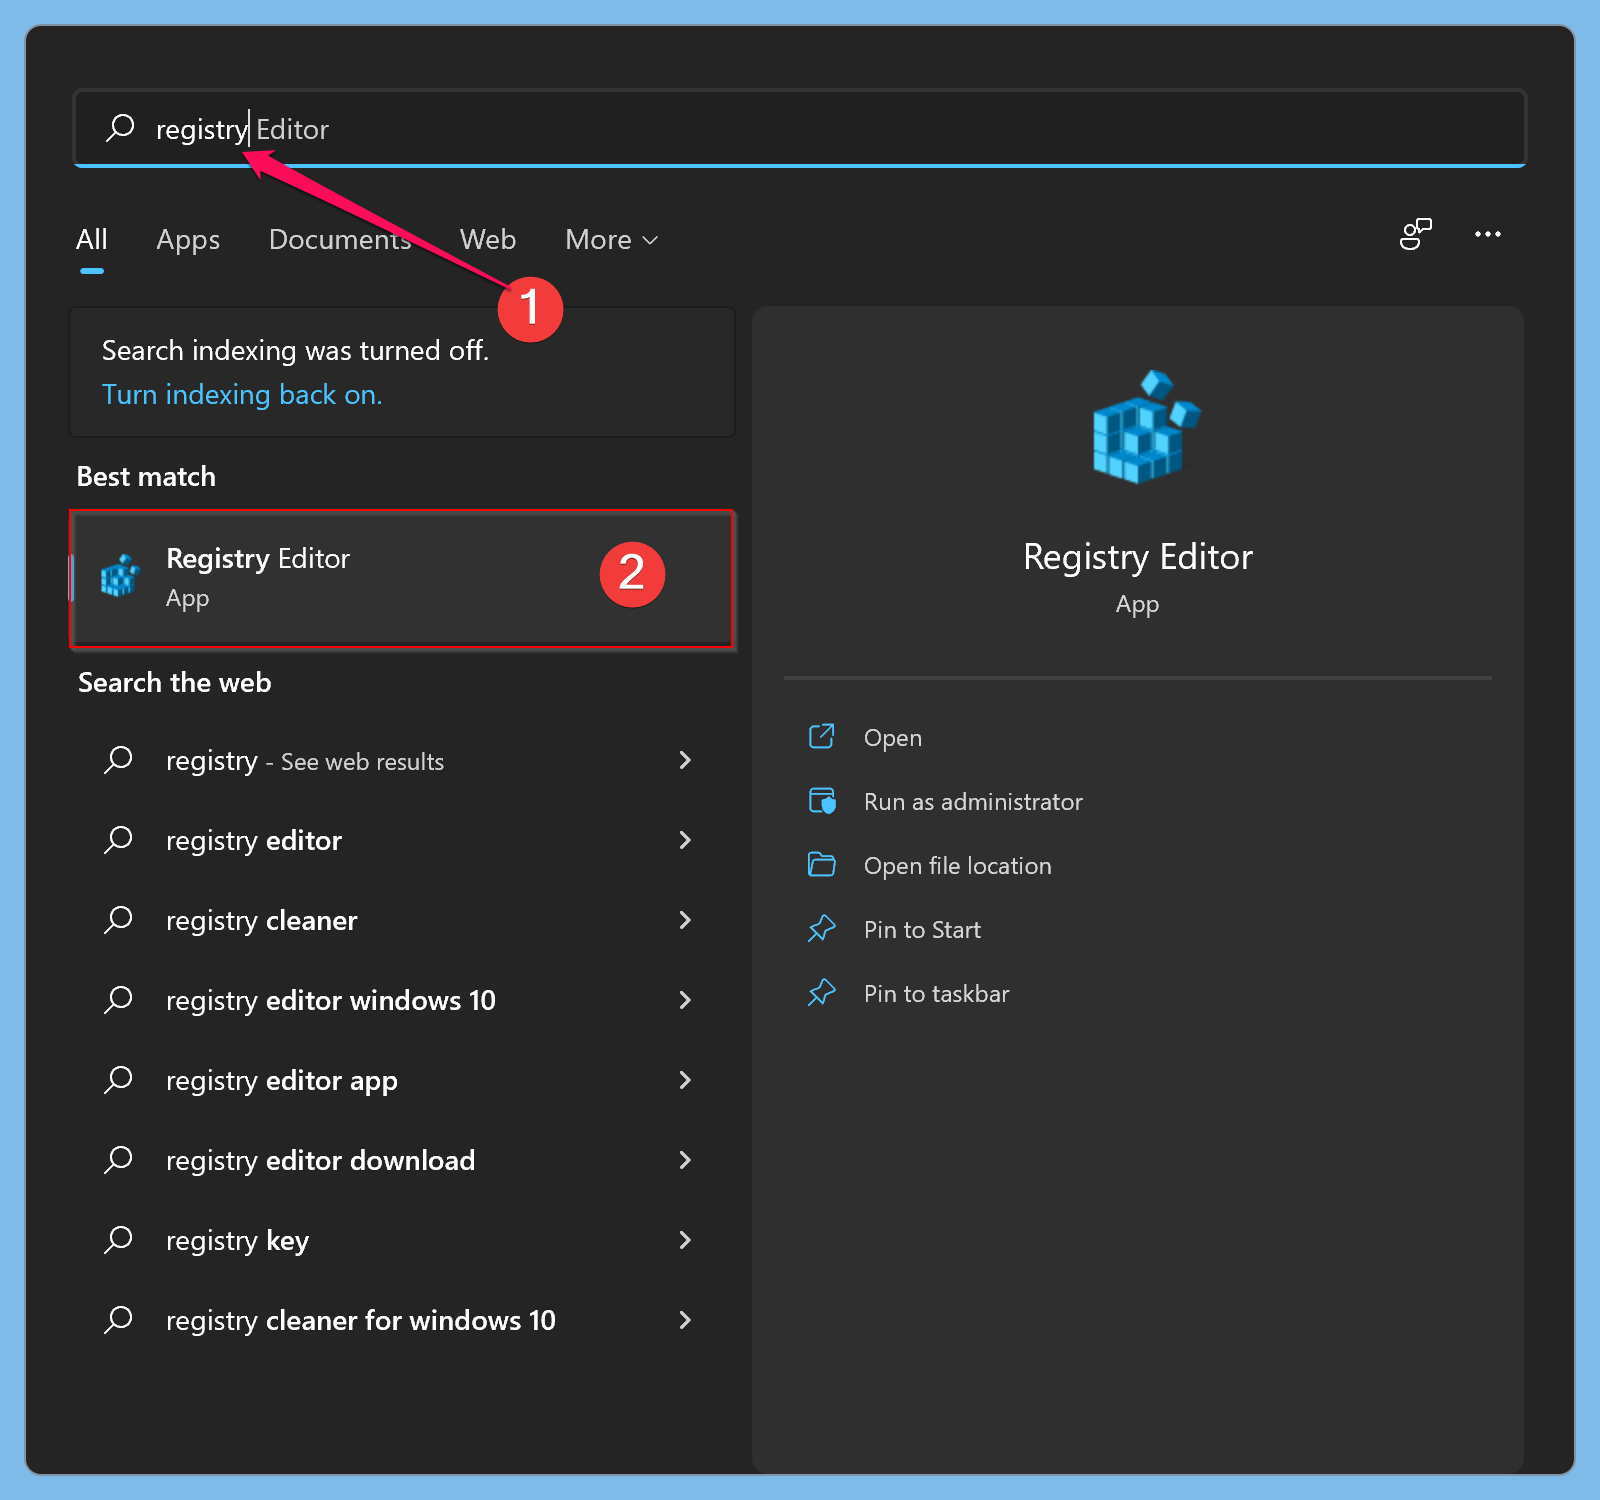
Step 1. Click on the Start button and type “regedit” in the search bar.
Step 2. Select the “Registry Editor” from the search results to open Registry Editor.
Step 3. Once the Registry Editor is open, navigate to the following key location:-
HKEY_CURRENT_USER\SOFTWARE\CLASSES\CLSID
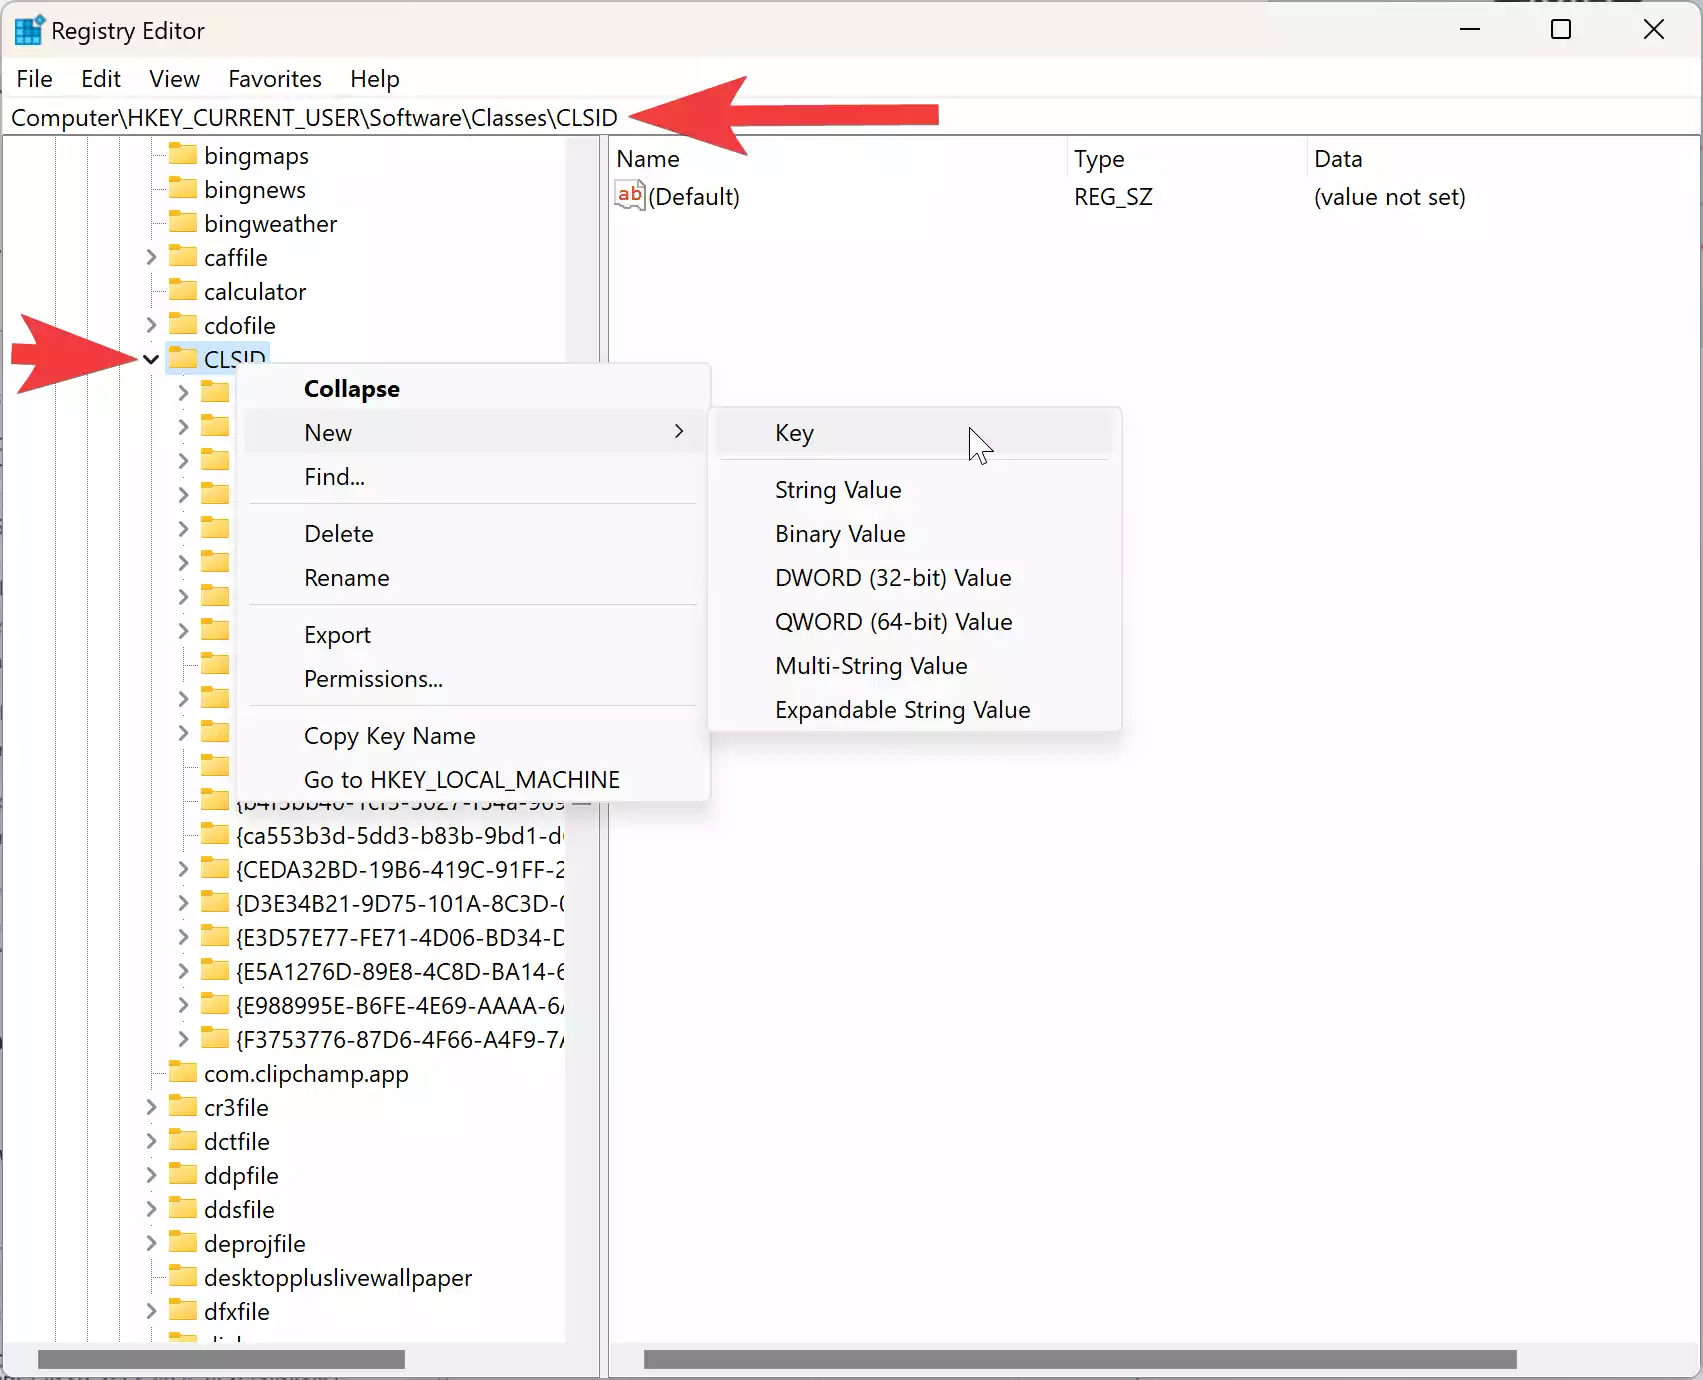
Step 4. Now, you’ll need to create new registry keys to enable the classic context menu. For that, right-click on the “CLSID” key and select “New” from the context menu, then choose “Key.”
Step 5. Name the new key “{86ca1aa0-34aa-4e8b-a509-50c905bae2a2}” and press Enter.

Step 6. Again, right-click on the newly created key and select “New” > “Key.”
Step 7. Name the new key “InprocServer32” and press Enter.
Step 8. After creating the necessary registry keys, you’ll need to set their values to enable the classic context menu. For this, double-click on the “(Default)” REG_SZ on the opposite side of the “InprocServer32” key you just created, and without making any changes, just click “OK” to save the changes.

Step 9. Restart your computer to apply the changes made to the registry. This step is crucial for the classic context menu to take effect.
Once your computer has restarted, verify that the classic context menu has been restored. Right-click on the desktop, a file, or a folder in File Explorer to confirm that the classic context menu appears instead of the modern one.
If you ever wish to revert to the modern context menu, simply follow the same instructions outlined above and delete the “{86ca1aa0-34aa-4e8b-a509-50c905bae2a2}” key and its contents.
Method 2: Using Command Prompt
The fastest method to restore the classic context menu involves accessing the Command Prompt. Follow these instructions:-
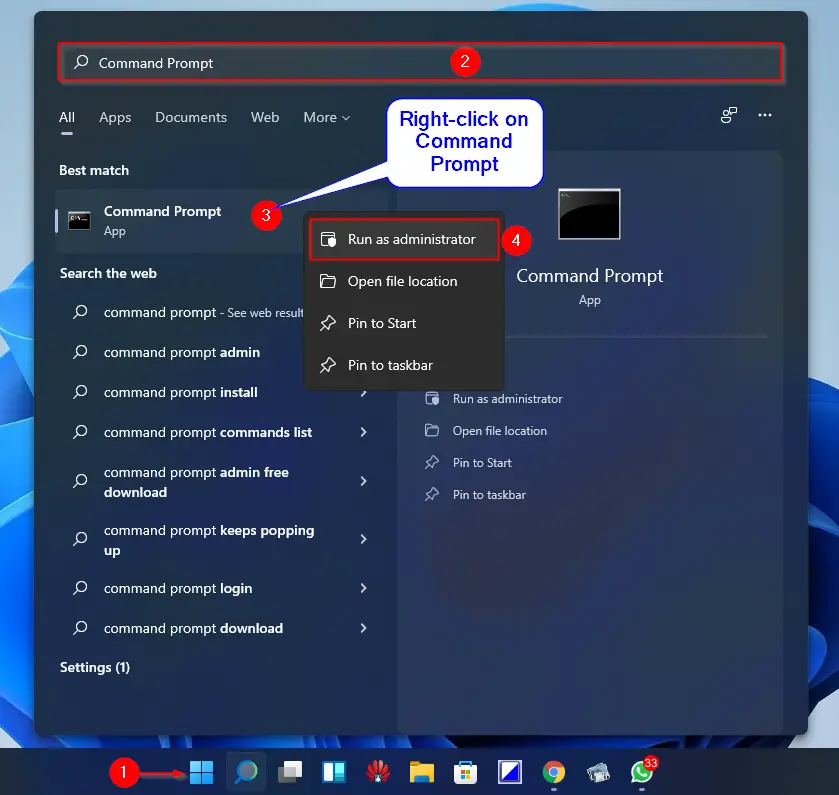
Step 1. Open Command Prompt as Administrator. To do that, press the “Windows” key on your keyboard. In the search bar, type “Command Prompt.” Right-click on “Command Prompt” from the search results. Select “Run as administrator.”
Step 2. In the Command Prompt window, type the following command and press “Enter“:-
reg add "HKCU\Software\Classes\CLSID\{86ca1aa0-34aa-4e8b-a509-50c905bae2a2}\InprocServer32" /f /ve
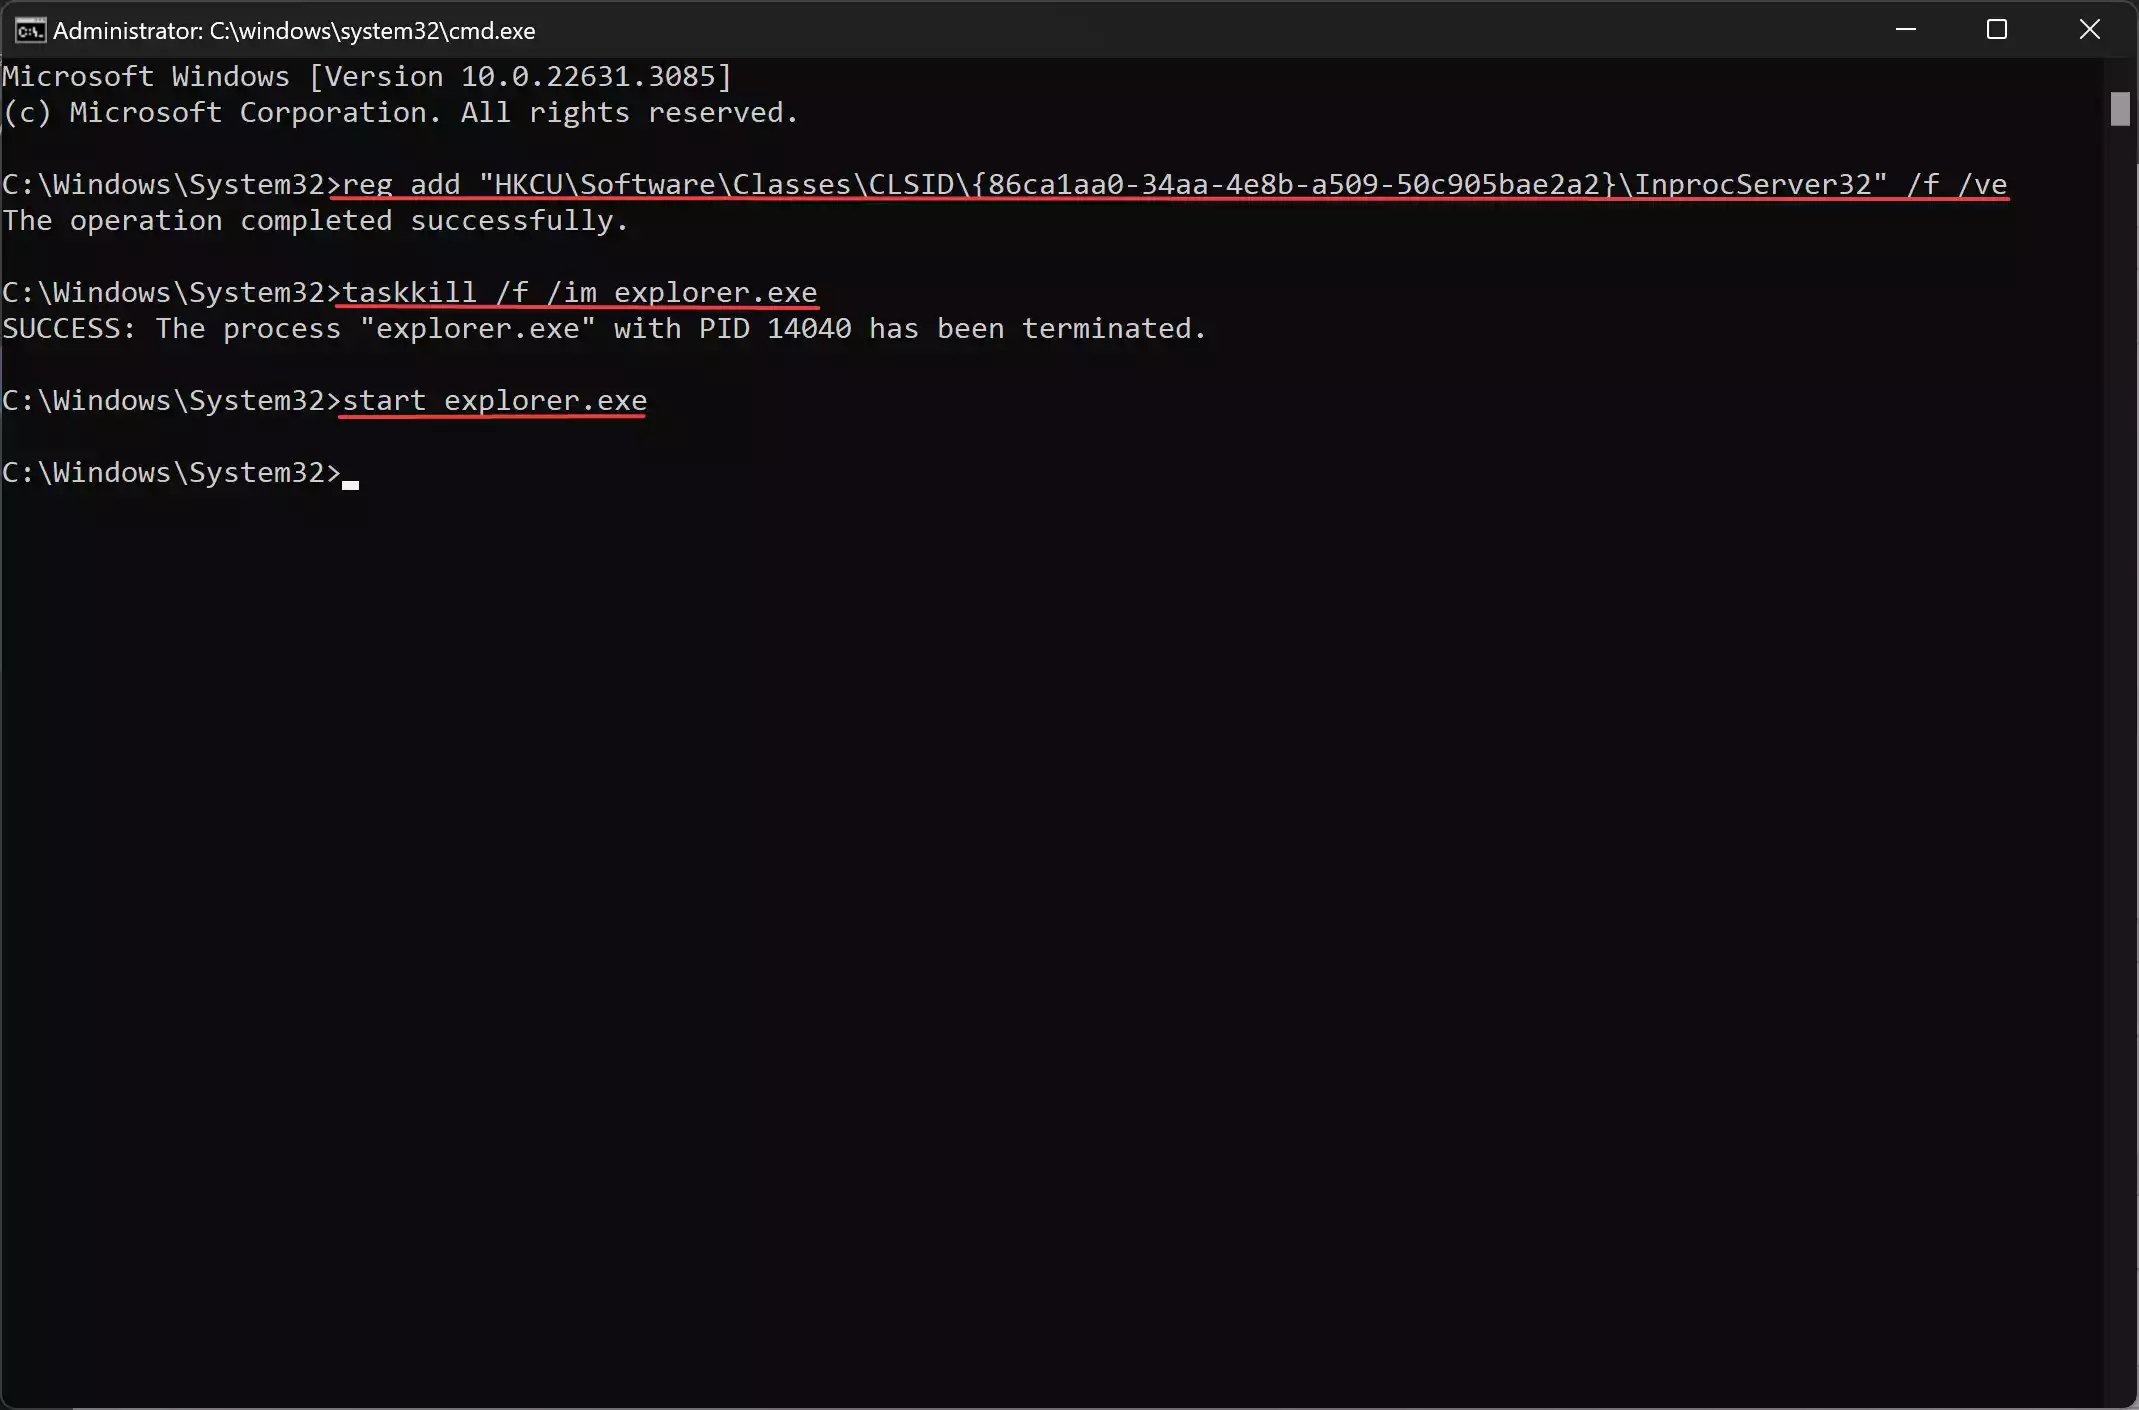
Step 3. Type the following command to close File Explorer and press “Enter“:-
taskkill /f /im explorer.exe
Step 4. Type the following command to start File Explorer and press “Enter“:-
start explorer.exe
If you want to revert the changes, use the same instructions as outlined above, but in step 2, run the reg delete “HKCU\Software\Classes\CLSID\{86ca1aa0-34aa-4e8b-a509-50c905bae2a2}” command instead.
Conclusion
Restoring the classic context menu on Windows 11 provides users with a familiar interface and access to a wider range of options. By following the step-by-step guide outlined above, you can seamlessly switch between the modern and classic context menus based on your preferences. Whether you prefer the sleek design of Windows 11’s modern context menu or the functionality of the classic menu, Windows 11 offers the flexibility to choose what works best for you.
