Printing is an essential task for many users on their Windows 11 computers. However, printing issues may sometimes arise for various reasons, including incorrect printer port settings. Changing the printer port settings can often resolve the issue if your printer is not printing correctly or giving you error messages. In this article, we will guide you on how to change the printer port to fix printing issues in Windows 11.
What is a Printer Port?
A printer port is a communication channel that connects a computer to a printer. It can be either a physical port, such as a USB or parallel port, or a virtual port, such as a network or Bluetooth port. The printer port setting tells the computer which port to use to communicate with the printer. Incorrect or outdated port settings can cause printing problems and errors.
How to Change Printer Port in Windows 11?
Follow these simple steps to change the printer port in Windows 11:-
Step 1. Click on the Windows icon on the taskbar to open the Start menu.
Step 2. Type “Printers & scanners” in the search bar and select the first option. This will open the “Printers & scanners” settings page.
Step 3. Find the printer you want to modify and click on it.
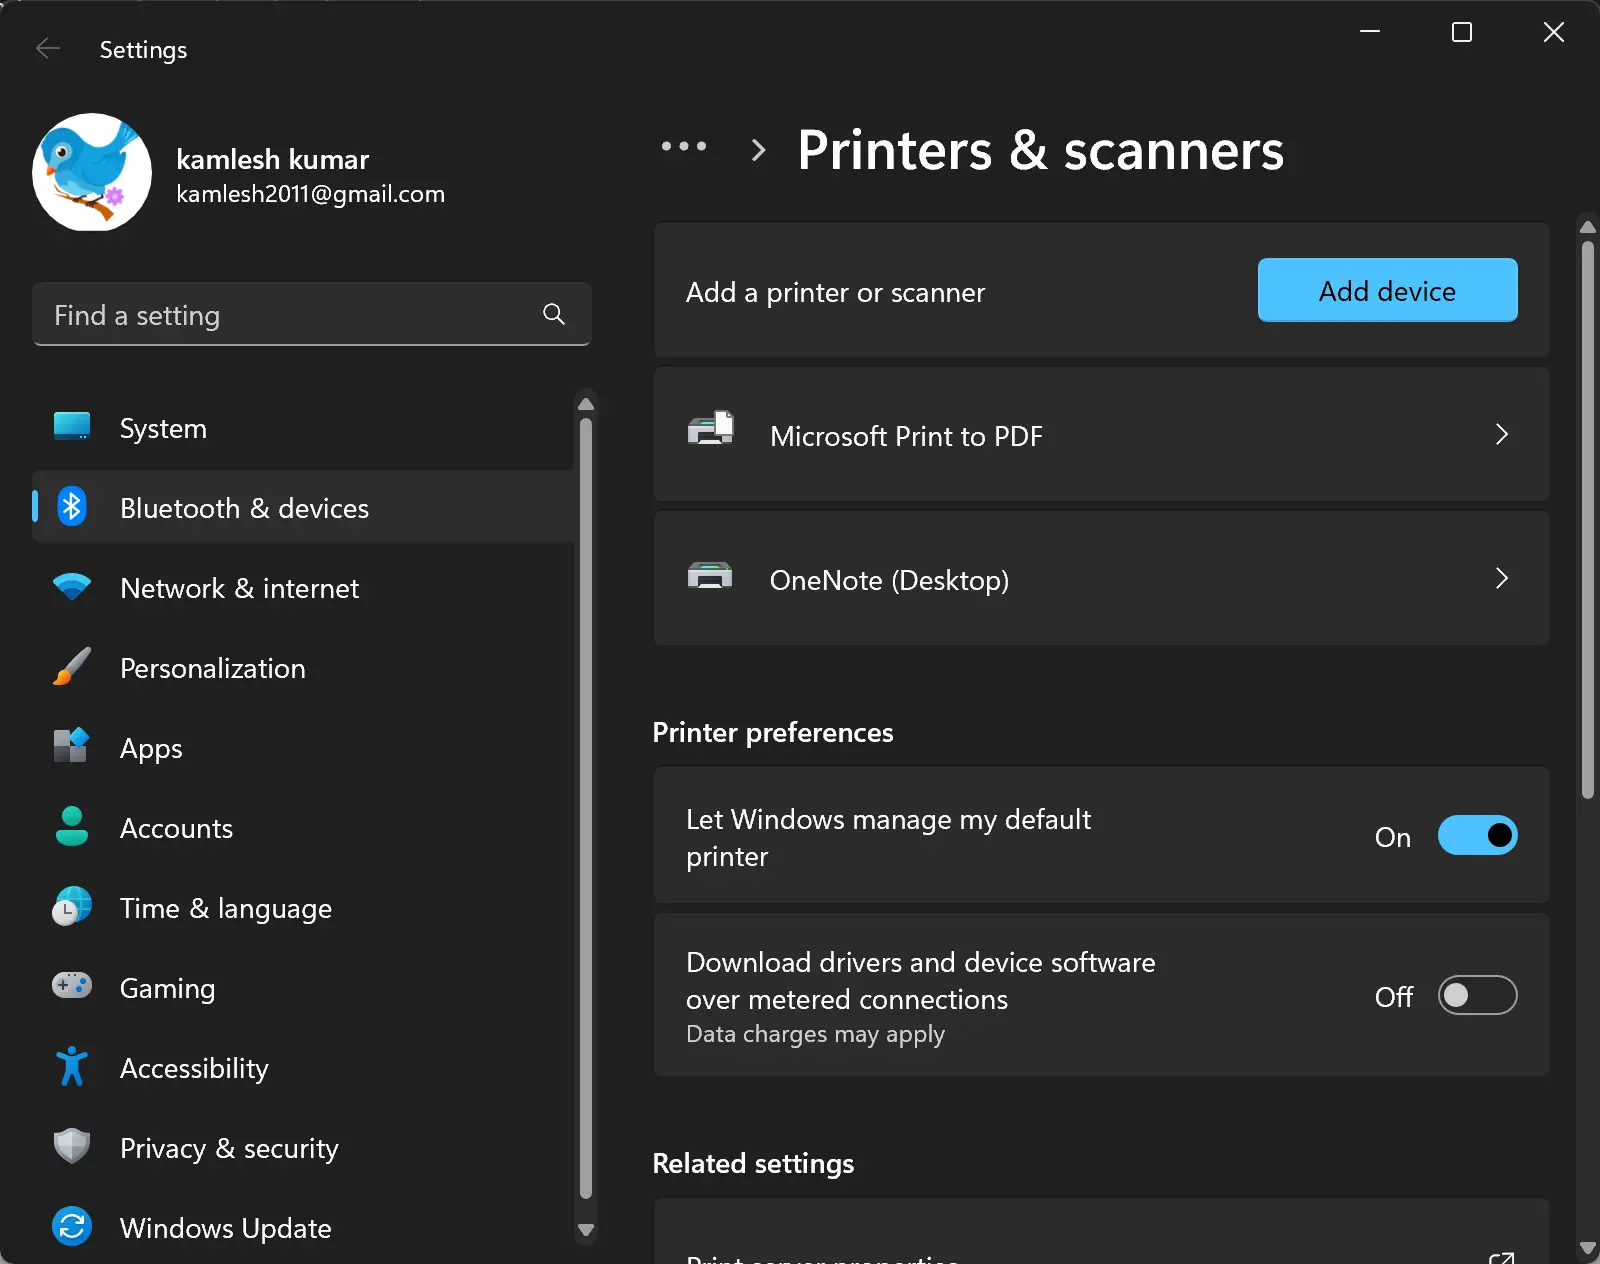
Step 4. Select “Printer Properties.”
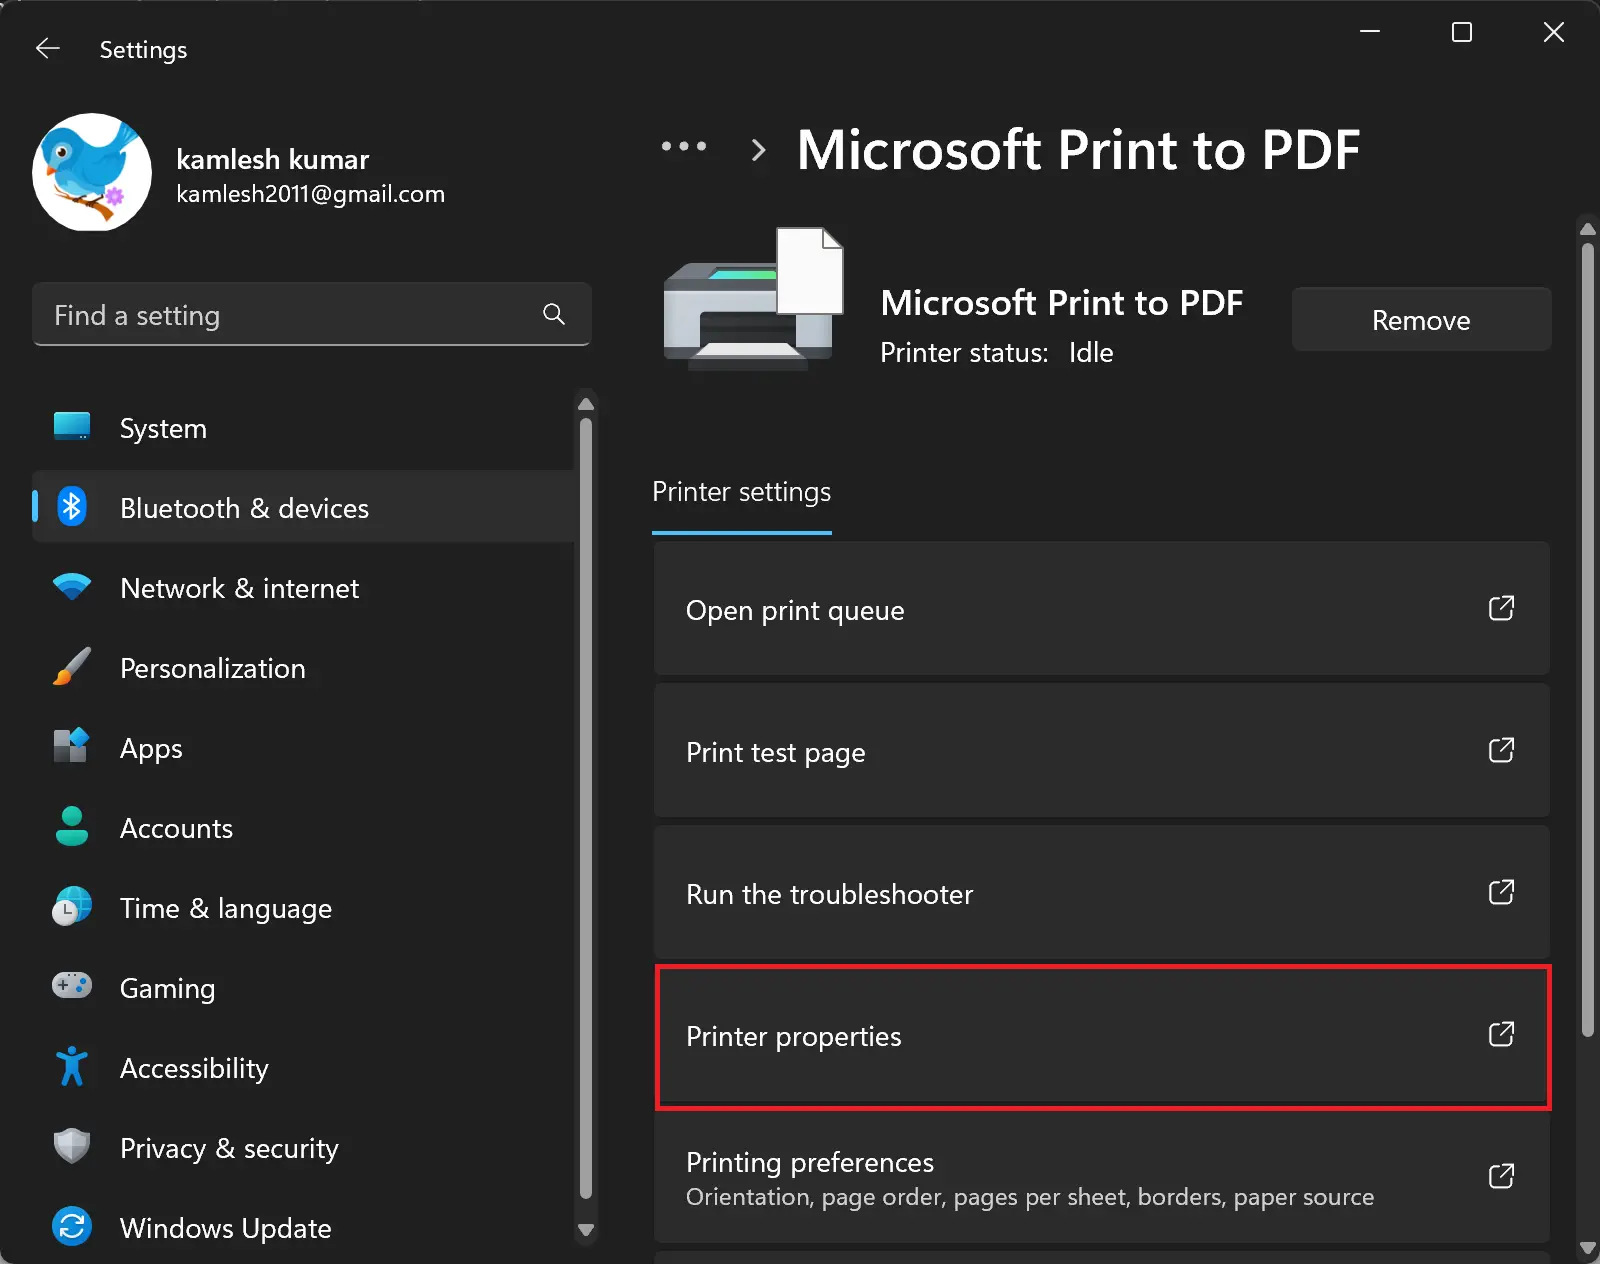
Step 5. In the Printer Properties window, click on the “General” tab.
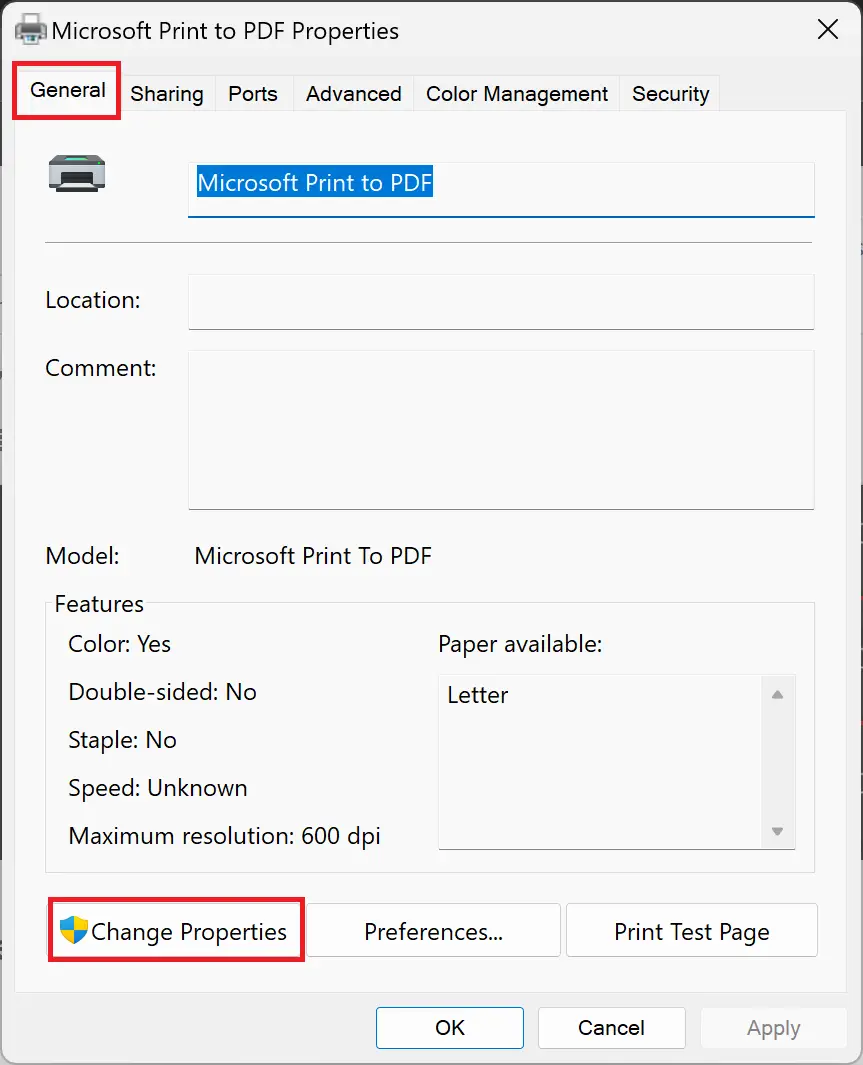
Step 6. Click on the “Change Properties” button.
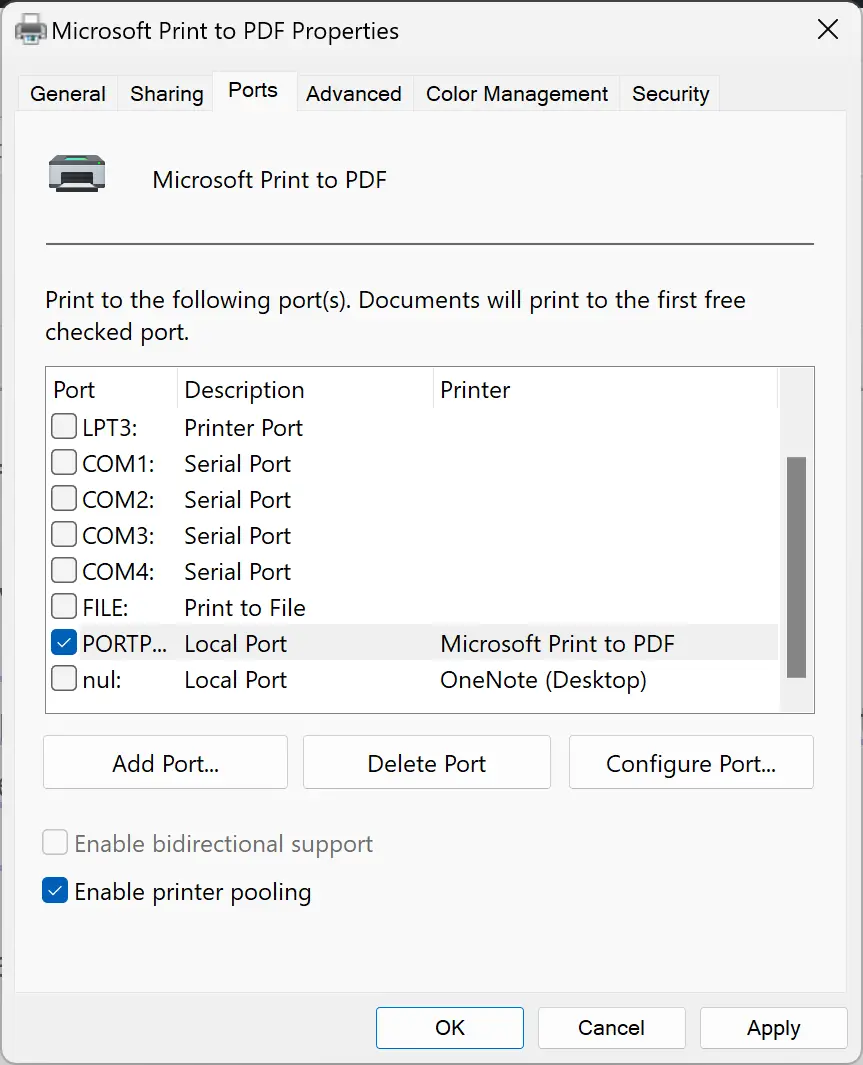
Step 7. Switch to the Ports tab.
Step 8. Select the correct port for your printer from the list of available ports.
Note: The NUL port is generally used for testing, while the Local port is mainly for virtual printers, such as XPS. It is recommended to assign a standard TCP/IP port to your physical printer to ensure proper functionality. If the existing TCP/IP port points to the wrong IP address, simply delete that port and create a new TCP/IP port with the correct IP address, then assign it to your printer.
Step 9. Click on “Apply” and then click on “OK” to save the changes.
Once you have completed these steps, your printer should be configured to use the correct port, and you should be able to print without any issues.
How to Troubleshoot Printing Issues in Windows 11?
If changing the printer port settings does not resolve your printing issue, there are a few additional troubleshooting steps you can take:-
Step 1. Make sure that your printer is turned on and connected to your computer.
Step 2. Check the printer driver and software to ensure they are current.
Step 3. Restart your computer and try printing again.
Step 4. Check the printer’s ink or toner levels and replace them if necessary.
Step 5. Try printing a test page or a different document to see if the issue persists.
If these steps do not resolve the issue, you may need to contact your printer manufacturer’s customer support for further assistance.
Conclusion
Changing the printer port settings can often resolve printing issues in Windows 11. By following the steps outlined in this article, you can easily modify the printer port to ensure that your printer is correctly connected and communicating with your computer. If you continue to experience printing issues, there are additional troubleshooting steps you can take to resolve the issue. With a little bit of effort, you can ensure that your printer works seamlessly with your Windows 11 computer.