As we connect multiple printers to our Windows 11 computers over time, we may end up with unused printer ports cluttering our system. These unused ports can cause confusion and may even lead to printing issues. Therefore, it is important to periodically delete any unused printer ports from your computer to keep your system clean and running smoothly.
In this article, we will guide you on how to delete unused printer ports in Windows 11.
How to Delete Unused Printer Ports in Windows 11?
Method 1: Using Settings App
Step-by-Step Guide to Delete Unused Printer Ports in Windows 11:-
Step 1. First, click on the Windows icon on your taskbar to open the Start menu.
Step 2. Type “Printers & scanners” in the search bar and select the first option. This will open the “Printers & scanners” settings page.
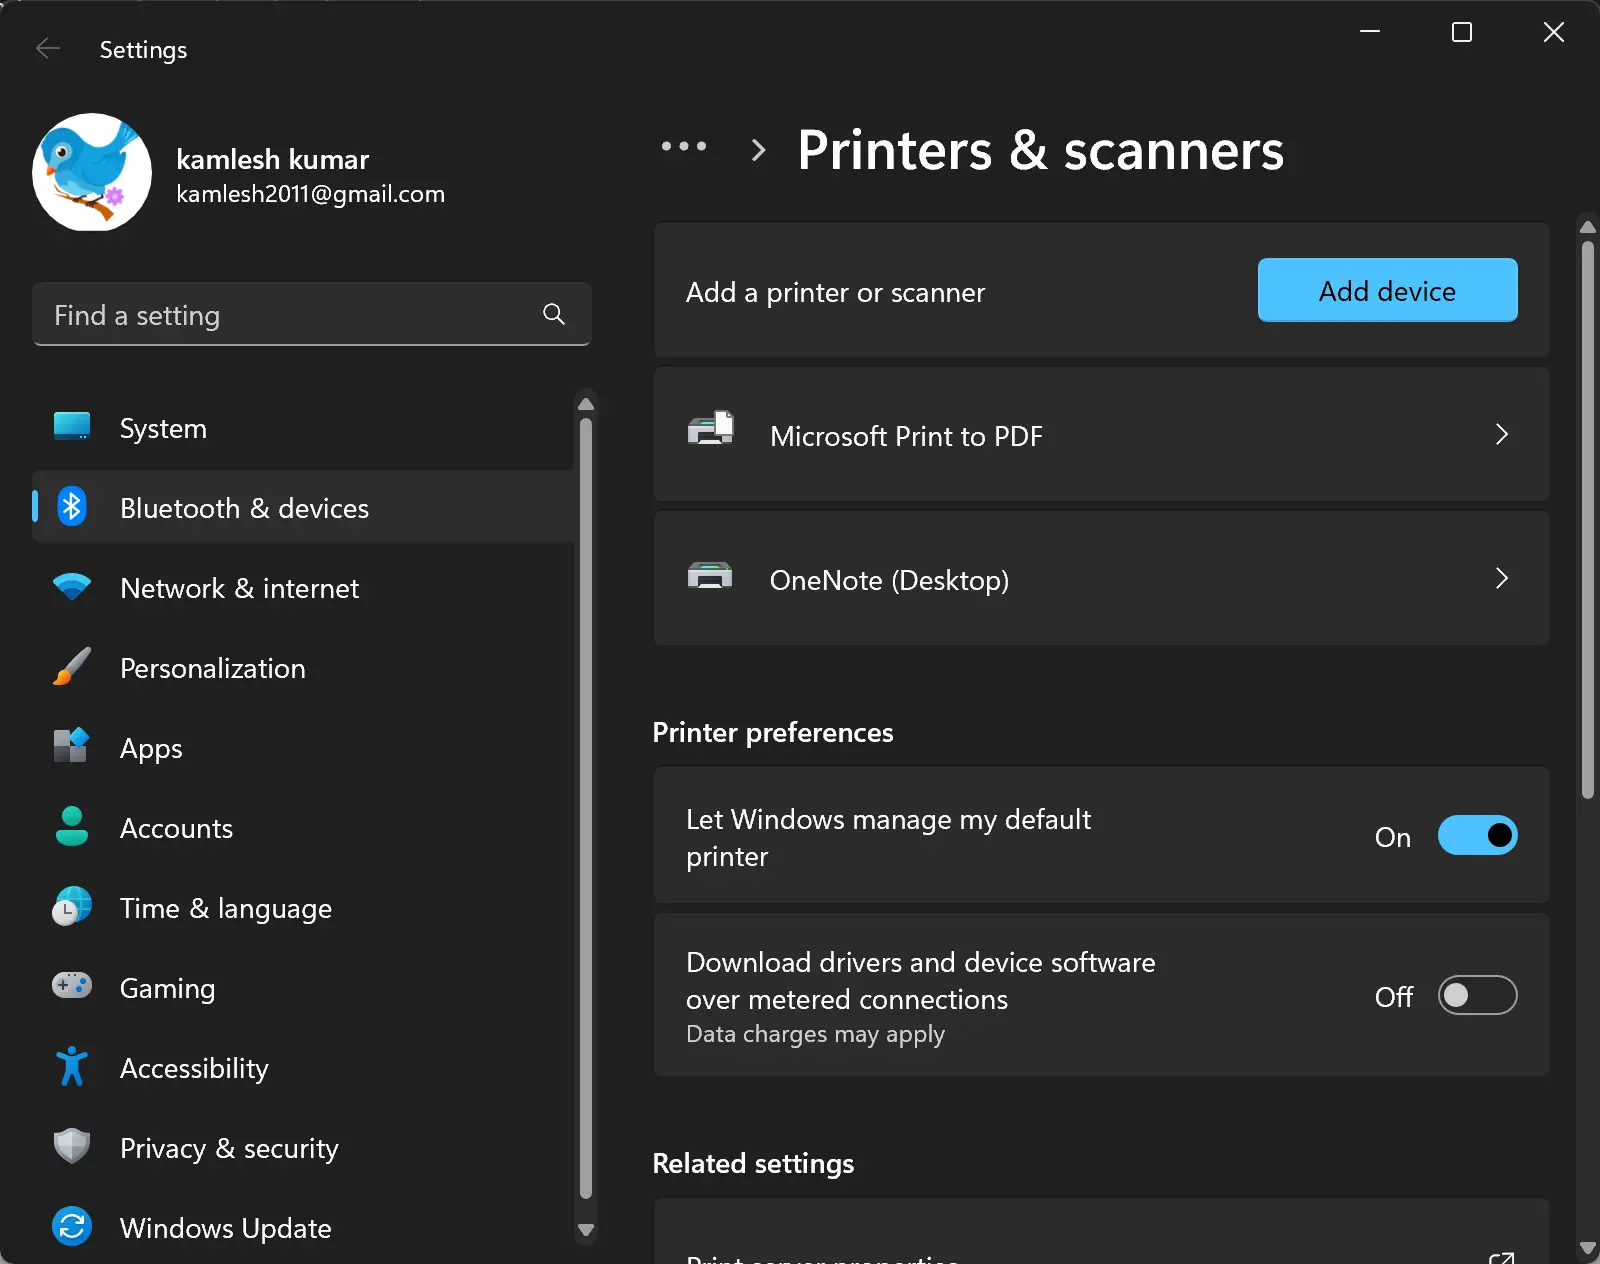
Step 3. In the “Printers & scanners” settings page, click on the “Print server properties” option located at the bottom of the window under the “Related settings” section.

Step 4. In the “Print Server Properties” window, navigate to the “Ports” tab.
Step 5. In the “Ports” tab, you will see a list of printer ports that are currently installed on your computer. Look for any ports that are not being used by any of your printers. To do this, you can simply check the “Printer” column and see if any of the printers are listed as using the port.
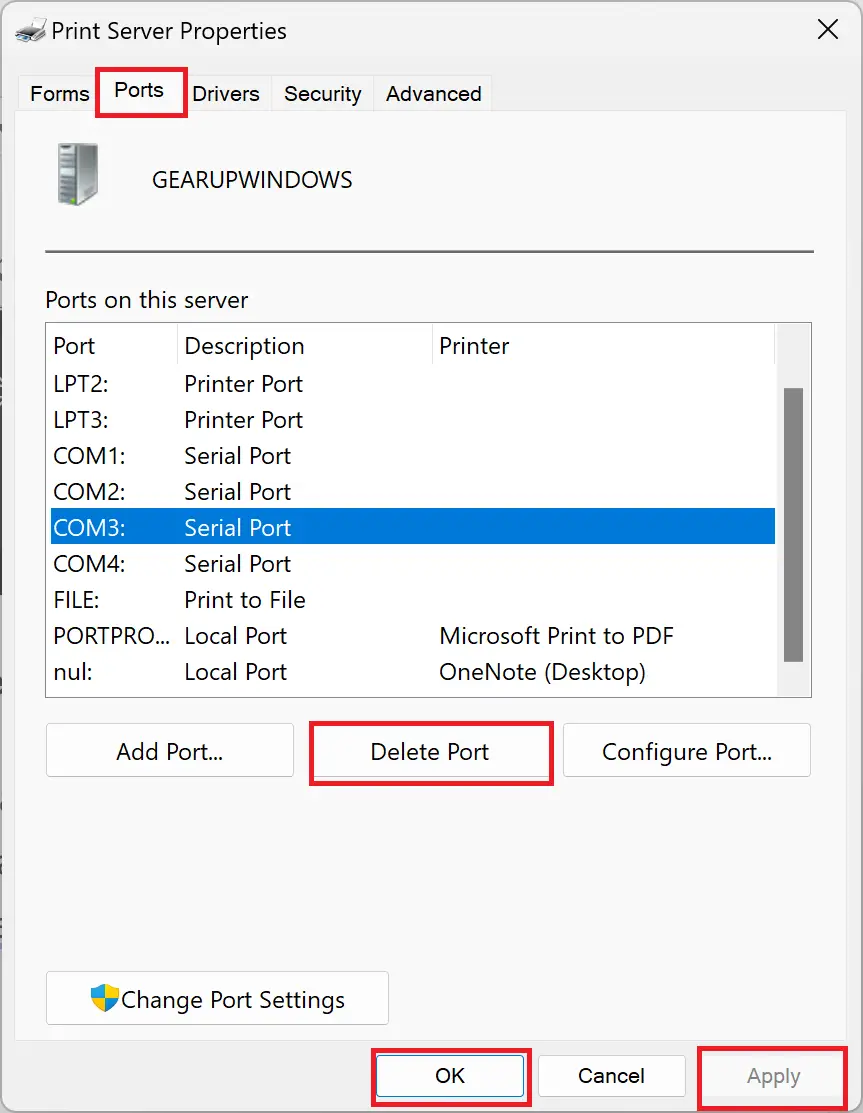
Step 6. Select the port from the list to delete an unused printer port and click on the “Delete port” button. You will be prompted to confirm the deletion, so make sure you have selected the correct port before proceeding. Click OK to confirm the deletion.
Note: Repeat this process for any additional unused printer ports you want to delete.
Step 7. Once you have deleted all the unused printer ports, click Apply.
Step 8. Close the “Print Server Properties” window by clicking on the “OK” button.
That’s it! You have successfully deleted any unused printer ports from your Windows 11 computer.
Method 2: Through Windows Terminal
Are you looking for a quick way to free up unused printer ports on your Windows 11 computer? Follow these easy steps to get started:-
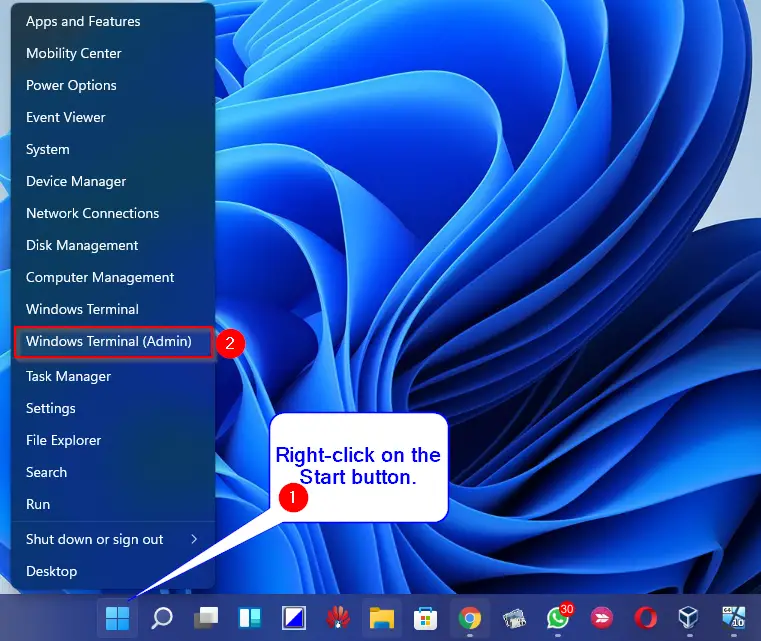
Step 1. Right-click on the Start button on your taskbar.
Step 2. Select “Terminal (Admin)/Windows Terminal (Admin)” from the pop-up menu to open a PowerShell window.
Step 3. Type in “Get-PrinterPort” and hit Enter. This will display a list of all the printer ports that are currently installed on your computer.
Step 4. Identify the name of the unused or old printer port that you want to delete, and write it down.
Step 5. To delete the printer port, execute the following command in PowerShell:-
Remove-PrinterPort -Name "your_port_name"
Note: Replace “your_port_name” with the actual name of the printer port you want to delete.
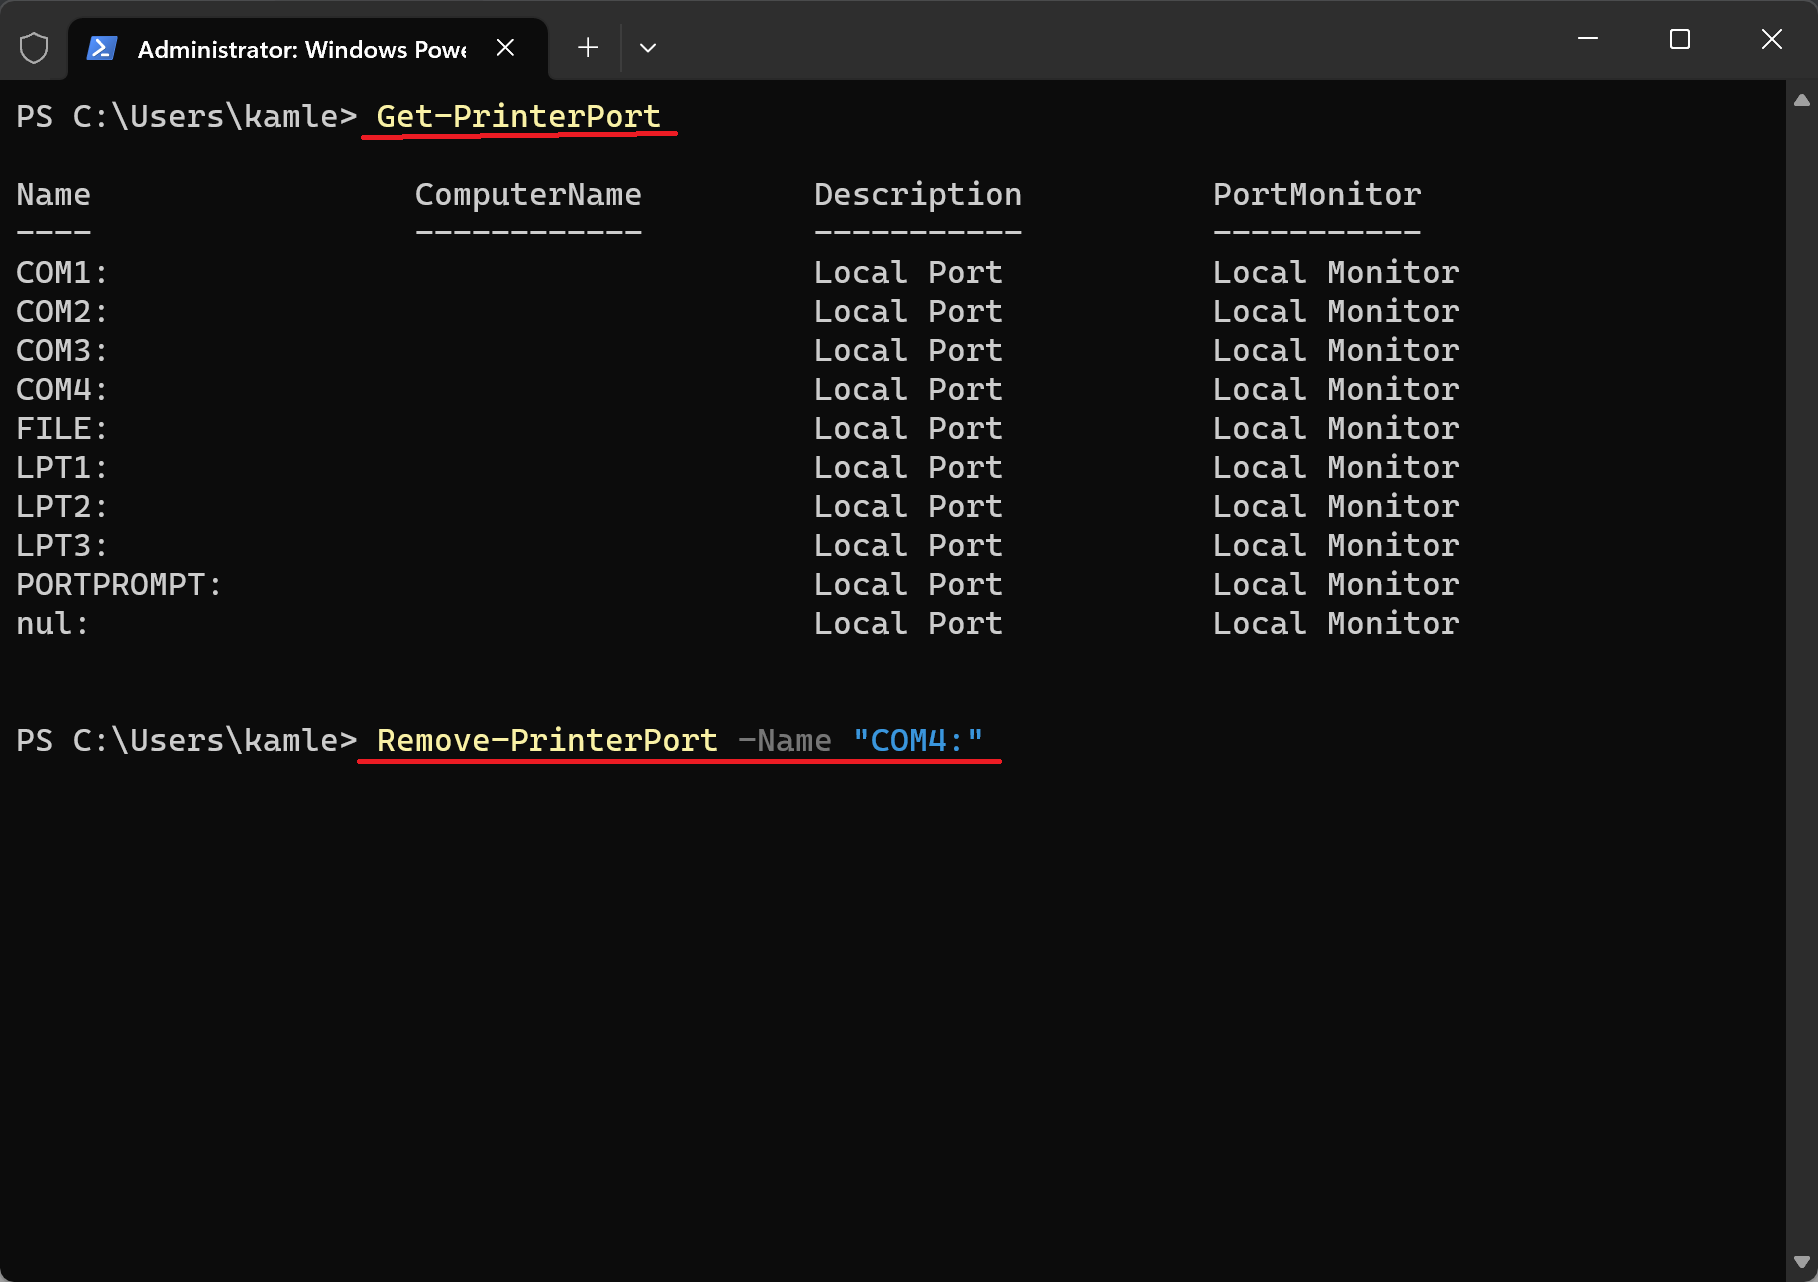
Step 6. Hit Enter, and the old printer port will be quickly freed up, ready to be used by another device.
Following these steps, you can easily delete unused printer ports and free up space on your Windows 11 computer.
Tips to Keep Your System Clean
- Regularly check and delete any unused printer ports to keep your system clean.
- Uninstall any printer software or drivers that you are no longer using.
- Use reliable antivirus software to protect your system from viruses and malware.
- Keep your Windows 11 system up-to-date with the latest updates and patches.
Conclusion
In conclusion, it is important to periodically delete unused printer ports from your Windows 11 computer to avoid printing issues and keep your system running smoothly. The article provided two methods to delete these ports – through the Settings app and Windows Terminal – and also offered tips to keep your system clean, such as uninstalling unused printer software or drivers and using reliable antivirus software. By following these steps, you can maintain a clean and efficient Windows 11 system.