If you frequently take screenshots in Windows 11 or 10 using a standard built-in shortcut, Microsoft allows you to move your Screenshots folder to a new location. You can capture screenshots using Windows + Print Screen on a Windows machine. When you do so, Windows saves them automatically in a special “Screenshots” folder that is located at “C:\Users[User Name]\Pictures\Screenshots.”
However, if your “C” drive is running out of storage or due to some reason, if you want, you can change the default location on Windows 11/10. It is quite easy to move the screenshots folder in Windows 11 or 10. You can quickly set a new location as default for your Screenshots folder.
In this gearupwindows article, we will guide you on changing the default location of Screenshots on Windows 11 and 10.
How to Change Where Screenshots are Saved on Windows 11 and 10?
To relocate the screenshots folder in Windows 11 or 10, use the following steps:-
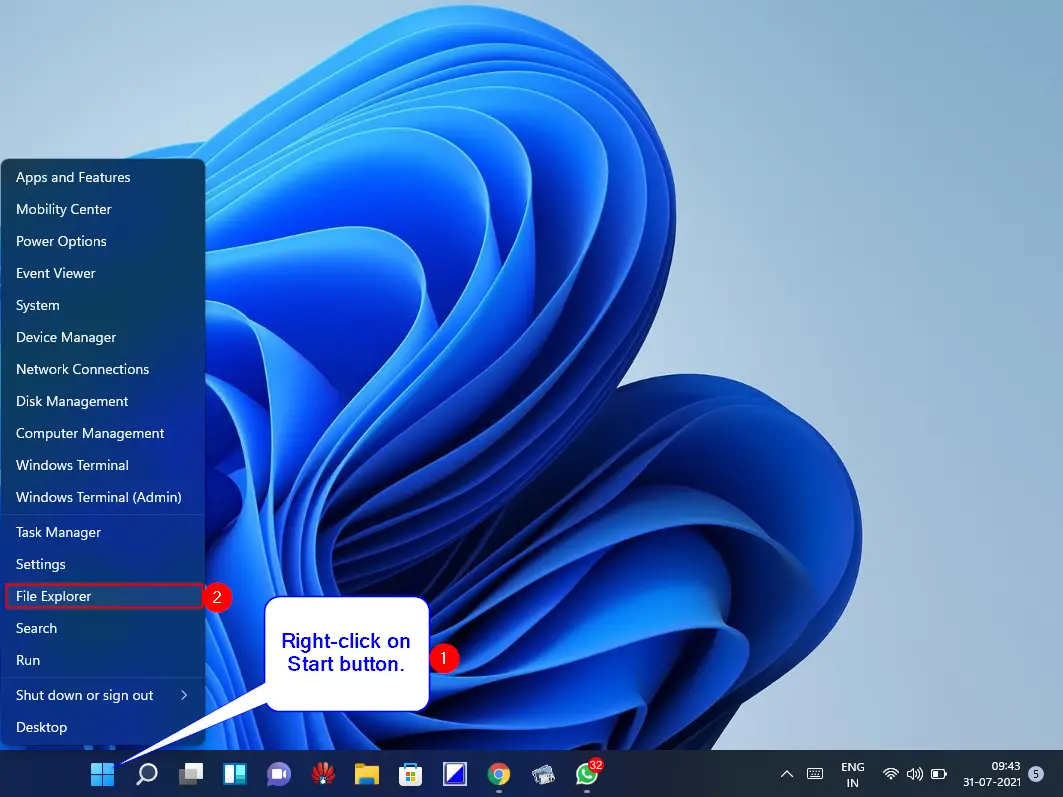
Step 1. First, open File Explorer.
To launch File Explorer on Windows 11 or 10, you can use the Windows + E keyboard shortcut. Alternatively, right-click the Start button and select File Explorer.
Step 2. When the File Explorer window appears on your computer, click Pictures in the left sidebar.
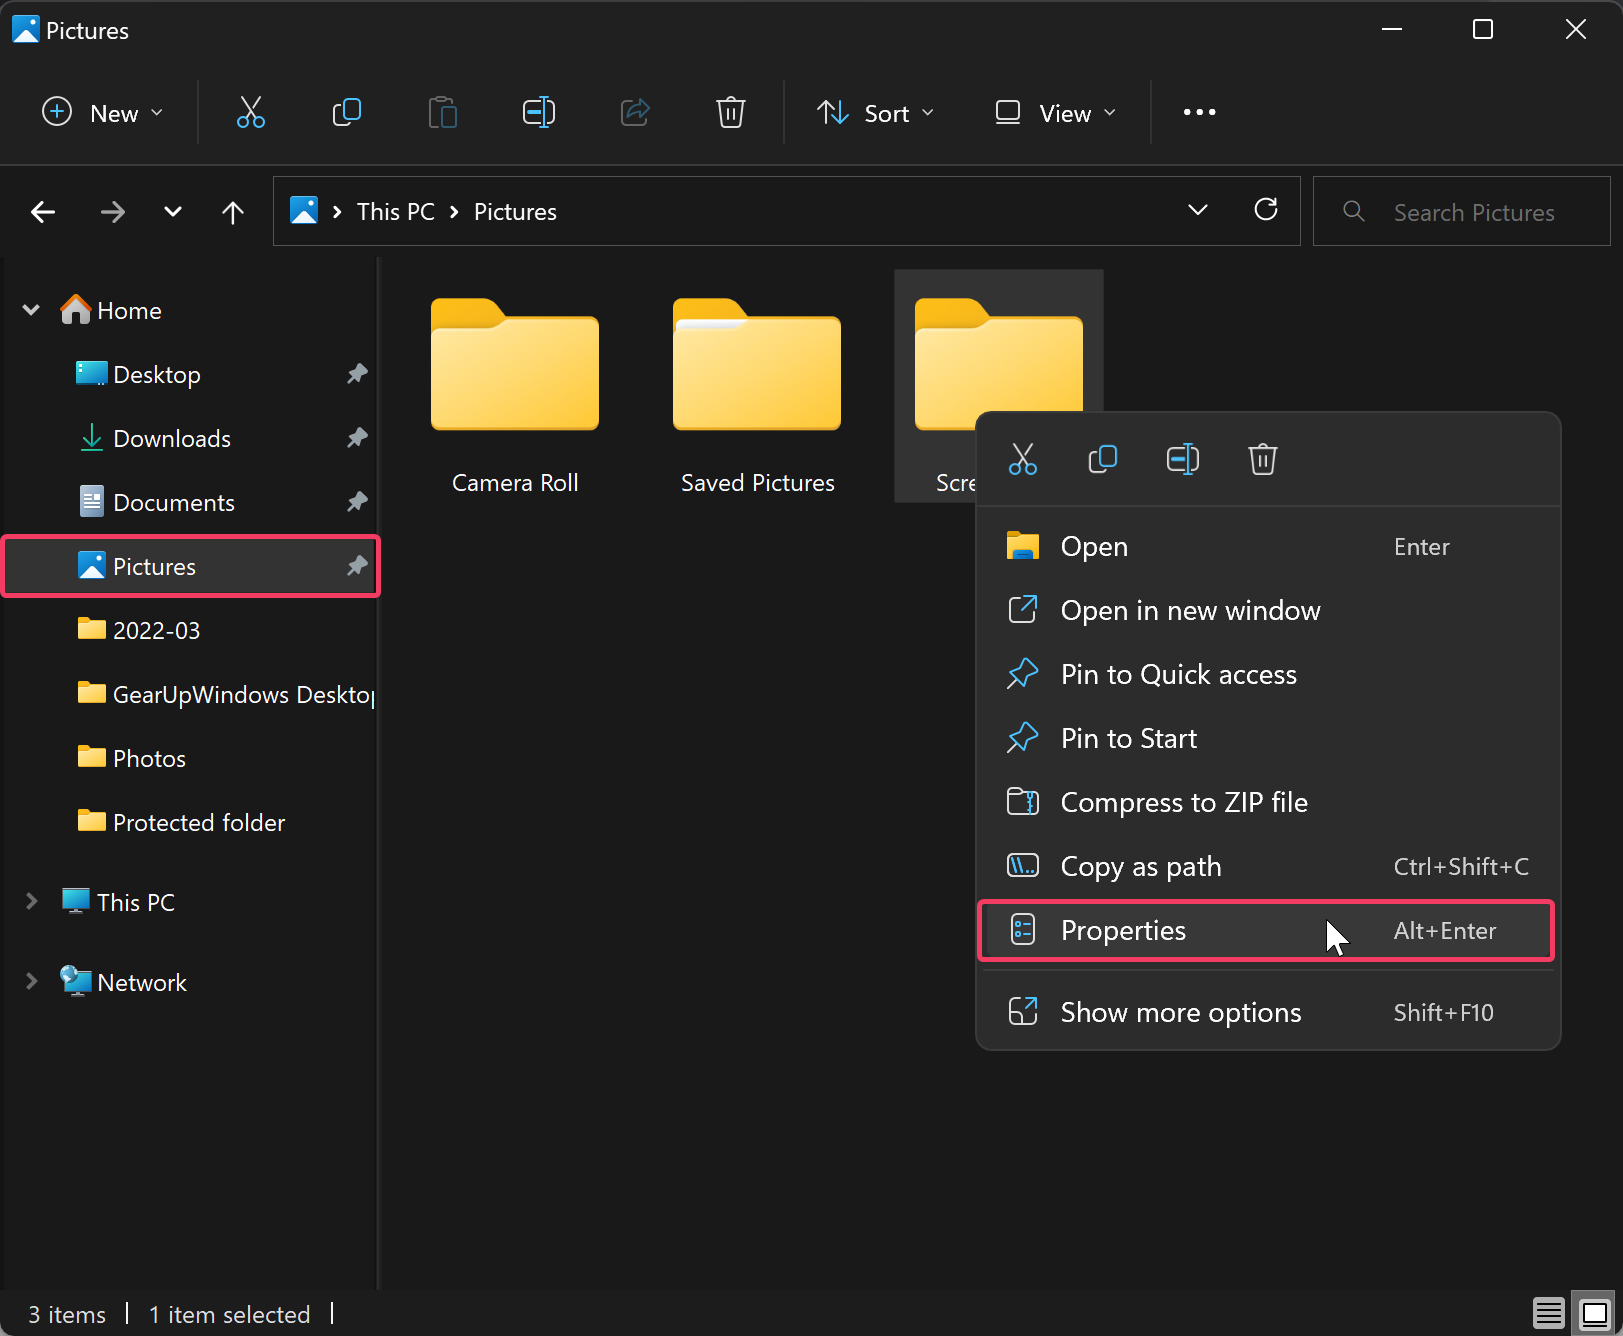
Step 3. On the right side, right-click on the Screenshots folder and select the Properties option in the menu that appears.
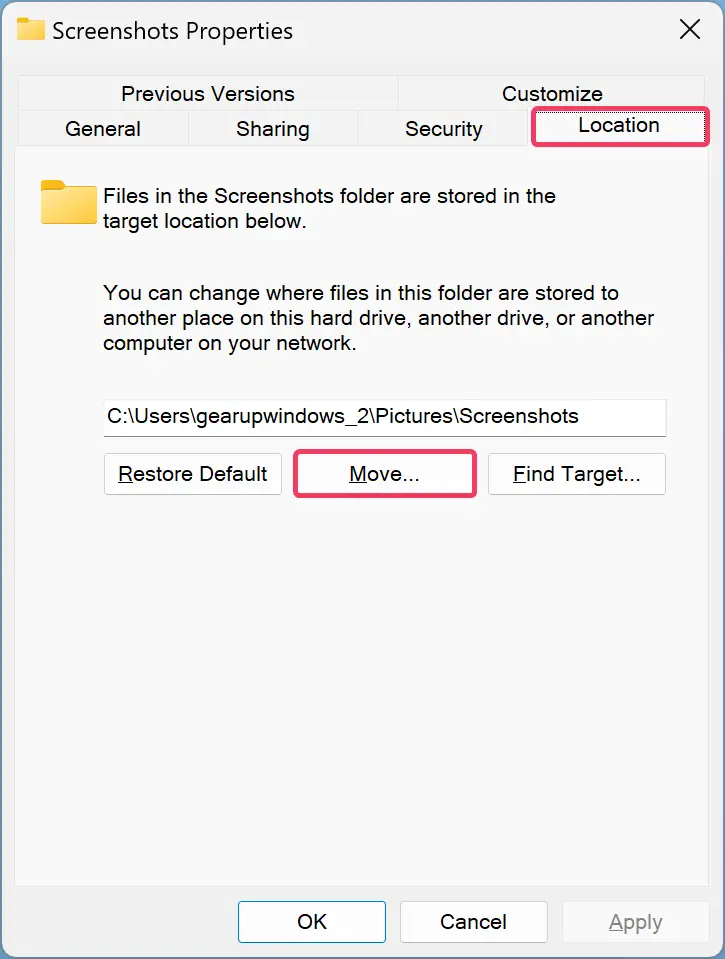
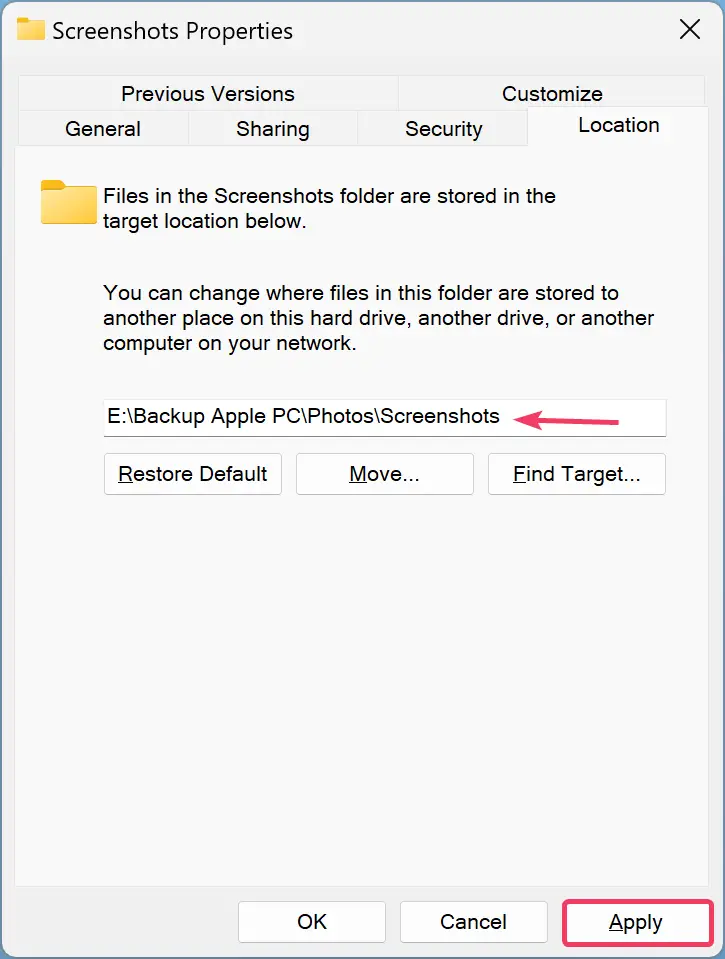
Step 4. In the “Screenshots Properties” dialog, switch to the Location tab and click the Move button.
Step 5. In the “Select a Destination” window, choose the location where you want to save the screenshots.
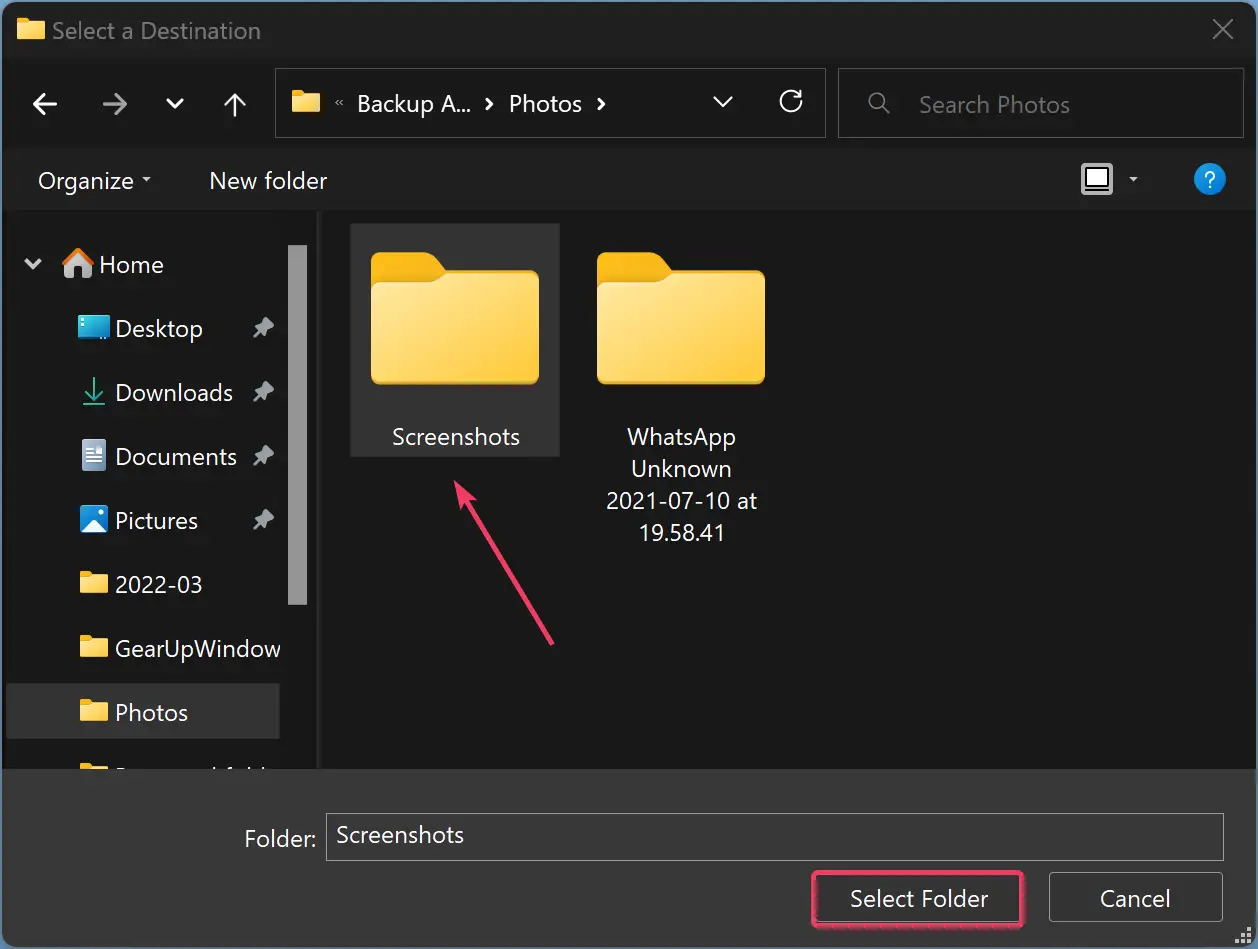
Step 6. Then, click the Select Folder button.
Step 7. Next, click Apply.
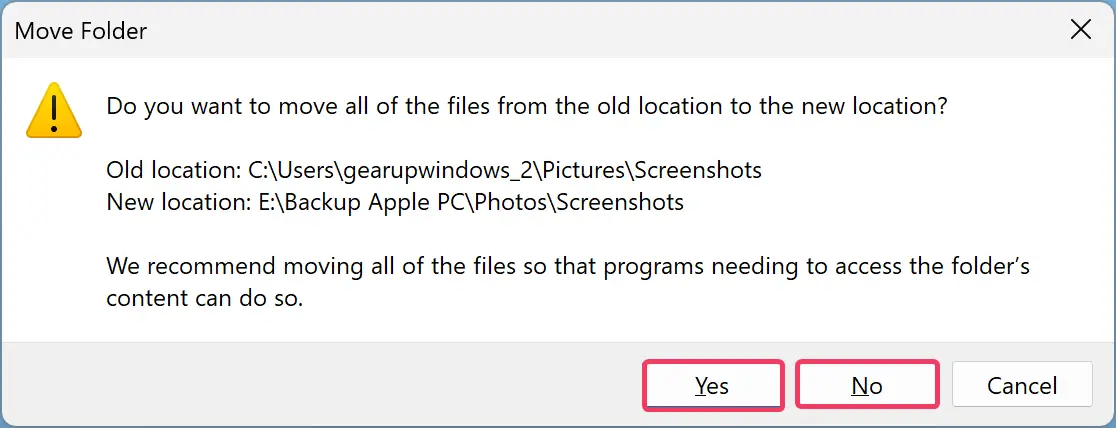
Step 8. When you’re done, Windows will ask if you want to move existing screenshot files to the new location; click Yes or No according to your choice.
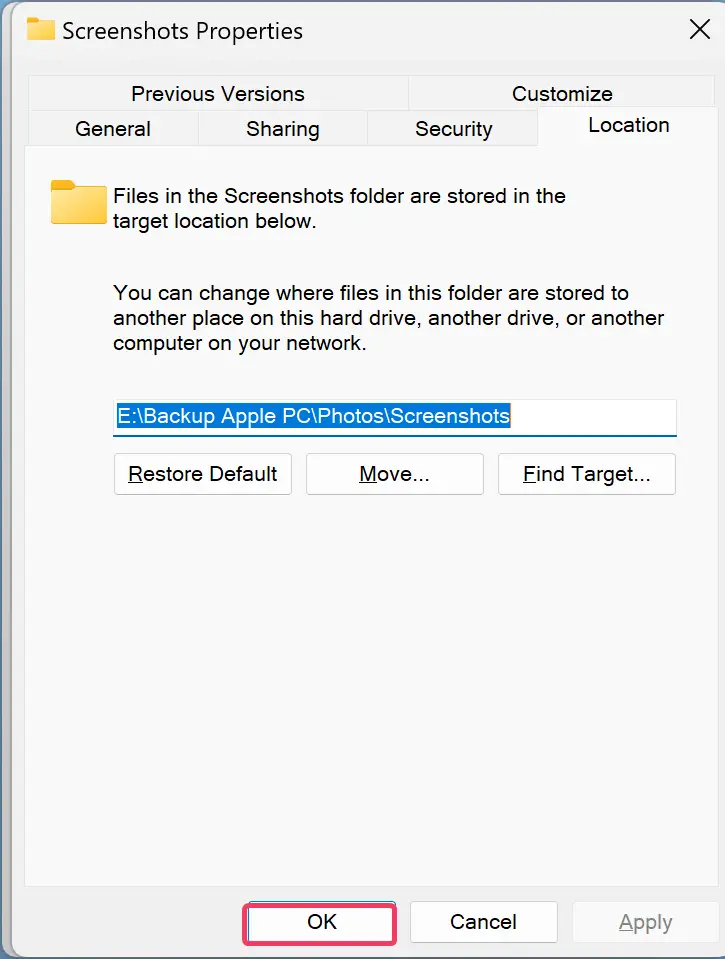
Step 9. Finally, click OK.
Once you complete the above steps, when you take a screenshot using Windows + Print Screen, it will be automatically saved in the new location.
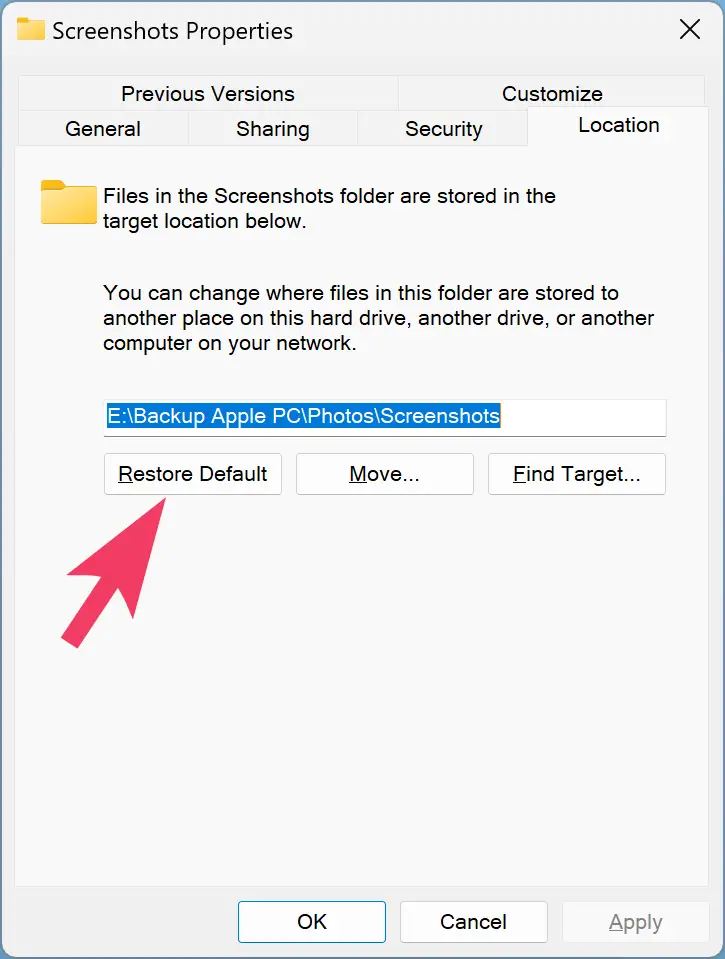
If you ever want to set the default location of the screenshots folder, browse to the new screenshot folder in File Explorer and right-click on that. Choose the Properties option and select the Location tab. Then click the Restore Default button.
That’s it.
Conclusion
In conclusion, changing the default location of Screenshots on Windows 11 and 10 is a straightforward process that can be completed in a few easy steps. By following the steps outlined in this guide, you can move the Screenshots folder to a new location of your choice, which can be particularly useful if your primary drive is running low on storage or for other reasons. Once you have set the new location, any new screenshots captured using the Windows + Print Screen shortcut will be automatically saved to the new location. If you ever need to restore the default location of the Screenshots folder, you can easily do so by following the steps provided in this guide.