How do I change my login picture on Windows 11? Do you don’t want to see a boring black-and-white Windows 11 profile picture? You can change or set your user account profile image to something else. Your account picture or profile picture is what you see on the Windows sign-in screen and the Start menu. When you create an account on your Windows 11 PC, it assigns a generic profile picture. However, it’s easy to change that to any image you want.
If you are using a Microsoft account that already has a picture associated with it, Microsoft sets your profile picture to the default user picture for Windows. In this gearupwindows article, we will show the steps to change or assign a picture to your user account profile. Whether you are using a local account or a Microsoft account, you can use this article steps to set or change your user profile picture.
How to Change a User Profile Picture in Windows 11?
On Windows 11, Local account profile pictures are controlled by the Settings app. That means you need to access the Settings app to set or change your account profile picture. You can also use this method to change your account profile picture for your Microsoft account.
Step 1. Open the Settings app.
To access the Settings app, click on the Start button from the Windows 11 Taskbar and then click Settings. However, if you prefer to use the keyboard shortcut to open the Settings app, then press the Windows + I keys simultaneously.
![]()
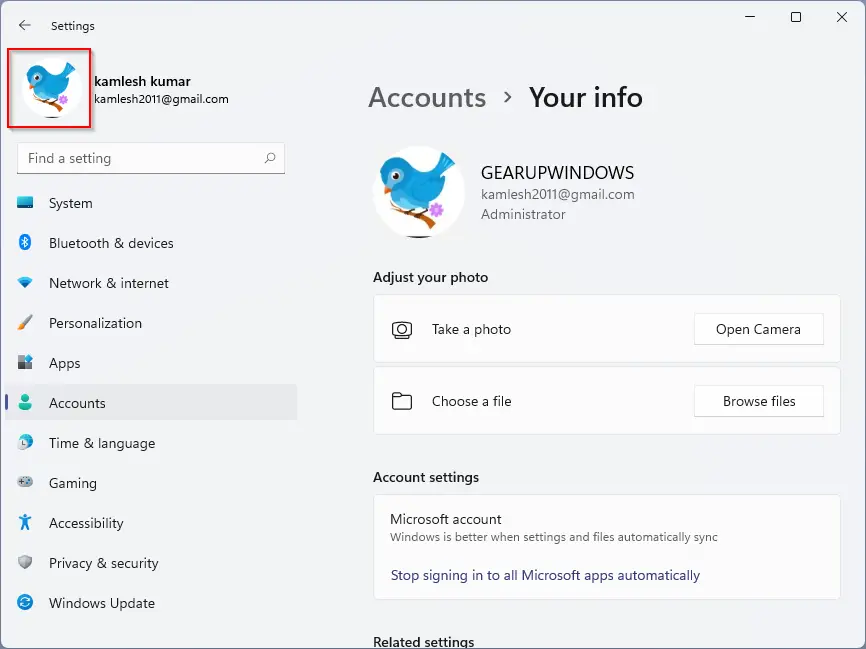
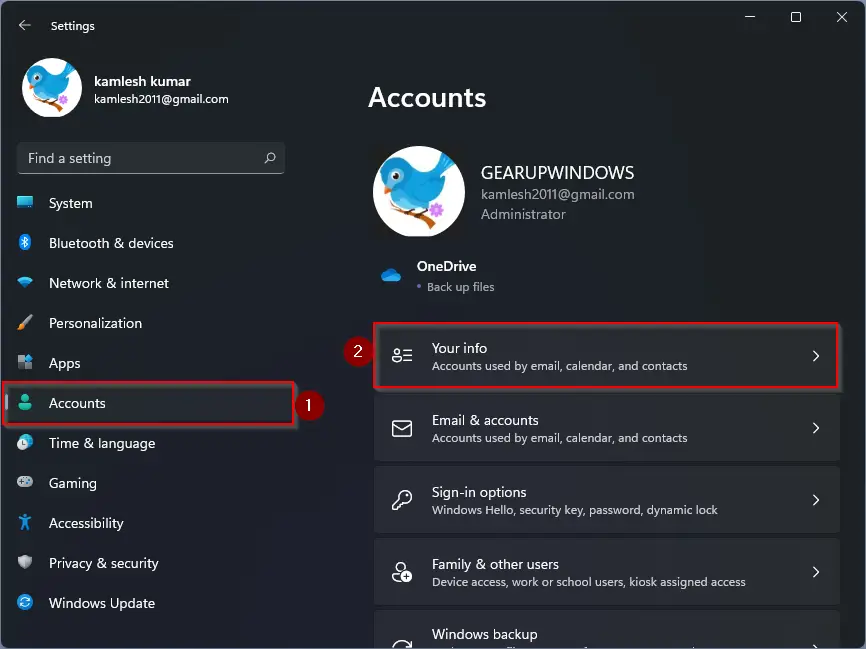
Step 2. In the Settings window left side, click on the Accounts category. On the right side of it, click on the Your info tab.
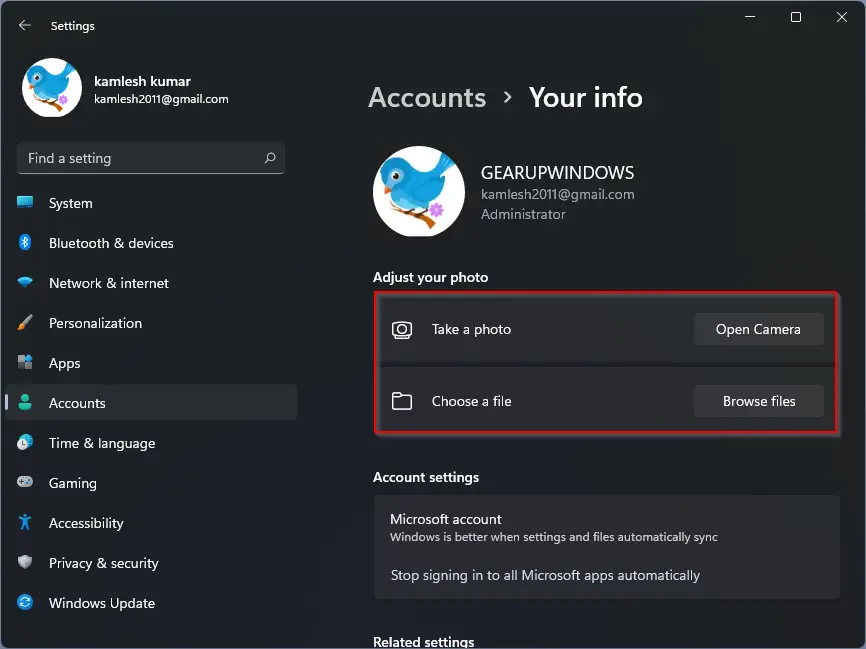
Step 3. In the “Adjust your photo” section, you will see two options to set your profile picture:-
- Take a photo – Click on the “Open Camera” button and take a photo to save it as a profile picture.
- Choose a file – This is handy when you don’t have an inbuilt camera on your computer or want to upload an image from your PC as a profile picture.
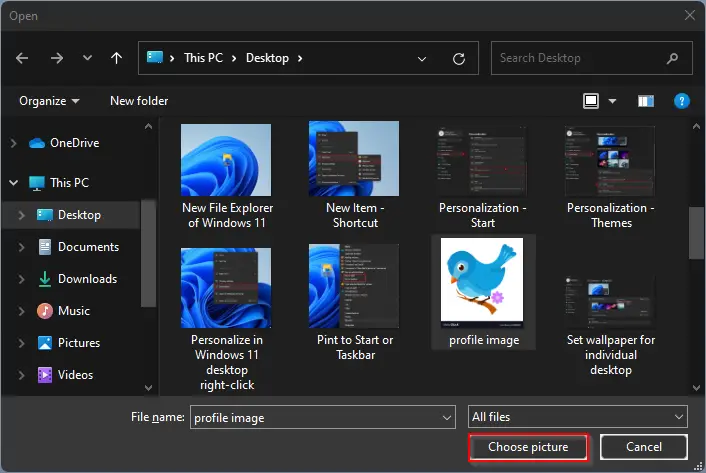
Step 4. If you prefer to upload an image from your PC, click the Browse files button next to Choose a file and select the photo from your computer. Finally, click on the Choose picture button to set or change your profile picture.
How to Change a User Profile Picture of a Microsoft Account in Windows 11?
This is another method to change or set a Microsoft account user profile picture in Windows 11. The change will apply across all Microsoft services where your profile picture is displayed. Since this process goes through a Microsoft server, it might take a little while for all sites and devices to display the new picture. You need to perform the following steps:-
Step 1. Login to your Microsoft account and then click the Your info button at the top of the page.
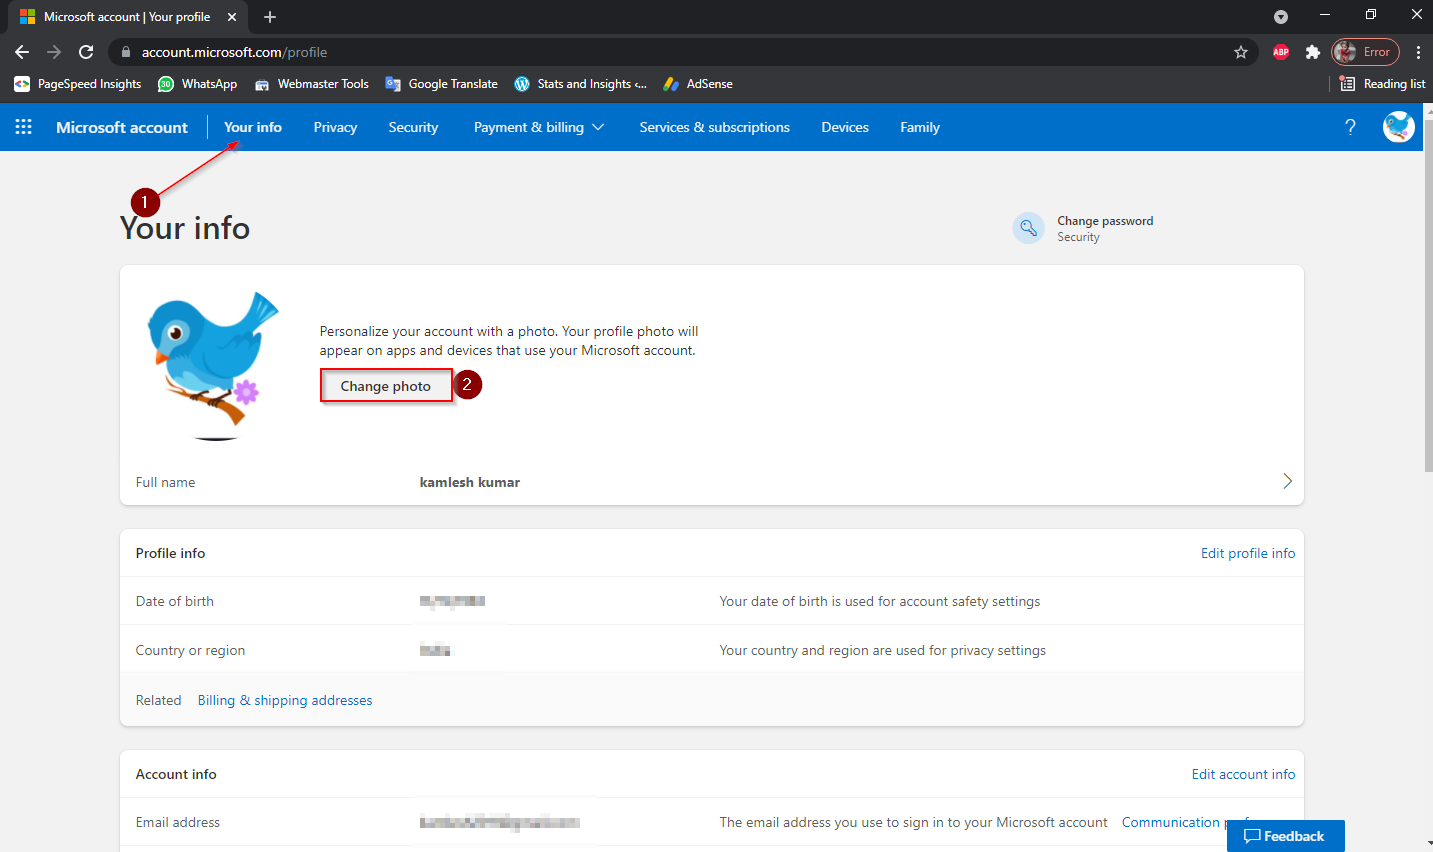
Step 2. Now, click the Change photo button.
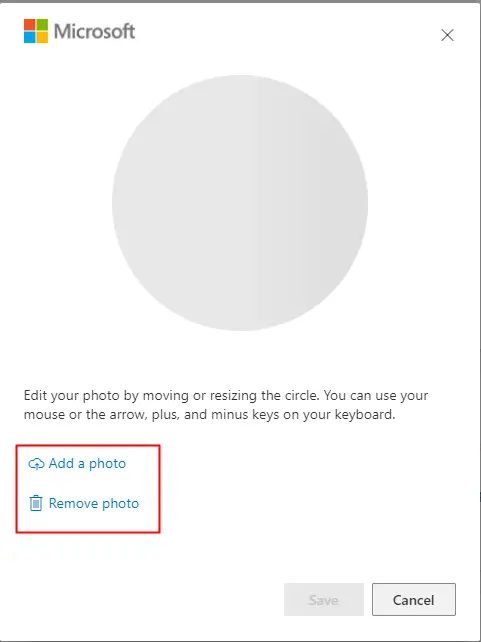
Step 3. A pop-up window will open. Here, you can add a new photo or remove an existing photo.
That’s all.
Conclusion
In conclusion, changing or setting your user account profile picture on Windows 11 is a simple process that can be done through the Settings app. Whether you are using a local account or a Microsoft account, you can follow the steps mentioned in this article to change your profile picture. With a new and personalized profile picture, you can add a touch of personality and creativity to your Windows 11 experience. So, don’t settle for the default profile picture and follow the steps to set or change your profile picture on Windows 11 today.
