Do you have some documents and want to transform them into PDF (Portable Document Format) form? If your answer is YES, then you are reading the right post. In this gearupwindows article, we will guide you on creating a PDF file in Windows 11.
Windows 11 does not only allow you to print a Notepad or Wordpad document into PDF. You can make a PDF file of any time of webpage or document that can be printed. All this is possible because of the built-in Microsoft Print to PDF feature.
Earlier, Microsoft had introduced the Microsoft XPS Document Writer printer that didn’t last long. Now, Microsoft has provided an alternative as PDF. Using this “Microsoft Print to PDF” virtual printer, you can create a PDF file of any document. You need to open the document and press Ctrl + P to invoke the Print dialog. Then select the built-in “Microsoft Print to PDF” printer and take your print as PDF. It’s that simple!
How to Print to PDF in Windows 11?
As stated above, you can create or convert any document/webpage into PDF format using Windows built-in ‘Print to PDF’ printer. There is no need to download and install a third-party application to make a PDF file. To do that, follow the steps below:-
Step 1. Depending on the app, you may find the Print option under the File menu. If not, press Ctrl + P on the keyboard to invoke the Print dialog. For instance, we want to print an XPS document as a PDF. So we opened it and then pressed Ctrl + P.
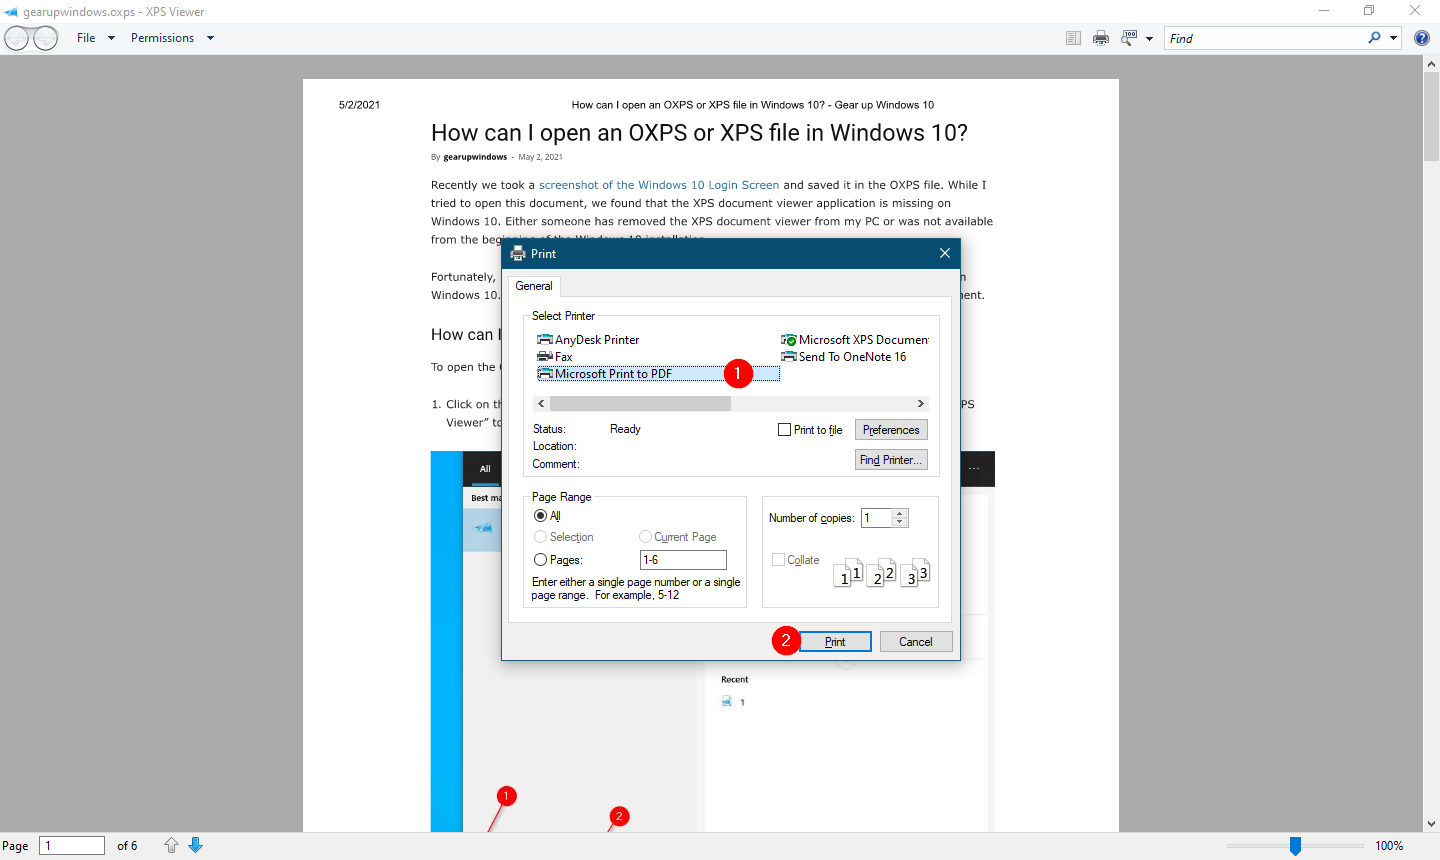
Step 2. After that, select Microsoft Print to PDF printer under the “Select Printer” section.
Step 3. Click on the Print button when you’re ready.
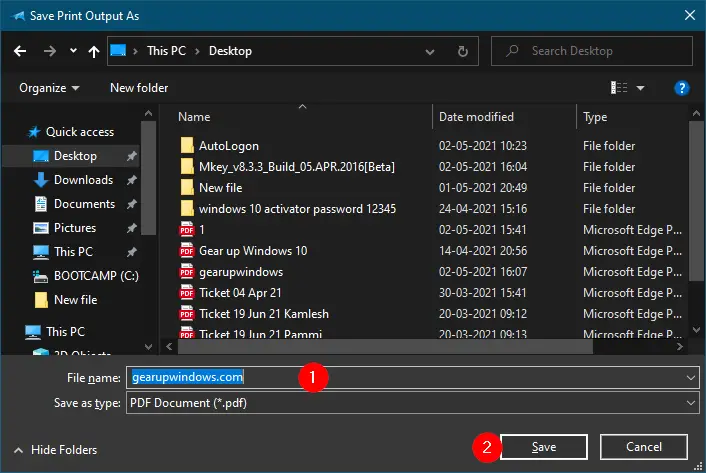
Step 4. Then select the file’s location and finally click on the Save button.
That’s all!!! Now, you will have a PDF document on your computer for your selected document. You can apply the same method to any other type of document or webpages.
Good luck.
Conclusion
In conclusion, converting documents into PDF format has never been easier with Windows 11’s built-in “Print to PDF” feature. This allows users to create PDF files of any document, webpage, or even images without the need for third-party applications. By following the simple steps provided in this article, you can easily create a PDF file by selecting the “Microsoft Print to PDF” printer from the Print dialog. The process is quick and efficient, and it ensures that your document retains its original format, regardless of the device or platform used to view it. With this capability, you can easily share and distribute documents that can be viewed on any device without worrying about compatibility issues.