A USB recovery drive is a crucial tool for any Windows 11 or Windows 10 user. It serves as a lifeline in case your operating system encounters issues or crashes. With a recovery drive at your disposal, you can repair your system, recover lost data, and troubleshoot problems effectively. In this guide, we’ll walk you through the step-by-step process of creating and using a USB recovery drive on Windows 11 or 10.
How to Create a USB Recovery Drive for Windows 11 or 10?
Creating a USB recovery drive is a straightforward process that requires minimal technical expertise. To get started, you’ll need a USB flash drive with a capacity of at least 8GB and access to a functioning Windows 11 or 10 computer. Here’s how to create a USB recovery drive:
Step 1. Insert the USB flash drive into an available USB port on your computer. Make sure it doesn’t contain any important data, as the process will erase everything on it.
Step 2. Open the Recovery Drive app.
To do that, simultaneously press the Windows key + R on your keyboard to open the Run command box. In the Run dialog that appears, type “RecoveryDrive” and then press OK. This action will immediately launch the Recovery Drive app.
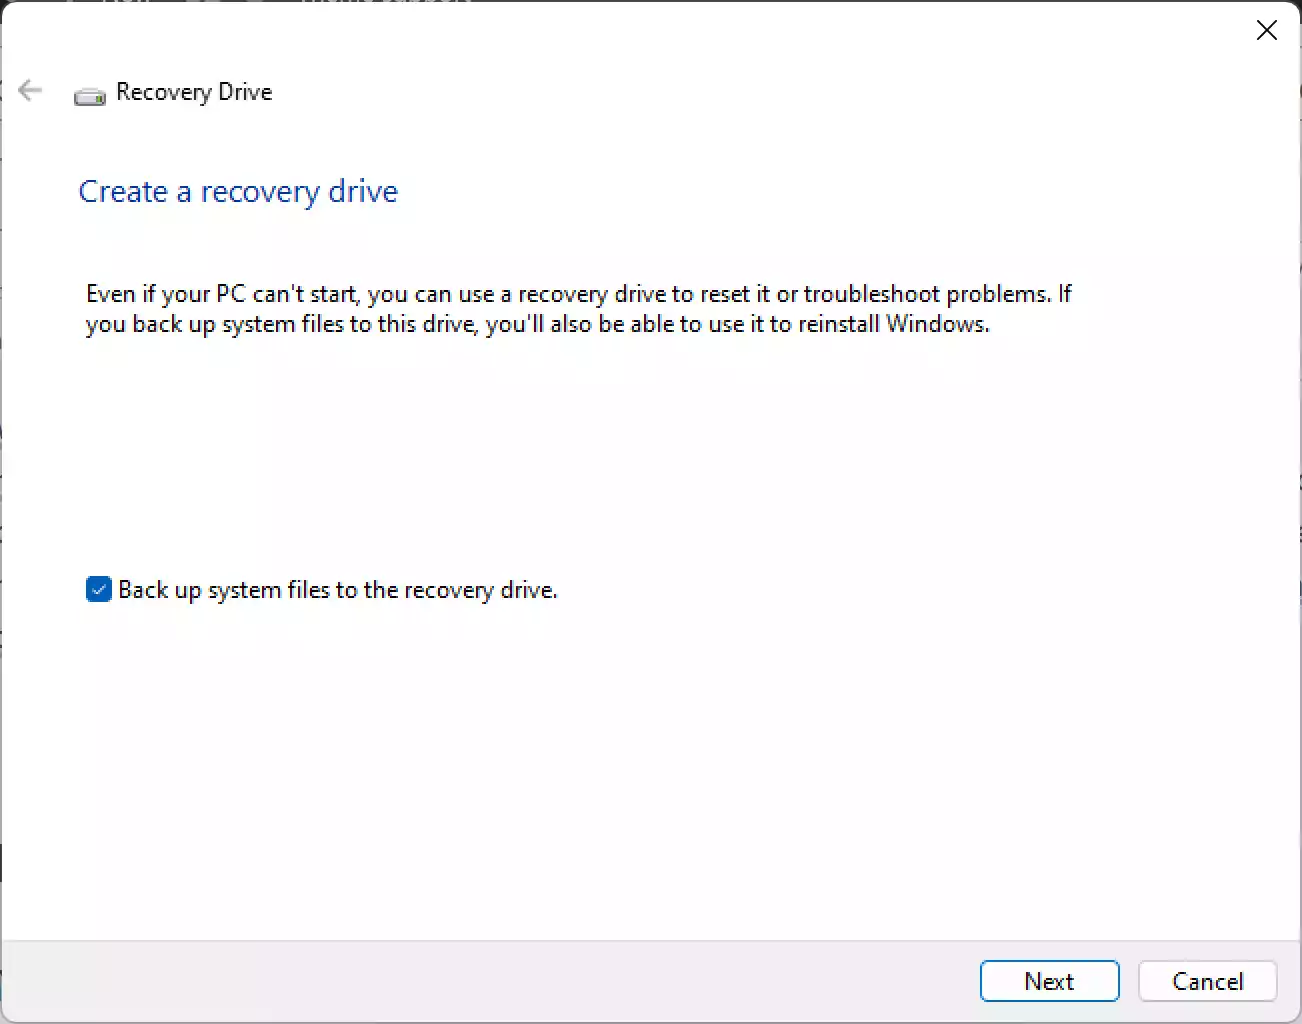
Step 3. In the “Recovery Drive” wizard, ensure that the “Back up system files to the recovery drive” option is checked. This will allow you to reinstall Windows if necessary.
Step 4. The wizard will detect your connected USB drive. Make sure the correct drive is selected, and then click “Next.”
Step 5. A warning message will appear, stating that everything on the USB drive will be deleted. Double-check to ensure you’ve backed up any important data, and then click “Create.”
Step 6. The wizard will begin creating the recovery drive. This process may take a few minutes to complete.
Step 7. Once the process is finished, you’ll see a message stating, “The recovery drive is ready.” Click “Finish” to exit the wizard.
Congratulations! You’ve successfully created a USB recovery drive for your Windows 11 or 10 computer. Now, let’s move on to Part 2 to learn how to use it when needed.
How to Use the USB Recovery Drive on Windows 11 or 10?
A USB recovery drive is an invaluable tool when your Windows operating system is experiencing problems. Here’s how to use it:-
Step 1. When your computer encounters issues that prevent it from booting up or running properly, insert the USB recovery drive into an available USB port.
Step 2. Turn on or restart your computer.
Step 3. As soon as your computer starts booting, press the key (usually F2, F12, ESC, or Del) to access the BIOS or UEFI settings. The key to enter BIOS/UEFI may vary depending on your computer’s manufacturer; consult your computer’s documentation or look for a brief message during startup.
Step 4. In the BIOS or UEFI settings, navigate to the boot options and set the USB drive as the first boot device. Save the changes and exit.
Step 5. Your computer will now boot from the USB recovery drive.
Step 6. After booting from the USB recovery drive, you’ll be presented with the Windows Recovery Environment (WinRE) screen. This environment provides various options for troubleshooting and recovery.
Step 7. From the Windows Recovery Environment, you can choose from several options, including:-
- Troubleshoot: This option allows you to access advanced troubleshooting tools.
- Reset this PC: You can use this option to reinstall Windows while keeping your files intact or remove everything and start fresh.
- System Restore: If you’ve previously created system restore points, you can use this option to restore your system to a previous working state.
- Command Prompt: If you’re familiar with command-line troubleshooting, you can access the Command Prompt.
Step 8. Depending on the issue you’re facing, choose the appropriate option and follow the on-screen instructions. Windows Recovery Environment provides step-by-step guidance to help you diagnose and resolve problems.
Step 9. After troubleshooting and resolving the issue, exit Windows Recovery Environment and remove the USB recovery drive.
Conclusion
Creating and using a USB recovery drive on Windows 11 or 10 is a fundamental skill for any computer user. It can help you recover from critical system errors, restore your system, or reinstall Windows when necessary. By following the steps outlined in this guide, you can ensure that you’re prepared for any unforeseen issues that may arise with your operating system. Remember to keep your USB recovery drive in a safe place, and periodically update it to ensure it remains effective.
