DirectX Shader Cache is those files that are created by your graphics system. It improves the overall performance of games and other programs by lowering the amount of time it takes for an image or video to render on the screen. Although it is not necessary to erase it from your system, if you believe your DirectX Shader Cache is corrupt or too large, you may delete it. Once you delete these cache files, they will be regenerated automatically & fill again after restarting your computer.
If you suspect that DirectX Shader Cache is malfunctioning on your Windows 11 or 10, this gearupwindows article will guide you to erase this cache in different ways. You can remove DirectX Shader Cache using Windows Settings, Disk Cleanup, or Storage Sense. We will review all methods one by one.
How to Clear DirectX Shader Cache using Windows 11 Settings?
If you prefer to use the modern Settings app to clean the DirectX Shader Cache in Windows 11, use these steps:-
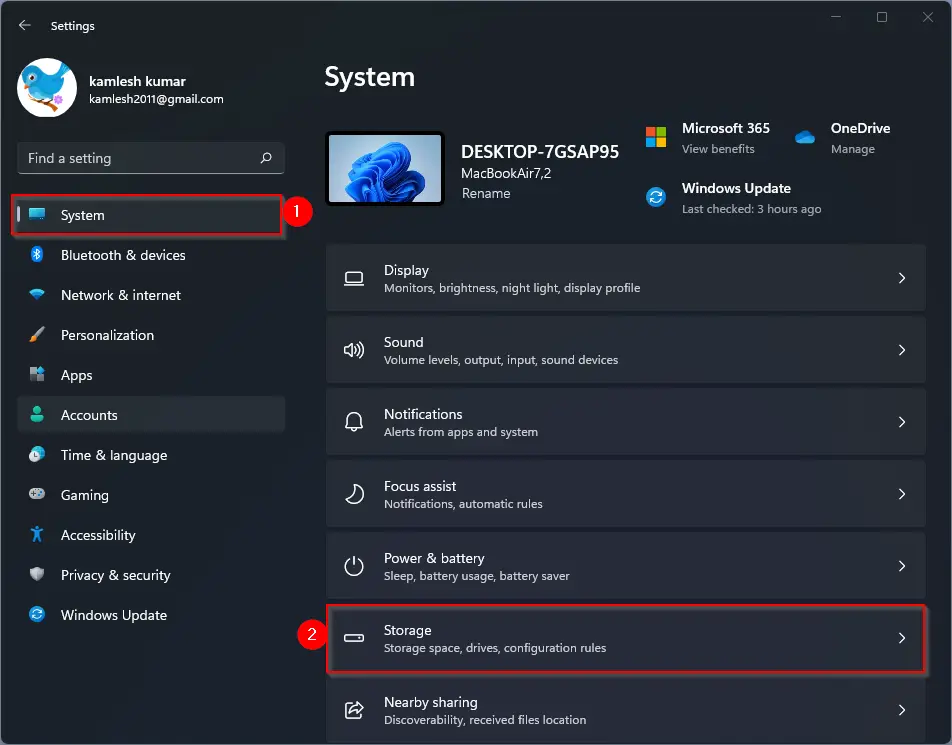
Step 1. Open Windows 11 Settings.
Step 2. Select System in the left sidebar of the Settings window.

Step 3. Click on the Storage tile on the right sidebar.
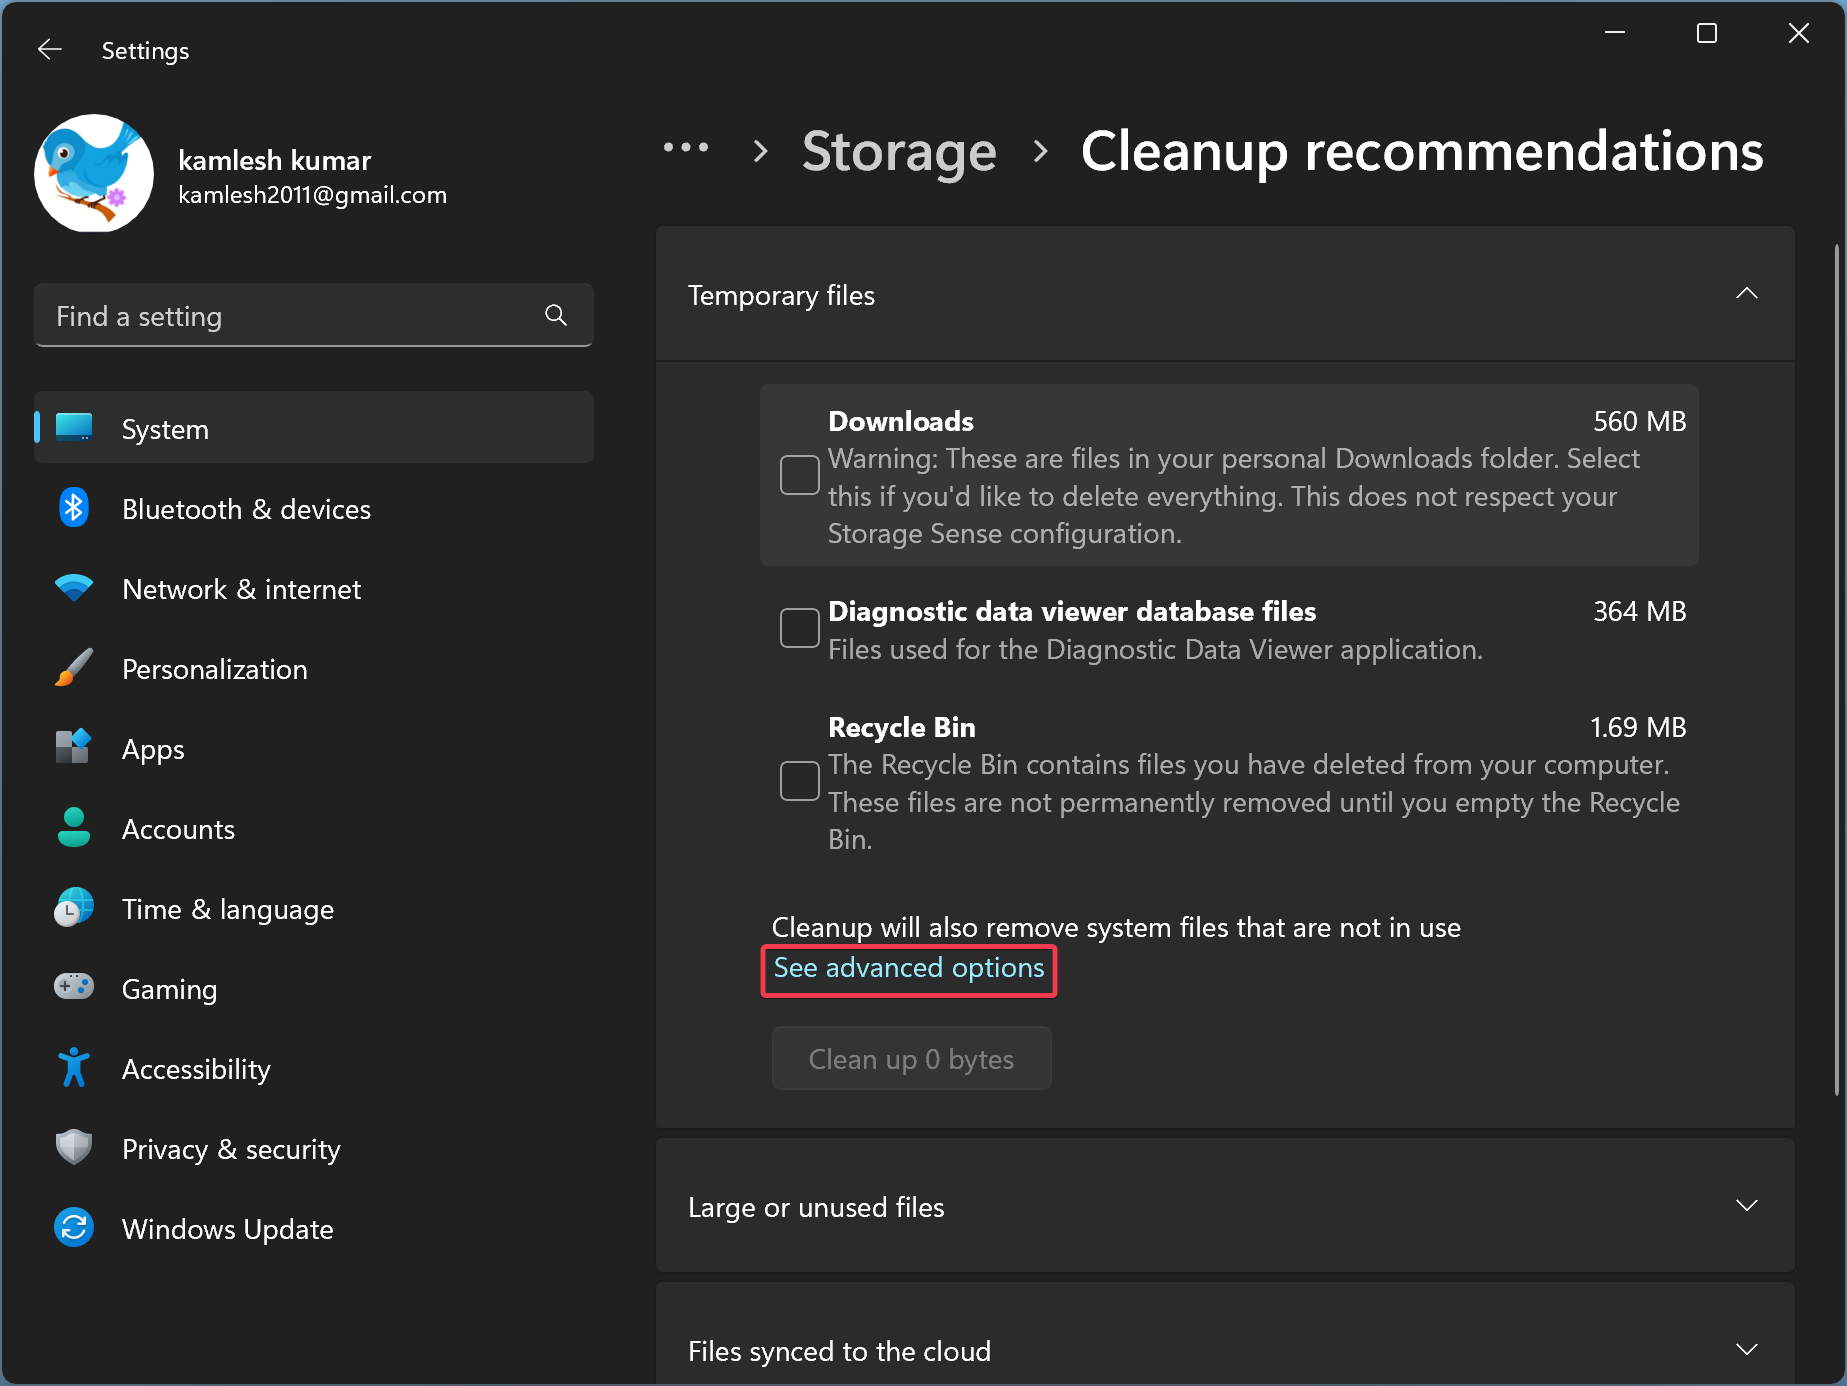
Step 4. Next, click the Cleanup recommendations option under the “Storage management” section.

Step 5. Under the “Temporary files” section, click the link See advanced options.
Step 6. In the following screen, scroll down to the bottom and check the option DirectX Shader Cache.
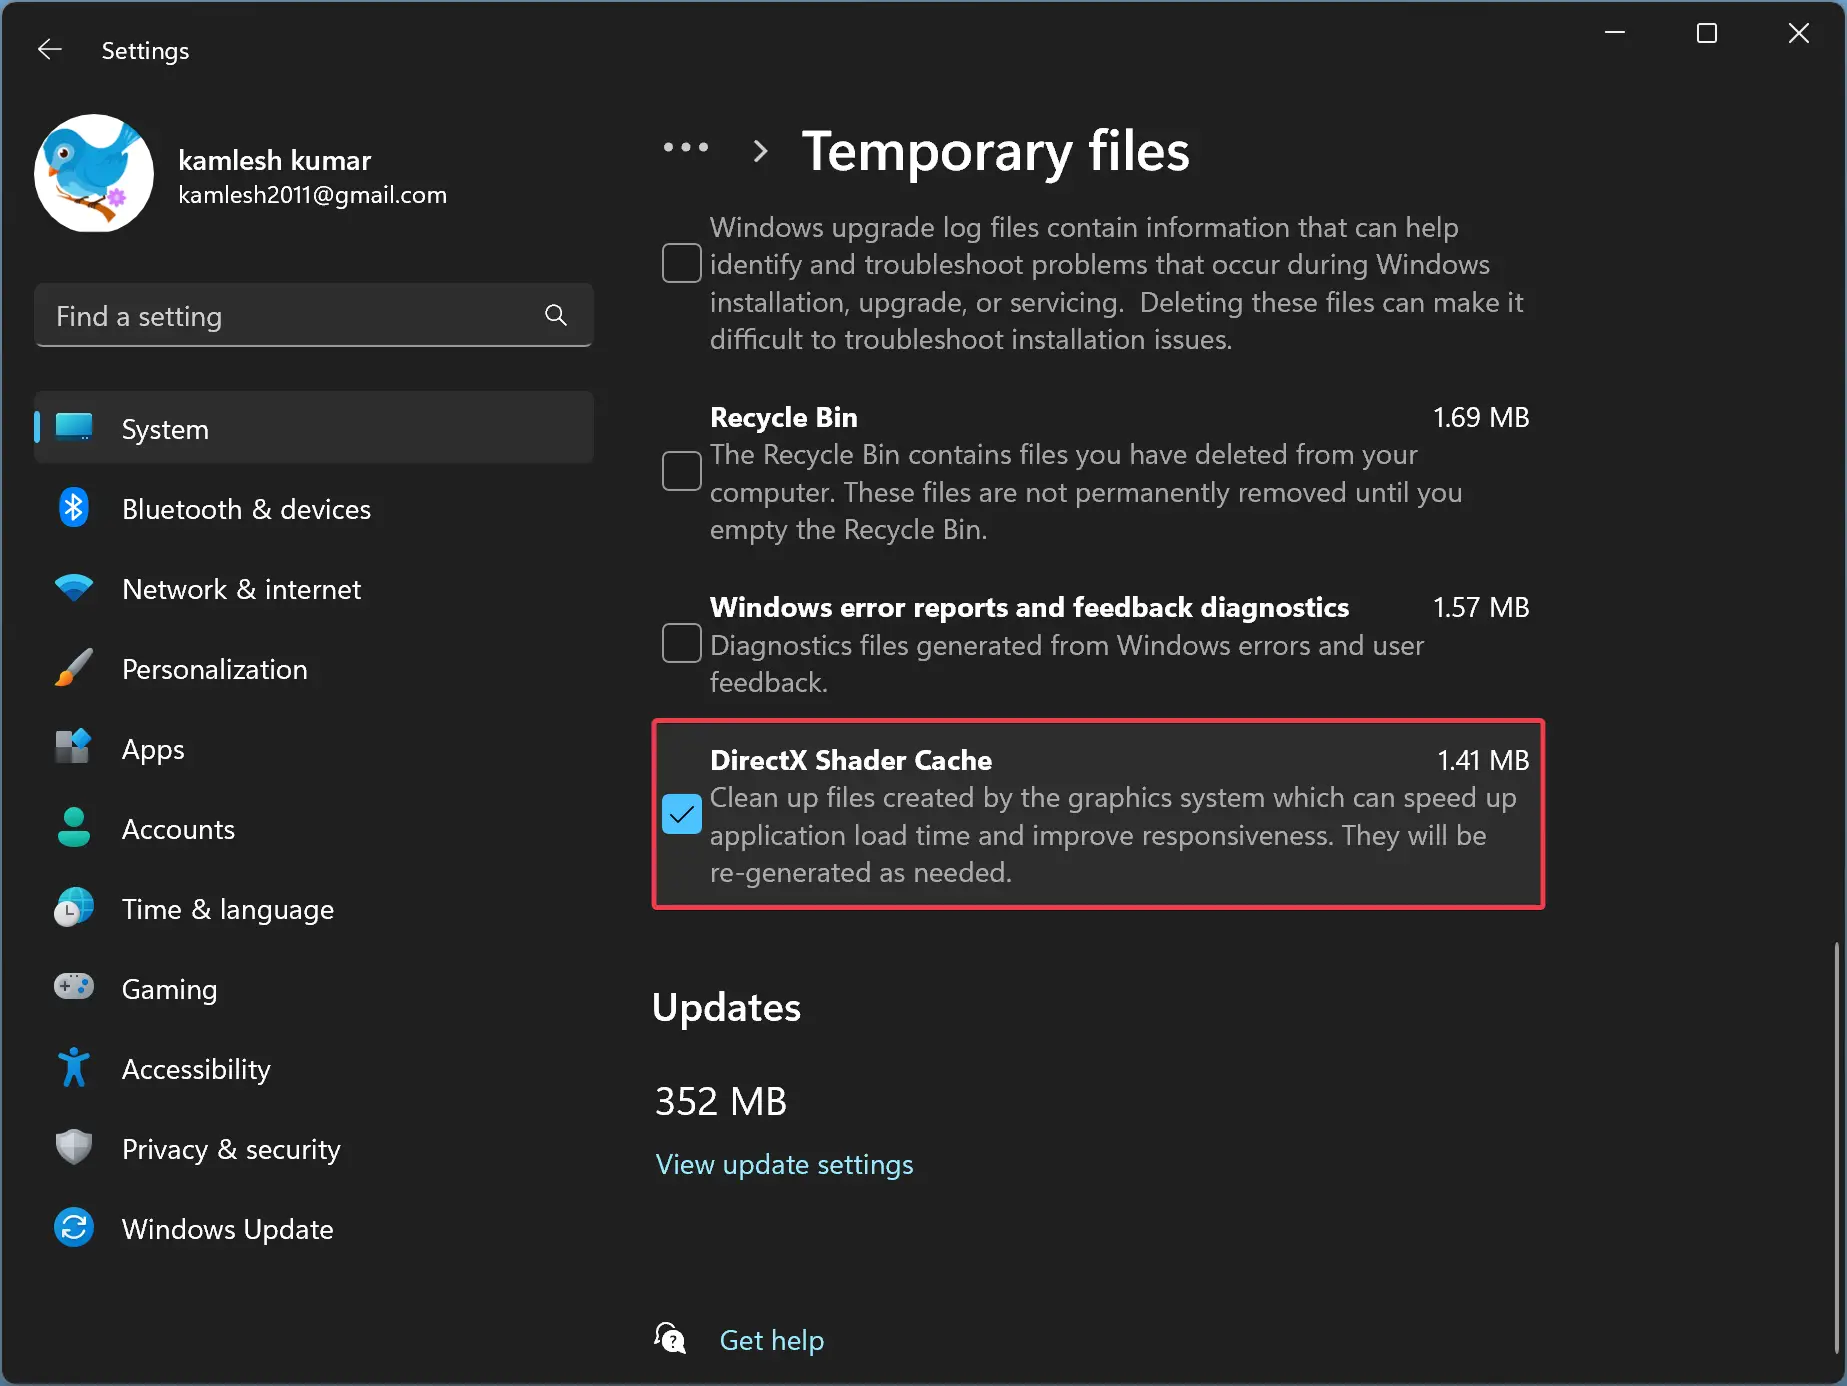
Step 7. Now, scroll up to the same page and click the Remove files button.

Once you complete the above steps, DirectX Shader Cache is removed from your computer. When you restart your computer, DirectX Shader Cache will be generated automatically by your Windows if required.
How to Erase DirectX Shader Cache in Windows 11 or 10 through Disk Cleanup?
To delete or remove the DirectX Shader Cache through Windows 11 or 10 Disk Cleanup, use these steps:-
Step 1. Click on the Start button and type Disk Cleanup.
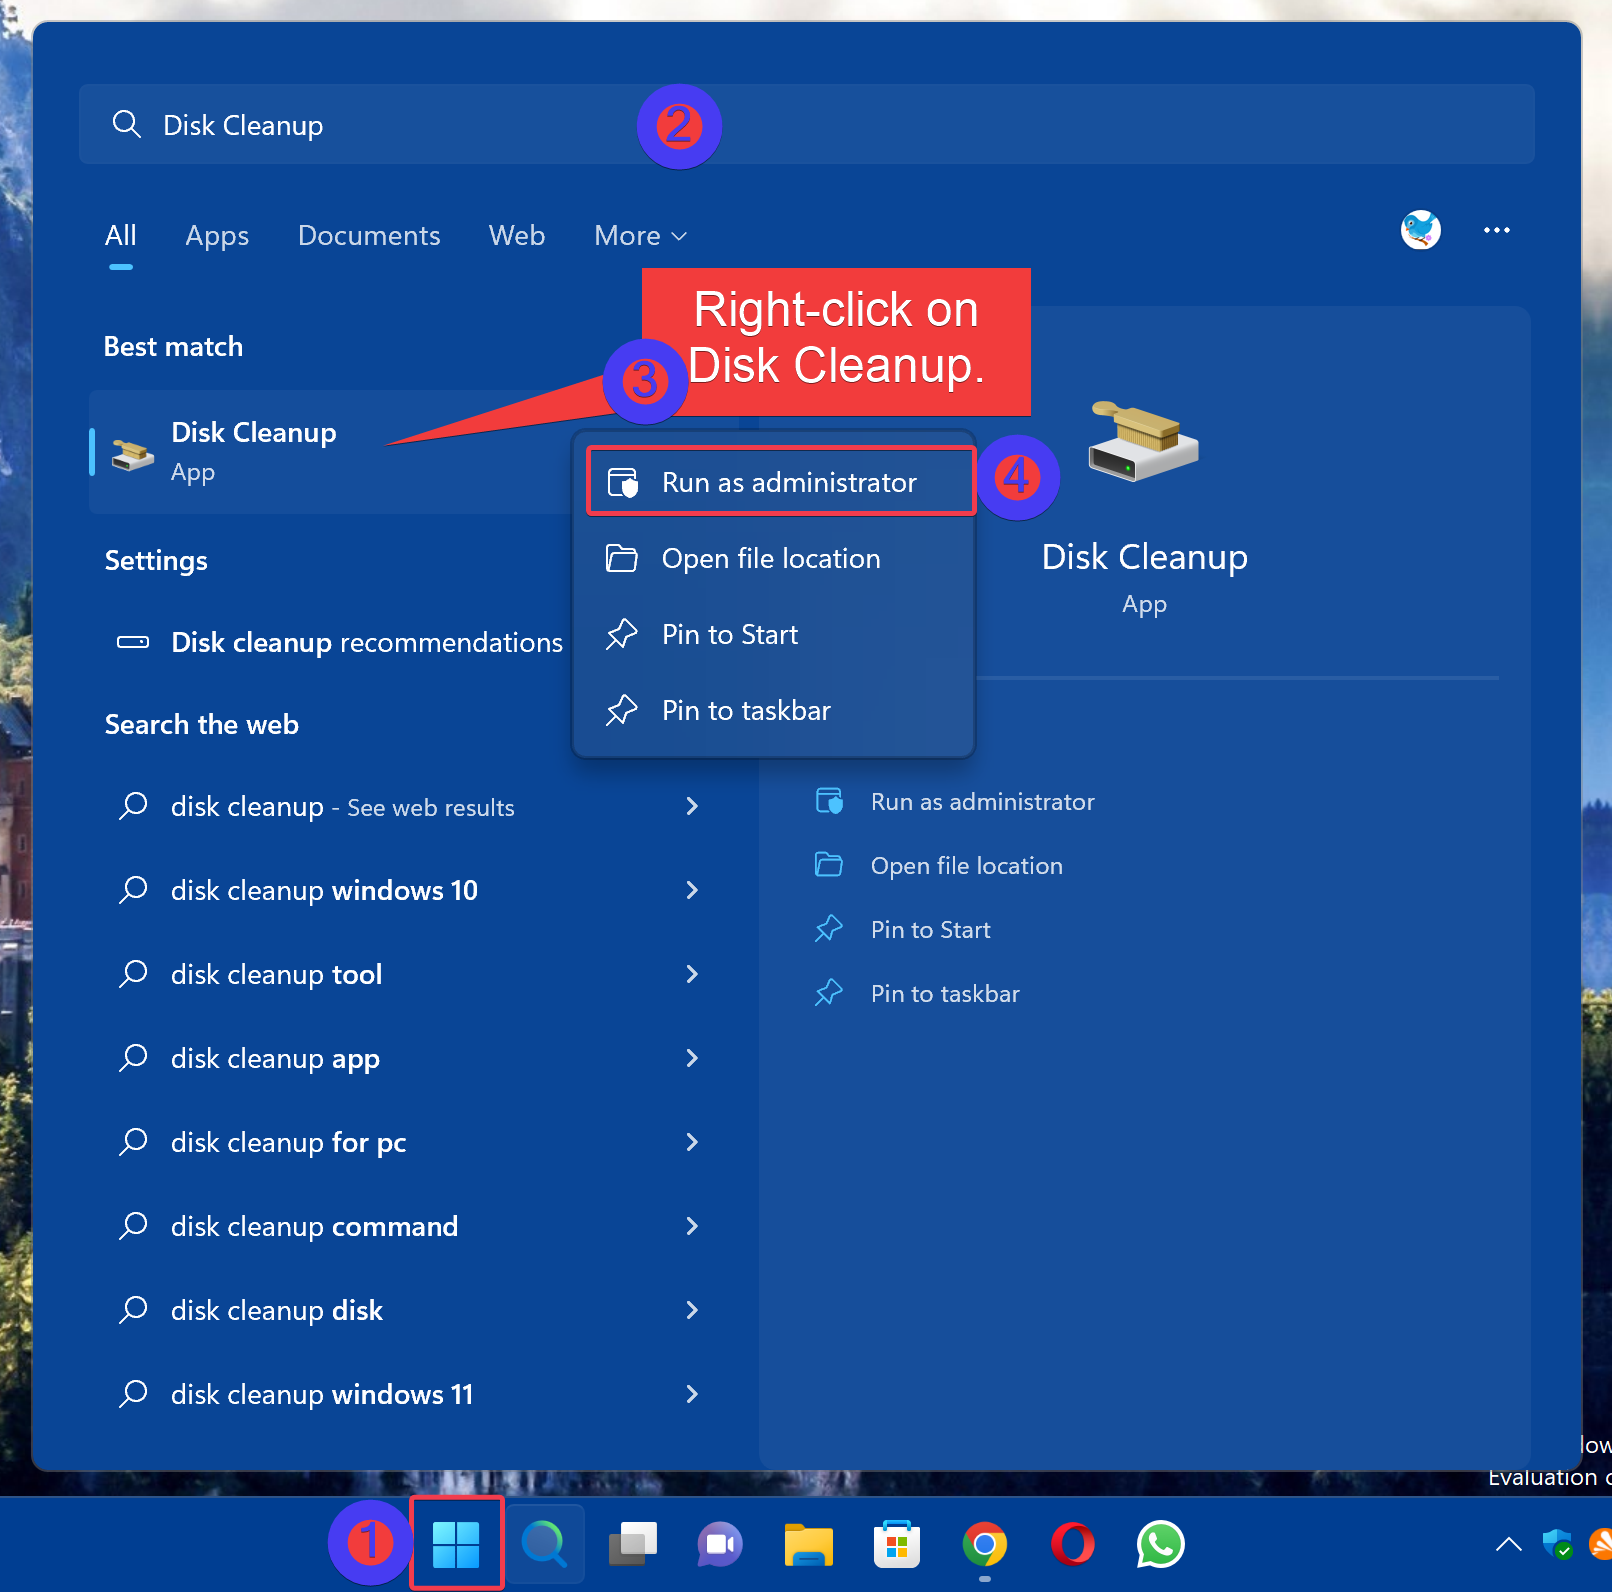
Step 2. Then, right-click on the Disk Cleanup and select the Run as administrator option.
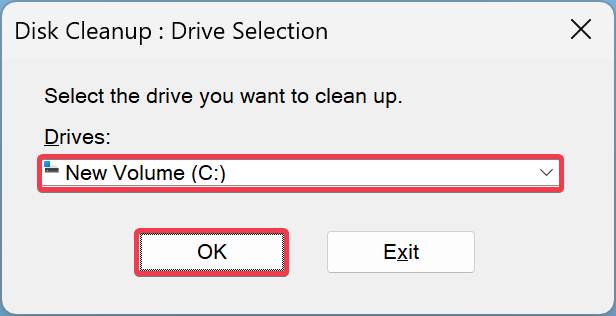
Step 3. When the Disk Cleanup tool appears on your computer, select the C drive (system drive) and click the OK button.
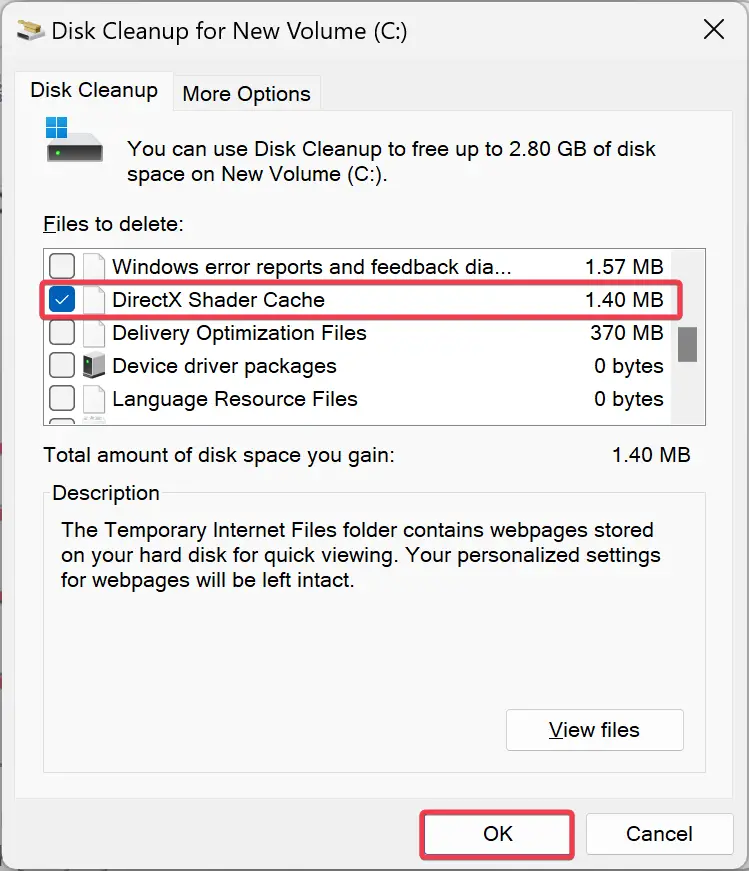
Step 4. Now, Windows will scan the “C” drive and show various checkboxes. Select the DirectX Shader Cache checkbox and click the OK button.
Once you complete the above steps, DirectX Shader Cache is erased from your computer. When you restart your computer, DirectX Shader Cache will be generated automatically by your Windows if required.
How to Clear DirectX Shader Cache via Windows 11 Storage Sense?
To remove the DirectX Shader Cache via Windows 11 Storage Sense, use these steps:-
Step 1. Open Windows 11 Settings.
Step 2. Select System in the left sidebar of the Settings window.
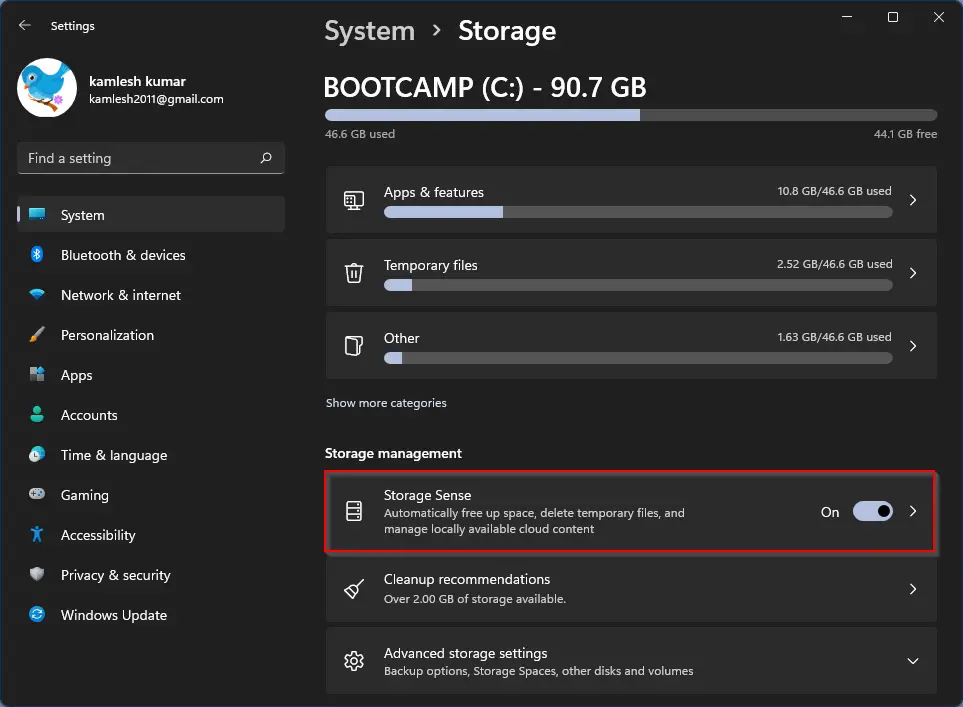
Step 3. Click on the Storage tile on the right sidebar.
Step 4. Next, turn On the Storage Sense toggle switch under the “Storage management” section.
That’s it. The next time storage sense scans and cleans unnecessary files on your Windows 11 machine, the DirectX Shader Cache will be removed automatically.
Conclusion
In conclusion, DirectX Shader Cache is a useful feature that can improve the performance of your system, especially when running games and other graphics-intensive applications. However, if you encounter issues with the cache or if it takes up too much space on your computer, you can delete it using various methods. This article has shown you how to clear the DirectX Shader Cache using Windows 11 Settings, Disk Cleanup, or Storage Sense. Regardless of which method you choose, DirectX Shader Cache will be regenerated automatically when required.