When you search anything on Windows 10 Start menu, by default, it sends every request to their servers and provides you results from Bing search. That means whatever you type in the Start menu, it will not remain private.
If you are running Windows 10’s May 2020 Update or later, you can turn off this behavior of Windows 10. The same tweak will disable the Microsoft Edge advertisements that appear when you search for Chrome in Windows 10’s Start menu. Furthermore, this tweak will also disable Cortana to turn off Bing web integration.
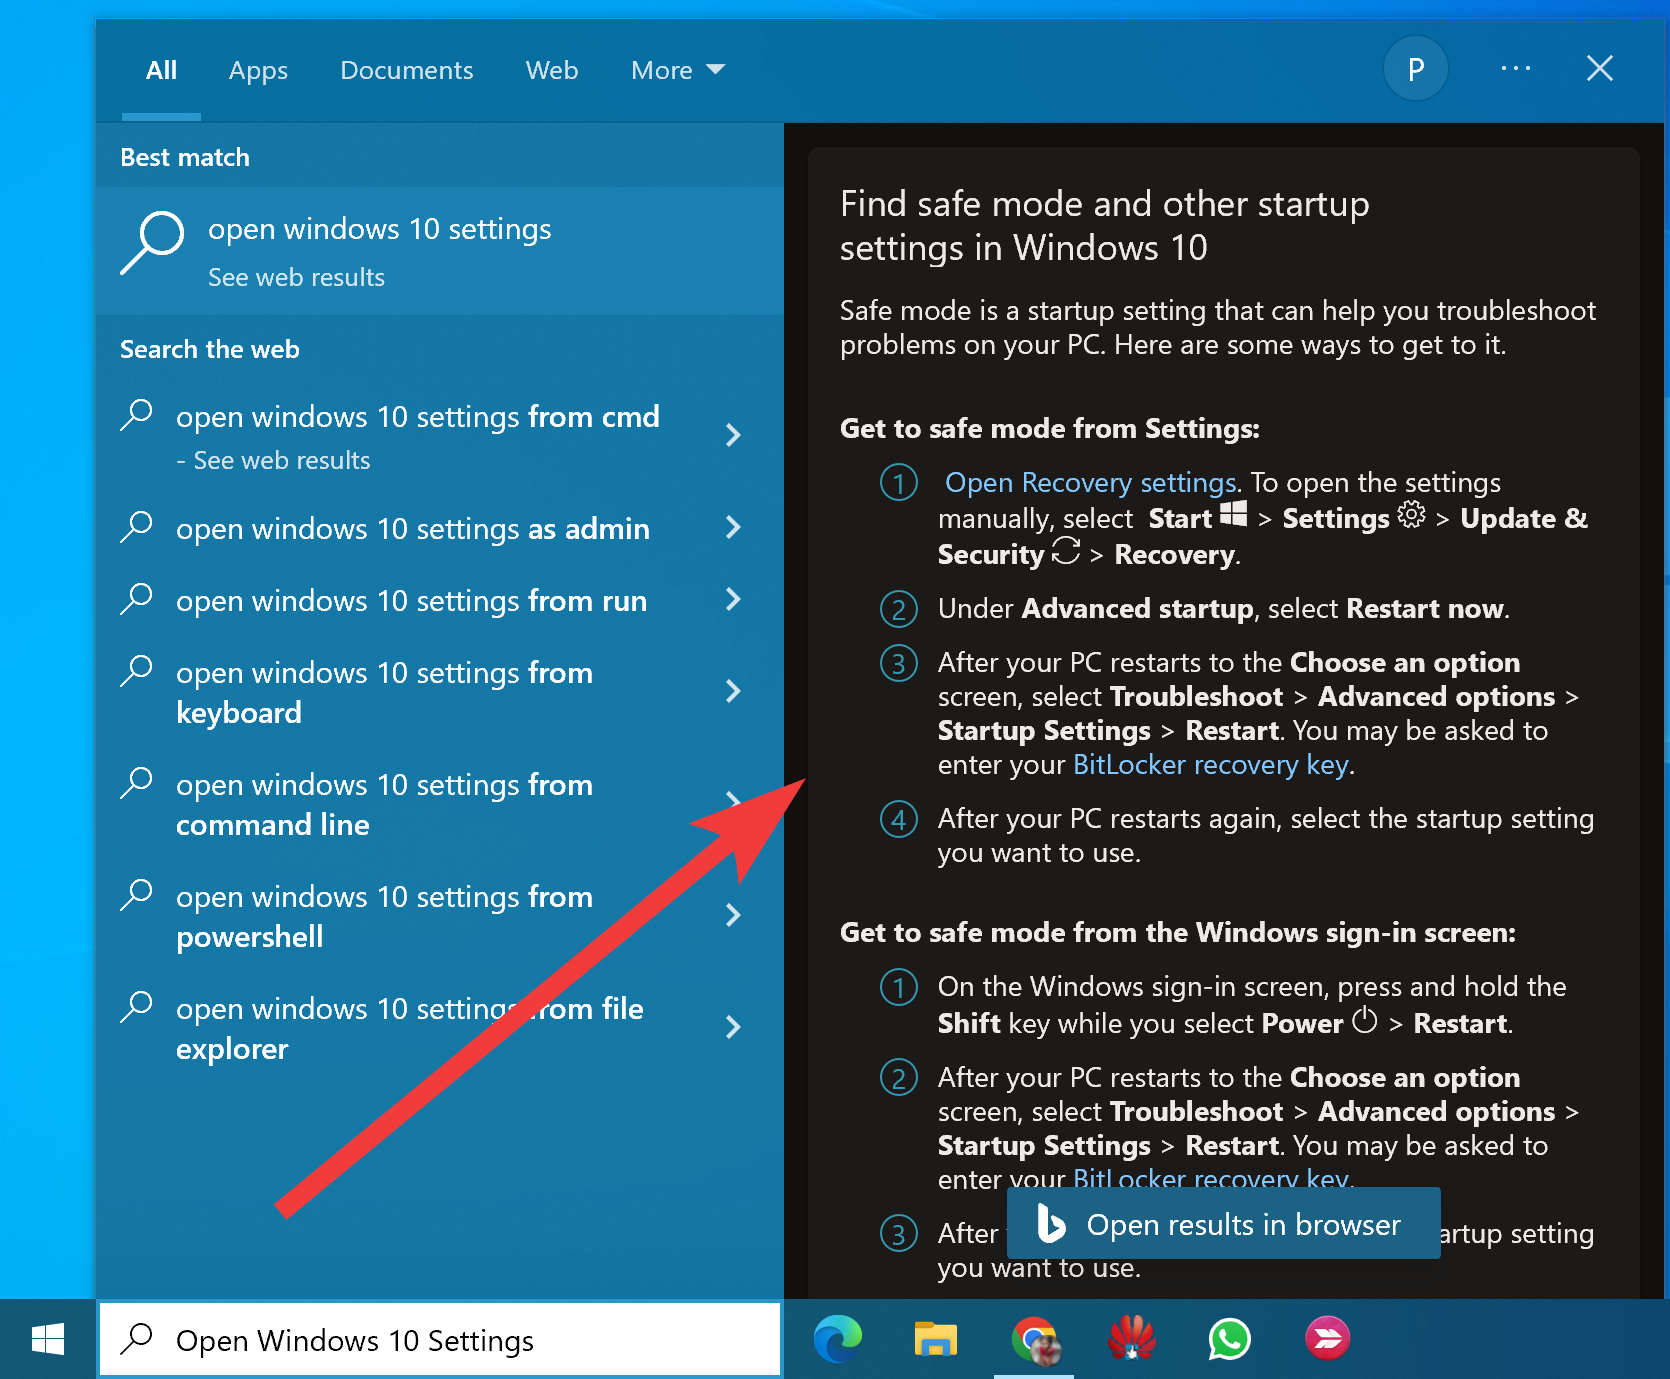
In this gearupwindows article, you will learn to turn off Bing search results in Windows 10 Start Menu.
How to Turn Off Bing in the Windows 10 Start Menu?
To hide Bing Search in the Windows 10 Start menu, use these steps:-
Step 1. First, open Registry Editor.
Step 2. In the Registry Editor window, browse to the following key in the left side navigation pane:-
HKEY_CURRENT_USER\Software\Policies\Microsoft\Windows
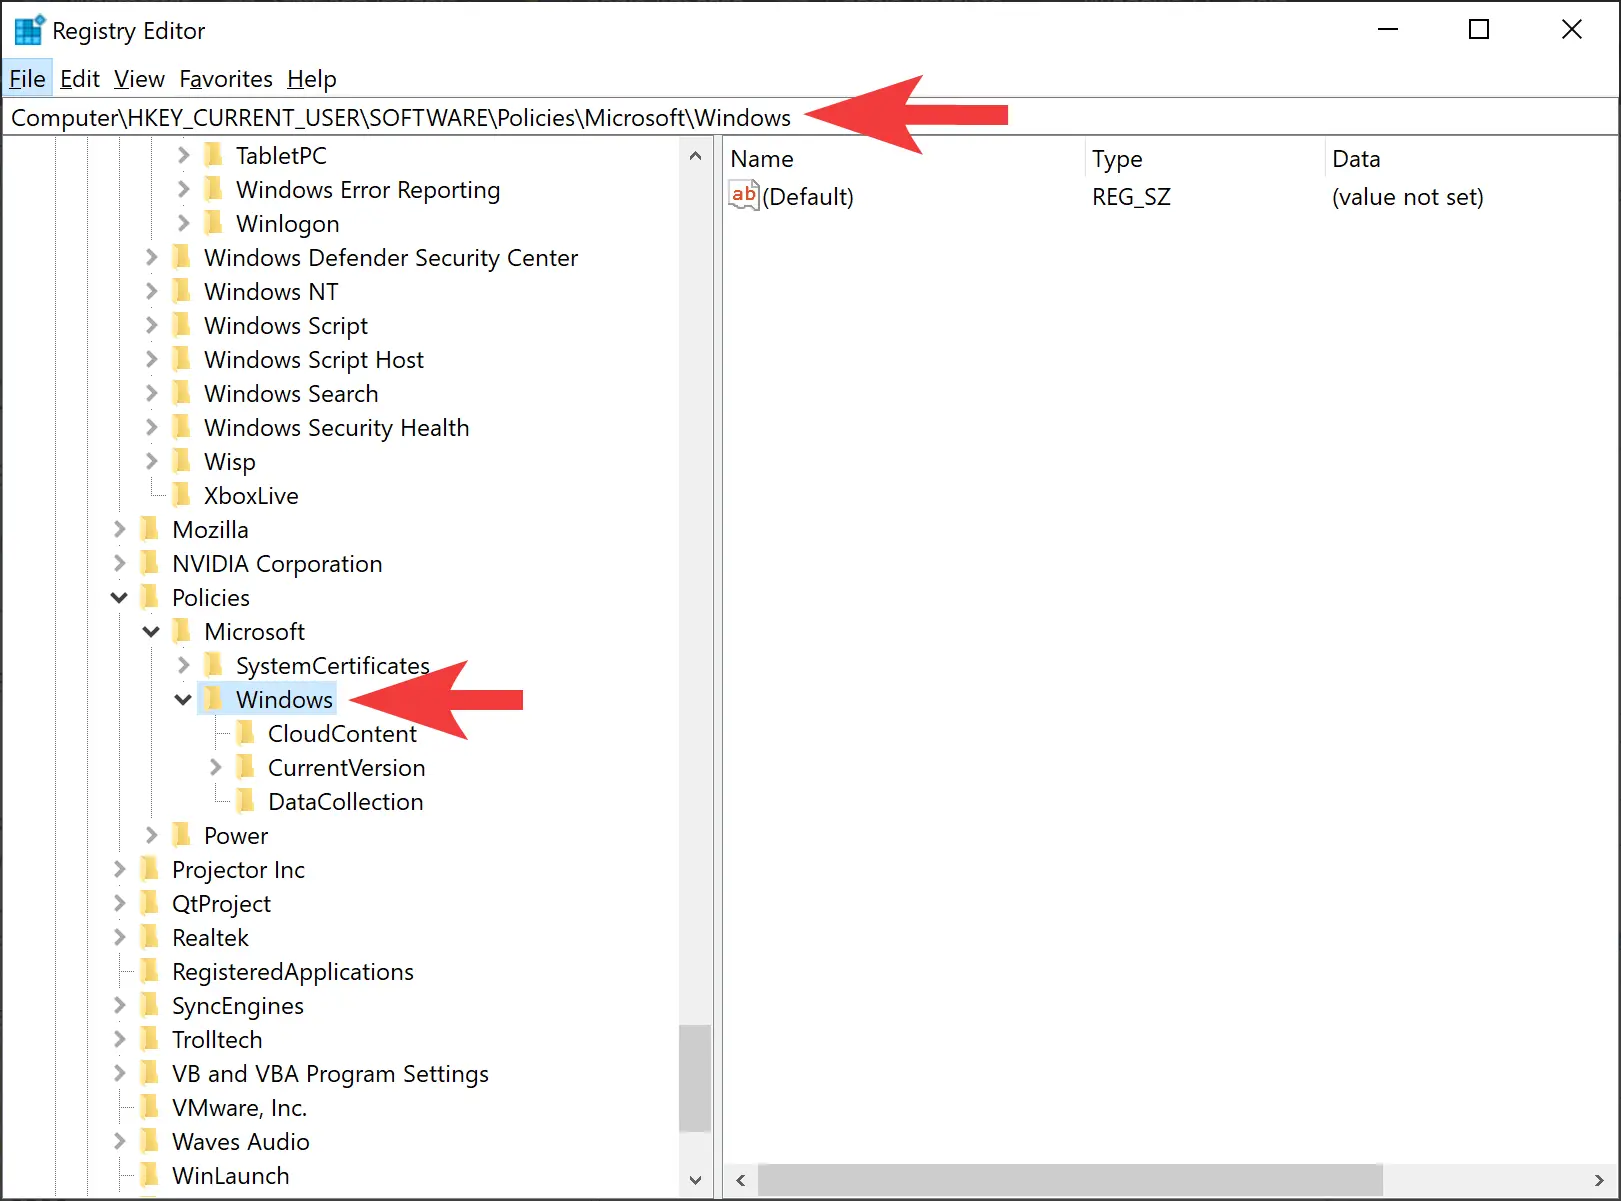
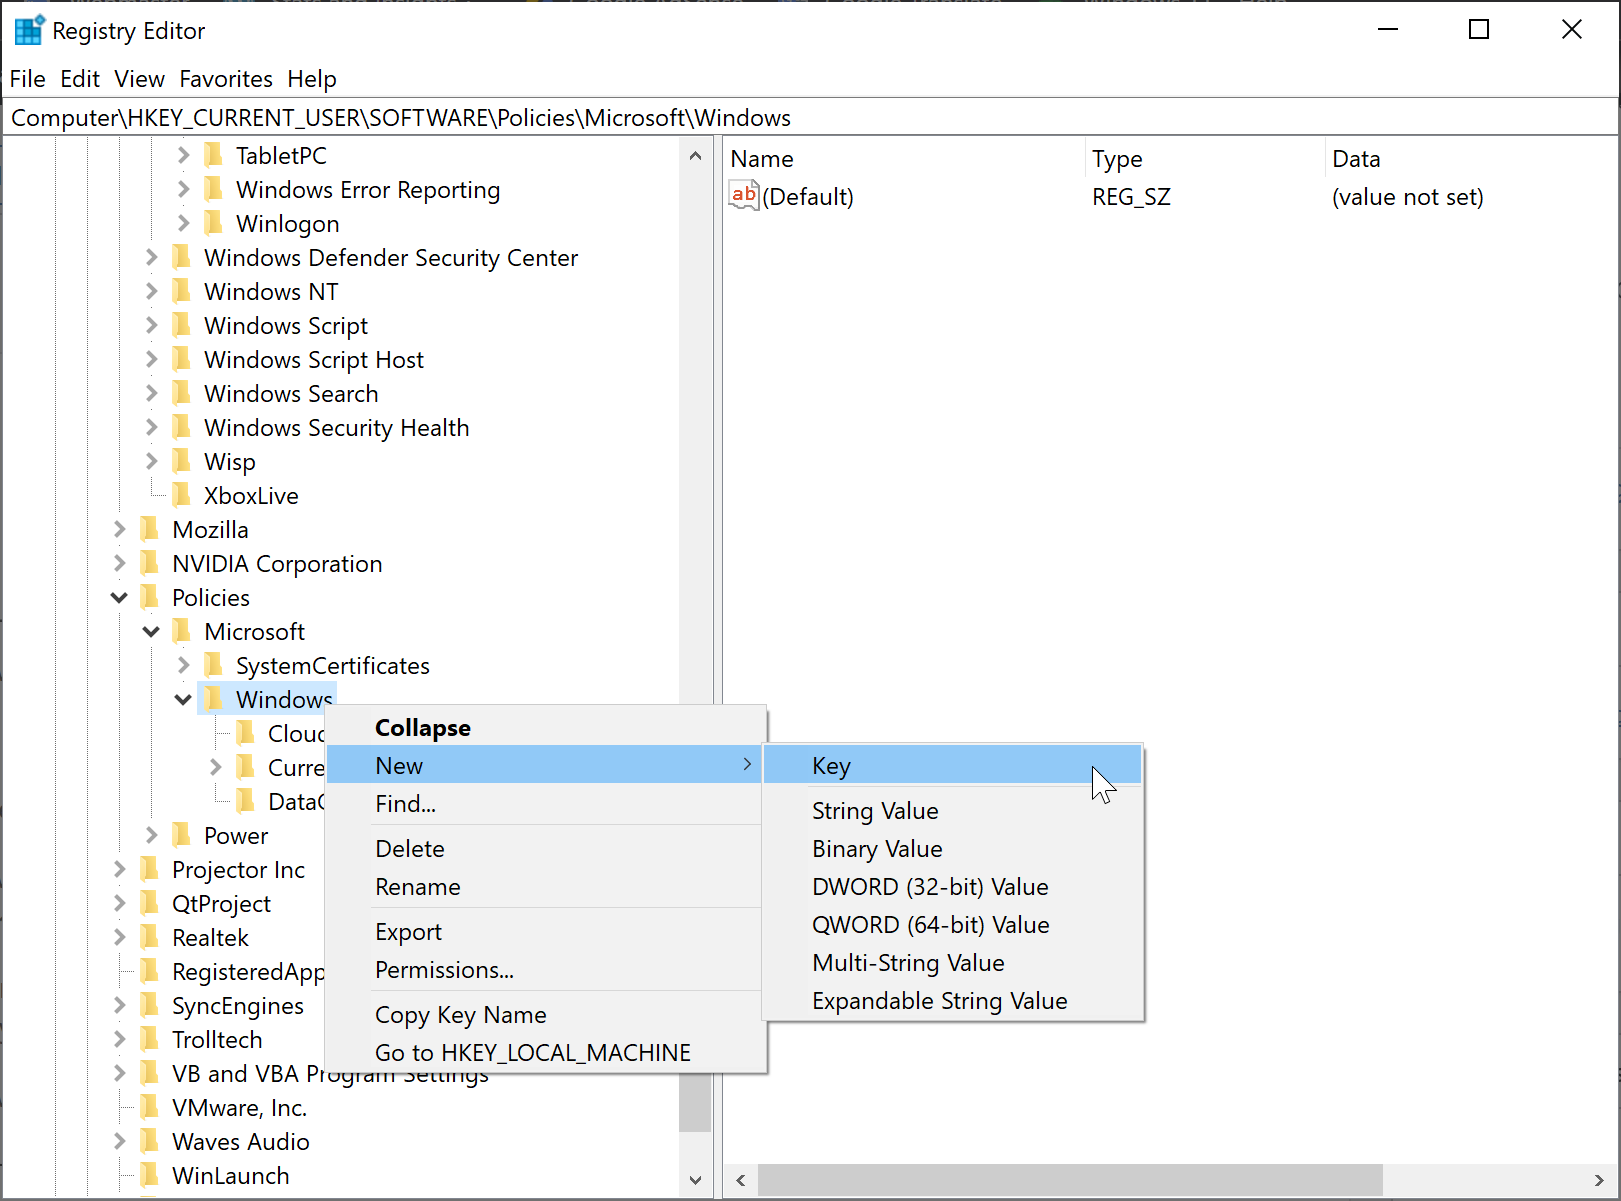
Step 3. Now, right-click on the Windows folder and select New > Key.
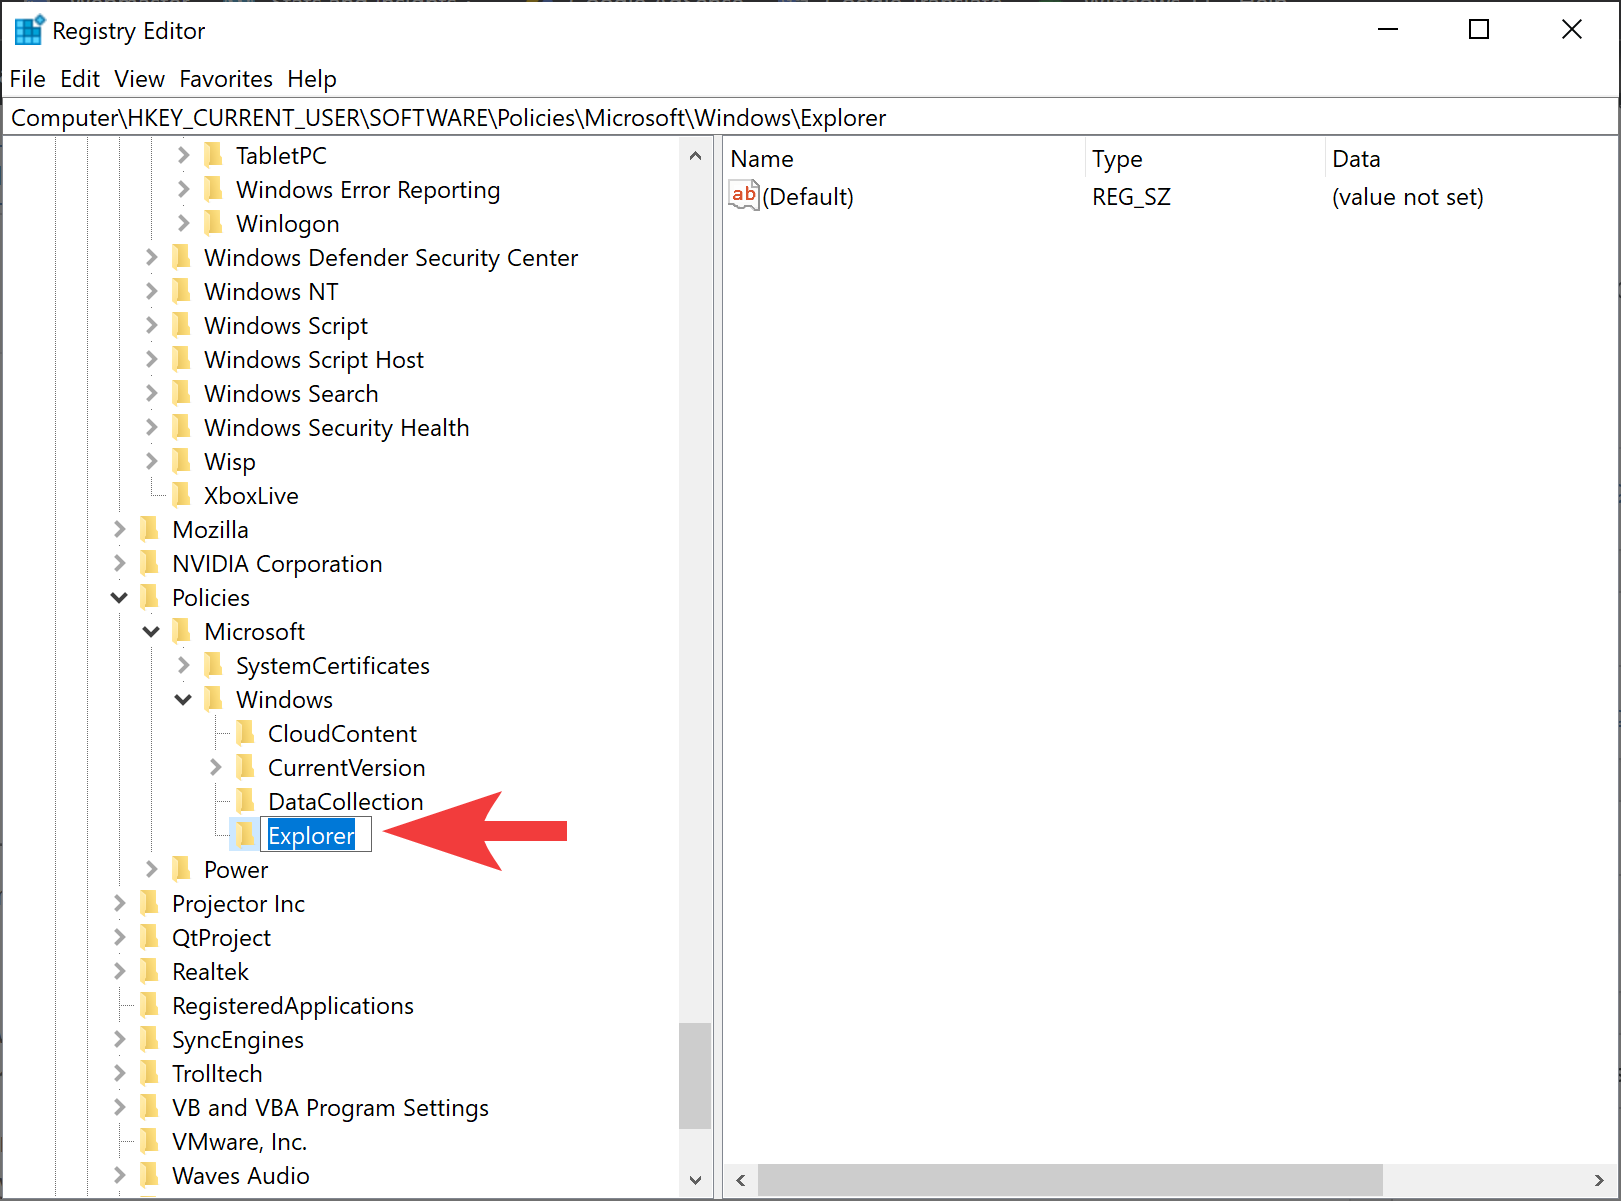
Step 4. Name the newly created key Explorer.
Step 5. Now, right-click on the Explorer folder and select New > DWORD (32-bit) Value.
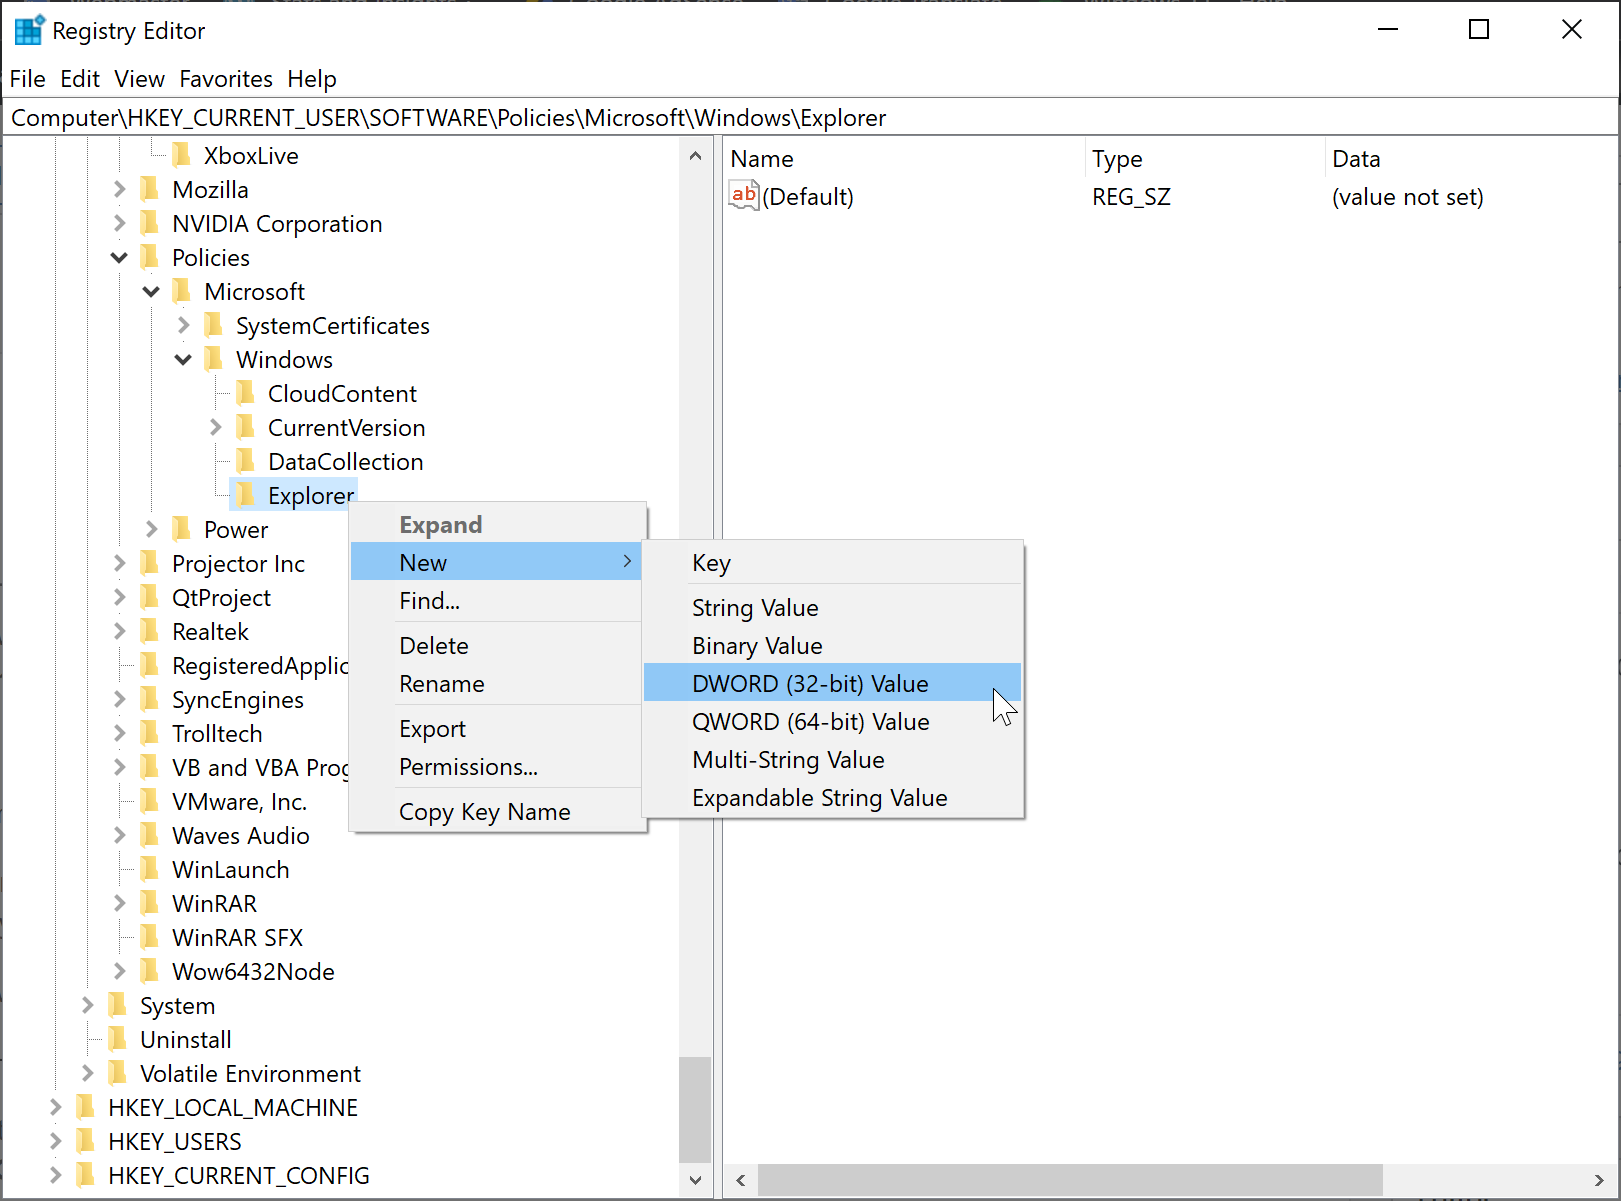
Step 6. Name the newly created REG_DWORD as DisableSearchBoxSuggestions.
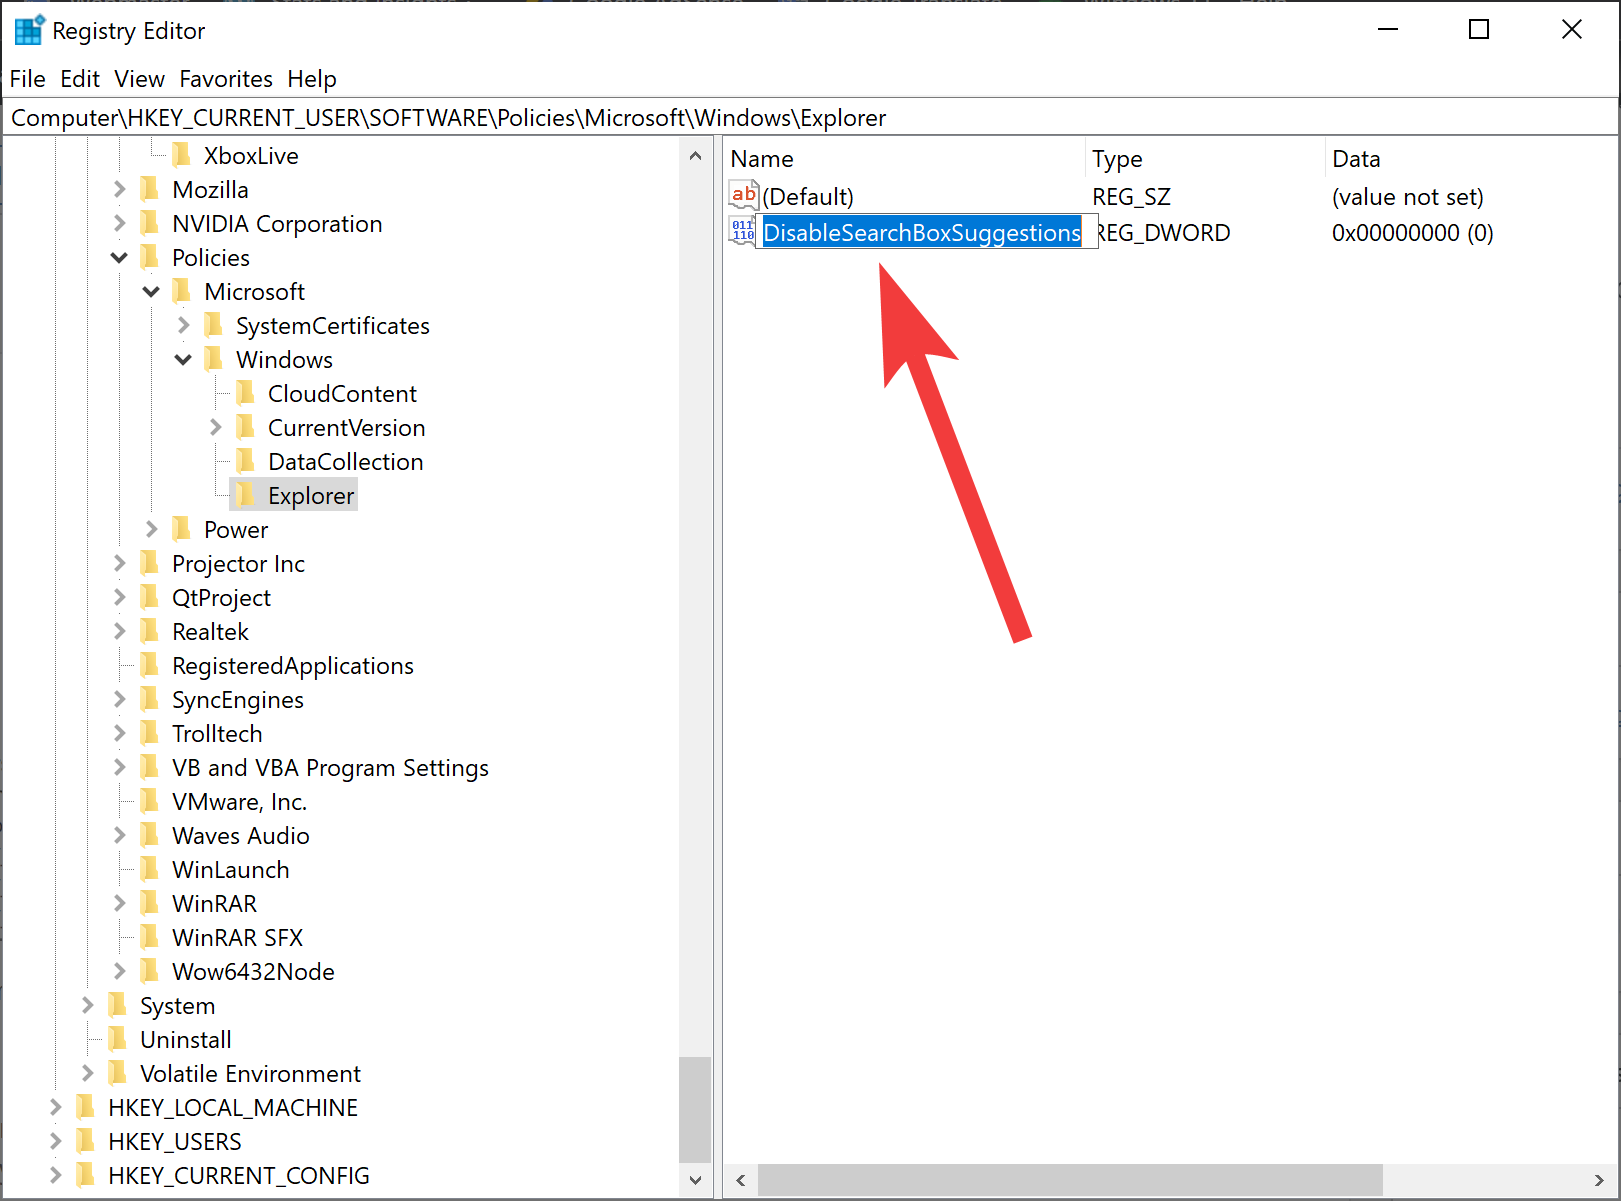
Step 7. Now, double-click on the DisableSearchBoxSuggestions REG_DWORD to edit its “Value data.”
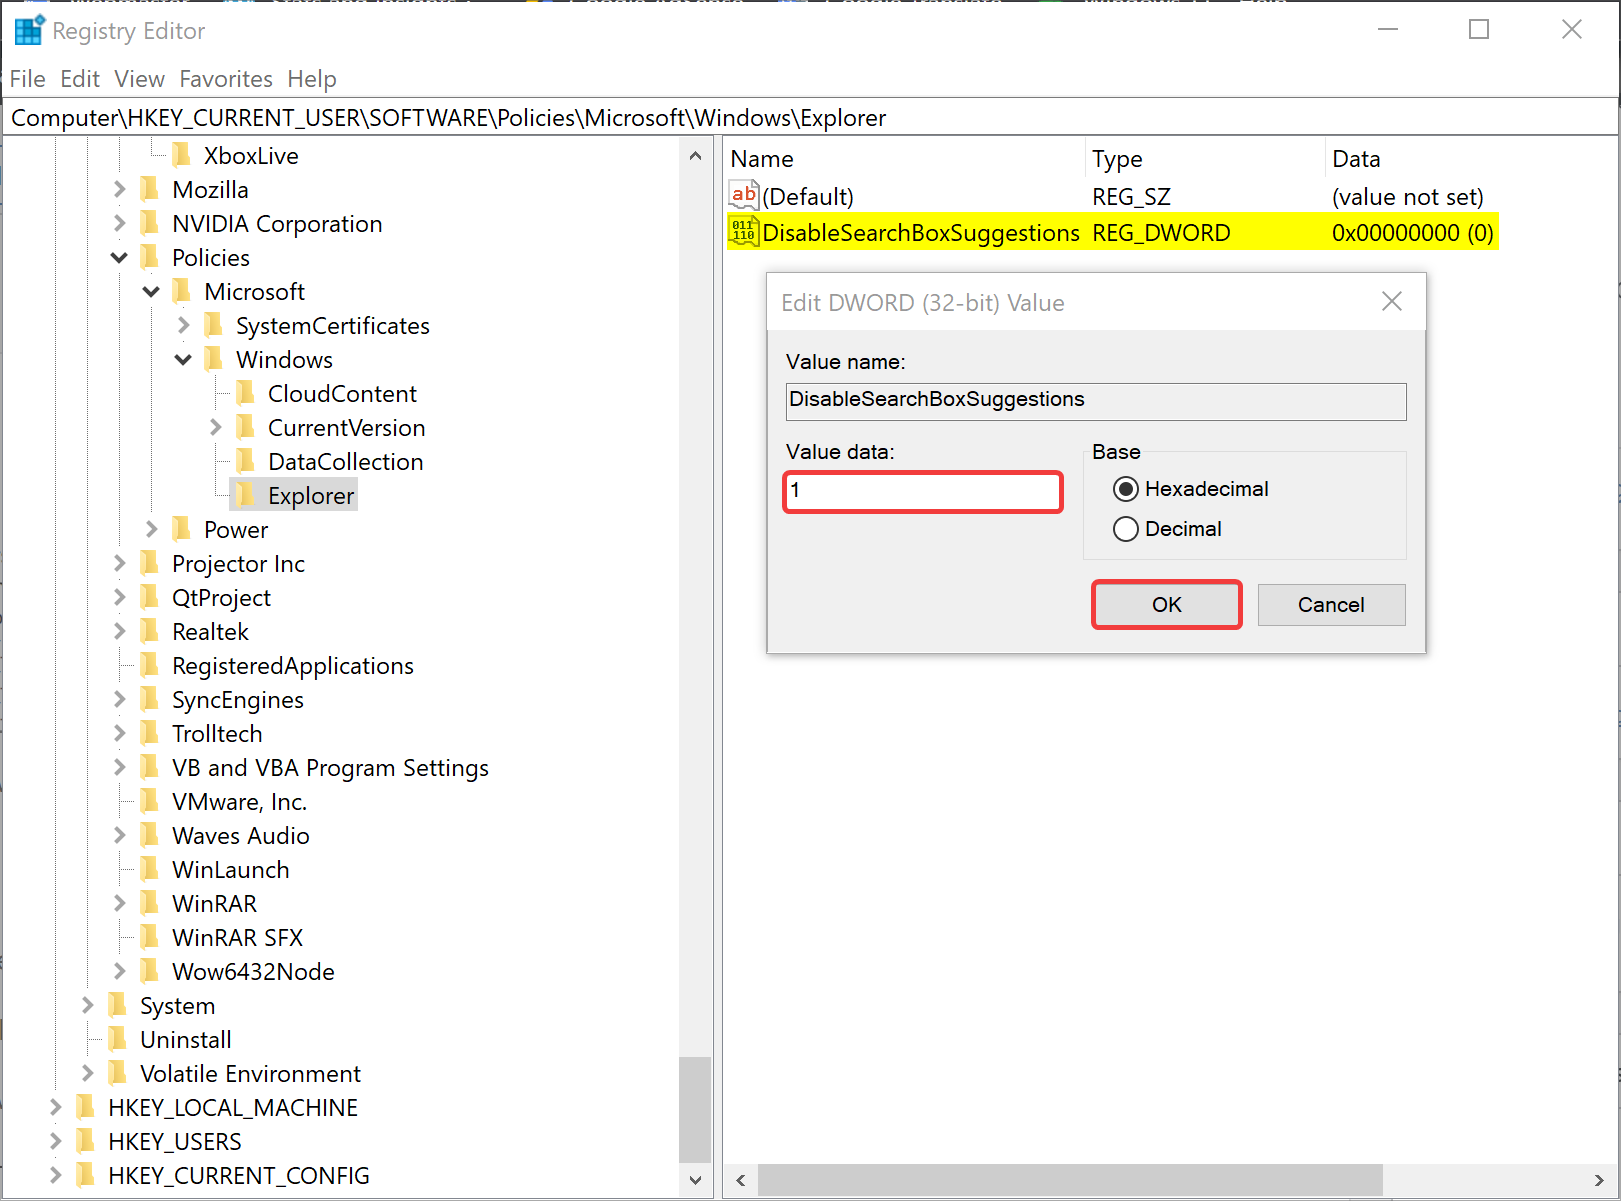
Step 8. Set the “Value data” to 1.
Step 9. Click OK.
Step 10. Now, browse the following path in the Registry Editor:-
HKEY_CURRENT_USER\Software\Microsoft\Windows\CurrentVersion\Search
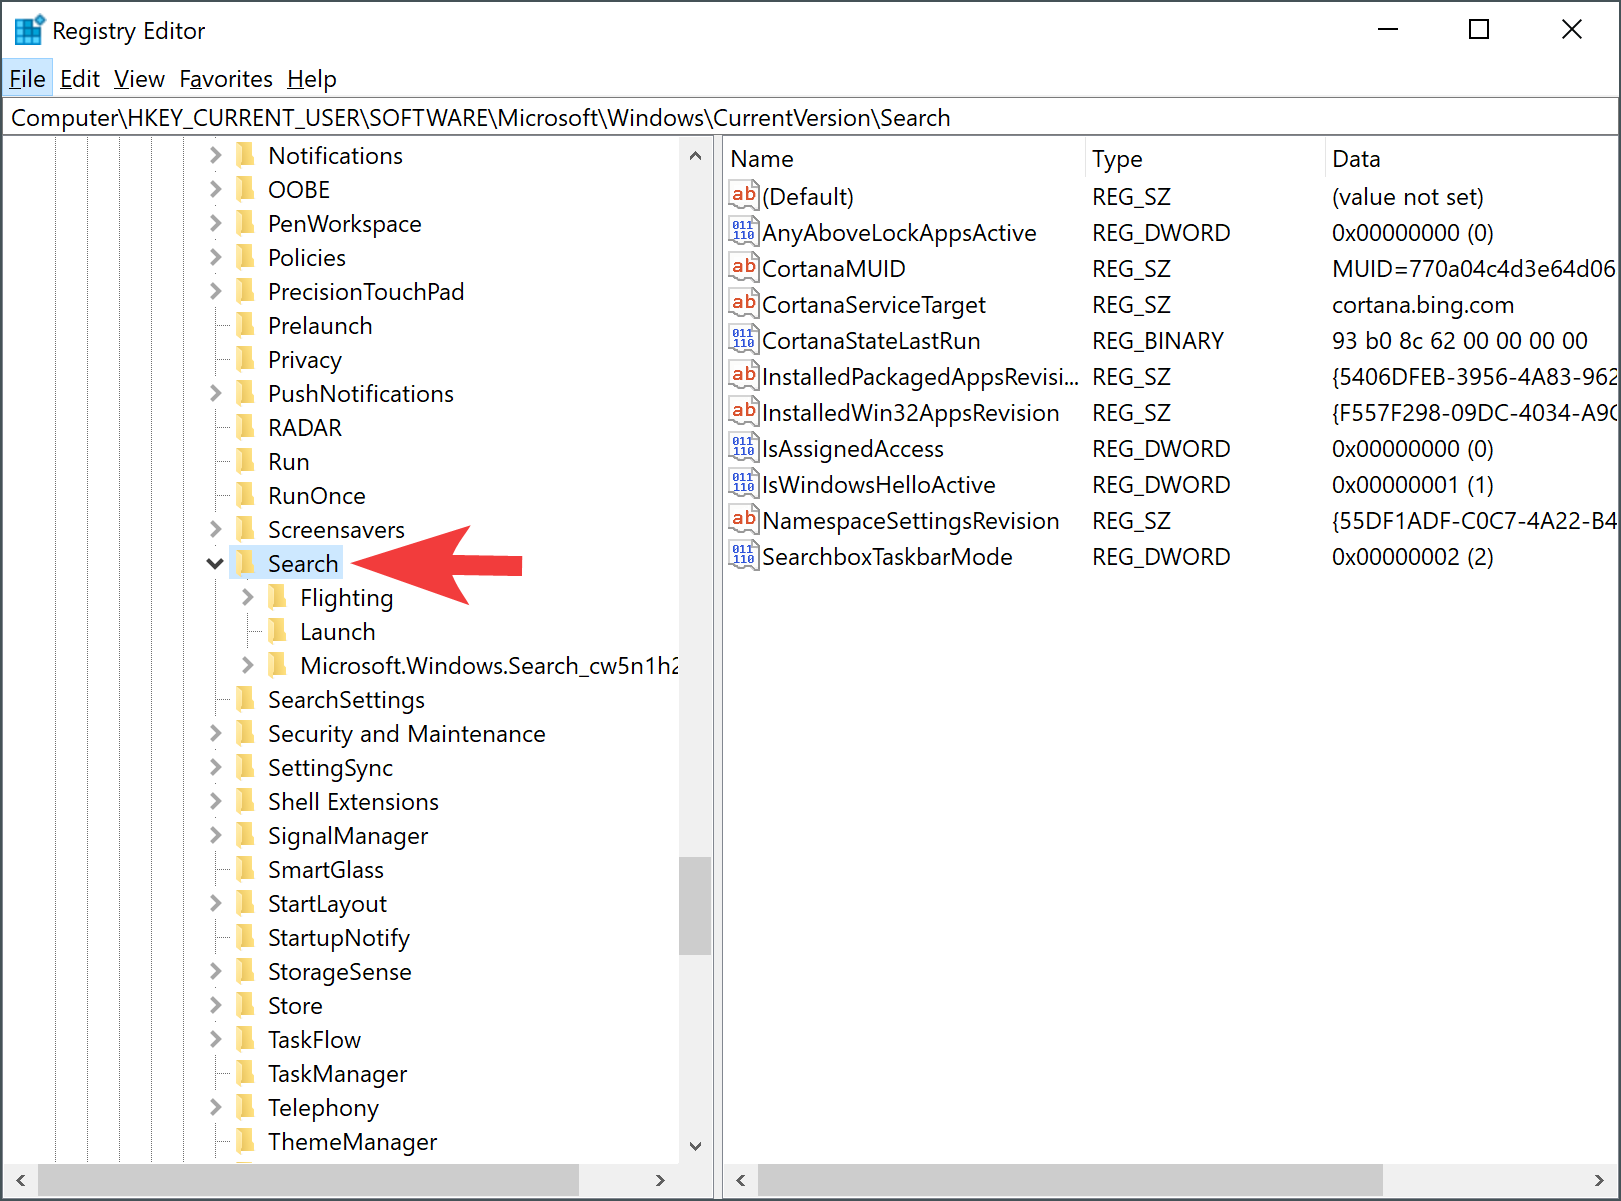
Step 11. Right-click on the Search key and choose New > DWORD (32-bit) Value.
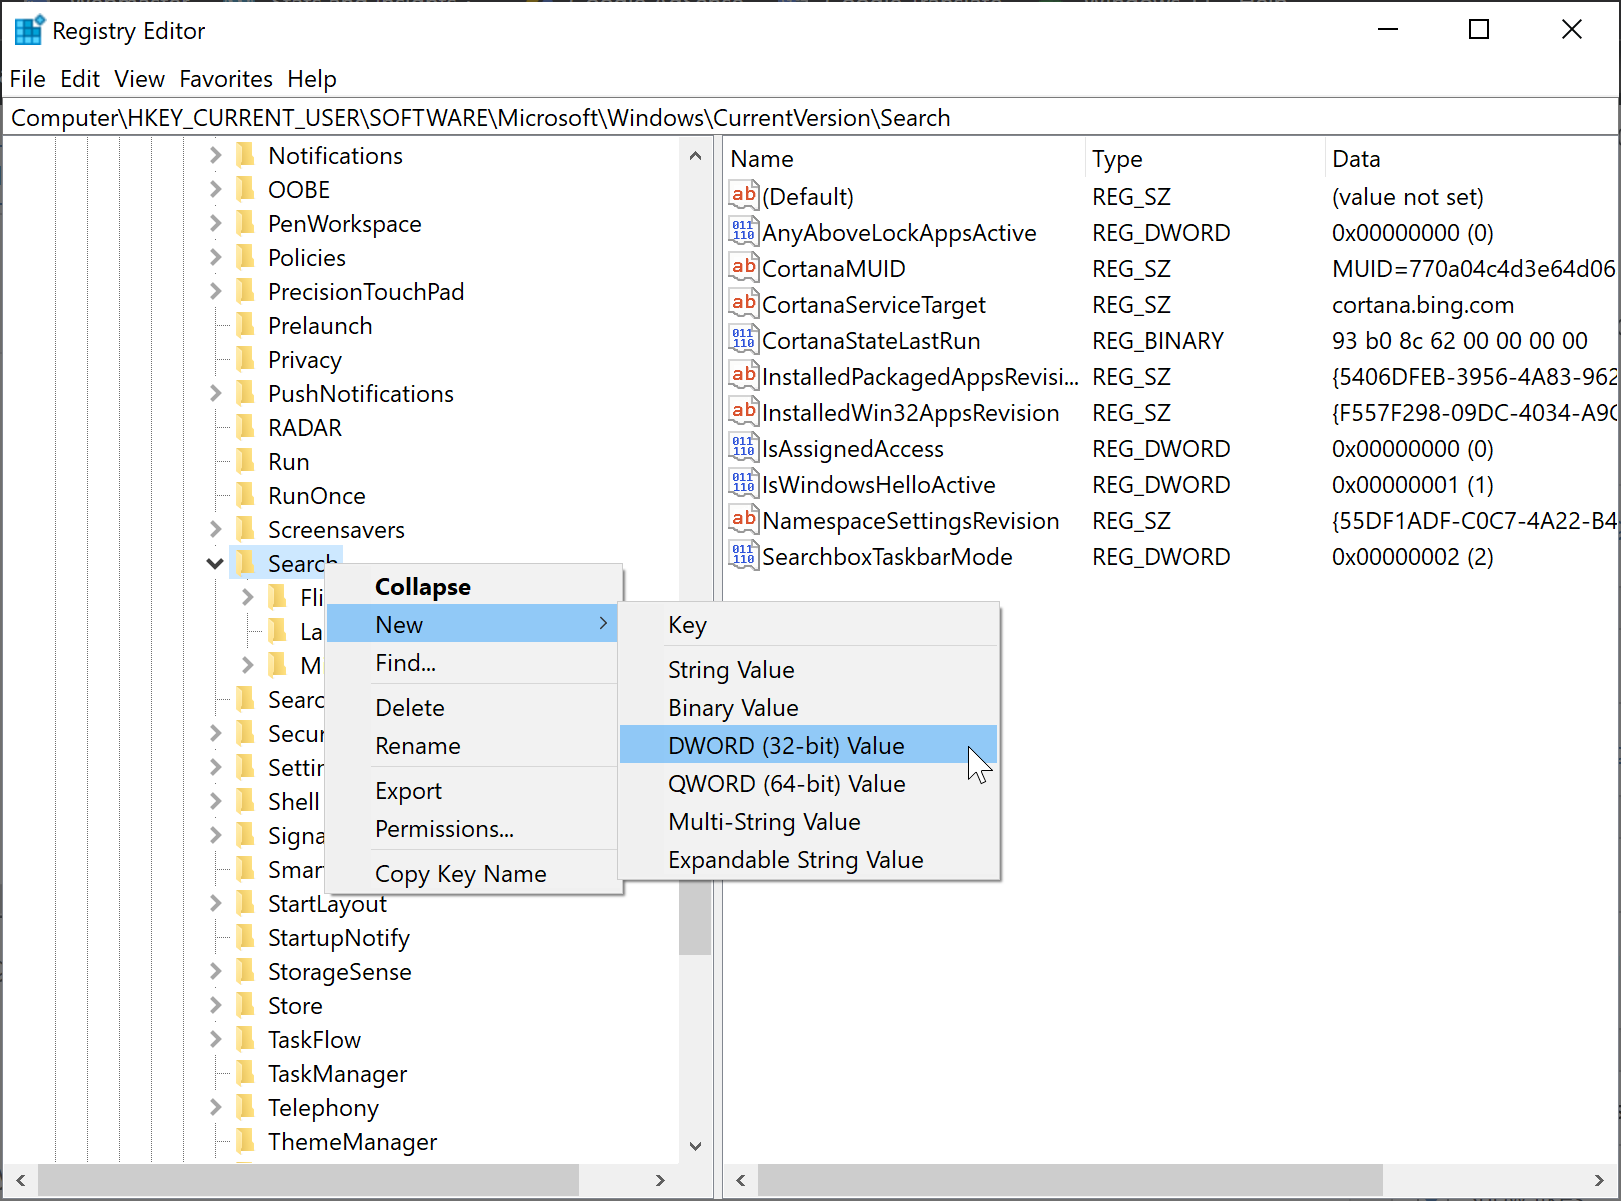
Step 12. Name the newly created REG_DWORD as BingSearchEnabled.
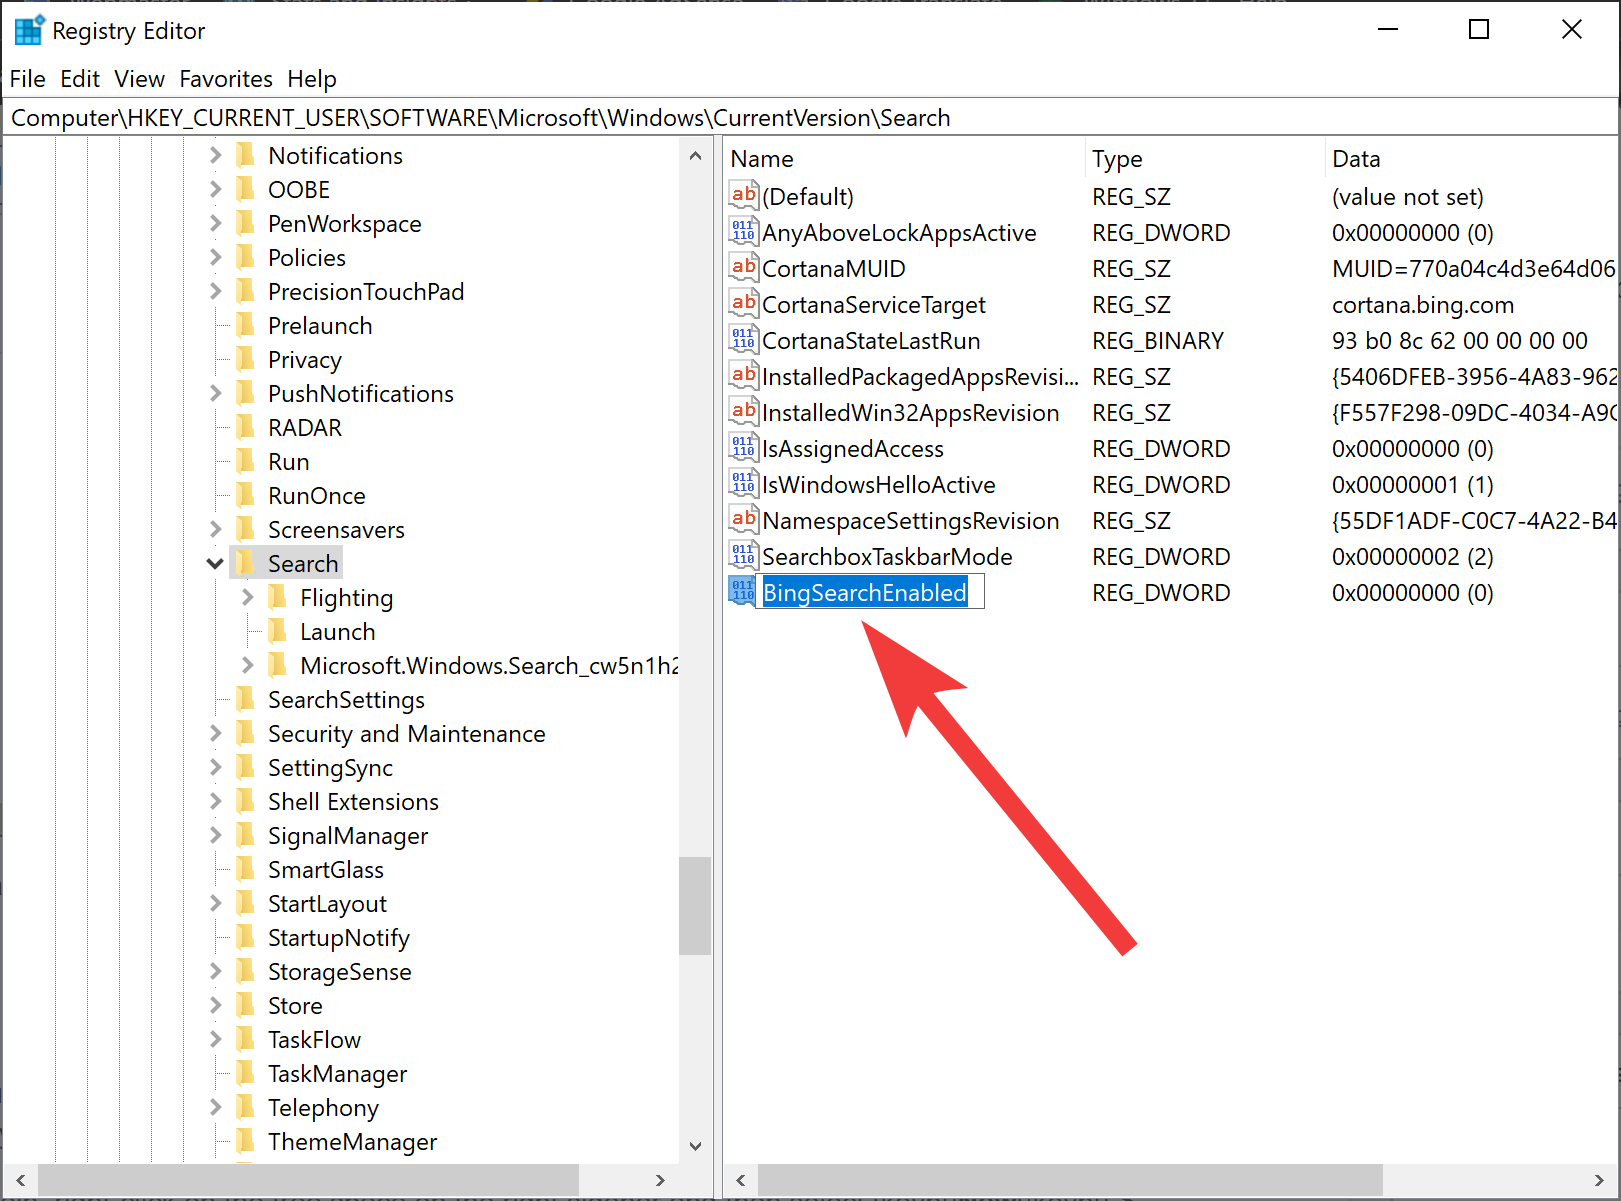
Step 13. Double-click on the newly created REG_DWORD BingSearchEnabled to edit its “Value data.”

Step 14. Set the “Value data” to 0
Step 15. Click OK.
Step 16. Again, right-click on the Search folder in the left sidebar and select New > DWORD (32-bit) Value.
Step 17. Name the newly created REG_DWORD as CortanaConsent.
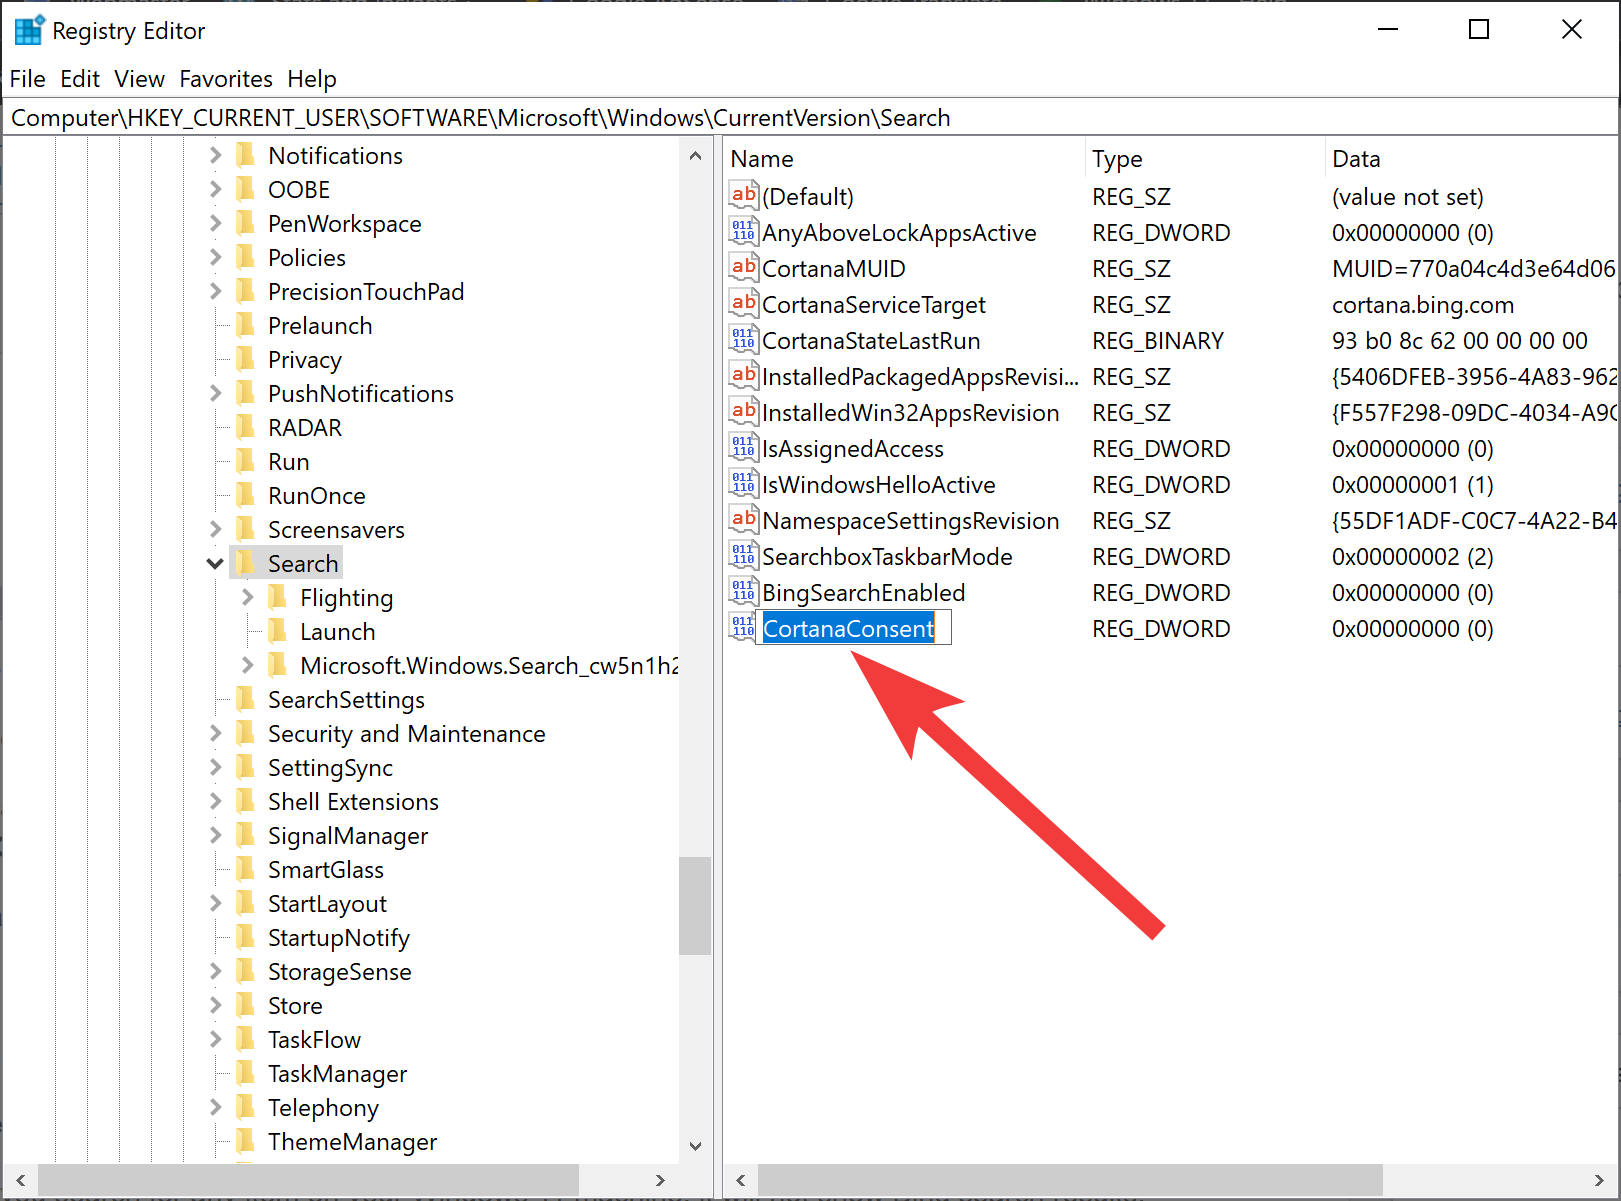
Step 18. Double-click on the newly created CortanaConsent REG_DWORD and set its “Value data” to 0.
Step 19. At last, restart your PC to apply the changes.
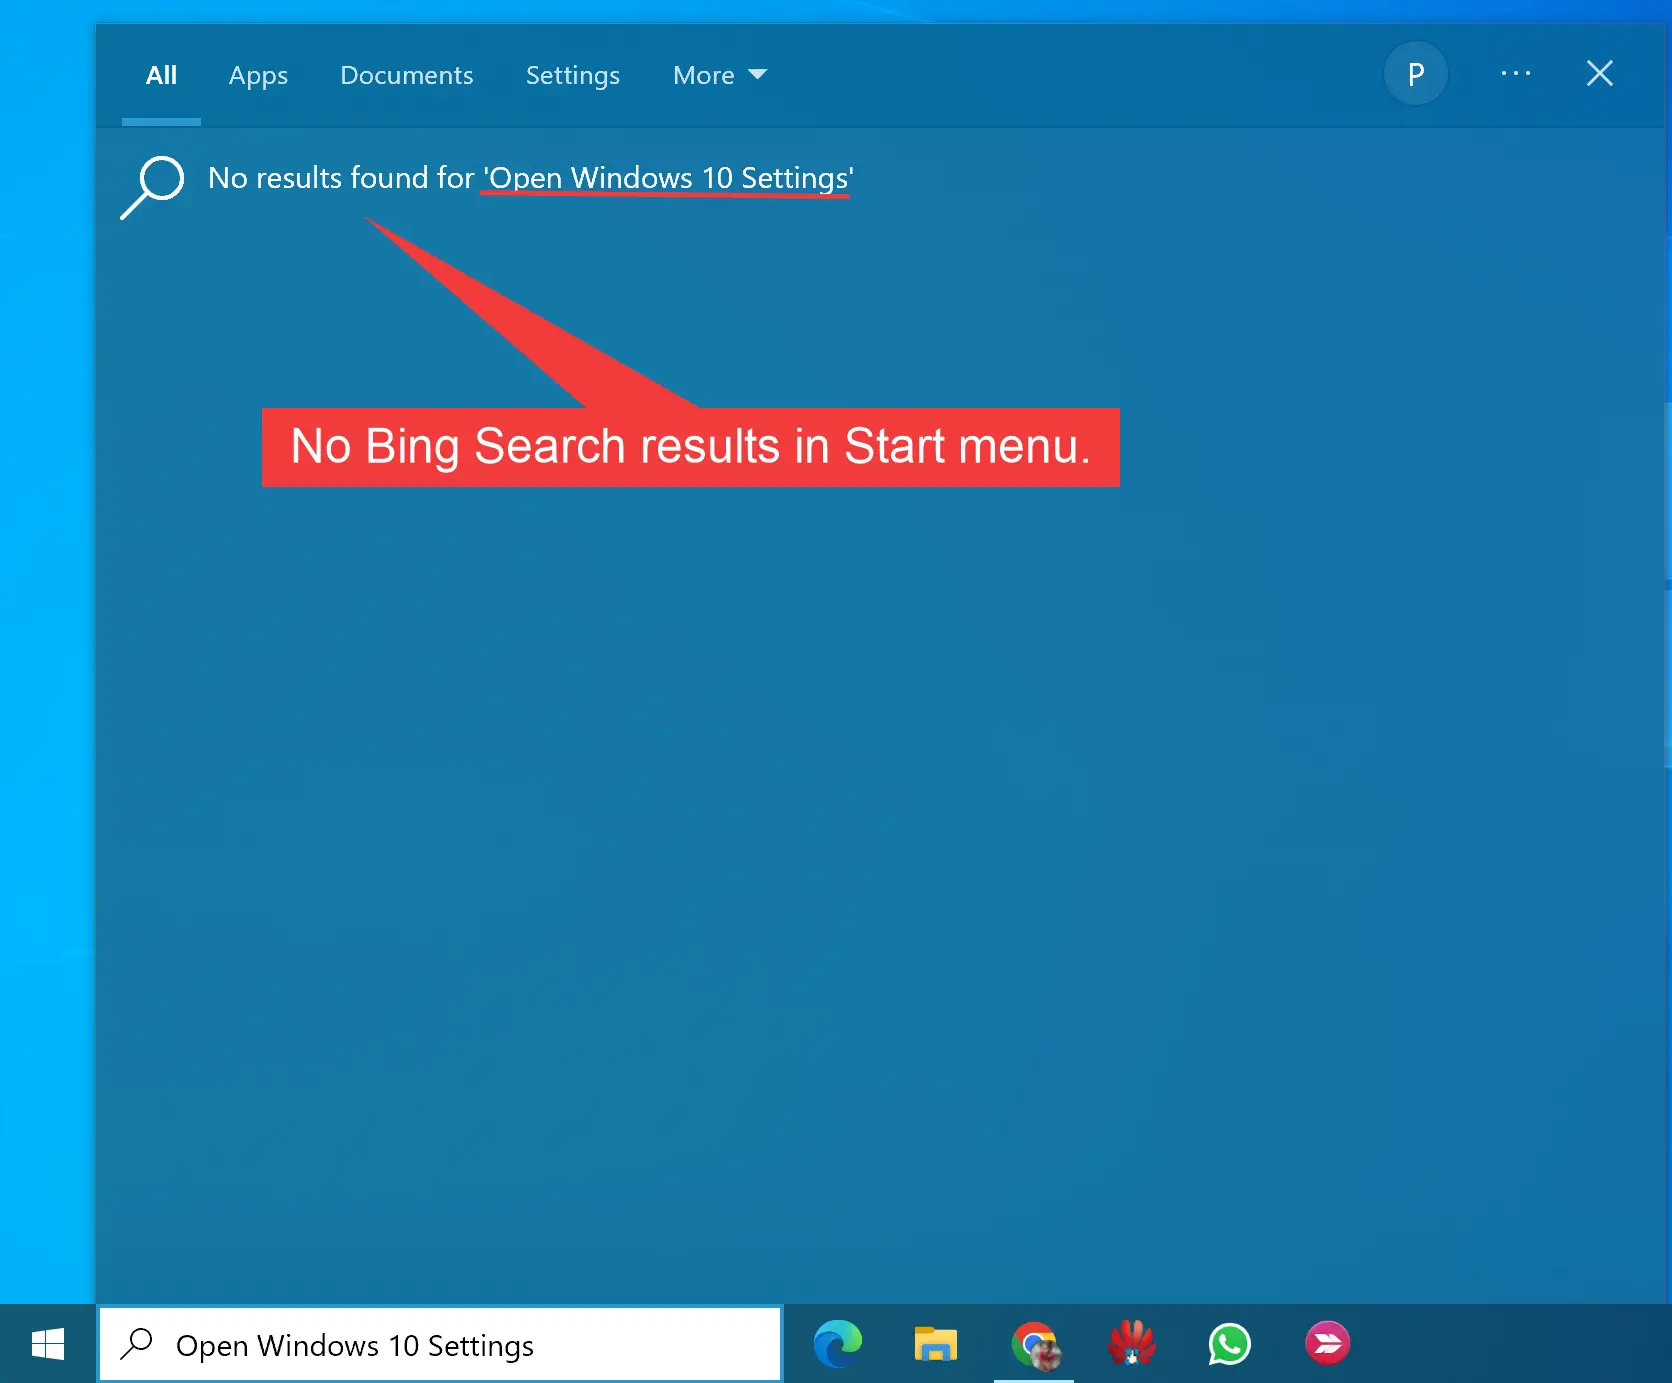
Now, when you search for any item on your Windows 10 machine, it will not display results from the Bing search engine anymore.
Happy searching!
Conclusion
In conclusion, while searching for anything on Windows 10 Start menu, by default, the search requests are sent to their servers, and results are provided from the Bing search engine. This means that your search queries are not private. However, if you are running Windows 10’s May 2020 Update or later, you can turn off this behavior of Windows 10 by disabling Bing search results in the Start menu. By following the steps mentioned in this gearupwindows article, you can easily turn off Bing search results and Cortana’s integration with Bing. This tweak will also disable Microsoft Edge advertisements that appear when you search for Chrome in Windows 10’s Start menu. By following these steps, you can ensure that your search queries remain private on Windows 10.