How do I turn on Night Light for Warmer Colors on Windows 11? Nowadays, without computers and laptops, our life is nothing. In every workplace, you will find PCs. People keep staring at the computer screens all day long. The increased usage of computers leads to an adverse impact on a person’s health, especially on the eyes. The major reason behind that is the Blue light from VDUs.
Now, Windows 11 operating system comes with a built-in feature called Night light. When this Night light feature is turned on, it reduces the Blue light on the screen and gives a warmer feeling. Unfortunately, this feature is turned off by default, and one needs to turn it on to use it.
This gearupwindows article will guide you on enabling and using the Night light for Warmer Colors on Windows 11. You can even schedule it to trigger automatically to reduce blue light and protect your eyes.
How to Enable Night Light on Windows 11?
To turn on or enable the Night light feature in Windows 11, perform the following steps:-
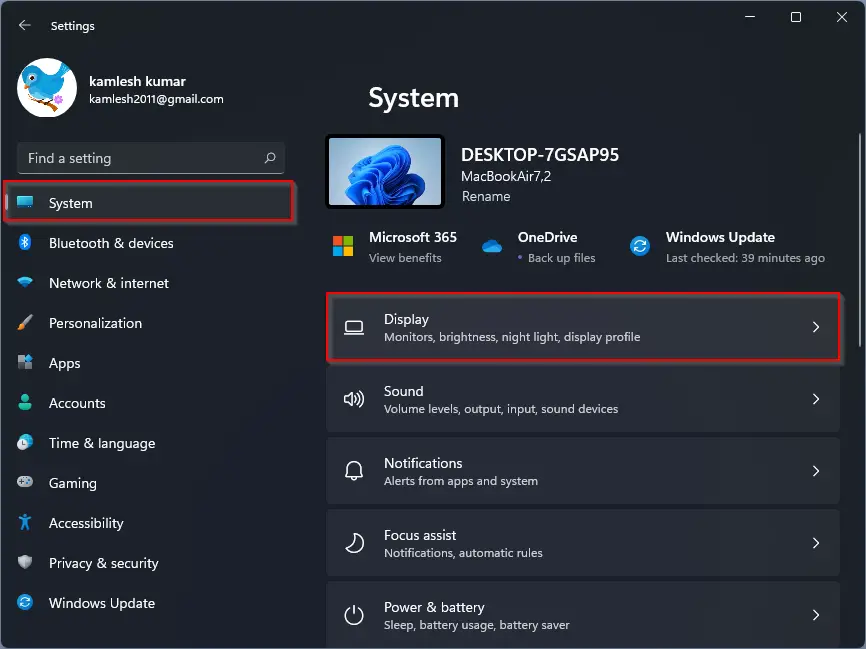
Step 1. Open the Settings app by pressing Windows + I keys simultaneously and then select the System category from the left side pane. On the System’s right side, click on the Display tab.
Step 2. Now, turn on the toggle switch next to the “Night light” option.
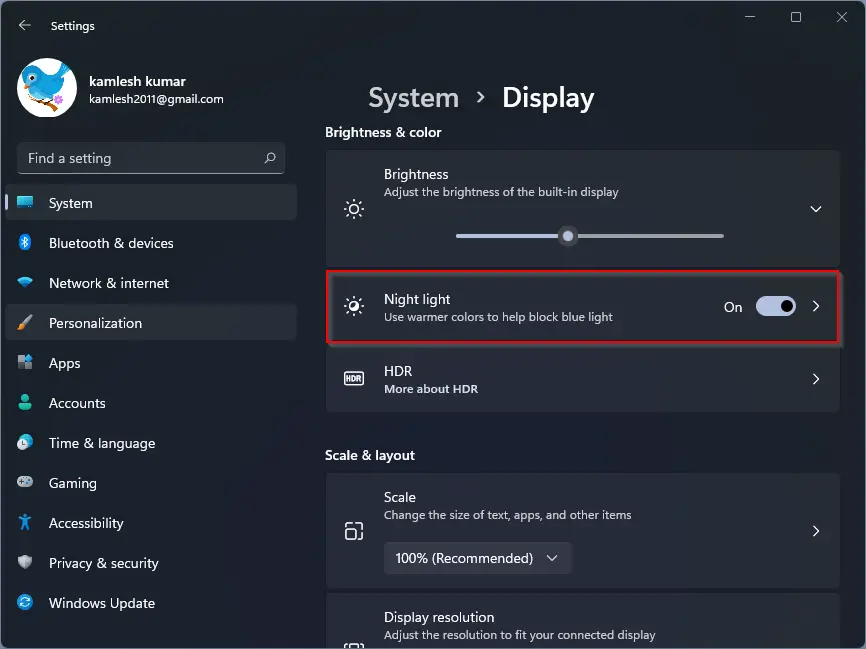
Once the Night Light feature is active on your Windows 11 machine, you will notice a warm tint across the screen, suggesting this activation. If the amount of warmth on your screen does not fit your requirement, you can always change the night light warmth.
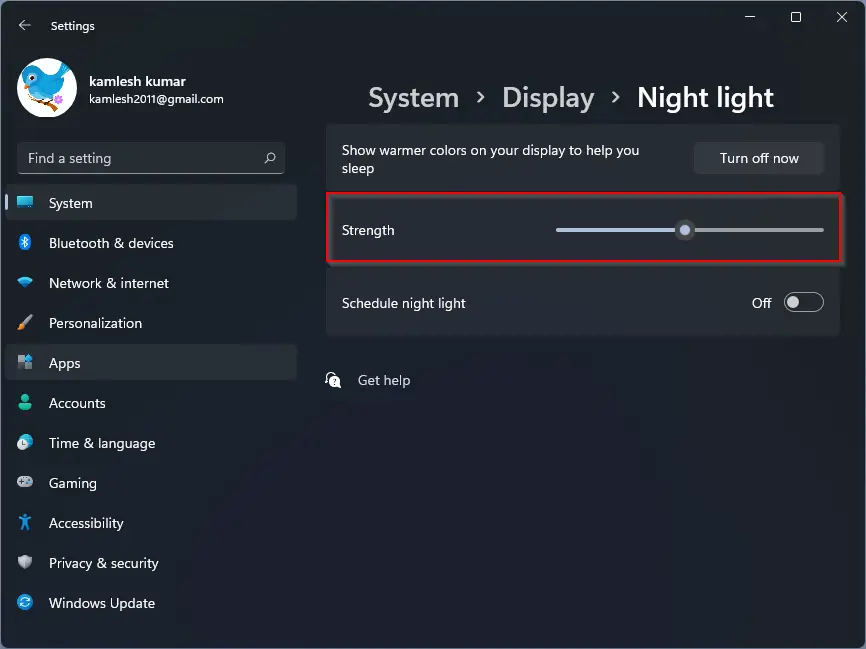
Step 3. On the same window, click anywhere on the Night light option. On the Night light page, navigate to the Strength section, which has a slider on the line ranging from 1 to 100, left to right, respectively. The closer you move this toggle to 100, the warmer the night light gets.
How to Schedule Night Light on Windows 11?
If you love using the Night light feature of Windows 11, activating and deactivating this feature each time can be time-consuming and irritating. You can schedule the night light according to your working hours and save time. After scheduling, this feature will automatically activate and deactivate on its own.
To schedule a Night light on Windows 11 PC, do the following:-
Step 1. Open the Settings app by pressing Windows + I keys simultaneously and then select the System category from the left side pane. On the System’s right side, select the Display tab.
Step 2. Now, turn on the toggle switch next to the “Night light” option.
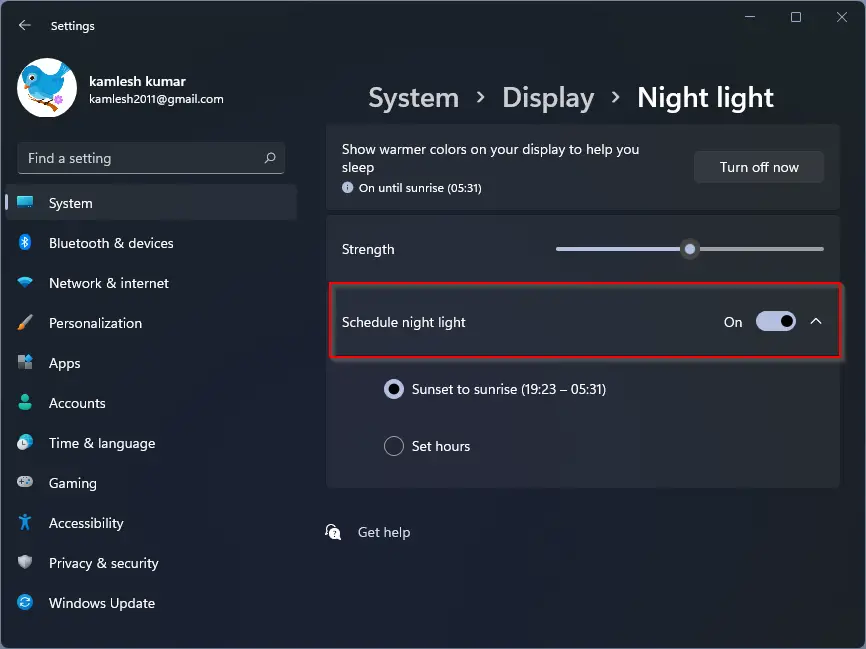
Step 3. Once the Night light function is turned on on your PC, click anywhere on the Night light option to open its further settings. Now, turn on the toggle switch next to the “Schedule night light” option. Here, you will find two options:-
- Sunset to sunrise: Windows will automatically determine sunset and sunrise and automatically schedule night light hrs for you.
- Set hours: If you are not happy with Windows automatic scheduled time, you can opt “Set hours” option and customize when to activate Night hours.
Conclusion
In conclusion, the Night light feature on Windows 11 is a useful tool for those who use their computers for extended periods. It reduces the blue light emitted by the screen, which can cause eye strain and other health issues. Turning on this feature is a straightforward process, and users can also adjust the warmth of the screen to their liking. Additionally, scheduling the Night light feature can save time and effort in activating and deactivating it manually. Overall, this feature is a welcome addition to Windows 11, and users should take advantage of it to protect their eyes and promote better health.