By default, Windows 11 comes with a handy feature that allows you to snap a window to a particular area on the screen with the help of your mouse. To do that, click on the title bar of a program’s window. Then, drag it to a corner or edge of the screen. After that, find the possible dragging position and release the mouse. This action will place the window in a particular area you have selected.
Although this feature is helpful, if you do not like to use this feature, you can disable it by referring to this post. You can turn on or off the “Drag to Snap” feature using your mouse in Windows 11 with the help of Registry Editor.
Since to enable or disable “Drag to Snap” in Windows 11, you will modify the registry; you are requested to backup all Registry files and create a System Restore point. If something goes wrong, you can restore your operating system to its previous working state.
How to Disable Drag and Drop Snap to Grid in Windows 11?
If you would like to turn off Drag and Drop Snap to Grid in Windows 11, use the following steps:-
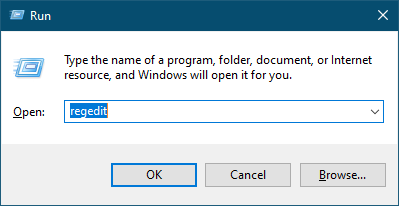
Step 1. First, press the Windows + R keys on the keyboard to open the Run dialog.
Step 2. Then in the Run box, type the following and hit the Enter button on the keyboard to open the Registry Editor window:-
regedit
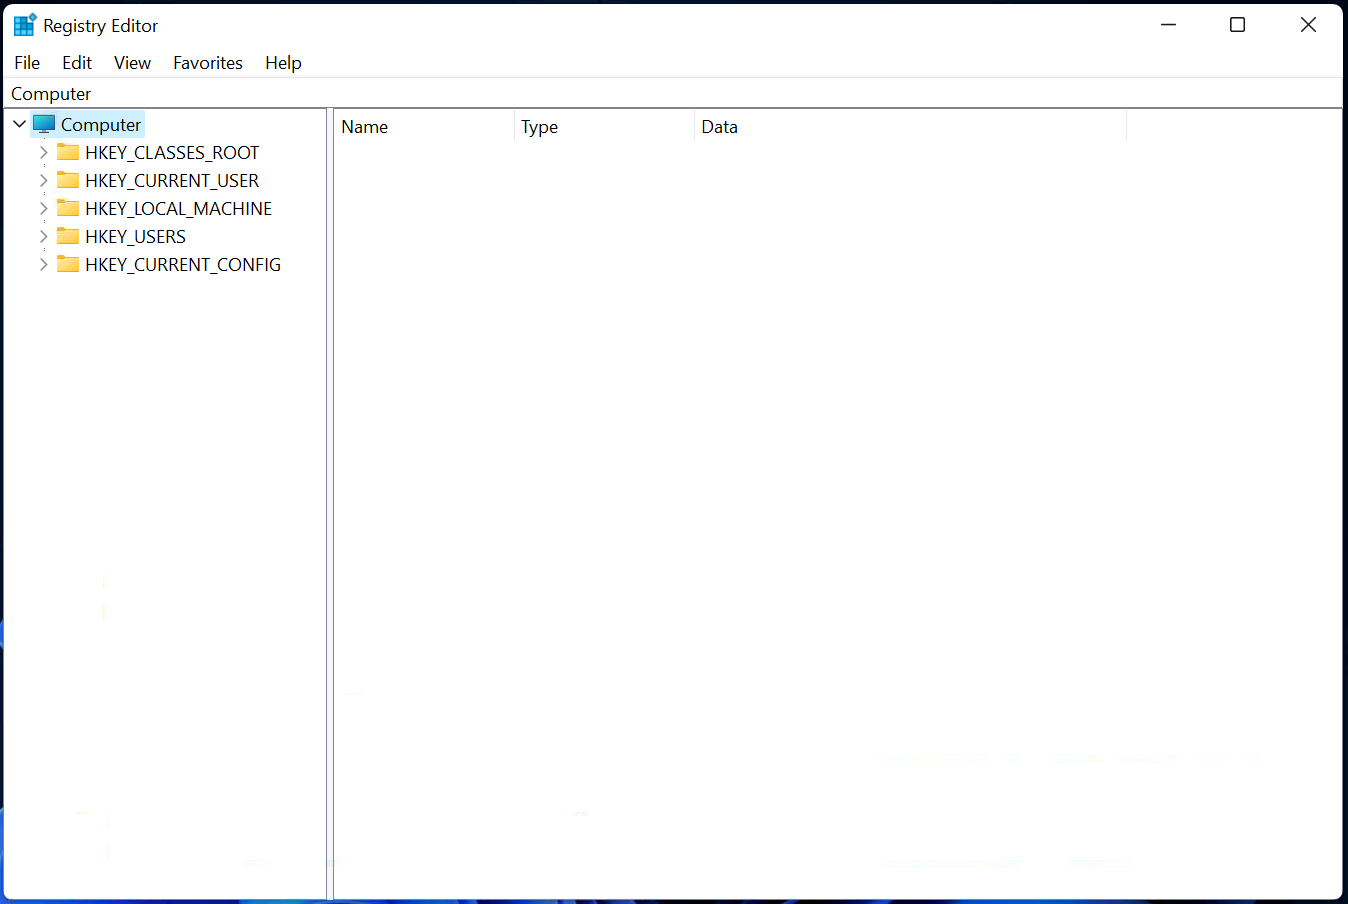
Step 3. Once the Registry Editor opens on your computer, navigate to the following path:-
HKEY_CURRENT_USER\Control Panel\Desktop
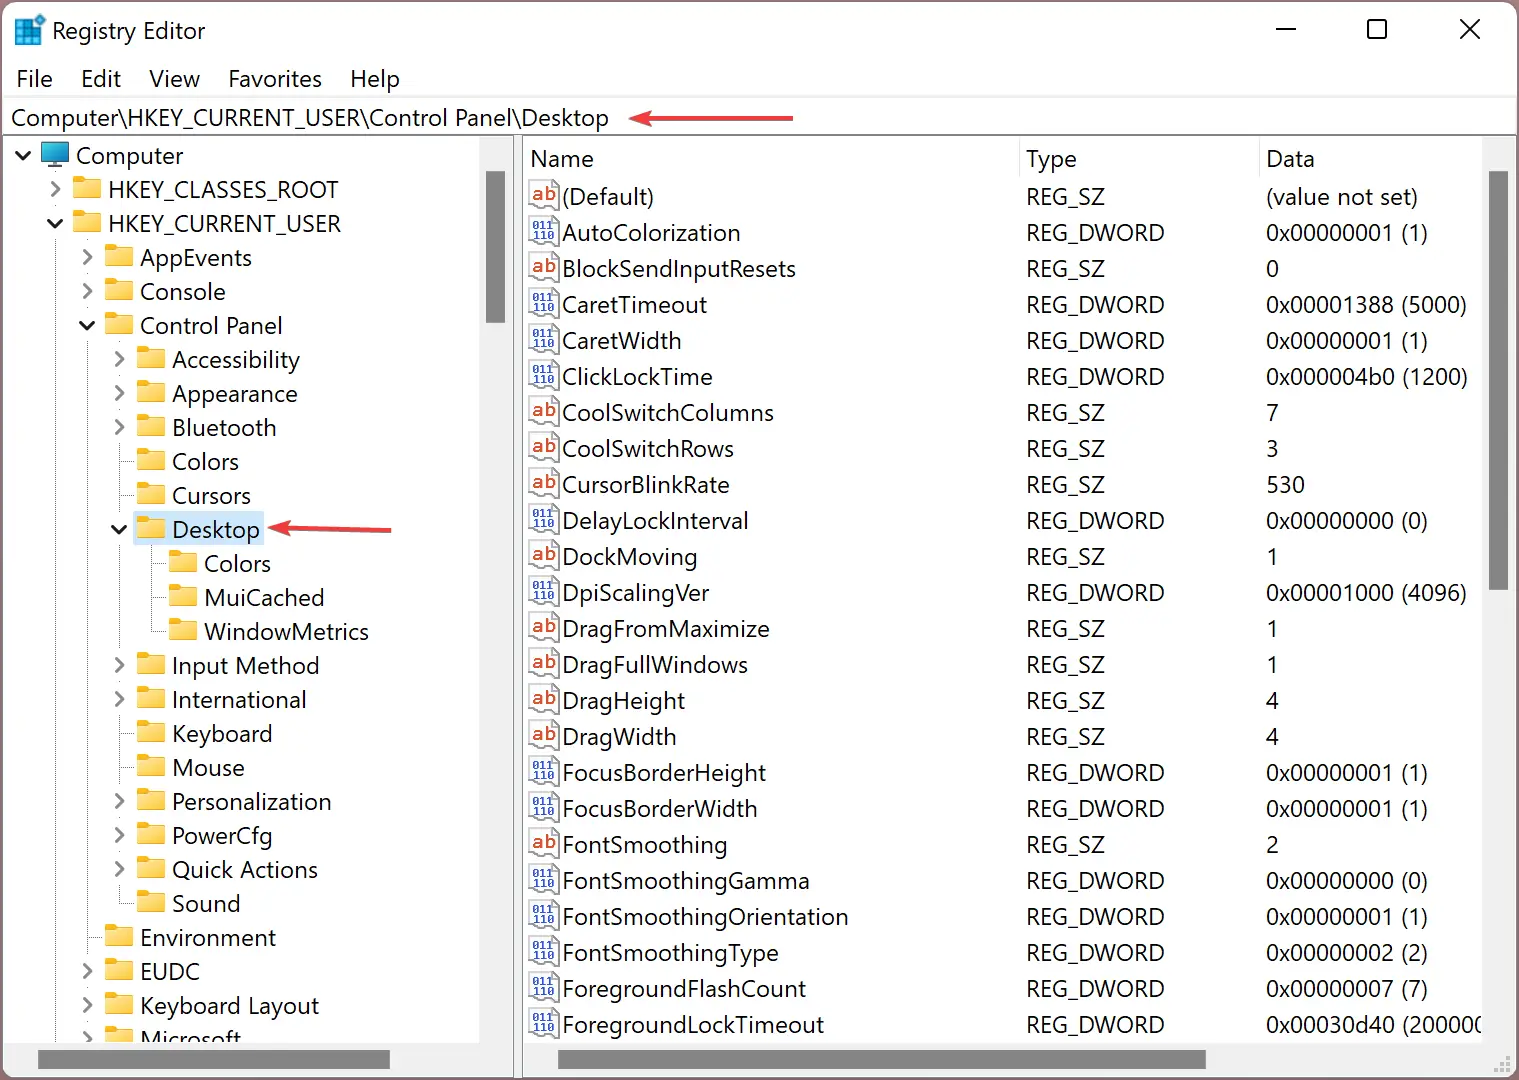
Step 4. After that, on the right side of the “Desktop” folder, look for the DWORD value named DockMoving and WindowArrangementActive. Double-click on each of them and set the “Value data” as 0.
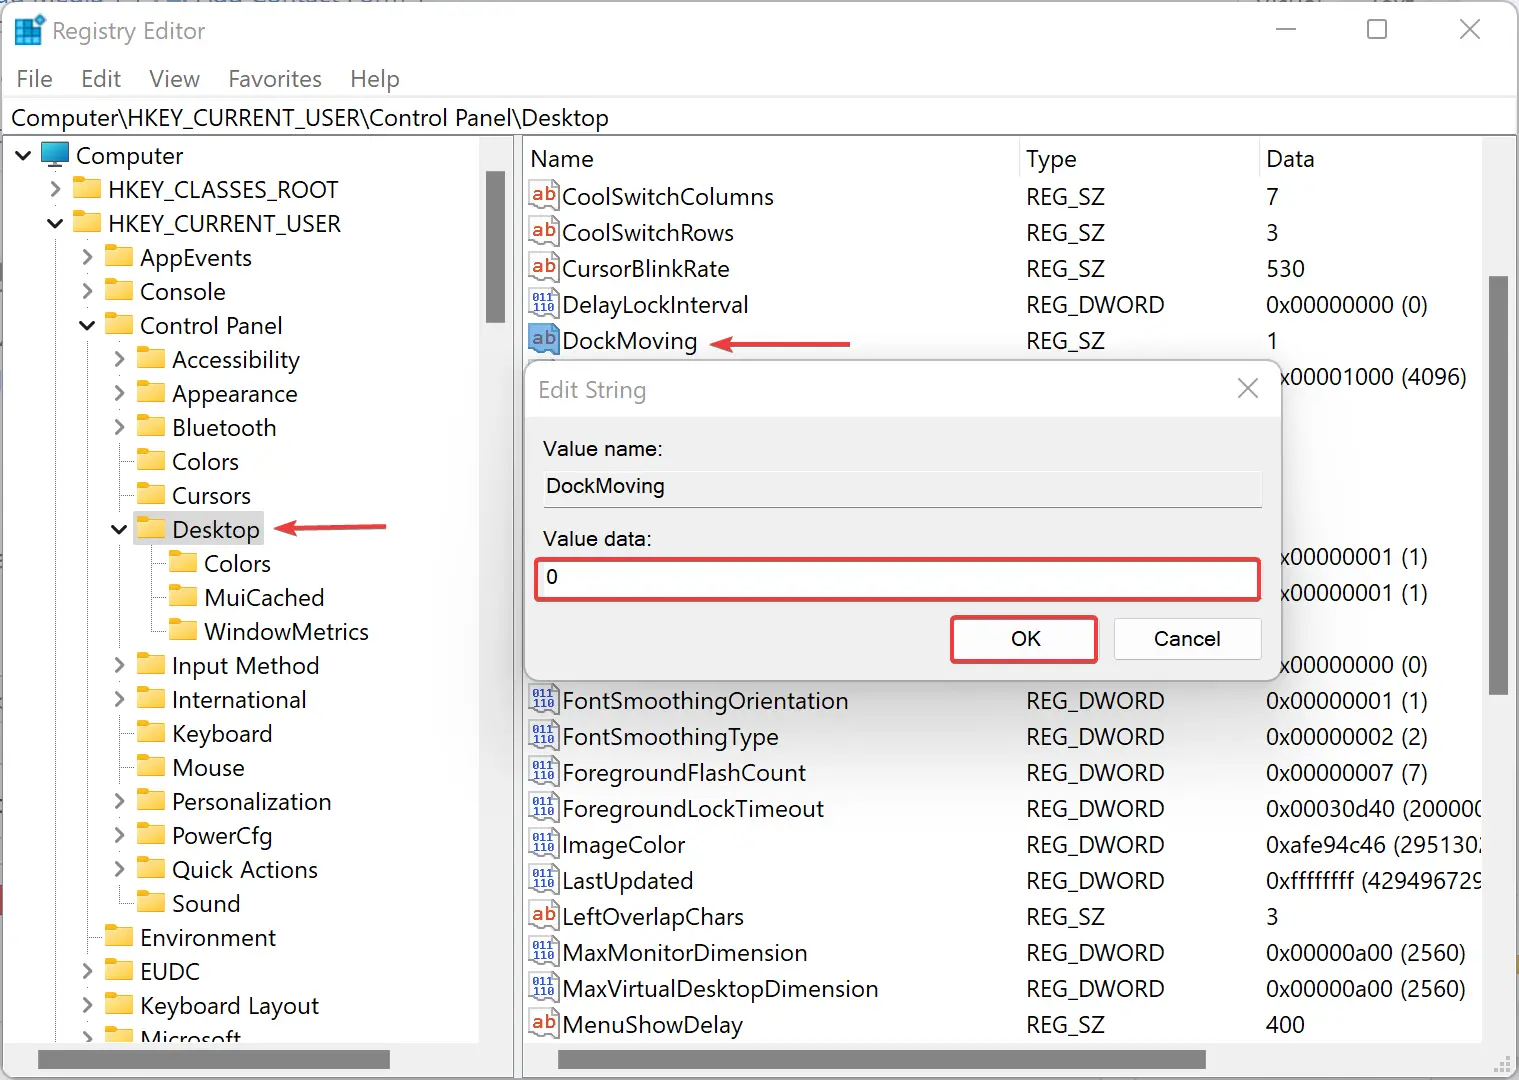
Step 5. Next, click the OK button to save the changes.
Step 6. Finally, restart your computer or sign out and sign in to your user account.
After completing the above steps, you will be unable to move your mouse to snap a window on your screen.
To enable Drag and Drop Snap to Grid in Windows 11, navigate the following path in the left sidebar of Registry Editor:-
HKEY_CURRENT_USER\Control Panel\Desktop
On the right side of the Desktop folder, look for the REG_DWORD named DockMoving and WindowArrangementActive. Double-click on each of them and set the “Value data” as 1.
That’s it.
Conclusion
In conclusion, the drag and drop snap to grid feature in Windows 11 is a useful feature that helps users organize their windows on the screen. However, some users may prefer to disable this feature. This post has provided step-by-step instructions on how to disable the drag and drop snap to grid feature in Windows 11 using the Registry Editor. It is important to note that modifying the registry can be risky, and users are advised to create a system restore point and backup their registry files before making any changes.