Windows 10 comes with many features, and its customization is possible through the Settings app and Group Policy. One good quality that is available in Windows 10 is Inactive Scrolling. Before the Inactive Scrolling feature, we used to select a window to activate it, and then only scrolling was possible through the content. However, with the Inactive Scrolling feature, one can scroll through the content, even without activating the window. One has to just hover the mouse over the window and scroll through the content.
This feature sounds cool, but it is not suitable for everyone. Many Windows users have experienced the accidental scrolling problem, and they wish to disable this feature as it is enabled in Windows 10 by default. Thanks to Microsoft, they have provided an option to disable it, which means there is no need to use a third-party tool to undermine the Inactive Scroll feature.
This post will guide you on enabling and disabling the Inactive Scrolling feature in Windows 10. You can achieve it using at least two methods; these are the following:-
- Enable or Disable Inactive Scrolling using the Settings app
- Turn On/Off Inactive Scrolling through Registry Editor
How to Disable the Inactive Scrolling feature in Windows 10 using the Settings app?
To turn off the Inactive Scrolling feature in Windows 10, perform the following steps:-
Step 1. Launch the Settings by pressing the Windows logo + I keys or any other method.
Step 2. In the Settings window that opens, click on the Devices category.

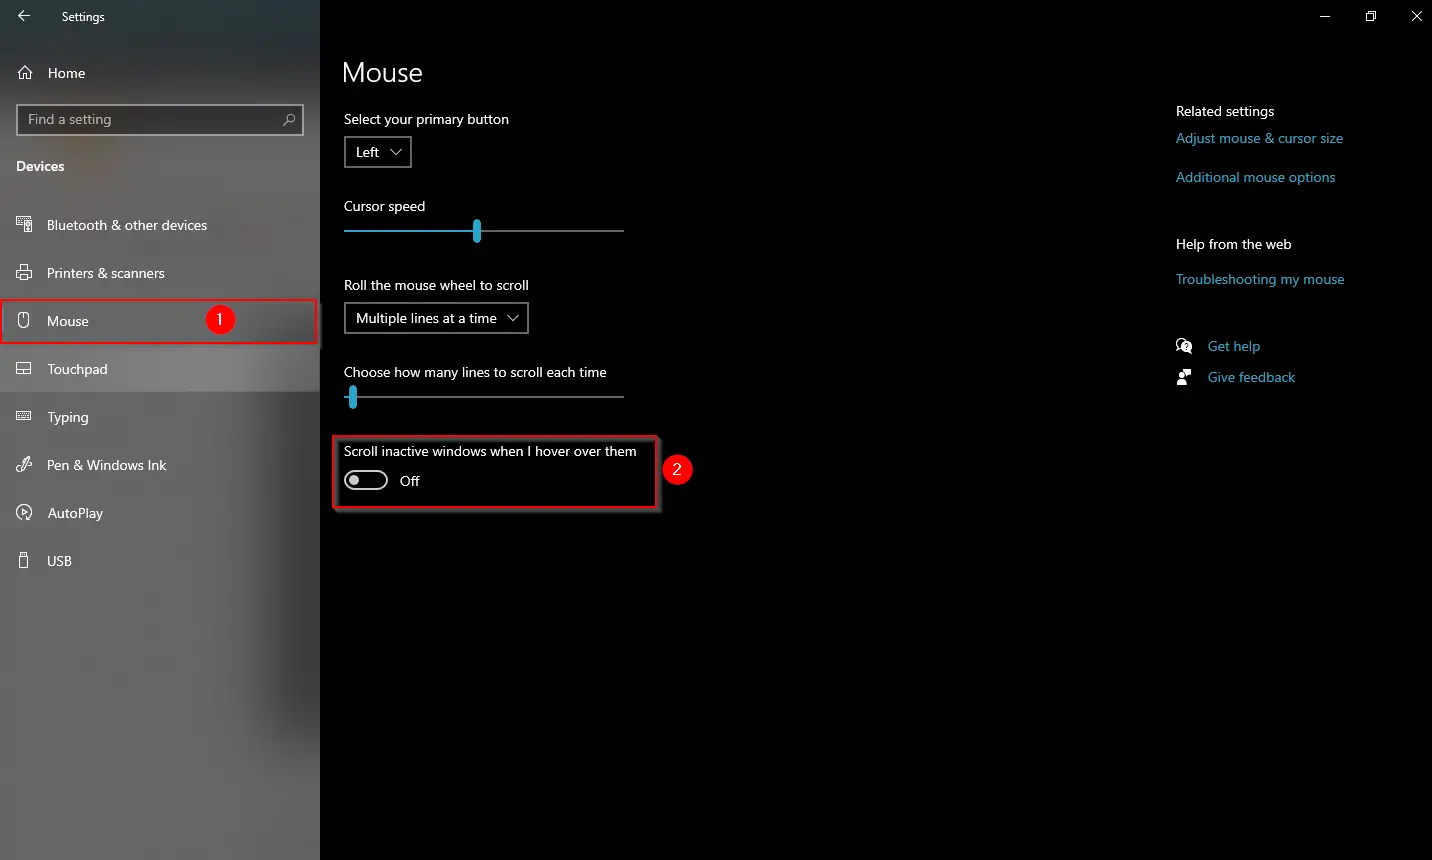
Step 3. Click on the Mouse in the left-side menu under “Devices.”

Step 4. On the right side pane of the Mouse, turn the toggle Off next to the “Scroll inactive window when I hover over them.”
Once you complete the above steps, you should be able to disable Inactive Scrolling in Windows 10.
How to Enable the Inactive Scrolling feature in Windows 10 using the Settings app?
To turn on the Inactive Scrolling feature in Windows 10, perform the following steps:-
Step 1. Launch the Settings by pressing the Windows logo + I keys or any other method.
Step 2. In the Settings window that opens, click on the Devices category.
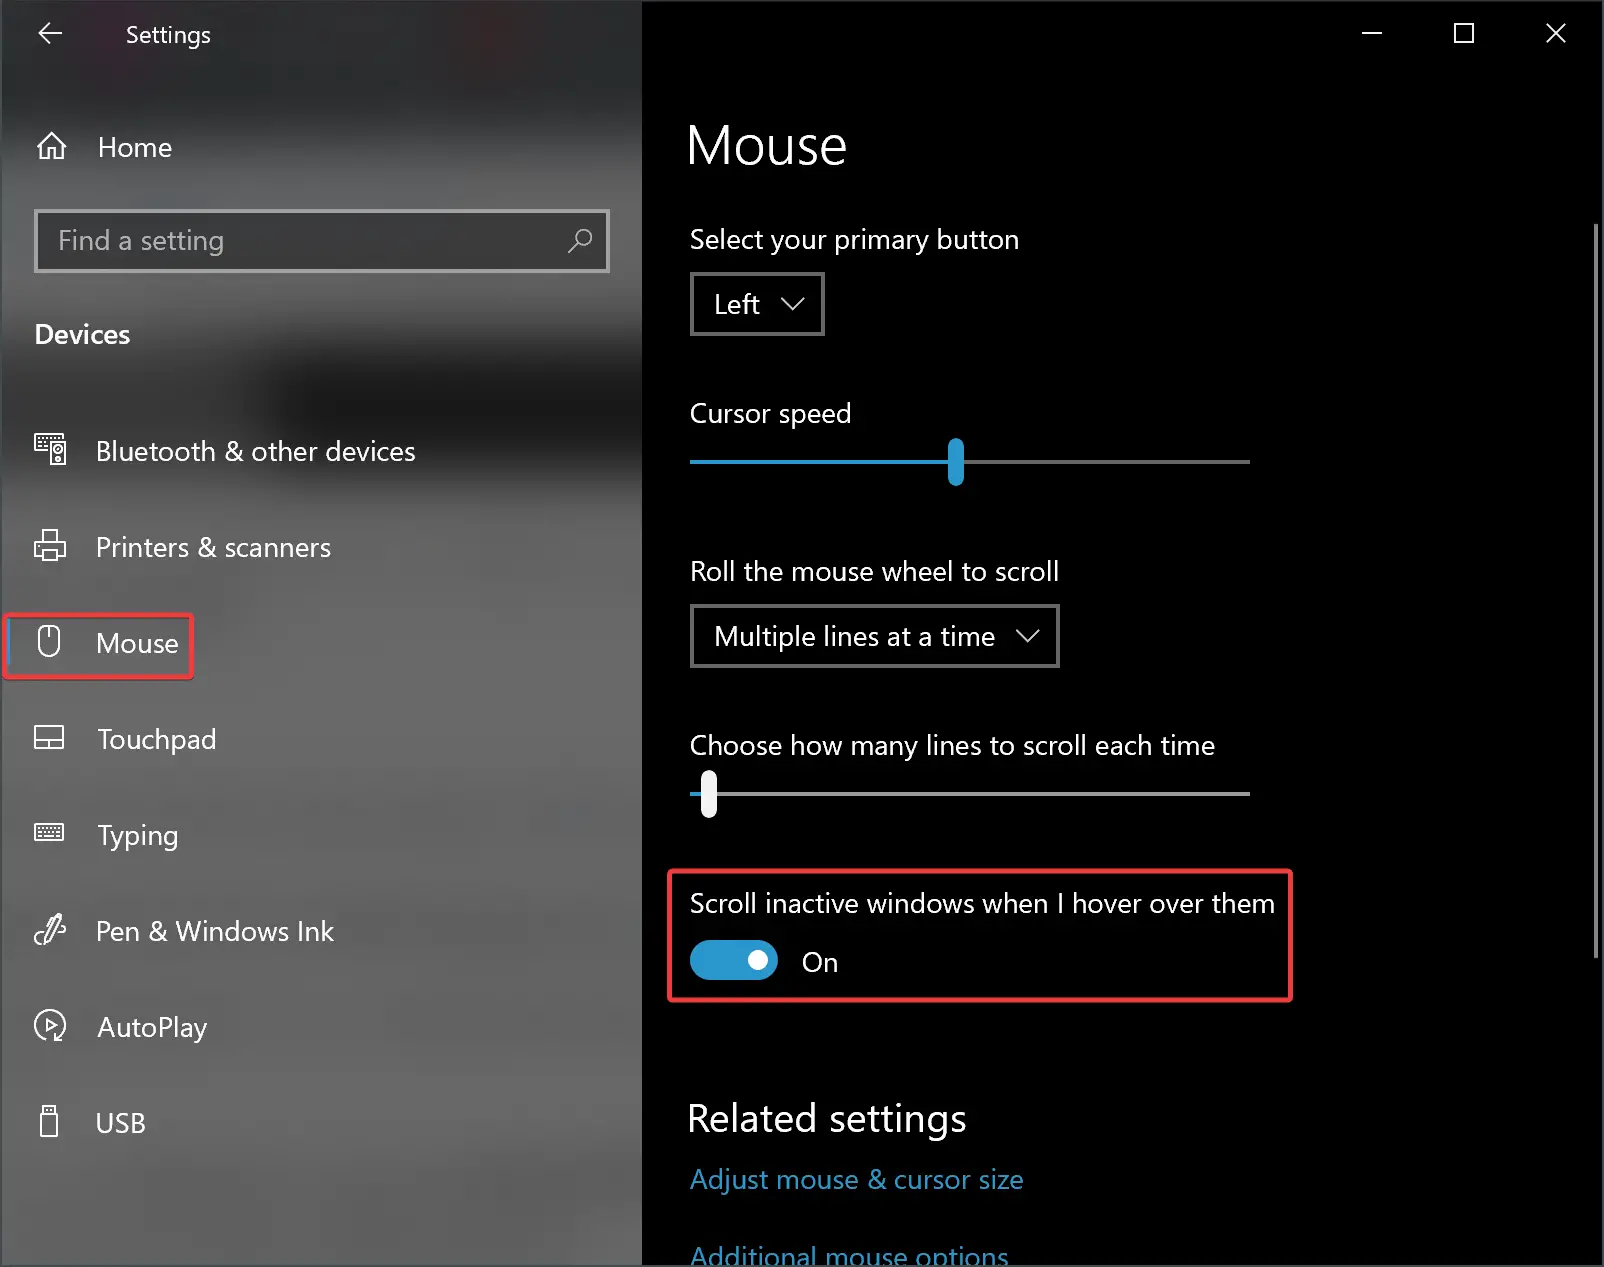
Step 3. Click on the Mouse in the left-side menu under “Devices.”
Step 4. On the right side pane of the Mouse, turn the toggle On next to the “Scroll inactive window when I hover over them.”
Once you finish the above steps, you should be able to enable Inactive Scrolling in Windows 10.
How to Enable or Disable Inactive Scrolling through Registry Editor?
If Windows Registry is your preferred method to customize Windows 10 features, perform the following advised steps:-
Step 1. Press and hold the Windows logo key and press the R key to open the Run command box.
Step 2. In the Run box that opens, type the following command and hit Enter from the keyboard to launch the Registry Editor window:-
regedit


Step 3. In the Registry Editor window, navigate to the following key:-
Computer\HKEY_CURRENT_USER\Control Panel\Desktop

Step 4. On the right side pane of the Desktop, double-click on the DWORD (32-bit) Value “MouseWheelRouting” to open it and set the Value data from 2 to 0. This will disable Inactive Scrolling in Windows 10.
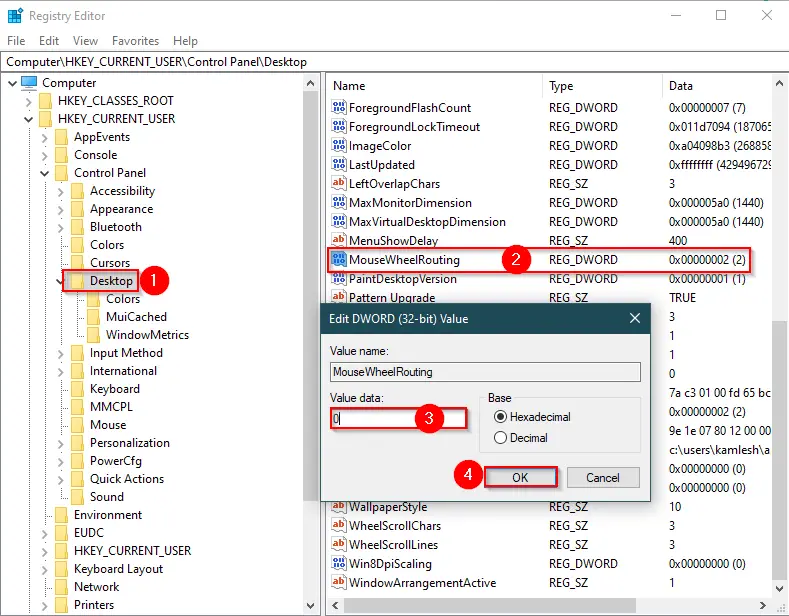
Step 5. Click the OK button.
Step 6. Then, reboot your computer.
Once you complete the above steps, the Inactive Scrolling feature is disabled on your Windows 10 PC. If you want to enable it again, repeat the above steps, and in step 4, change the Value data from 0 to 2.
That’s all!!!
Conclusion
In conclusion, Windows 10 offers various features that can be customized according to user preferences. One such feature is Inactive Scrolling, which allows users to scroll through content even without activating the window. While this feature can be useful for some, it may not be suitable for everyone, and accidental scrolling can be a problem. However, Microsoft has provided an option to enable or disable this feature, and users can achieve it using either the Settings app or the Registry Editor. By following the steps mentioned in this post, users can easily enable or disable Inactive Scrolling in Windows 10, depending on their preferences.