Internet Protocol version 6 (IPv6) is the latest version of the Internet Protocol, designed to replace the older IPv4 protocol that’s been in use for decades. While IPv6 brings several advantages, some situations might require you to enable or disable it on your Windows 11/10 computer. Whether you need to troubleshoot network issues or prefer to use only IPv4, here’s a user-friendly guide on how to enable or disable IPv6 on Windows 11/10.
What is IPv6?
IPv6 provides a larger address space than IPv4, enabling more devices to connect directly to the Internet and supporting the growth of the Internet ecosystem. It brings benefits such as improved security, auto-configuration, and streamlined routing. However, IPv4 is still widely used, and in some cases, disabling IPv6 can resolve compatibility issues with certain networks or applications.
How to Enable or Disable IPv6 on Windows 11 or 10?
Follow these simple steps to enable or disable IPv6 on your Windows 11or PC:-
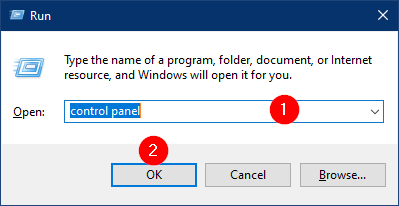
Step 1. Right-click on the Start button located on the taskbar, and from the context menu, select “Run.”
Step 2. In the Run dialog box, type “control” or “control panel” and press Enter or click OK. This will open the Control Panel.
Step 3. In the Control Panel, set the “View by” option to “Category” (usually located in the top-right corner).
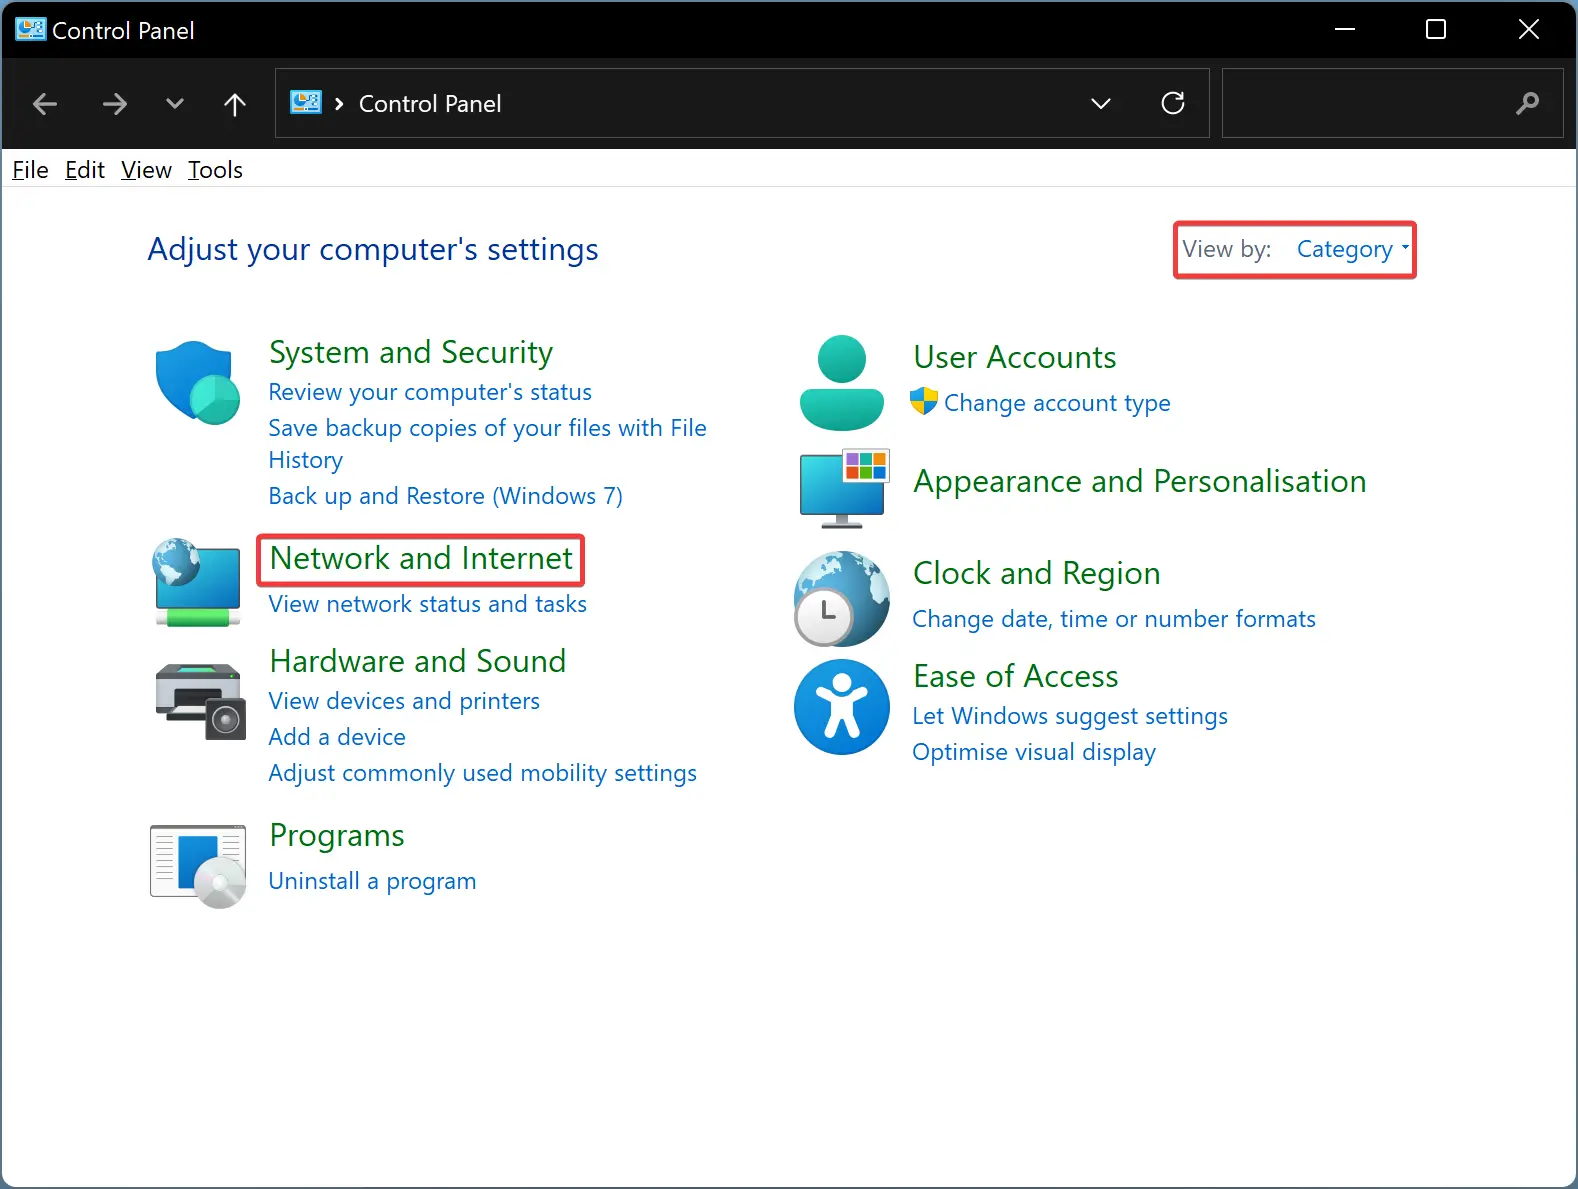
Step 4. Click on the “Network and Internet” category.
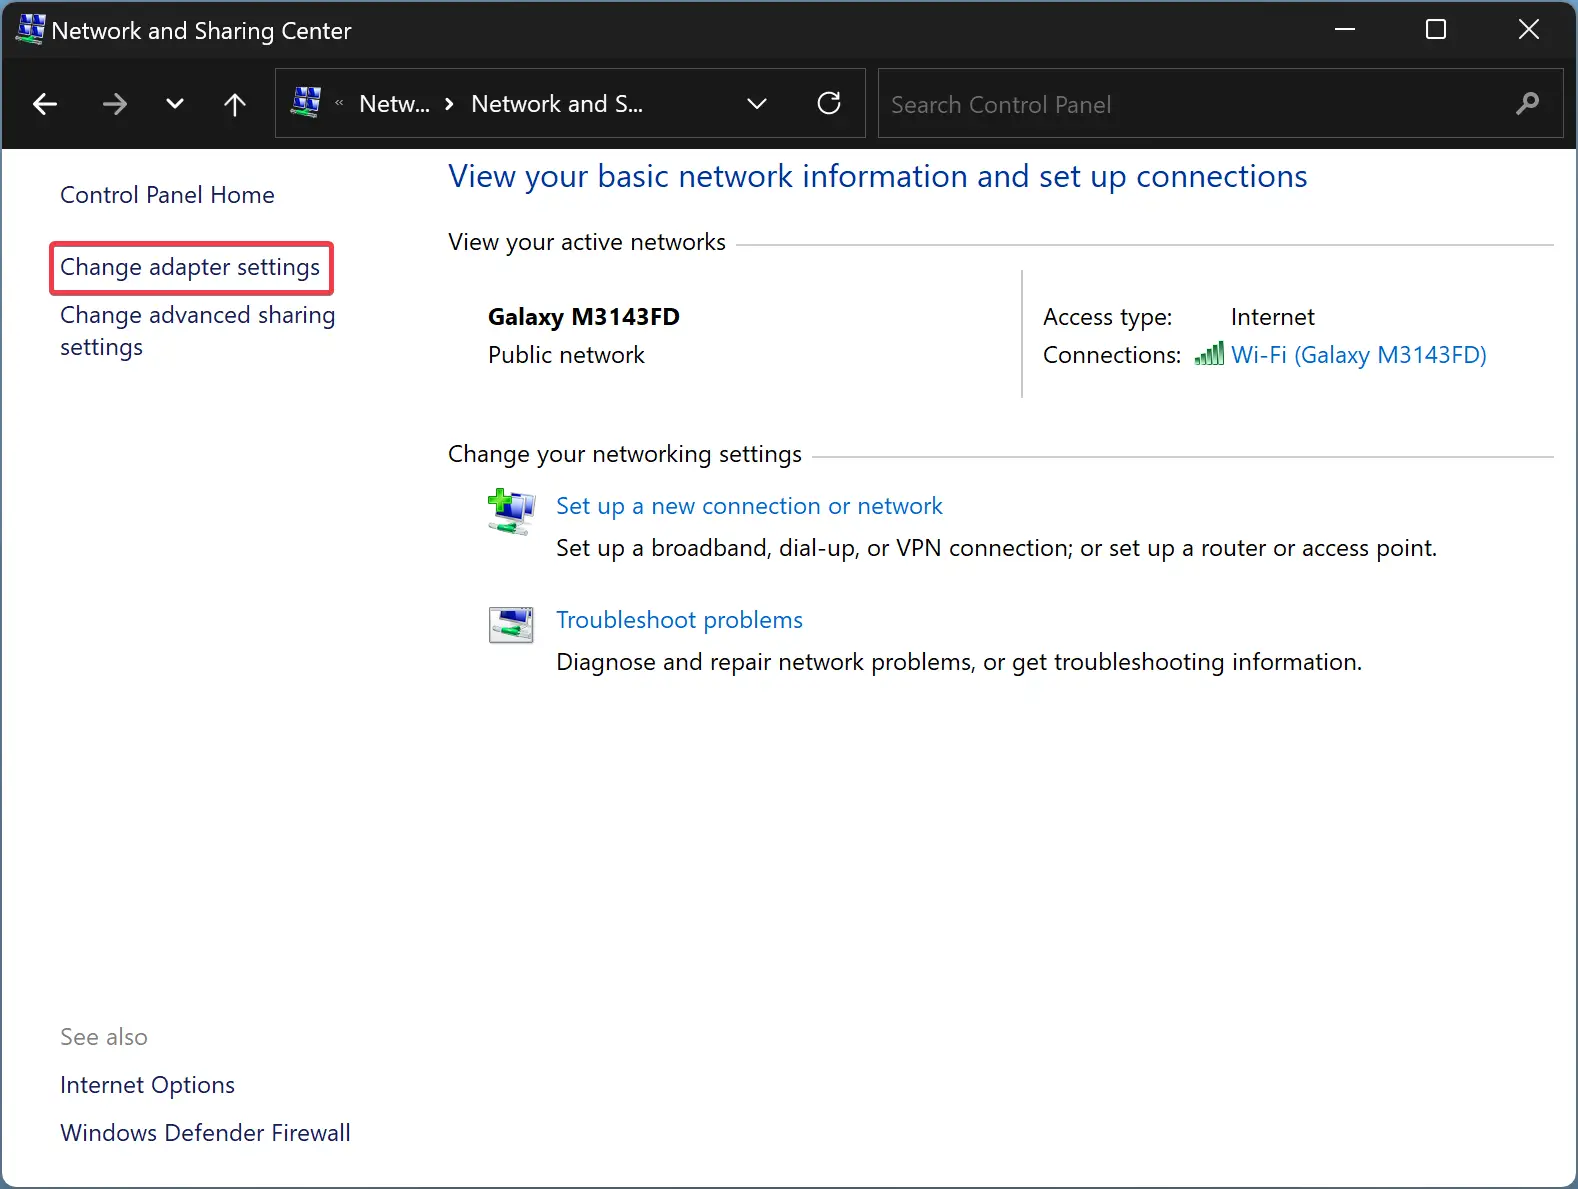
Step 5. Now, click on “Network and Sharing Center.”

Step 6. In the Network and Sharing Center window, find and click on the “Change adapter settings” link on the left-hand side.
Step 7. You’ll now see a list of network connections on your computer. Right-click on the network connection you want to modify (e.g., Ethernet or Wi-Fi) and select “Properties” from the context menu.
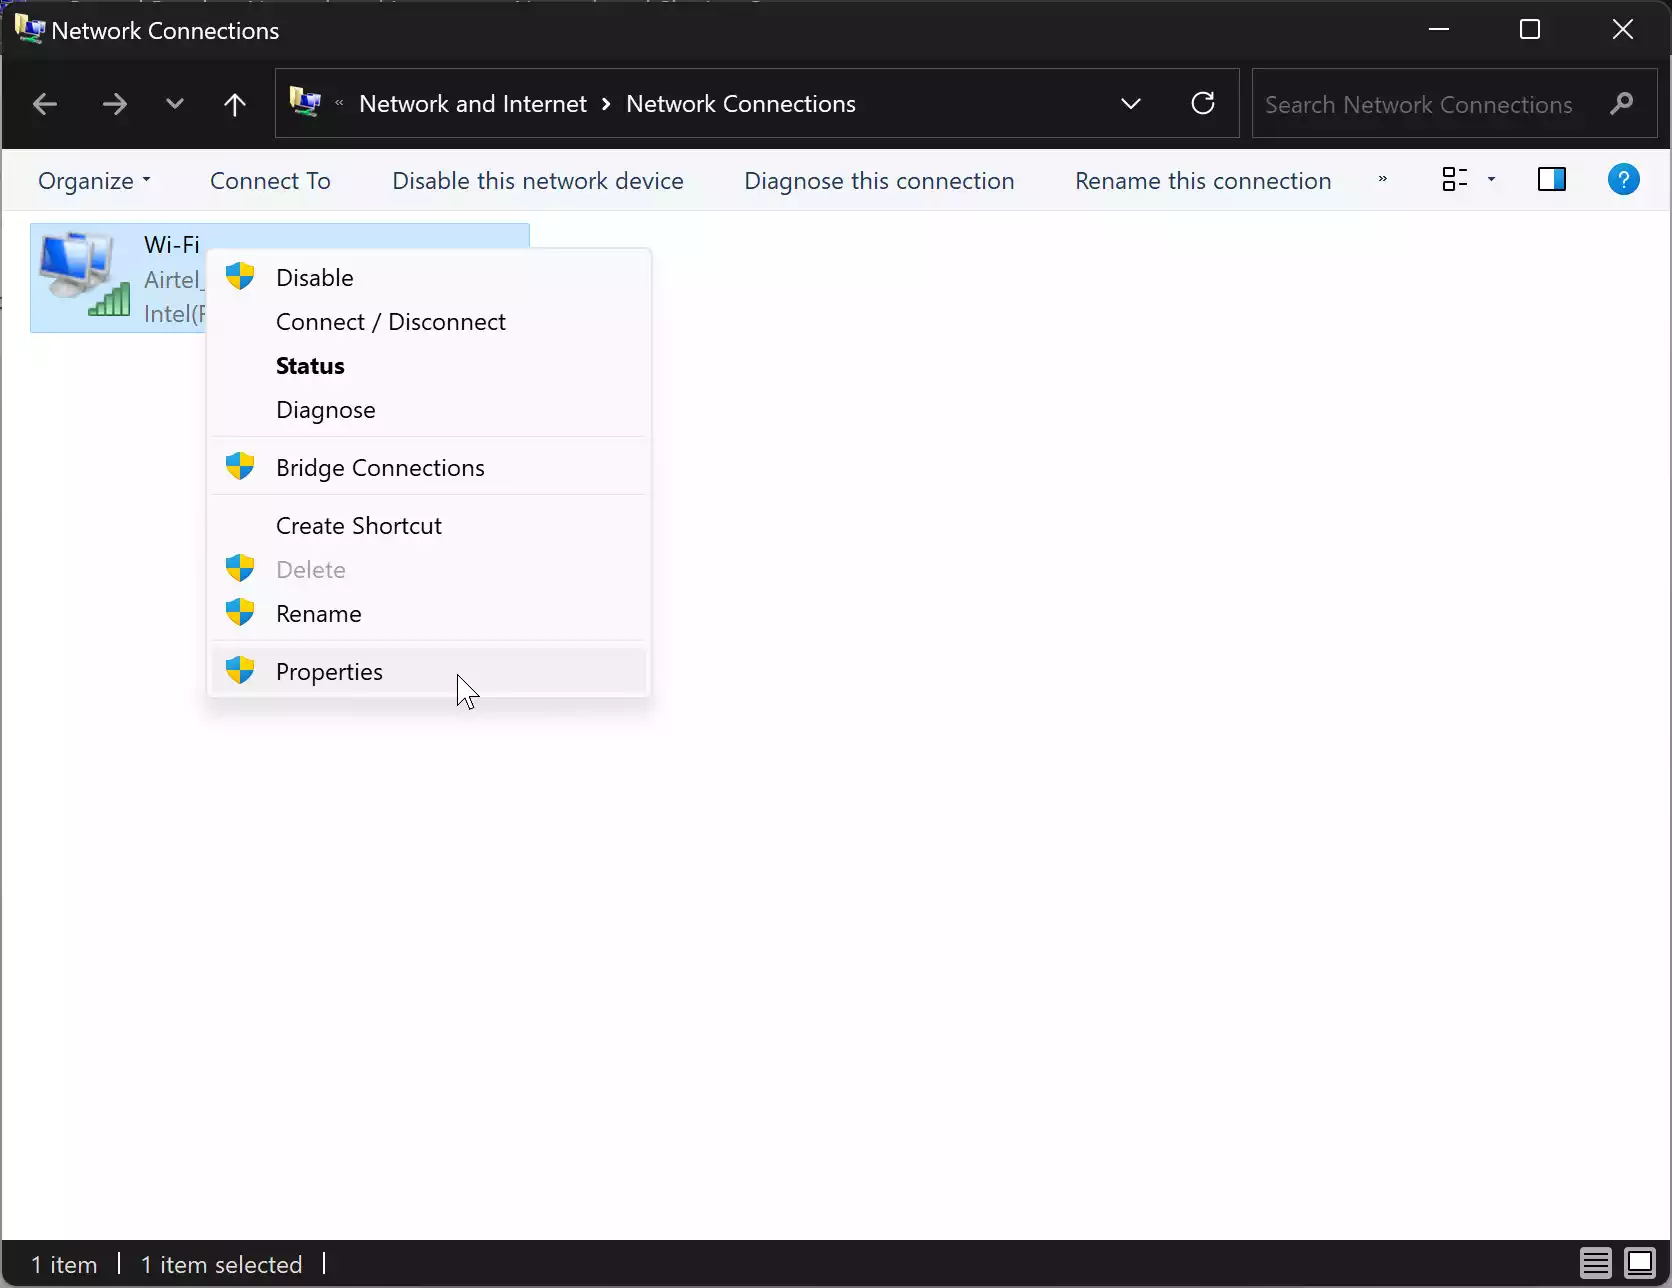
Step 8. In the Properties window, locate and select “Internet Protocol Version 6 (TCP/IPv6)” from the list of items.
Step 9. To enable IPv6, make sure the checkbox next to “Internet Protocol Version 6 (TCP/IPv6)” is checked. If it’s not, check the box and then click “OK.”
Step 10. To disable IPv6, uncheck the box next to “Internet Protocol Version 6 (TCP/IPv6)” and click “OK.”
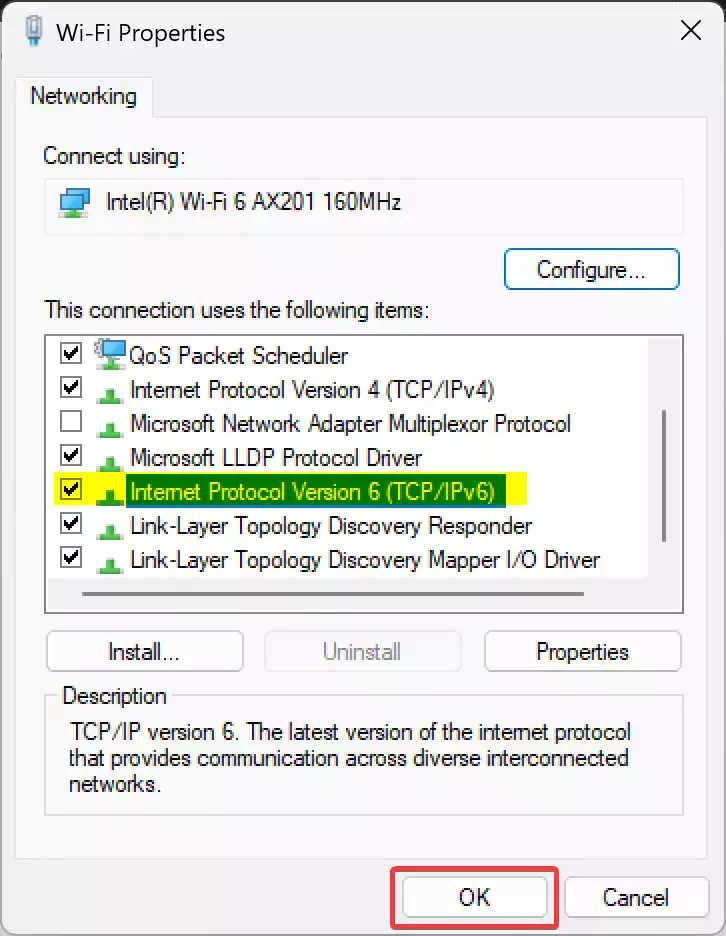
Step 11. If you made any changes to the IPv6 settings, you might be prompted to restart your computer for the changes to take effect fully. If so, save your work and restart your PC.
Using the Control Panel method, you can easily enable or disable IPv6 on your Windows 11 computer. Remember to consider the implications of disabling IPv6, as it’s generally recommended to leave it enabled for the best internet experience.
Notes:
- Disabling IPv6 should generally be done with caution and only when you encounter specific issues that can be resolved by doing so. IPv6 offers several advantages and is becoming more widely adopted.
- It’s advisable to update your network hardware and drivers to the latest versions if you experience any compatibility issues with IPv6.
That’s it! You have successfully enabled or disabled IPv6 on your Windows 11/10 computer. Remember that IPv6 is the future of the internet and offers many benefits, so it’s generally recommended to leave it enabled unless you have a specific reason to disable it.
Conclusion
In conclusion, configuring IPv6 settings on Windows 11/10 is a straightforward task, and this user-friendly guide provides step-by-step instructions to enable or disable IPv6 as needed. While IPv6 offers several advantages, it’s essential to weigh the implications of disabling it, as it plays a crucial role in the future of the internet. By staying informed and making informed choices, you can ensure a seamless and efficient network experience on your Windows 11/10 PC.