How do I enable Screen Savers on Windows 11? Screen savers have been part of the Windows operating system for a long time, but it has not seen any improvements after Windows 7. Microsoft ships Windows 7 screen savers on its successors too. The same goes here with Windows 11. Windows 11 also comes with Windows 7 screensavers, and nothing has been improved. Because of its lower popularity, Microsoft has not shown any interest in improving it.
Very few people know that Windows 11 includes screen savers also. By default, it remains turned off because it is not required on modern PCs. It was initially introduced to avoid screen burn-in (in Cathode Ray Tube displays) due to the cumulative non-uniform use of display pixels. Most people still use it to protect their PC when they are away from their computers.
How to Enable or Disable Screen Savers in Windows 11?
First Method:
Turning on or turning off the screen saver is relatively easy on Windows 11. To enable or disable the screen saver, do the following steps:-
Step 1. Open the Settings app by pressing Windows + I keys from the keyboard.
Step 2. In the settings window that opens, click on the Personalization category from the left side pane.
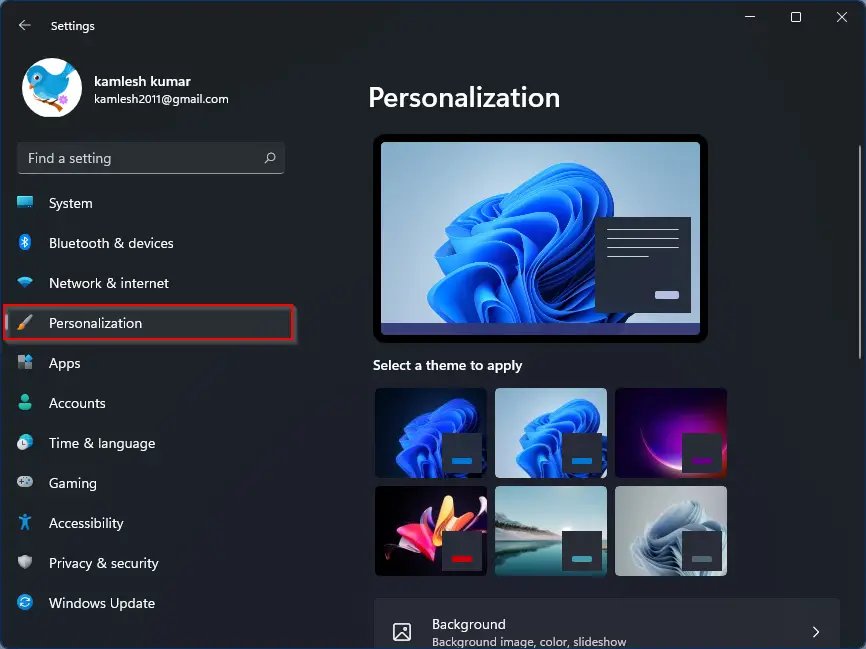
Step 3. On the right side pane of Personalization, click on the Lock Screen.
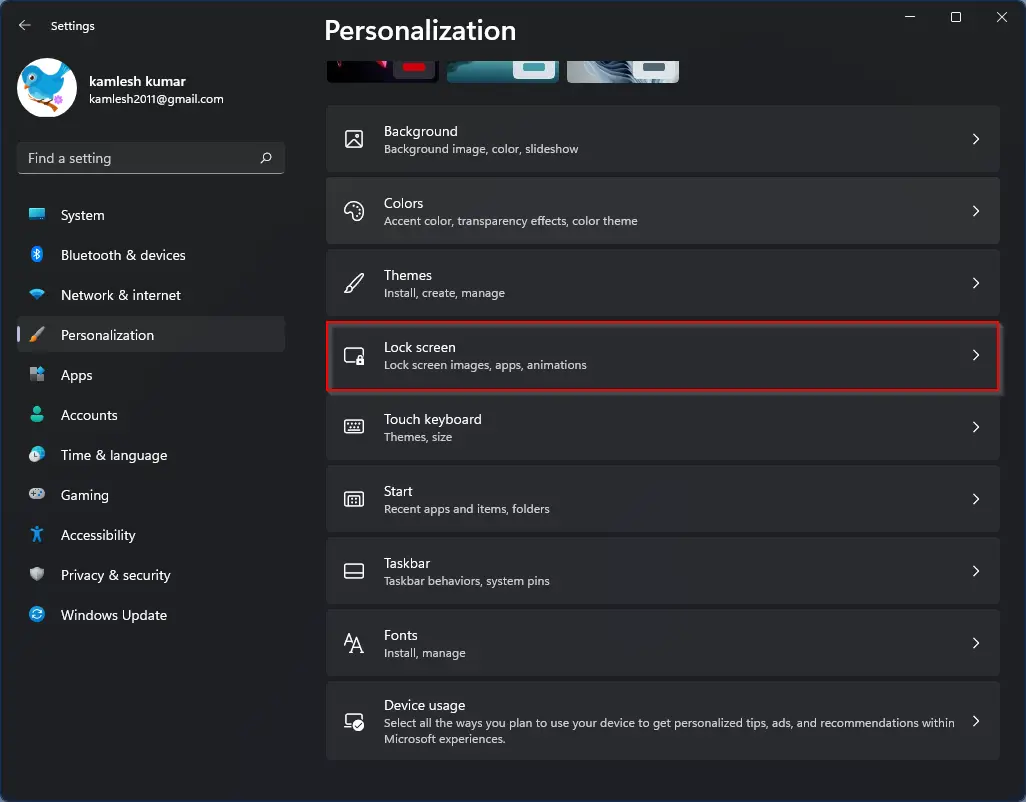
Step 4. Now, click on the Screen saver option.

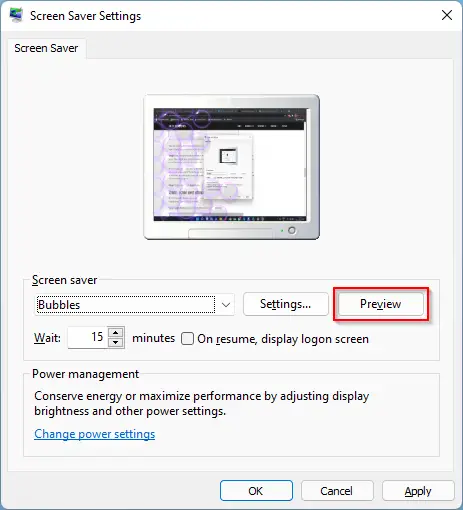
Step 5. After doing the above steps, the Screen Saver Settings window will open. Select your desired screensaver from the drop-down menu.
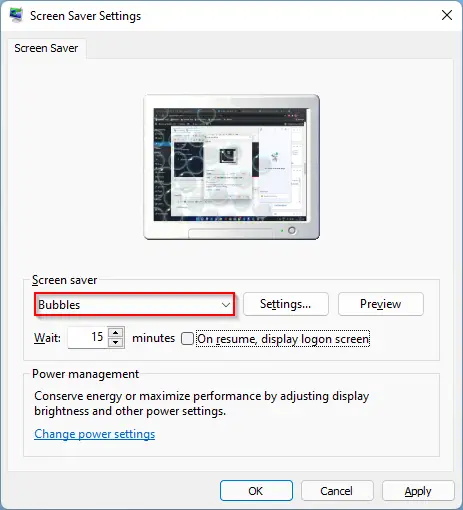
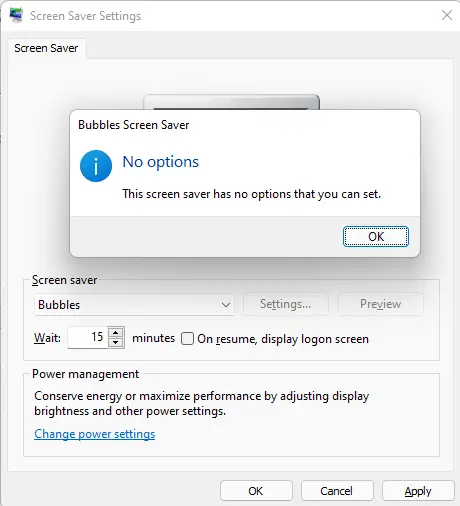
Step 6. Next, if you would like to customize the selected screen saver, click on the Settings button next to the chosen Screen saver. If customization is possible on the selected screen saver, a new pop-up window will open; otherwise, you will see, “This screen saver has no options that you can set.”
Note: Only 3D Text screen saver offers customization.
Step 7. Before applying the screen saver, click on the Preview button if you want to see a glimpse. When a screen saver is being previewed, pressing any key from the keyboard will exit the preview.
Step 8. Next, set the number of inactive minutes to wait for Windows 11 before displaying the screen saver. The default value is set to 1 minute, but it allows you to change the waiting time by clicking the up and down arrow buttons, or even you can select the value manually by typing between 1 and 9999.
Further, check the checkbox On resume, display logon screen. When you will away from your PC, this feature will password-protected your account. After activating the screensaver, you will be prompted to enter the password or other methods to sign in when you try to log in to your account.
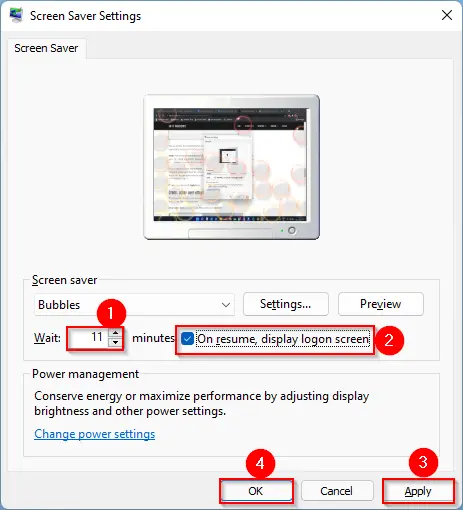
Step 9. Finally, click on Apply and then the OK button.
Once done, when your PC will idle for the specified time that you have set, the screen saver will activate automatically and protect your PC from unauthorized access.
Second Method:
If you don’t want to enable or disable the screensaver through the Settings app, click on the Start button from the taskbar or press the Windows + S shortcut keys to open the Search menu. In the search box, type change screen saver.
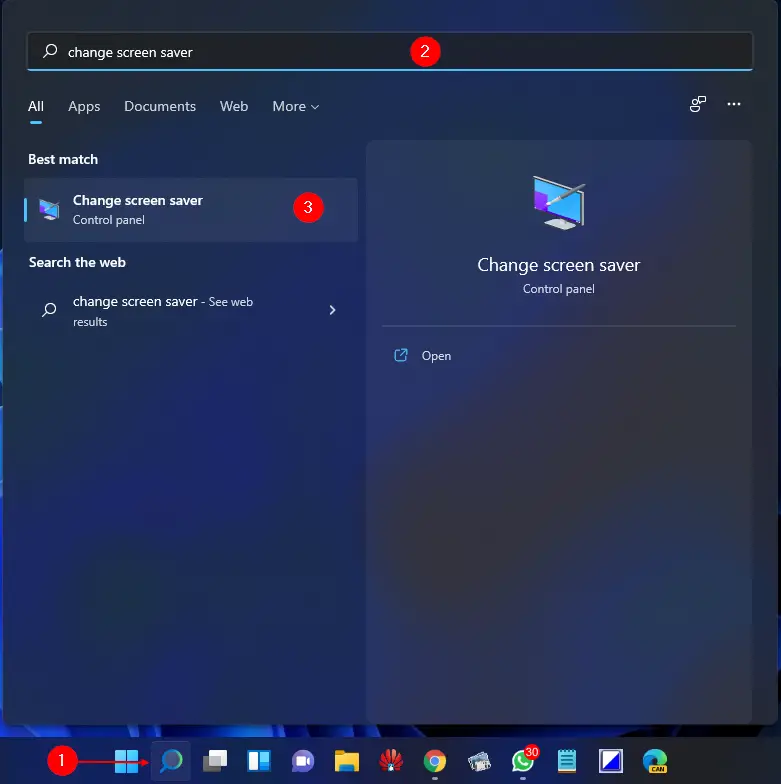
Click on the Change screen saver option to open the Screen Saver Settings window. Now, repeat the above steps from step 5 to configure the screen saver.
If you want to disable or turn off the screensaver on your Windows 11 computer, on the Screen Saver Settings window, select (None) from the drop-down menu. Then, uncheck the checkbox “On resume, display logon screen.”
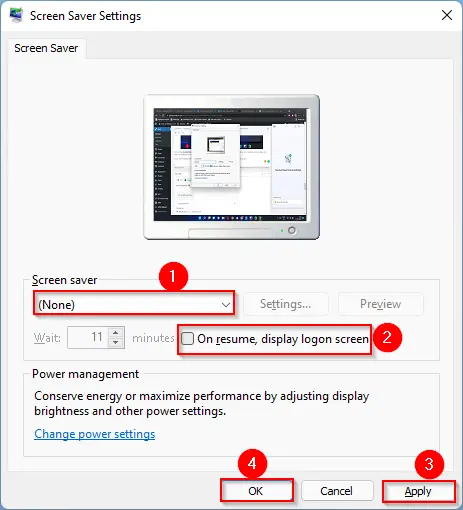
Finally, click on the Apply and then the OK button. Now, the screensaver will not protect your computer.
How to Create a Screen Saver Settings Shortcut on Windows 11 Desktop?
If you are one of those Windows users who frequently change the Screen saver on your PC and want to create a desktop icon for this, do the following steps:-
Step 1. Right-click on the blank space on the desktop and select the New, and then the Shortcut option.
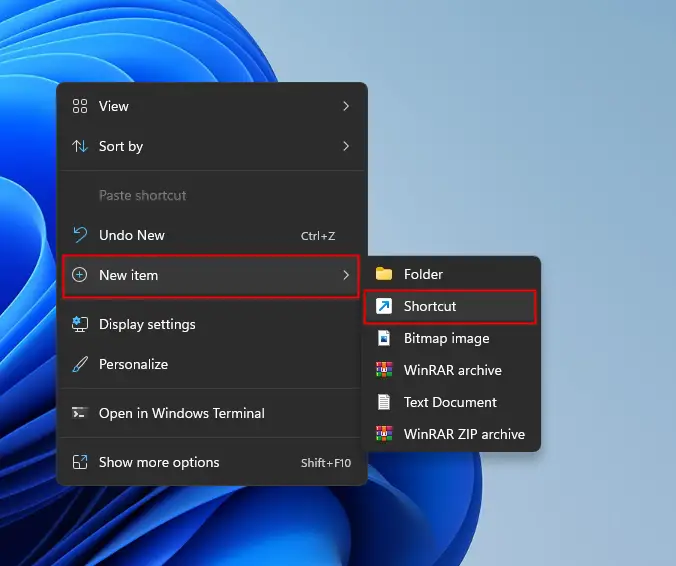
Step 2. In the Create Shortcut wizard, copy and paste the following texts:-
control desk.cpl,,@screensaver
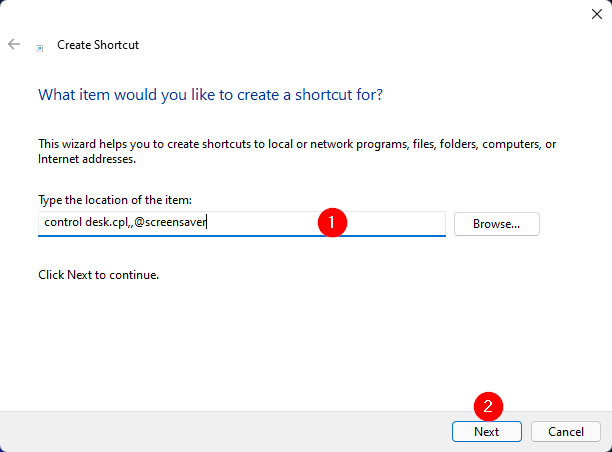
Step 3. Click on the Next button at the bottom of the screen.
Step 4. Name the shortcut to Screen Saver.
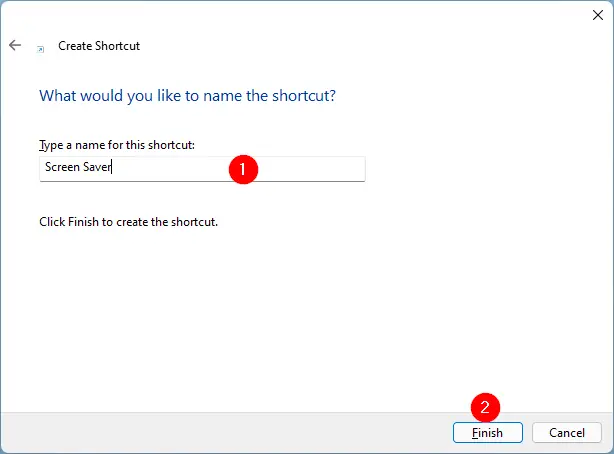
Step 5. Finally, click on the Finish button.
Once you complete the above steps, a shortcut of the Screen saver is created on your PC desktop. By double-clicking on this shortcut, you can access Screen Saver Settings.
Conclusion
In conclusion, screen savers have been a part of the Windows operating system for a long time and continue to be available in Windows 11. While Microsoft has not made any improvements to the screen savers since Windows 7, they can still be useful for protecting your PC from unauthorized access or screen burn-in. Enabling or disabling the screen saver in Windows 11 is a simple process that can be done through the Settings app or a desktop shortcut. By following the steps outlined in this guide, you can easily configure the screen-saver settings on your Windows 11 computer.