Transport Layer Security (TLS) is a cryptographic protocol that provides secure communications over computer networks. Designed to succeed the older Secure Sockets Layer (SSL), it primarily protects data privacy and integrity when transmitted over the Internet. Over the years, several versions of TLS have been introduced, with each offering enhanced security features. However, many applications and older devices still rely on the earlier versions, specifically TLS 1.0 and 1.1. Although Windows 11, Microsoft’s latest operating system, has put a greater emphasis on using the more secure TLS 1.2 and 1.3 by default, there might be instances where enabling the older versions becomes necessary. This could be due to legacy applications, specific server configurations, or certain compatibility requirements. In this guide, we will walk you through a step-by-step process on how to enable TLS 1.0 and 1.1 on Windows 11, ensuring you can maintain compatibility while being mindful of the associated security implications.
How to Enable TLS 1.0 and 1.1 on Windows 11?
To ensure compatibility with older systems and applications on Windows 11, you may need to activate TLS versions 1.0 and 1.1. Here’s a unique breakdown of the process:-
Step 1. Open Registry Editor.
Step 2. Use the left sidebar to browse to the following directory:-
HKEY_LOCAL_MACHINE\SYSTEM\CurrentControlSet\Control\SecurityProviders\SCHANNEL\Protocols\
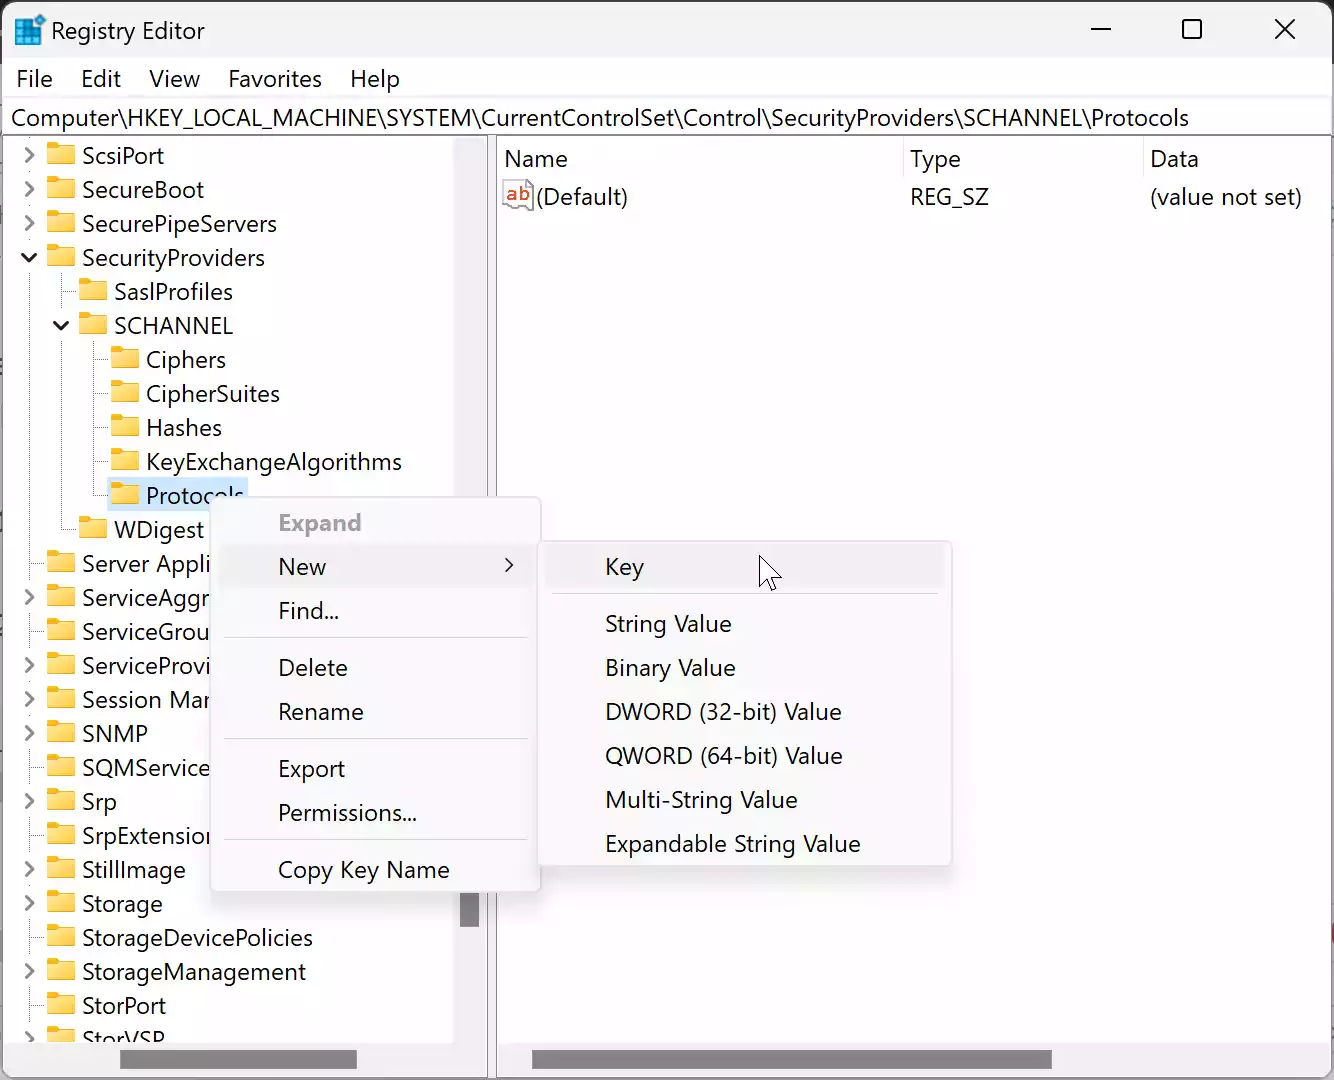
Step 3. Right-click on the Protocols folder and select New > Key.
Step 4. Name the new key TLS 1.0.
Note: In case the TLS 1.0 key already exits under the Protocols folder, then skip this step.
Step 5. Again, right-click on the newly created key TLS 1.0 and select the New > Key option.
Step 6. Name this new sub-key Client.
Step 7. Right-click on the Client folder and hover over “New,” and then choose “DWORD (32-bit) Value.”
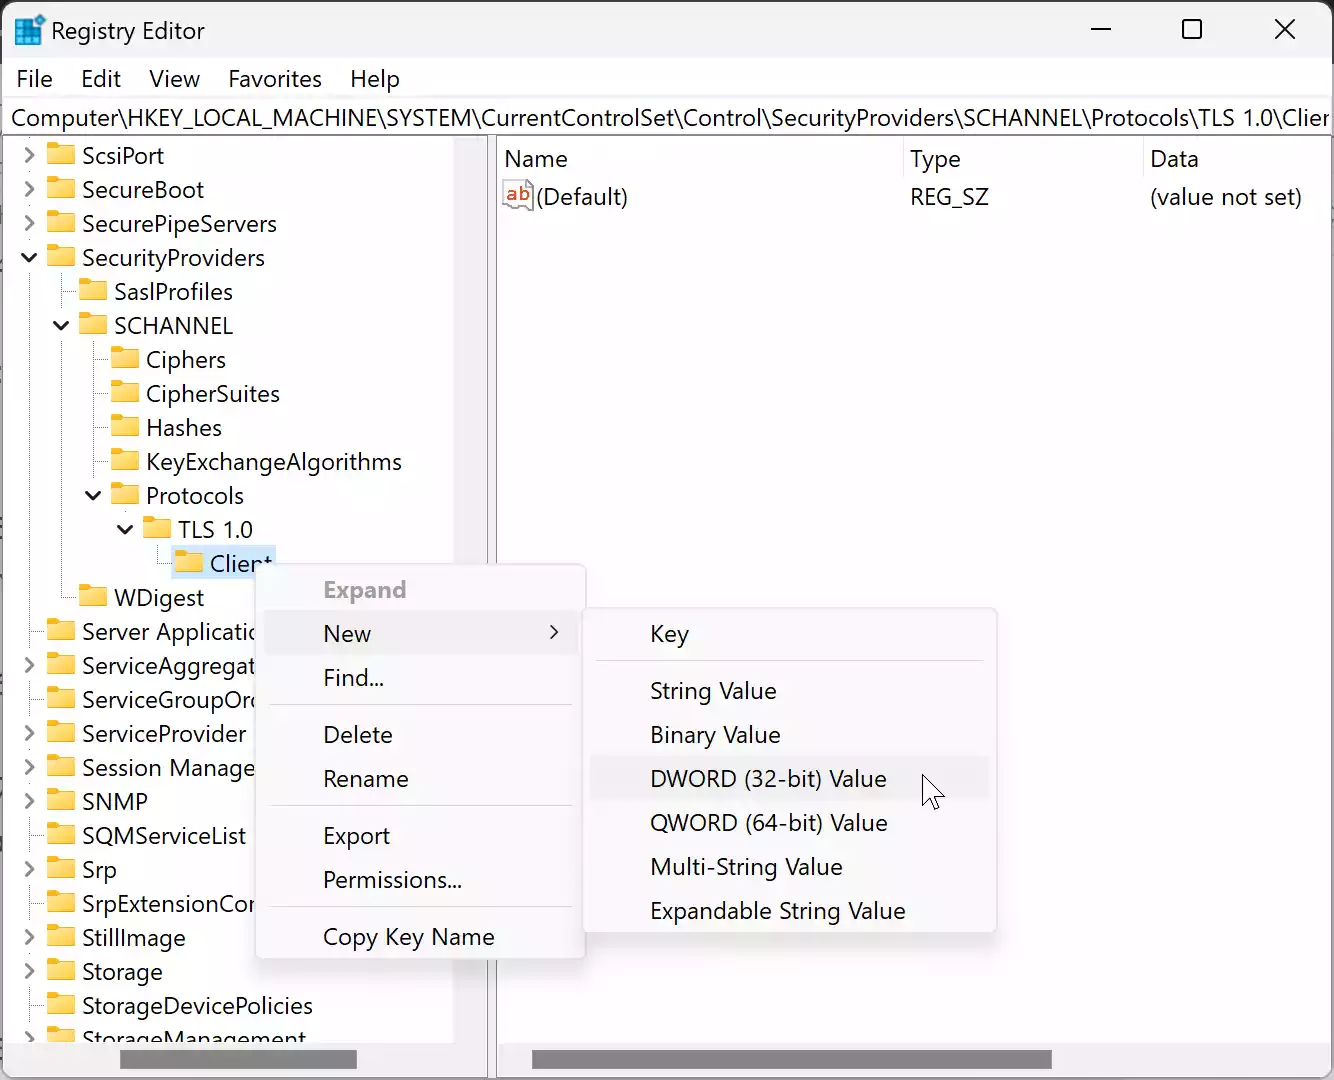
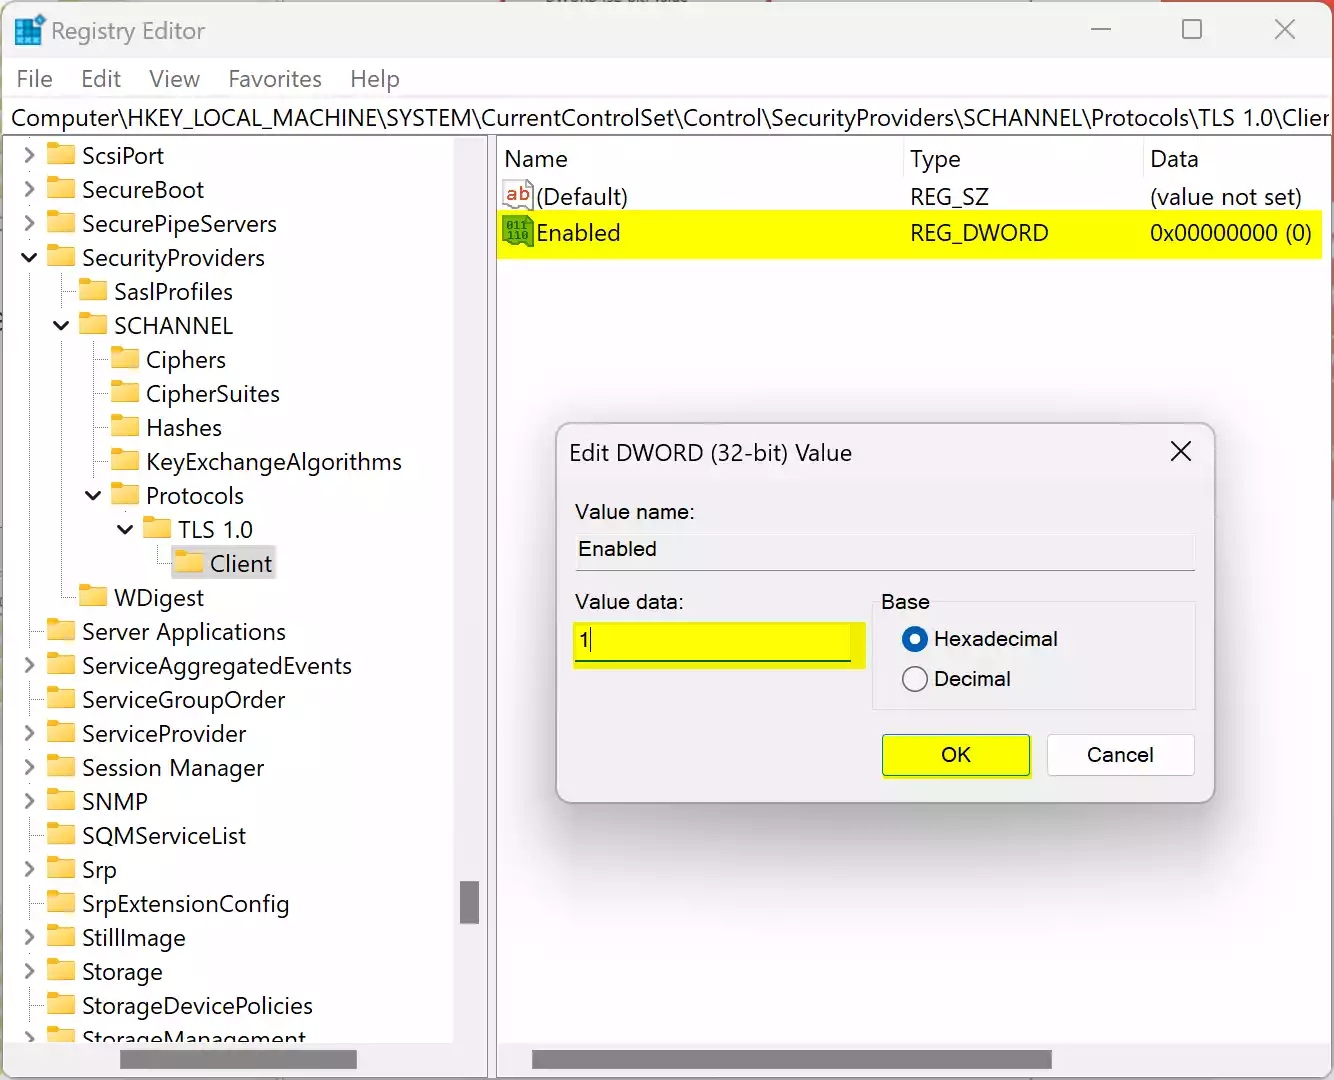
Step 8. Assign the name “Enabled” to this new DWORD and press Enter.
Step 9. Double-click on the “Enabled” DWORD. Set its “Value data” to 1 from the default 0 and confirm by clicking “OK.”
Step 10. Now, navigate to the following path:-
Computer\HKEY_LOCAL_MACHINE\SYSTEM\CurrentControlSet\Control\SecurityProviders\SCHANNEL\Protocols\TLS 1.0
Step 11. Right-click on the TLS 1.0 and select New > Key.
Step 12. Name this new sub-key Server.
Step 13. Right-click on the Server folder and select “New” and then “DWORD (32-bit) Value.”
Step 14. Name this REG_DWORD “Enabled” and press Enter.
Step 15. Open the “Enabled” REG_DWORD by double-clicking on it.
Step 15. Modify its “Value data” from 0 to 1, and finalize your change by clicking “OK.”
Once these steps are executed, you will have successfully enabled the TLS 1.0 and 1.1 versions on your Windows 11 system.
Conclusion
Enabling TLS 1.0 and 1.1 on Windows 11 can be crucial for maintaining compatibility with older systems and applications. By following the above step-by-step guide, users can achieve this configuration seamlessly. However, it’s essential to be aware of potential security risks associated with older TLS versions, and where possible, prioritize the use of updated security protocols.
