Microsoft Excel is a powerful tool for data organization, analysis, and visualization. However, working with Excel spreadsheets can sometimes be a bit tricky, especially when dealing with merged cells. Merged cells can cause problems when you’re sorting, filtering, or performing calculations in Excel. Therefore, it’s essential to know how to find and manage merged cells in your spreadsheet. In this gearupwindows article, we will explore various methods to identify and address merged cells in Microsoft Excel.
Understanding Merged Cells
Merged cells in Excel are created when you combine two or more adjacent cells into a single, larger cell. This can be done for formatting purposes, such as creating a title or header that spans multiple columns or rows. While it may make your spreadsheet look more presentable, merged cells can be problematic when performing data operations. Excel treats merged cells differently, which can lead to errors or unexpected behavior in functions like sorting, filtering, and copying data.
Why You Should Find Merged Cells?
Before diving into the methods for finding merged cells, it’s important to understand why you should seek them out and possibly unmerge them:-
Data Consistency: Merged cells can make your data inconsistent. When you perform operations on merged cells, you might get unexpected results.
Sorting and Filtering Issues: Sorting and filtering a column containing merged cells can lead to misalignment and inaccuracies.
Data Entry Problems: Merged cells can create difficulties in data entry, especially if you need to input data for the entire range of the merged cell.
Functions and Formulas: Merged cells can cause issues with Excel functions and formulas, as they don’t handle merged cells consistently.
How to Find Merged Cells in Microsoft Excel?
Method 1: Manual Inspection
The most straightforward method to find merged cells is to manually inspect your spreadsheet. Look for visually obvious merged cells, which are often used for headers or labels. Merged cells are typically larger than regular cells and display the content of the first cell.
Method 2: Use the Find and Replace Tool
You can use the “Find and Replace” feature in Excel to identify merged cells. Here’s how:-
Step 1. Press `Ctrl` + `F` to open the “Find and Replace” dialog box.
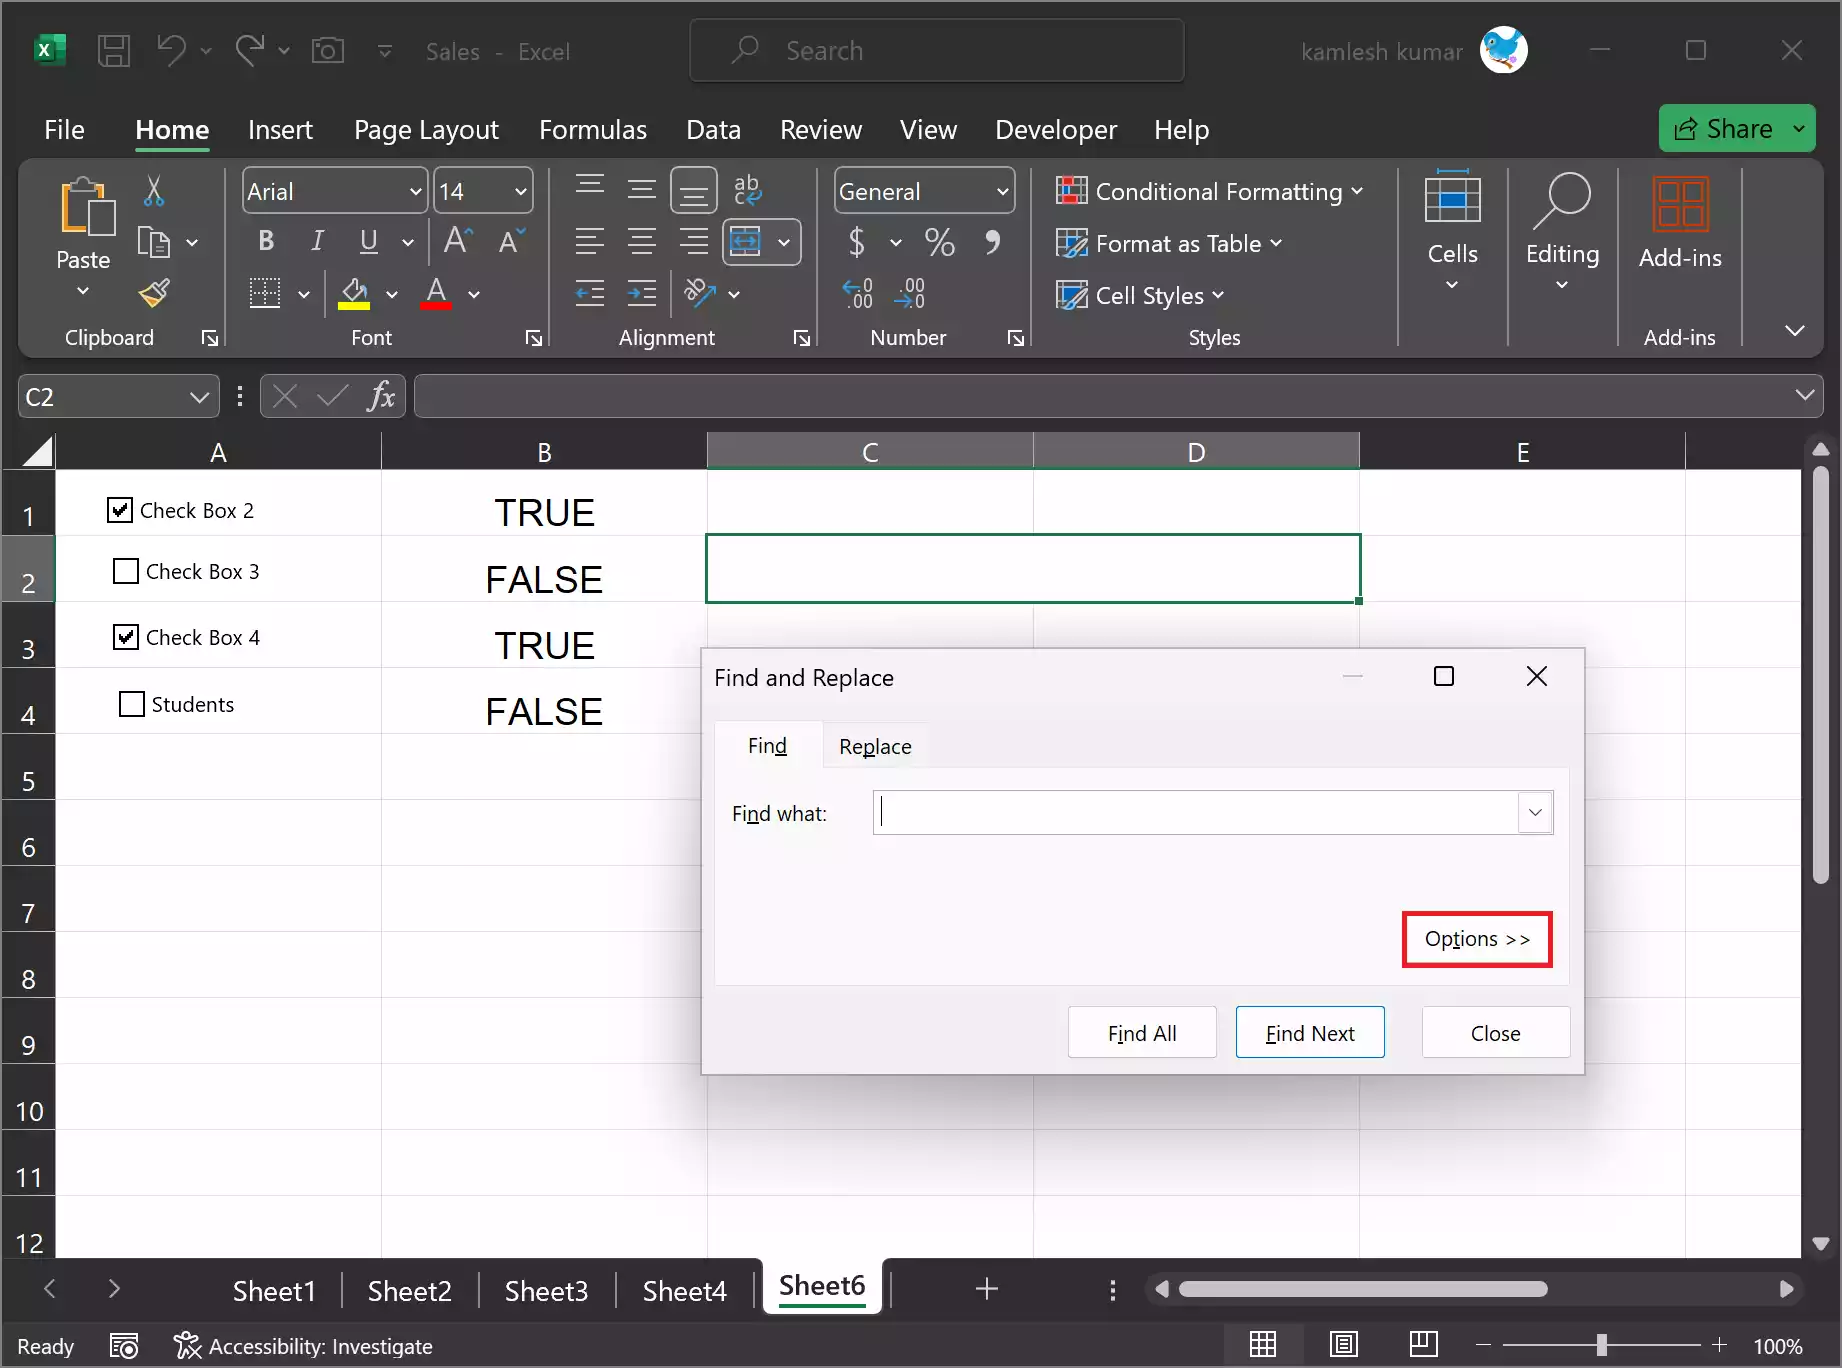
Step 2. Click on the “Options” button.
Step 3. Check the “Format” button.

Step 4. In the “Find Format” dialog, go to the “Alignment” tab and select “Merge cells.”
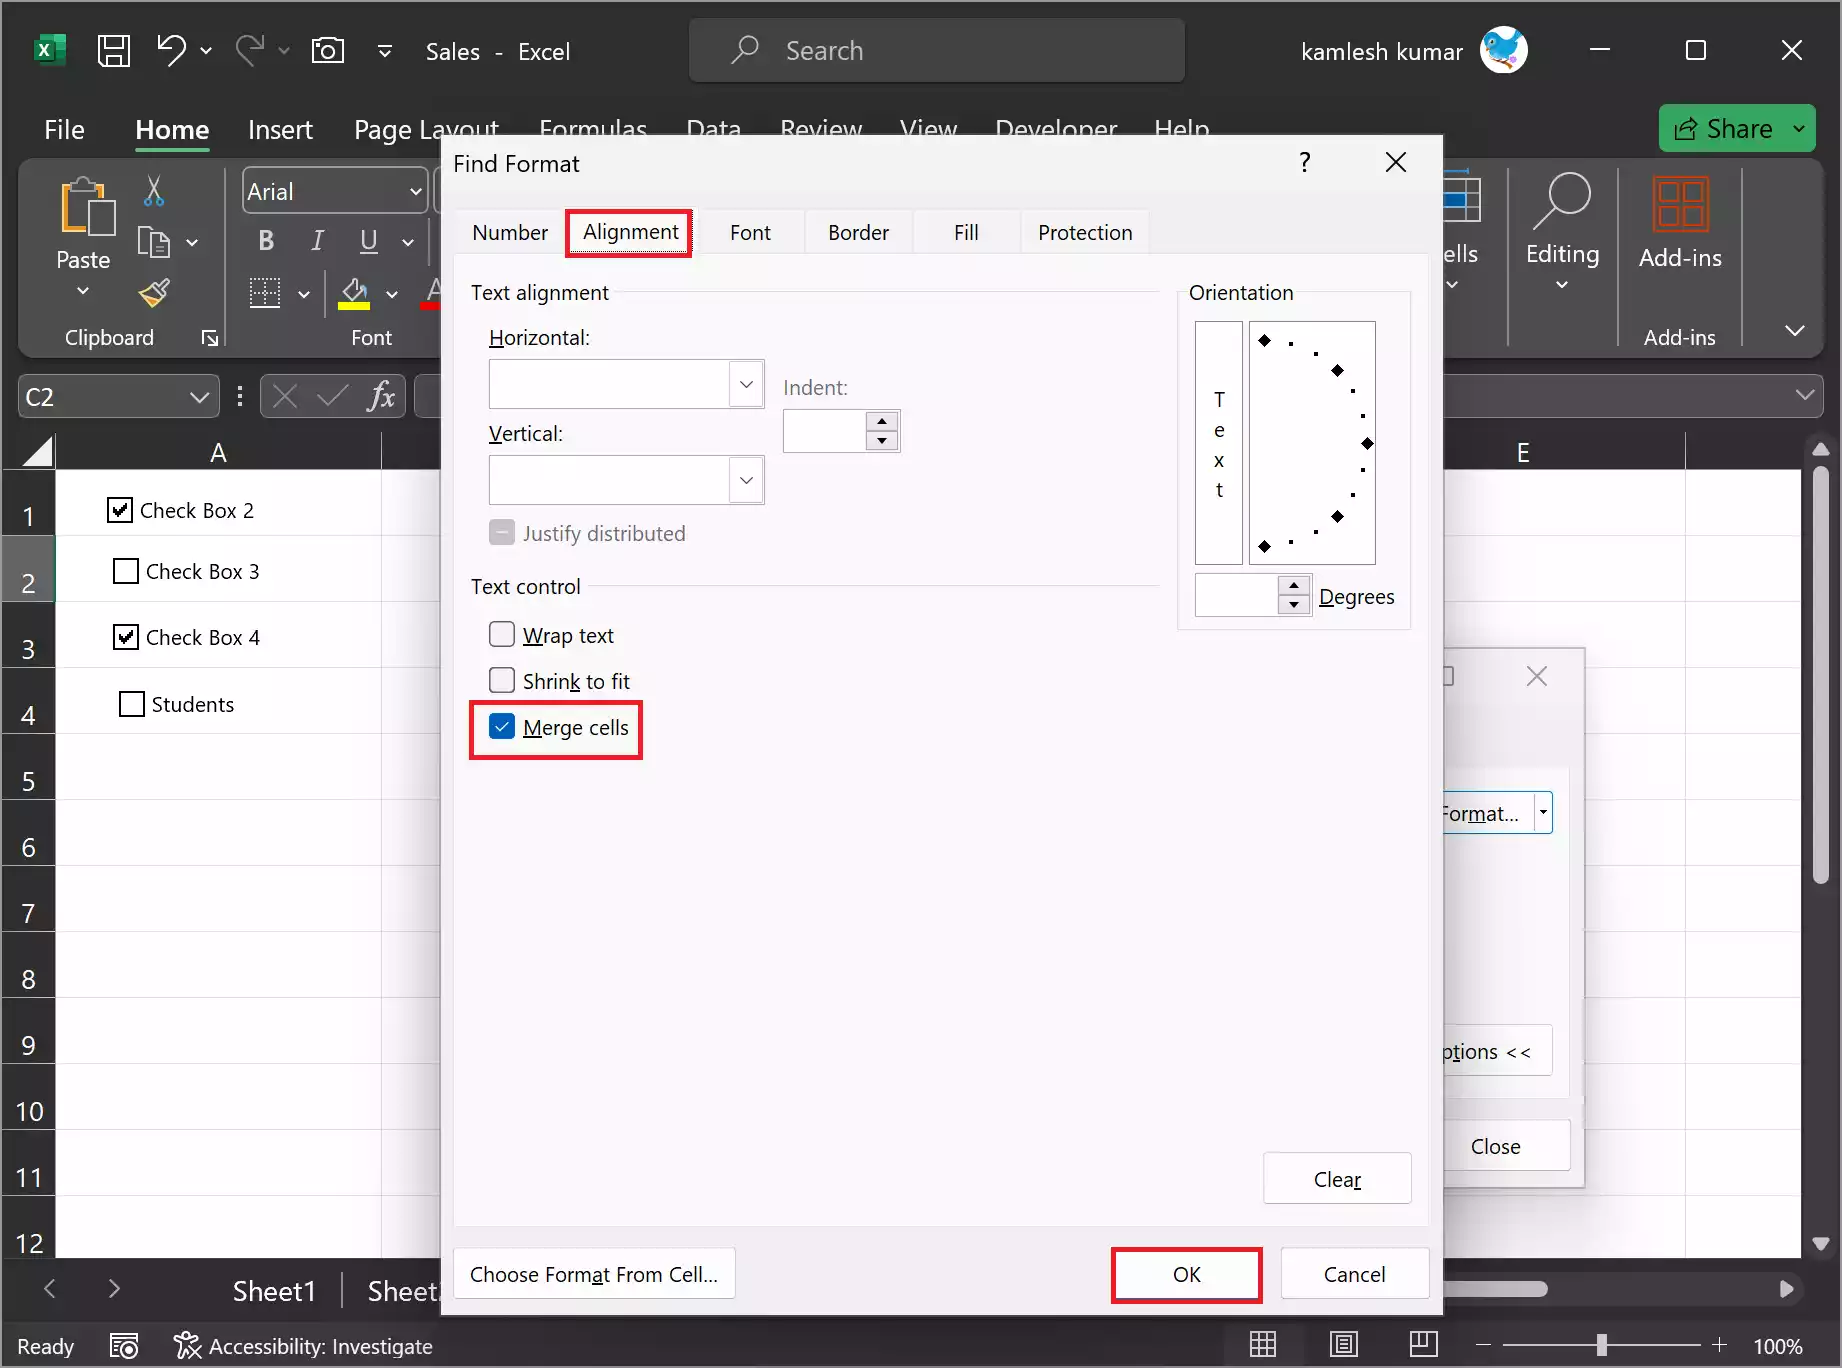
Step 5. Click OK.
Step 6. Click “Find All” to locate all merged cells in your spreadsheet.
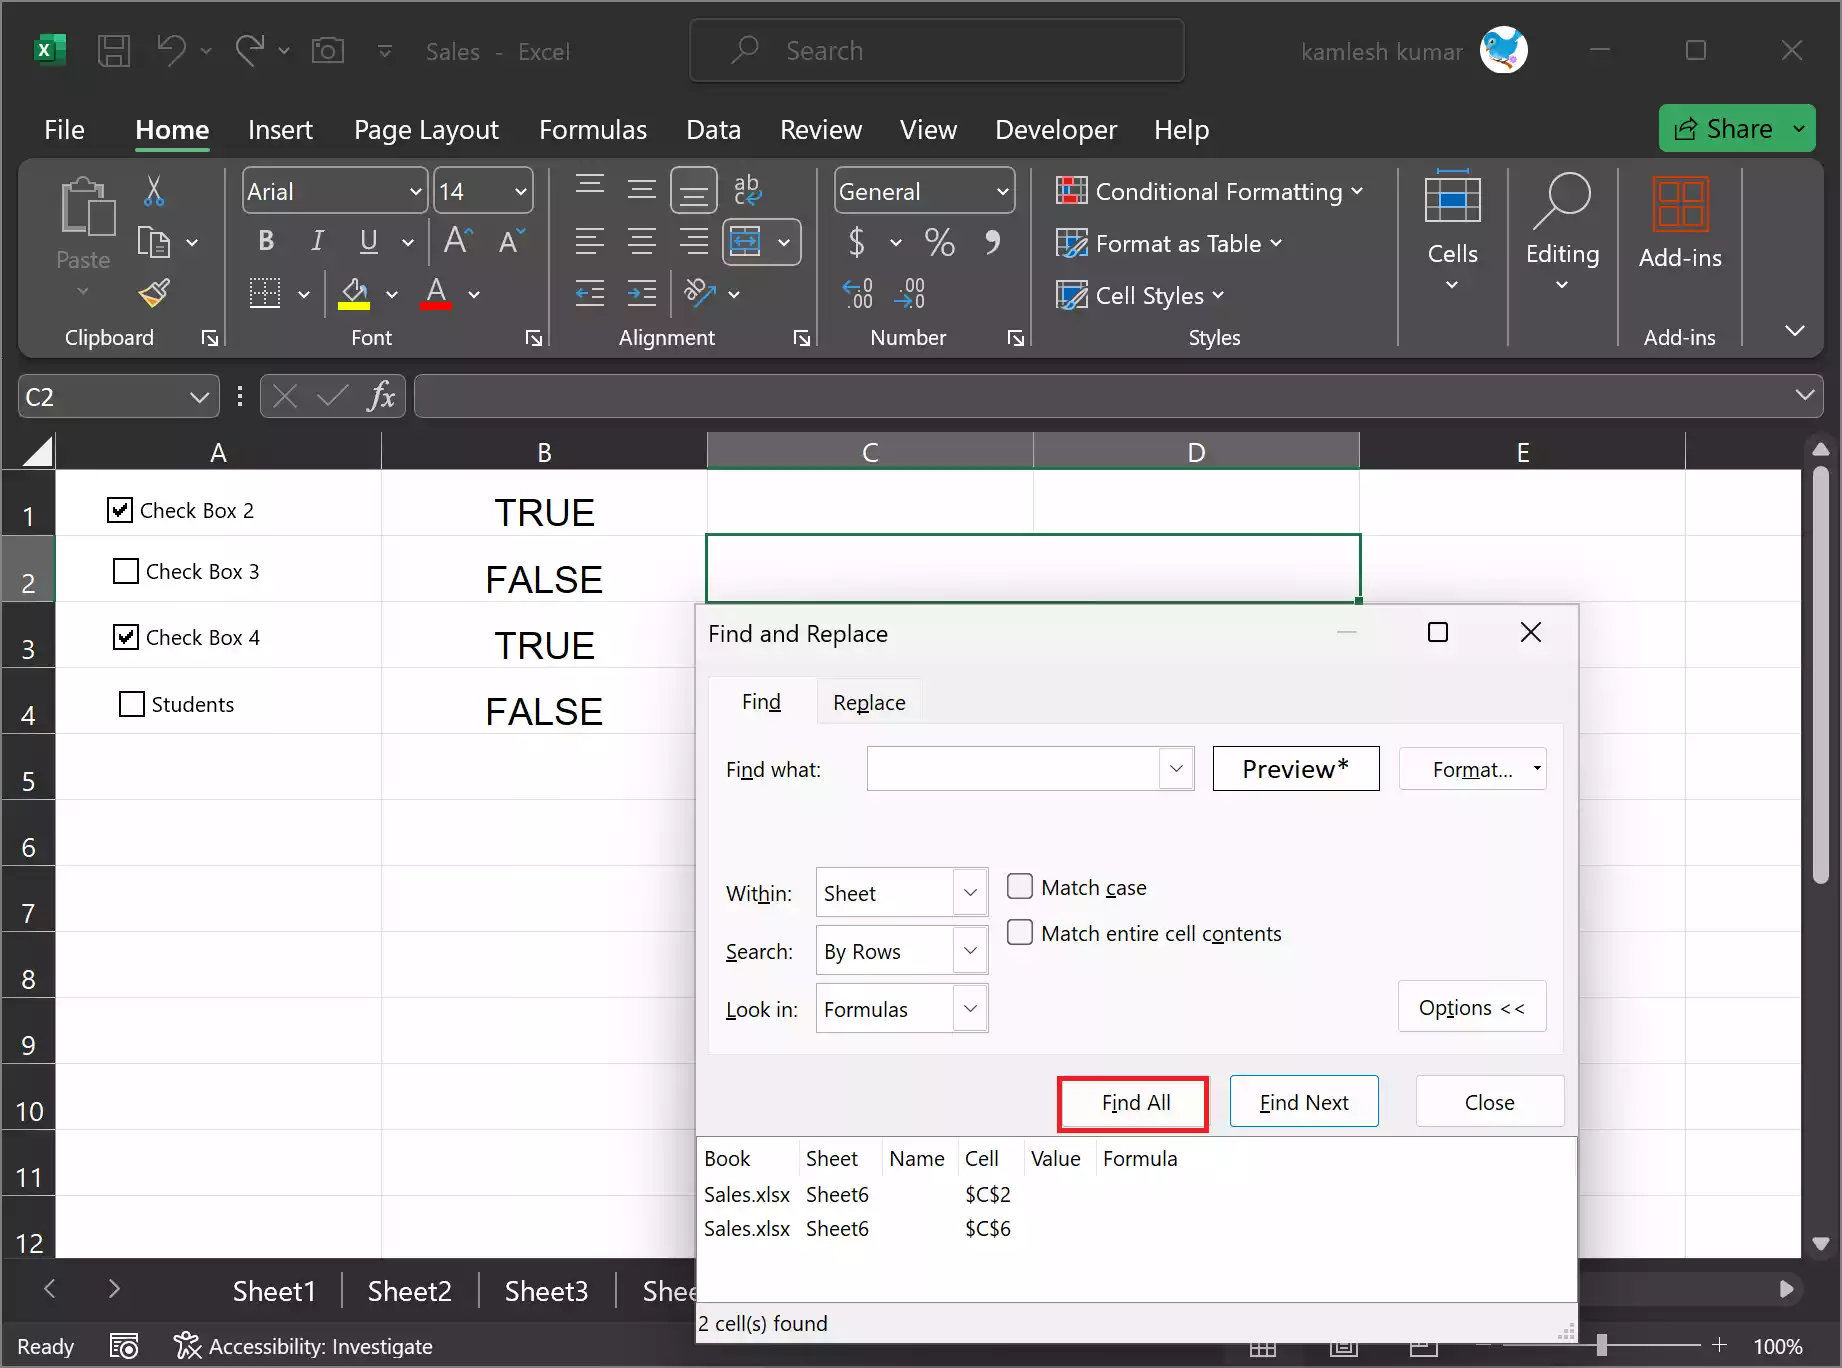
You can now click one of the results to go directly to it in your sheet.
Unmerging Cells
Once you’ve found the merged cells in your spreadsheet, you might want to consider unmerging them to ensure data consistency. To unmerge cells in Excel, follow these steps:-
Step 1. Select the merged cell or cells that you want to unmerge.
Step 2. Go to the “Alignment” group on the “Home” tab.
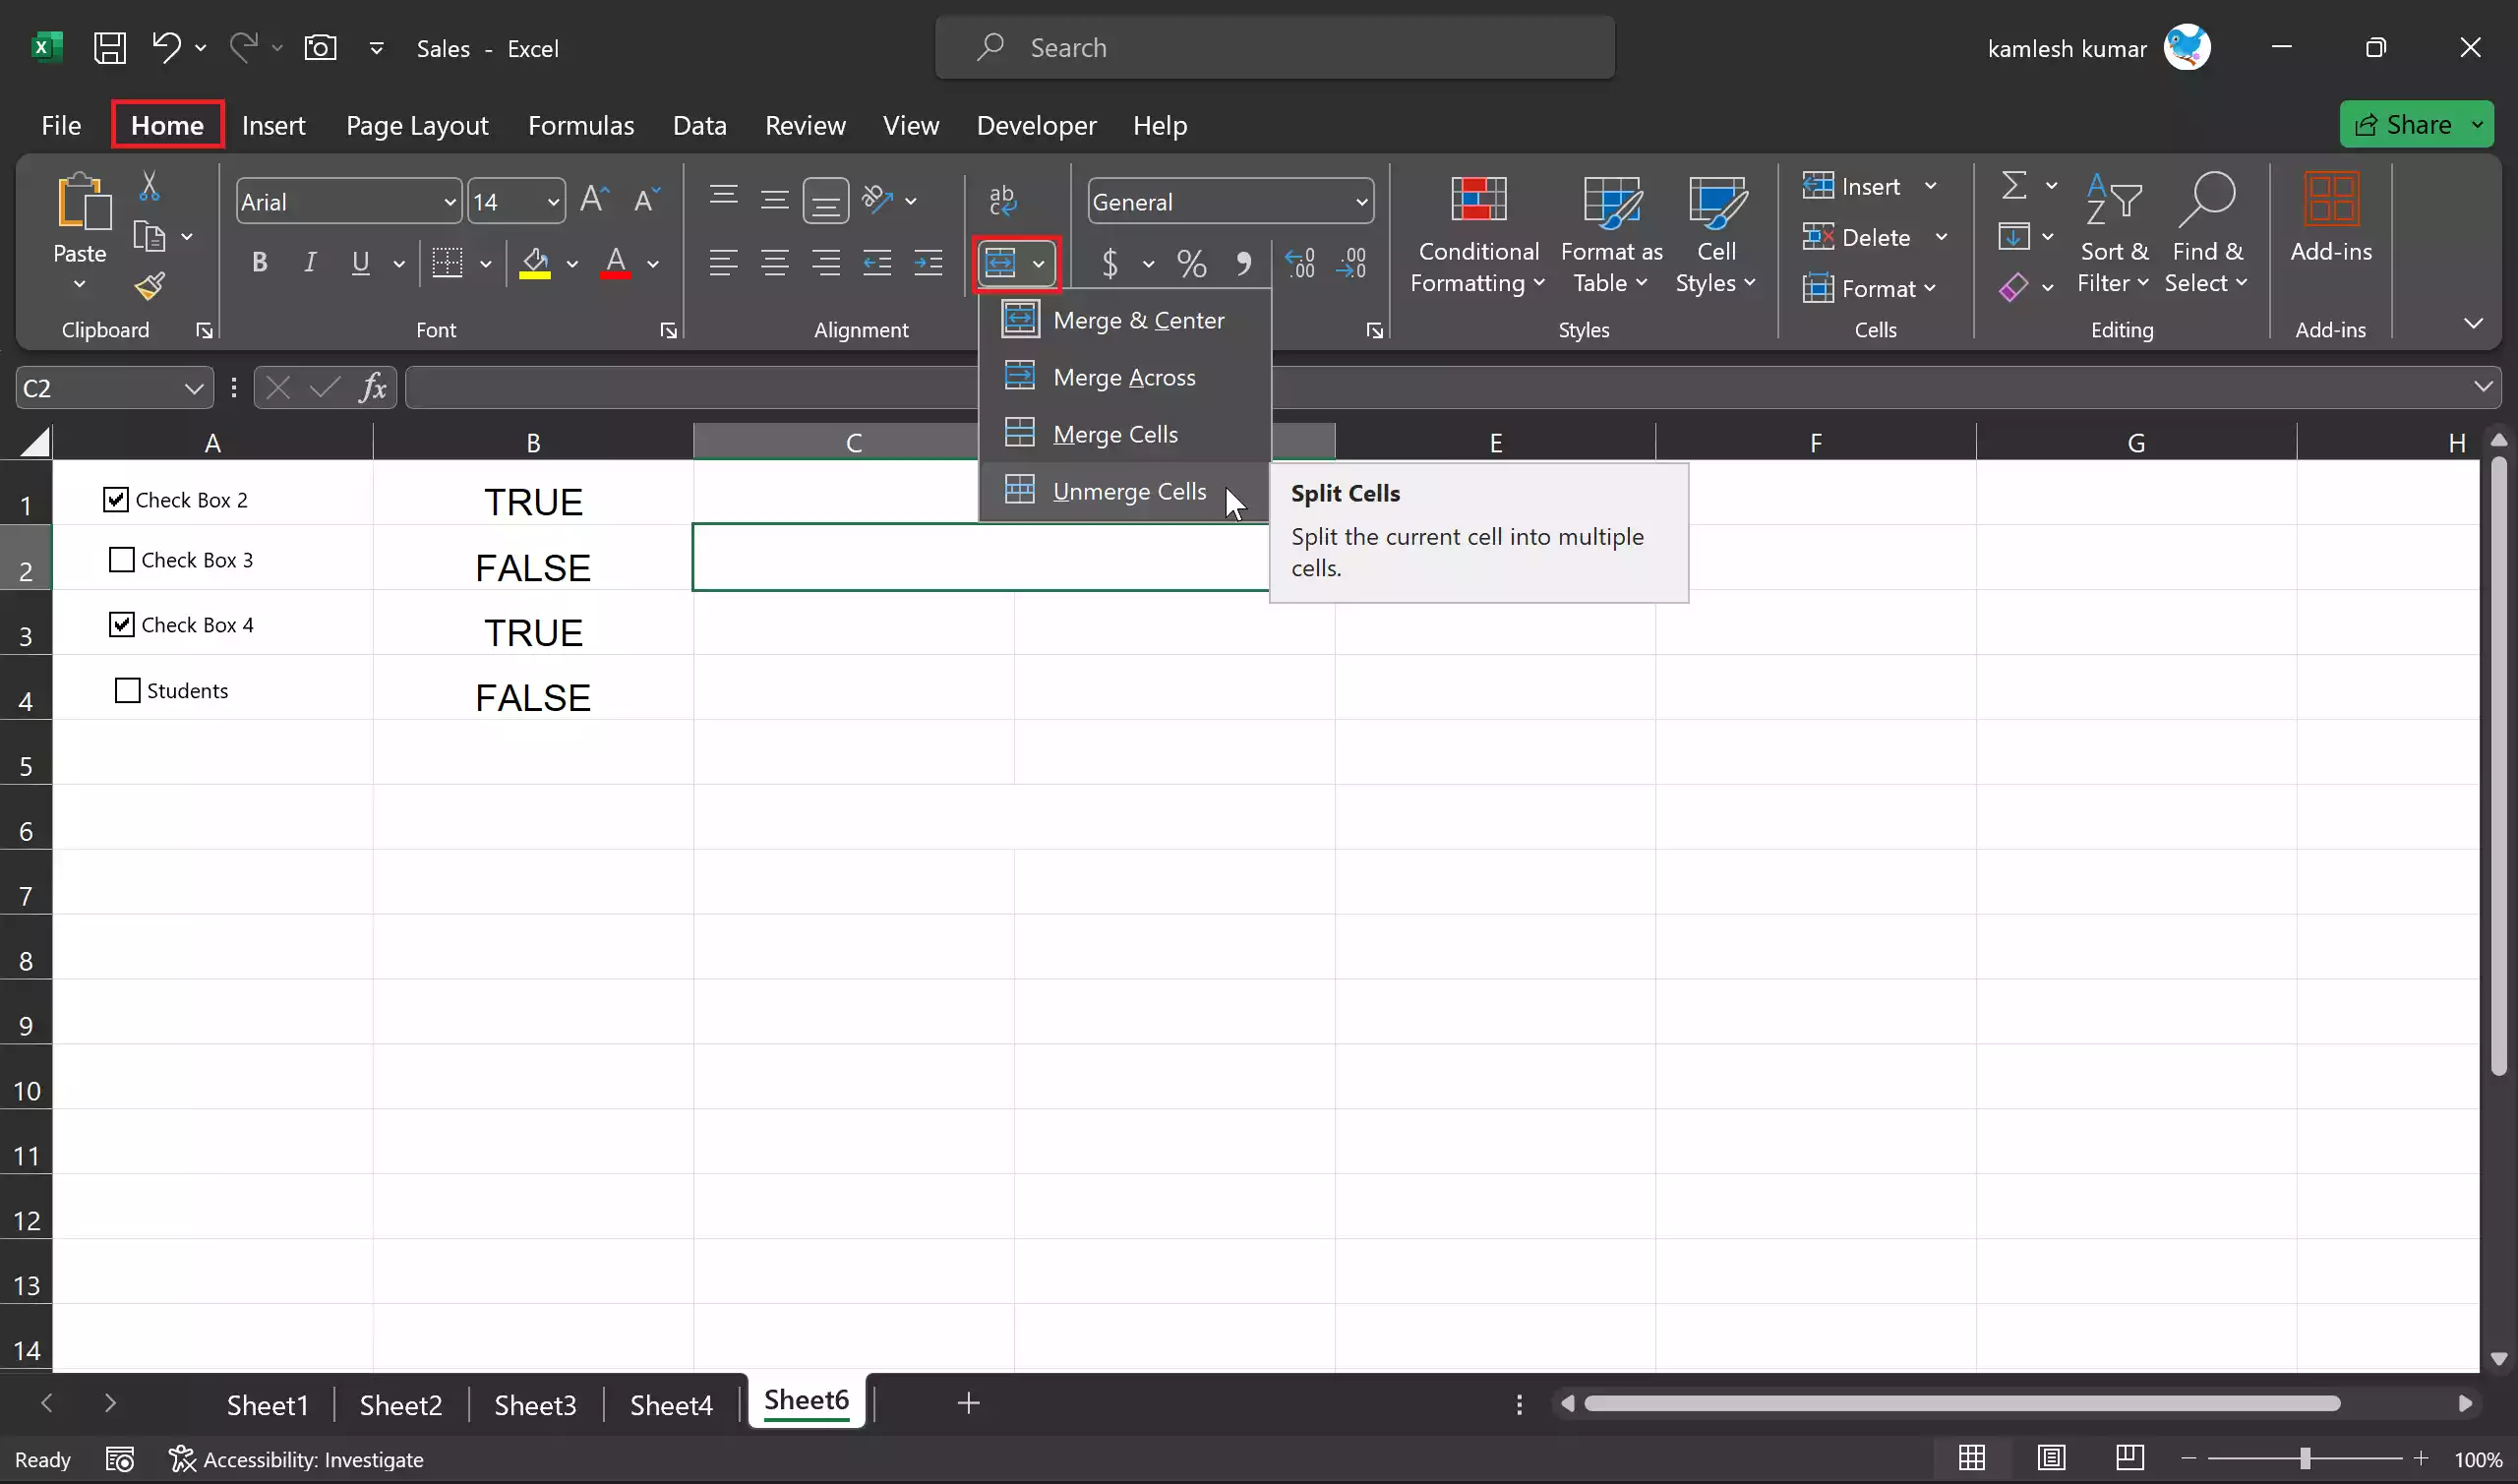
Step 3. Click the “Merge & Center” button and select “Unmerge Cells.”
Keep in mind that unmerging cells may alter the formatting of your spreadsheet, so be sure to review and adjust it as needed.
Conclusion
In conclusion, finding and dealing with merged cells in Excel is an essential skill for anyone working with spreadsheets. Merged cells can lead to inconsistencies and errors, especially when performing data operations. By using the methods mentioned in this article, you can easily locate merged cells and decide whether to unmerge them to maintain data integrity in your Excel workbooks.
