Microsoft Excel is a powerful spreadsheet application that allows you to organize and manipulate data in a tabular format. Whether you’re working with financial data, creating project plans, or simply making lists, you’ll often need to insert or delete rows to maintain the integrity and organization of your data. In this gearupwindows article, we’ll walk you through the step-by-step process of inserting and deleting rows in Excel.
How to Insert and Delete Rows in Microsoft Excel?
Inserting Rows in Excel
Inserting rows in Excel is a straightforward process that can help you add new data or reorganize your existing data. Follow these steps to insert rows in Excel:-
Step 1. Launch Microsoft Excel and open the workbook in which you want to insert rows.
Step 2. Click on the row below where you want to insert the new rows. The selected row will be the location where the new rows will be inserted.
Step 3. There are several ways to insert rows:-
A. Right-click and Insert
– Right-click on the selected row.
– From the context menu, select “Insert.”

– Excel will insert a new row above the selected row.
B. Keyboard Shortcut
– Select the row.
– Use the keyboard shortcut: `Ctrl` + `Shift` + `+`. (The plus sign key located on the numeric keypad).
– Excel will insert a new row above the selected row.
C. Ribbon Option
– Select the row.
– Click the “Home” tab on the Excel ribbon.

– In the “Cells” group, click on the “Insert” dropdown.
– Choose “Insert Sheet Rows.”
– Excel will insert a new row above the selected row.
Step 4. Now, you can start entering data in the newly inserted row. Excel will automatically adjust the row numbers and cell references for you.
Deleting Rows in Excel
Deleting rows is another essential task in Excel, as it allows you to remove unnecessary or redundant data. Here’s how to delete rows in Excel:-
Step 1. Launch Microsoft Excel and open the workbook in which you want to delete rows.
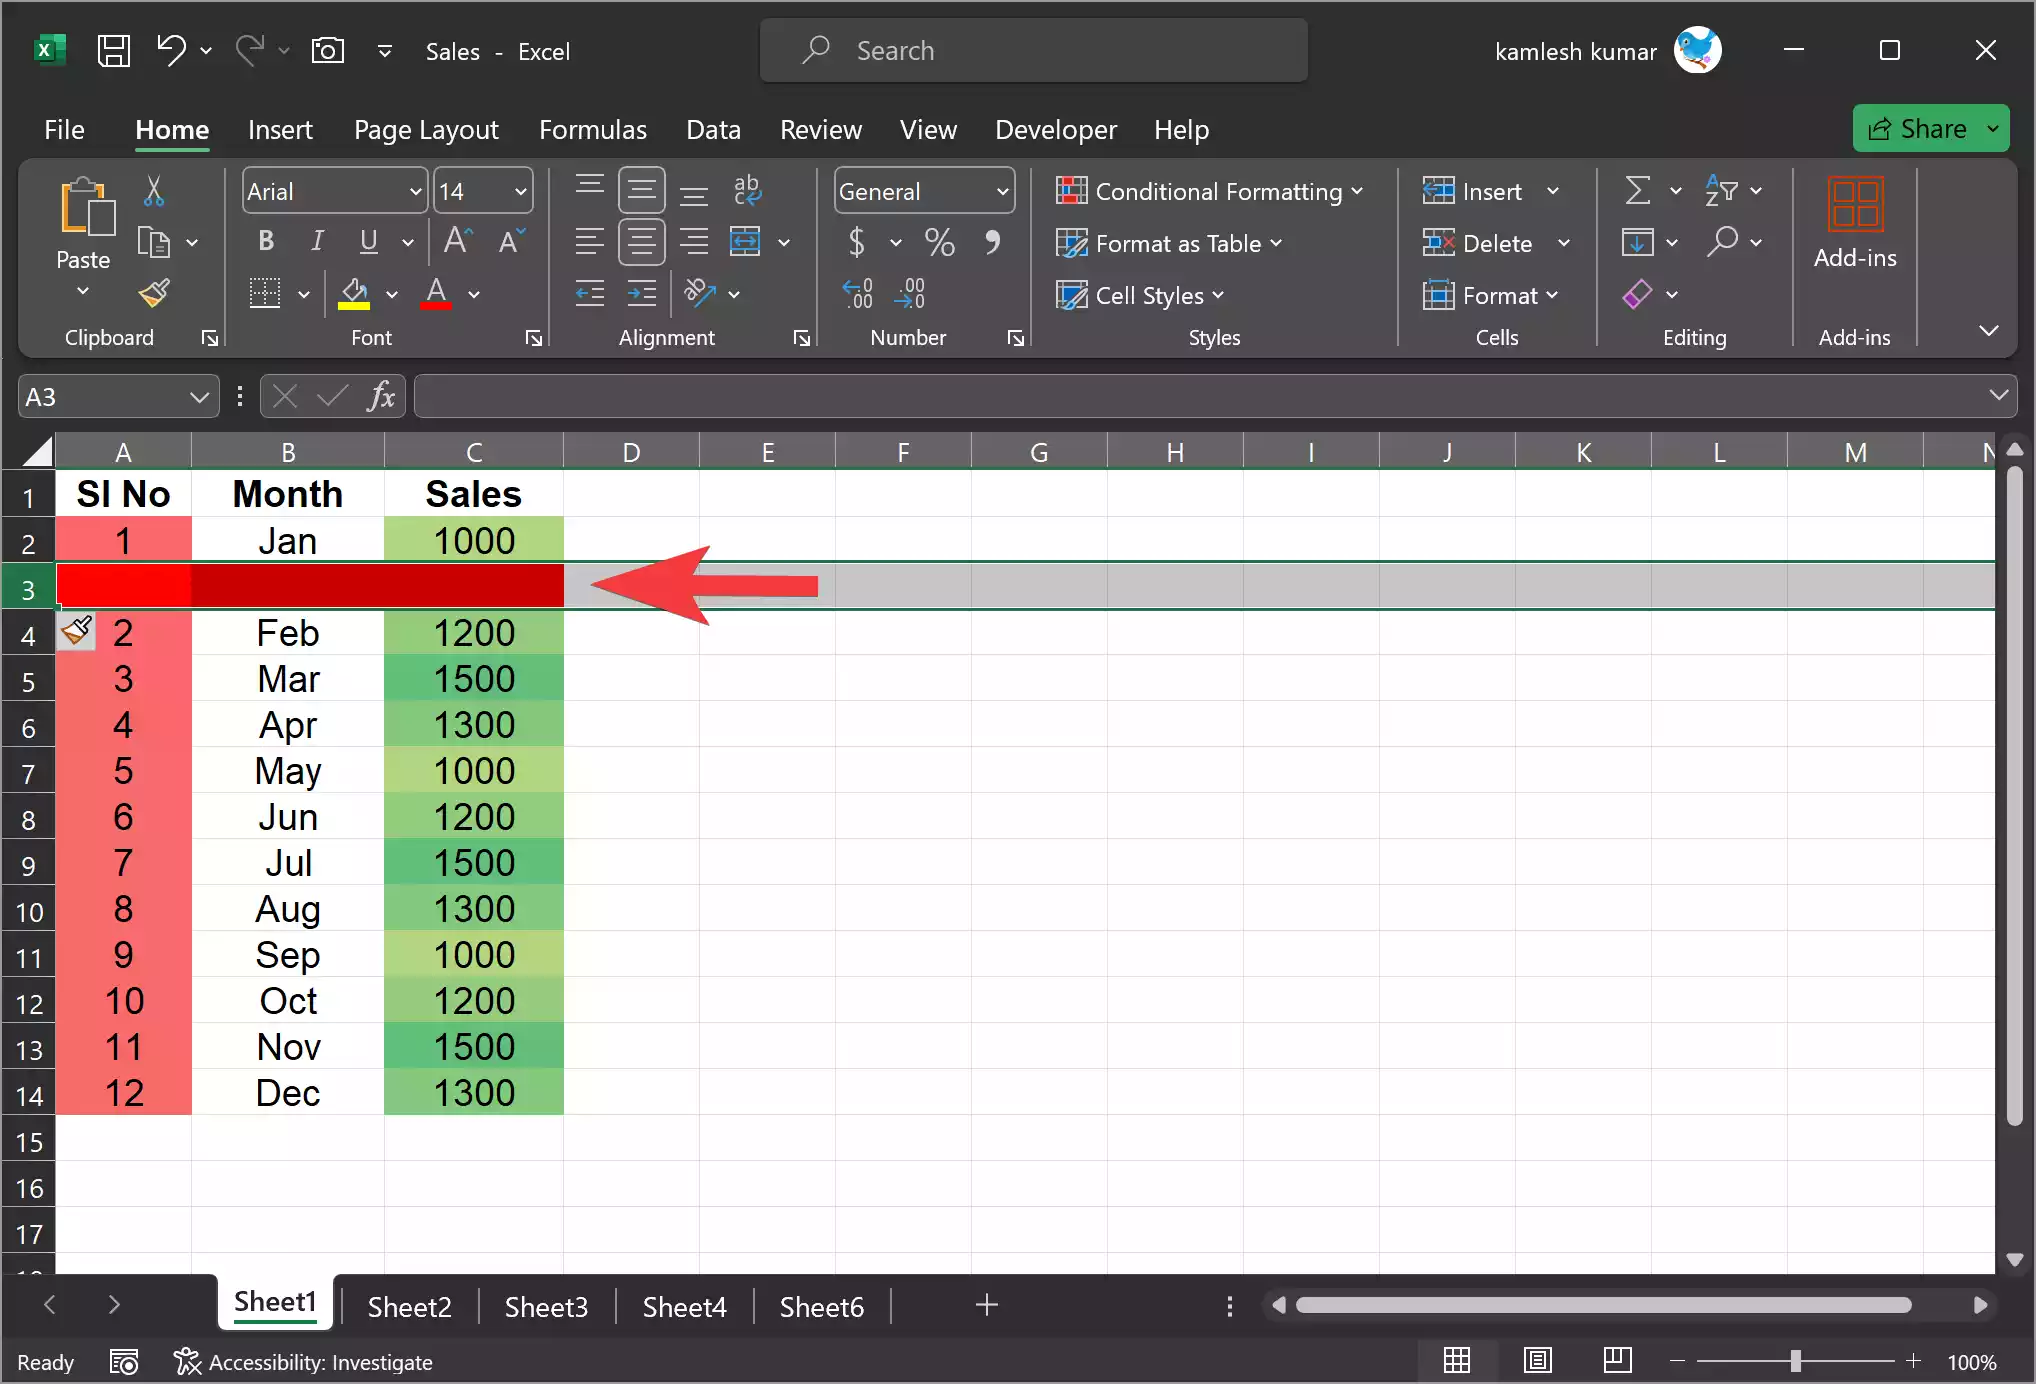
Step 2. Select the row(s) you want to delete. You can select multiple rows by clicking and dragging your mouse cursor or holding down the `Shift` key and clicking on individual rows.
Step 3. There are several methods to delete the selected rows:-
A. Right-click and Delete
– Select a row(s) by clicking on the number on the extreme left.
– Right-click on the selected rows.
– From the context menu, choose “Delete.”

The selected rows(s) will be deleted permanently.
Alternatively, select a cell(s) on a row(s) you want to delete and then right-click on it and choose “Delete.”

A dialog box will appear. Select “Entire row” and click “OK.”
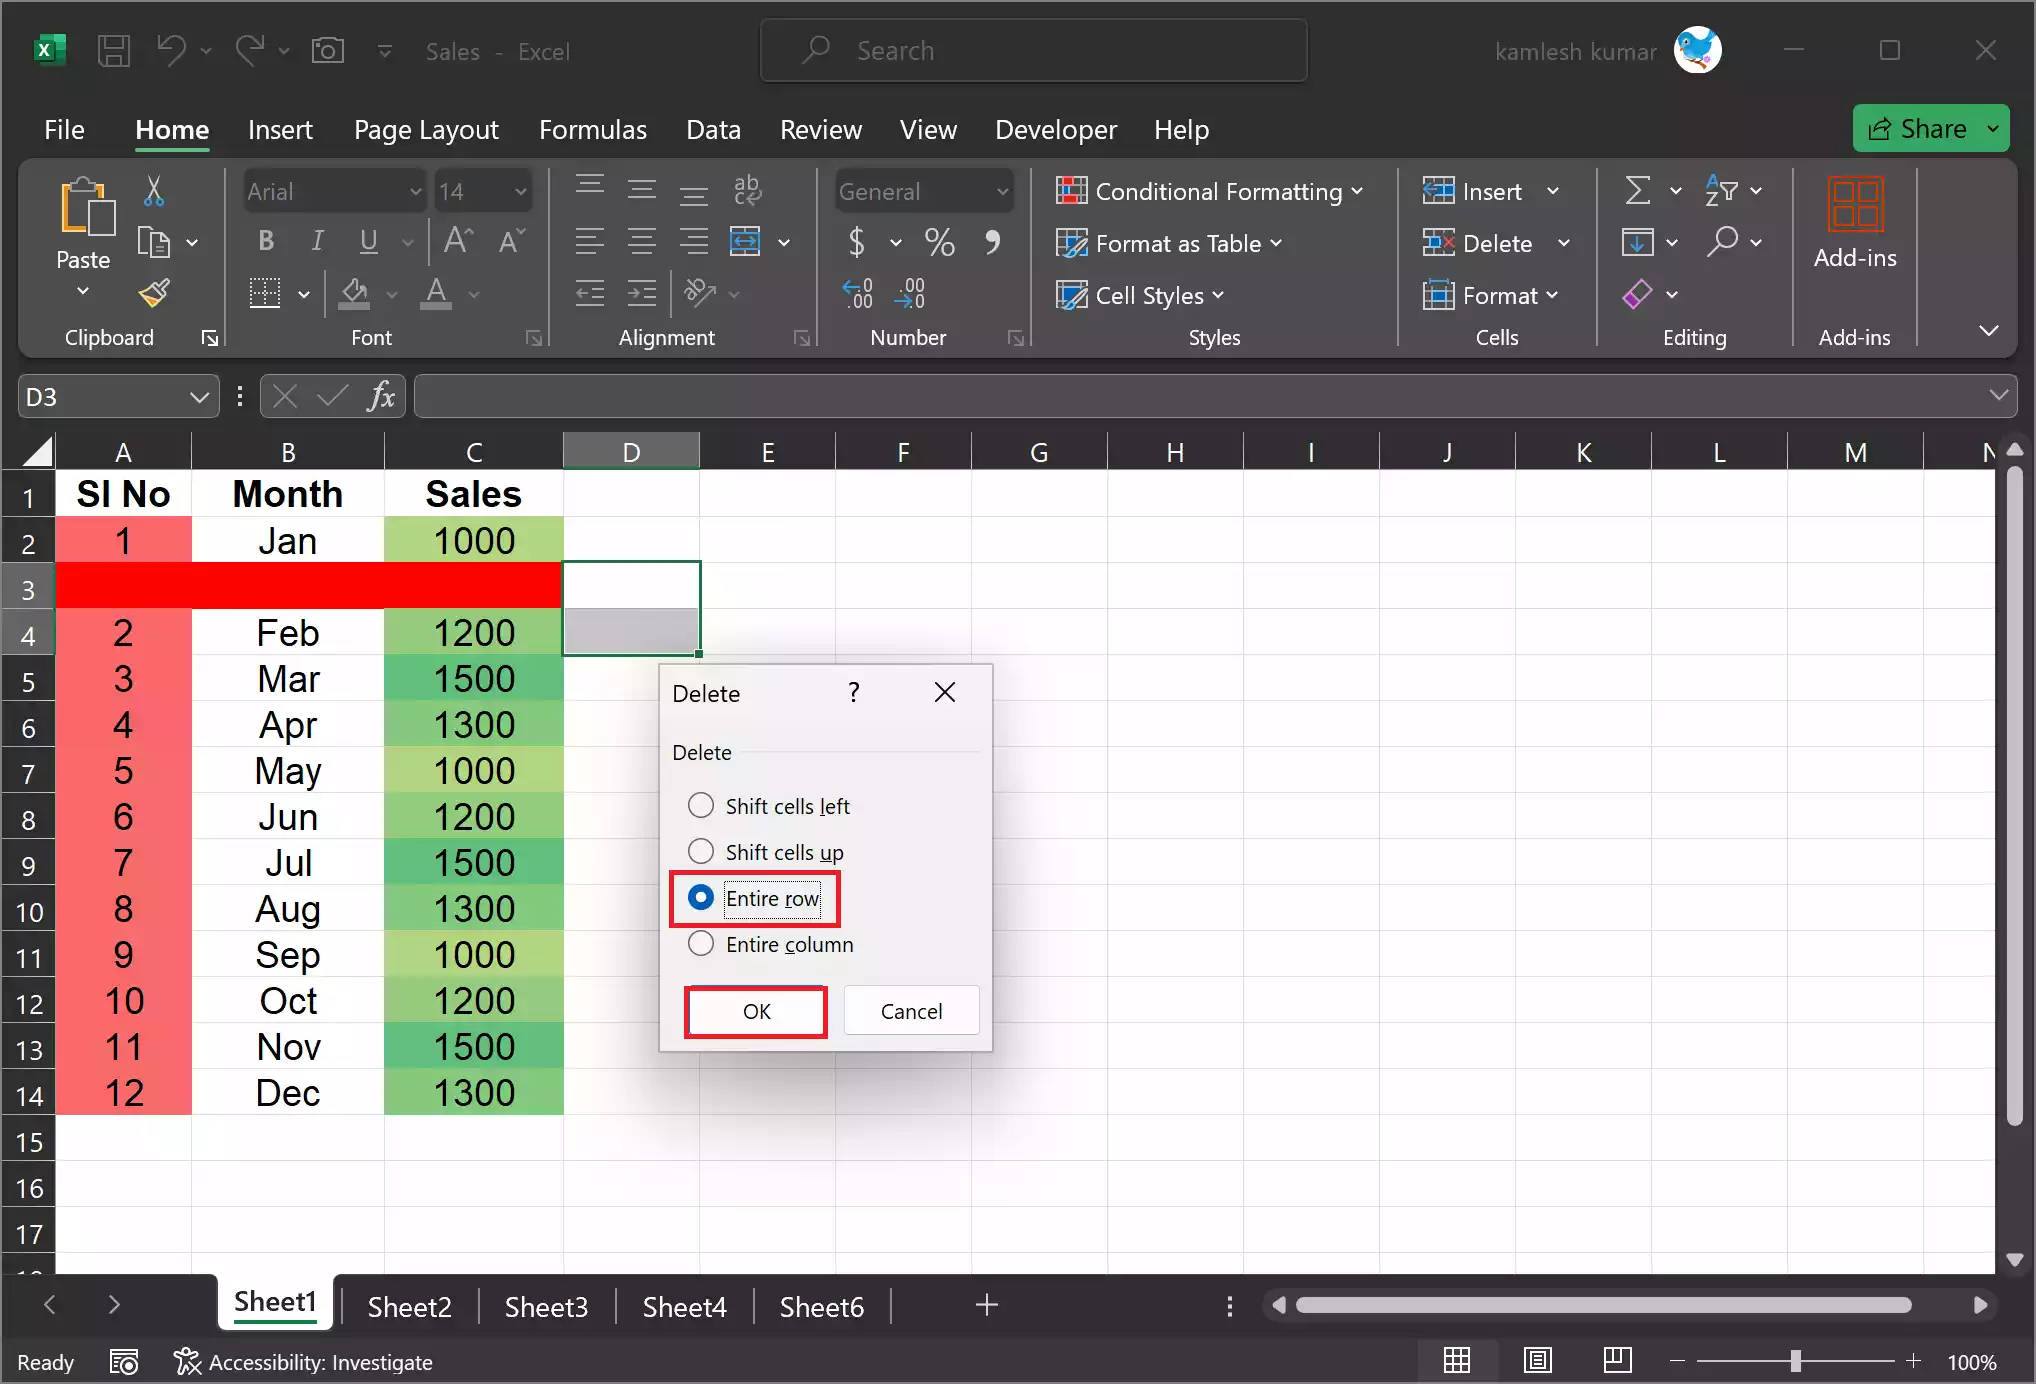
Excel will remove the selected rows.
B. Keyboard Shortcut
– Select the cell(s) in a row(s) you want to delete.
– Use the keyboard shortcut: `Ctrl` + `–` (the minus sign key located on the numeric keypad).
– A dialog box will appear. Select “Entire row” and click “OK.”
– Excel will delete the selected rows.
C. Ribbon Option
– Select a row(s) by clicking on the number on the extreme left. Alternatively, select the cell(s) on the row(s) you want to delete.
– Click the “Home” tab on the Excel ribbon.
– In the “Cells” group, click on the “Delete” dropdown.
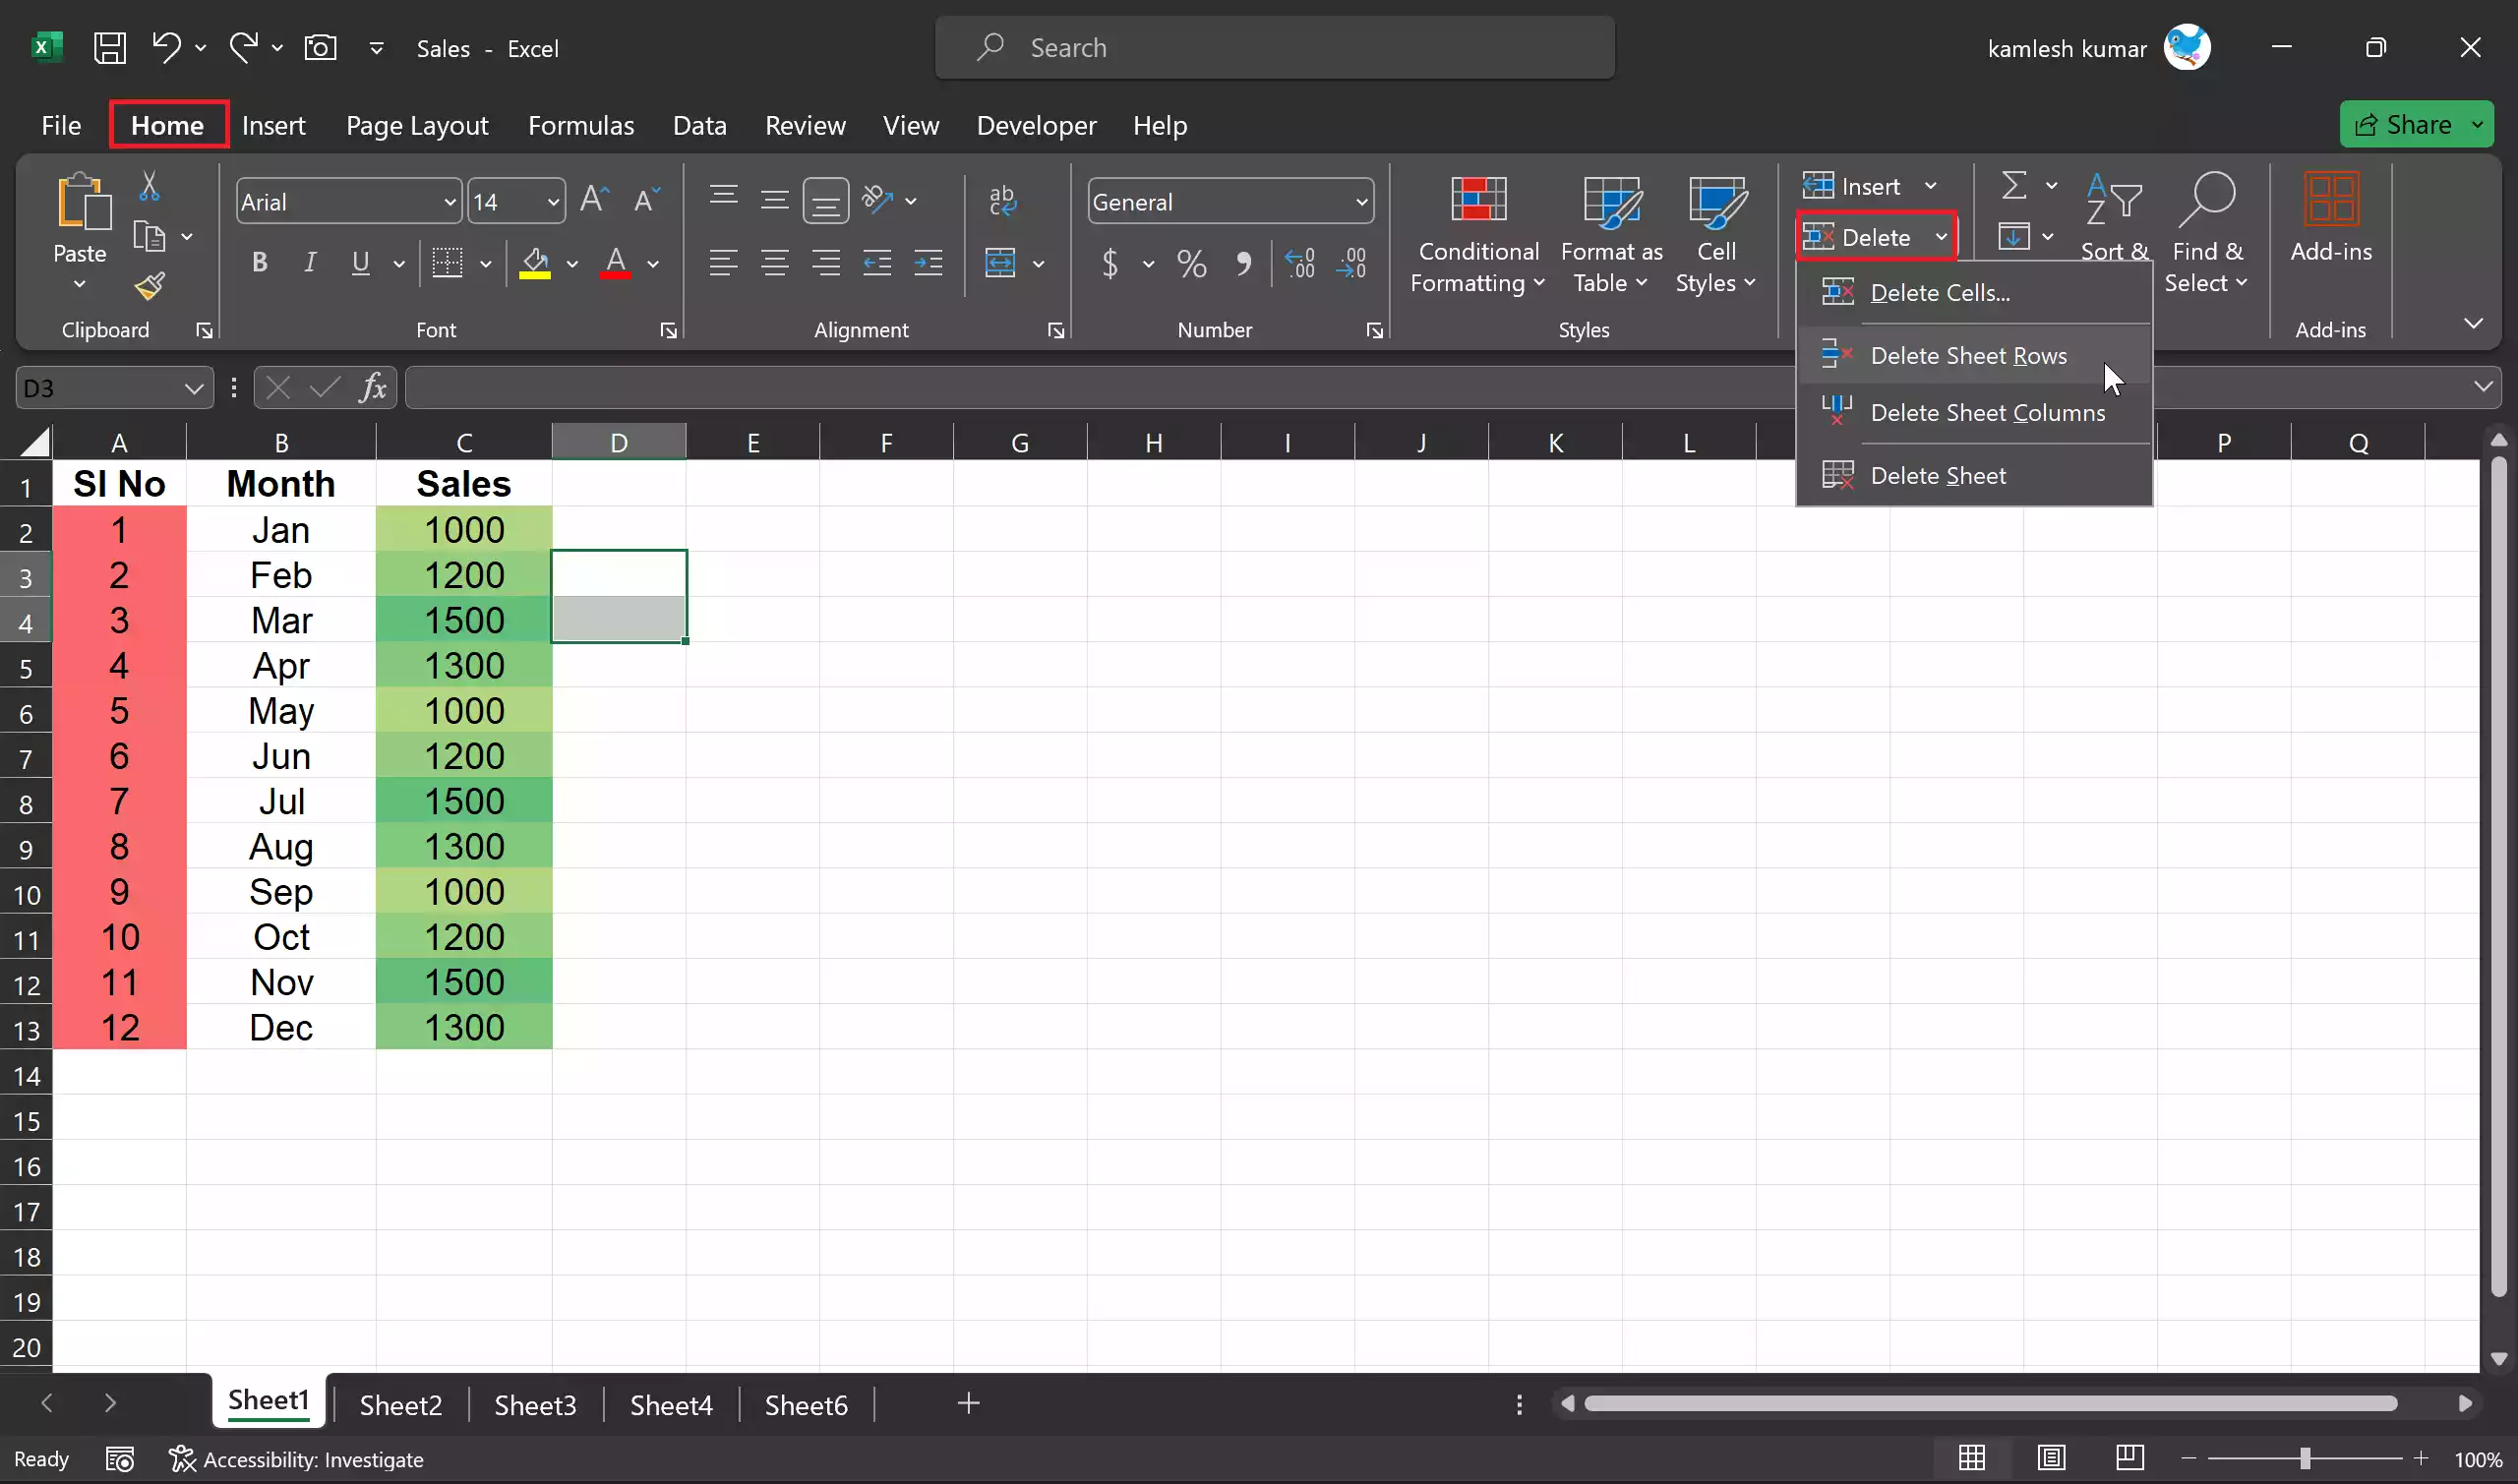
– Choose “Delete Sheet Rows.”
– A dialog box will appear. Select “Shift cells up” and click “OK.”
– Excel will remove the selected rows.
Additional Tips
– Undo: If you make a mistake while inserting or deleting rows, you can always use the “Undo” feature (keyboard shortcut: `Ctrl` + `Z`) to revert your actions.
– Hidden Rows: Be aware that if you have hidden rows within your selection, Excel will delete those hidden rows as well.
– Sorting Data: When you insert or delete rows, Excel will automatically adjust formulas, references, and sorting in your worksheet to maintain data integrity.
– Protecting Data: If you’re working with sensitive data, you can protect your worksheet to prevent accidental deletion of rows. Use the “Review” tab and the “Protect Sheet” feature.
Conclusion
In summary, inserting and deleting rows in Microsoft Excel is a fundamental skill for working with spreadsheet data. Whether you’re adding new data or cleaning up your sheet, these actions can help you keep your Excel workbook organized and up to date. By following the steps outlined in this article, you’ll be well-equipped to manipulate rows efficiently in Excel.
Also Read: How to Insert and Delete Columns in Microsoft Excel?
