In an age where information is both a powerful asset and a potential liability, safeguarding sensitive data has never been more critical. Fortunately, with Windows 11 Snipping Tool, you can now easily hide (redact) text from your screenshots before sharing them. This guide will take you through the steps of wielding this handy feature effectively.
Why Redact Text on Screenshots?
Before we dive into the nitty-gritty of using Windows 11 Snipping Tool’s text redaction feature, let’s understand why this tool is so indispensable. There are numerous scenarios where hiding sensitive information becomes a priority:-
- Privacy Concerns: Whether you’re sharing a screenshot for work, personal communication, or on social media, there might be sensitive information like personal identification, passwords, or confidential conversations that you want to keep hidden.
- Compliance and Security: Professionals often deal with documents and images containing confidential client or business data. Redacting text ensures compliance with data protection regulations and minimizes the risk of data breaches.
- Educational or Presentation Purposes: In educational settings or presentations, you may want to focus on specific content without revealing private information.
Now, let’s delve into the steps to redact text effectively using the Windows 11 Snipping Tool.
How to Hide Text from Screenshots on Windows 11 Snipping Tool?
To hide or redact text from screenshots on Windows 11 snipping tool, follow these steps:-
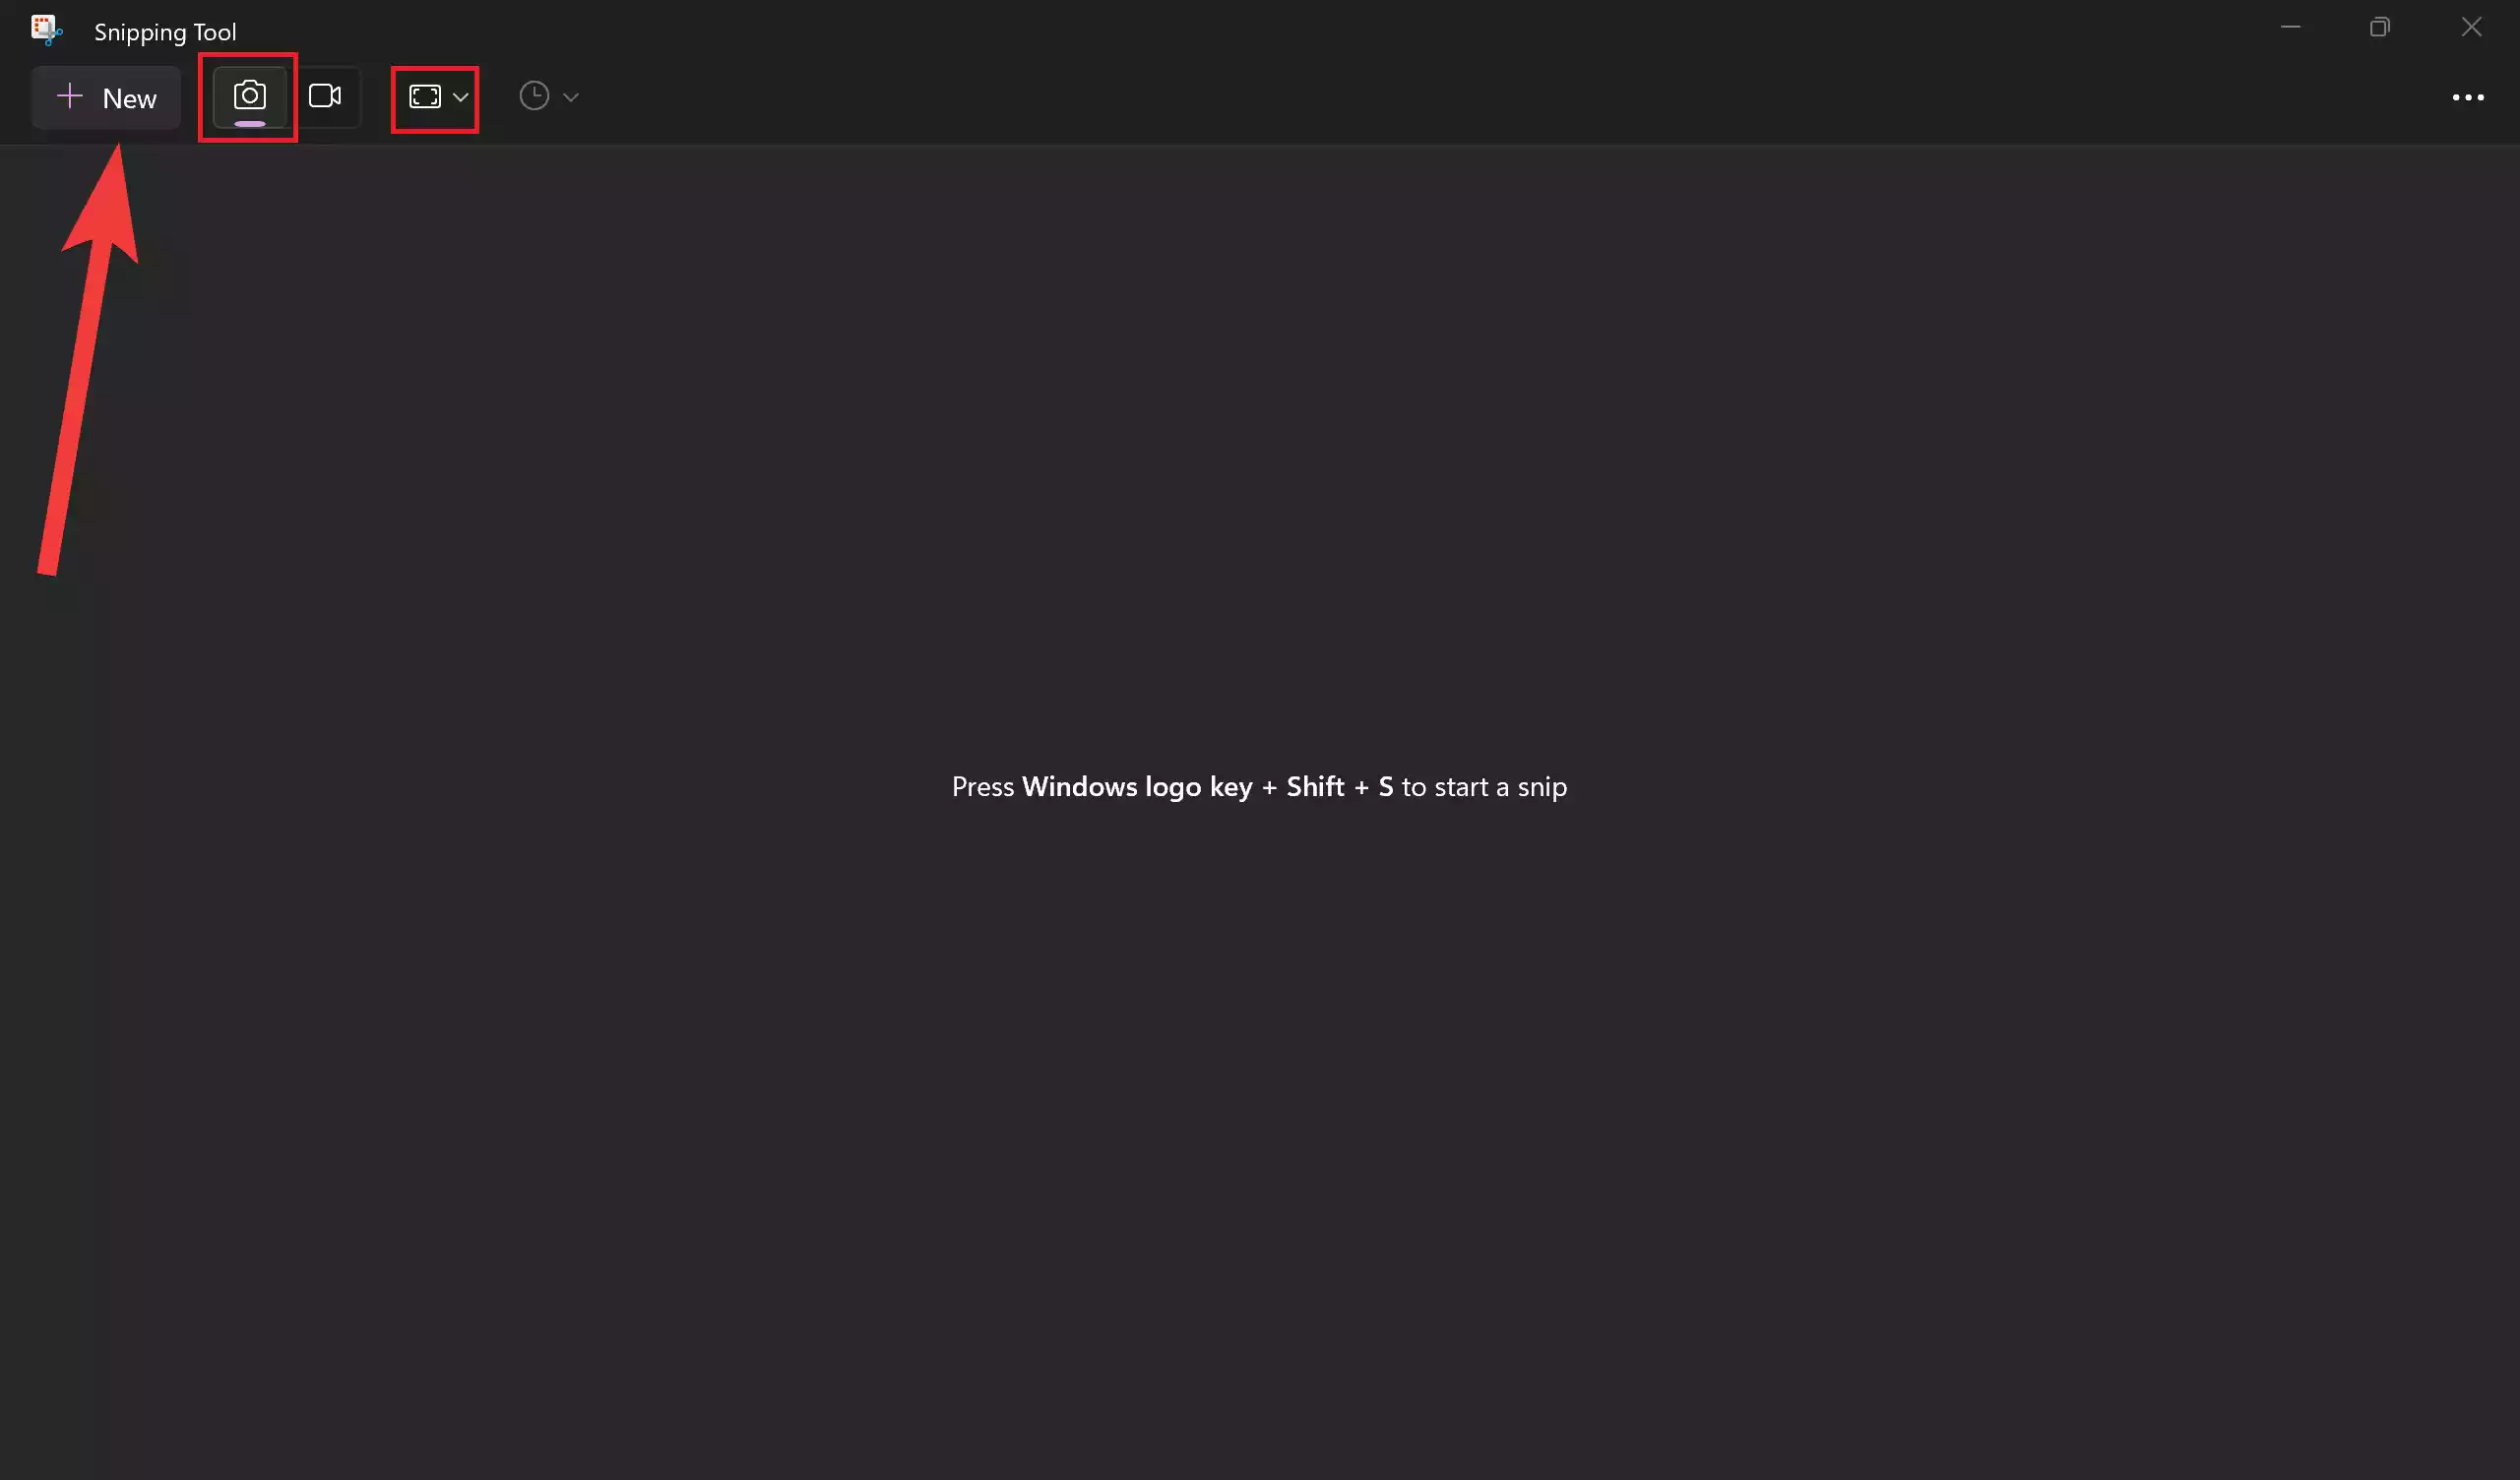
Step 1. Begin by opening the Snipping Tool on your Windows 11 system. You can do this by searching for “Snipping Tool” in the Windows search bar and selecting it from the results.
Step 2. Click the “Snip” button within the Snipping Tool window. You’ll have options to select a snipping mode that suits your needs: freeform, rectangular, window, or full-screen. Capture the screenshot with the chosen mode.
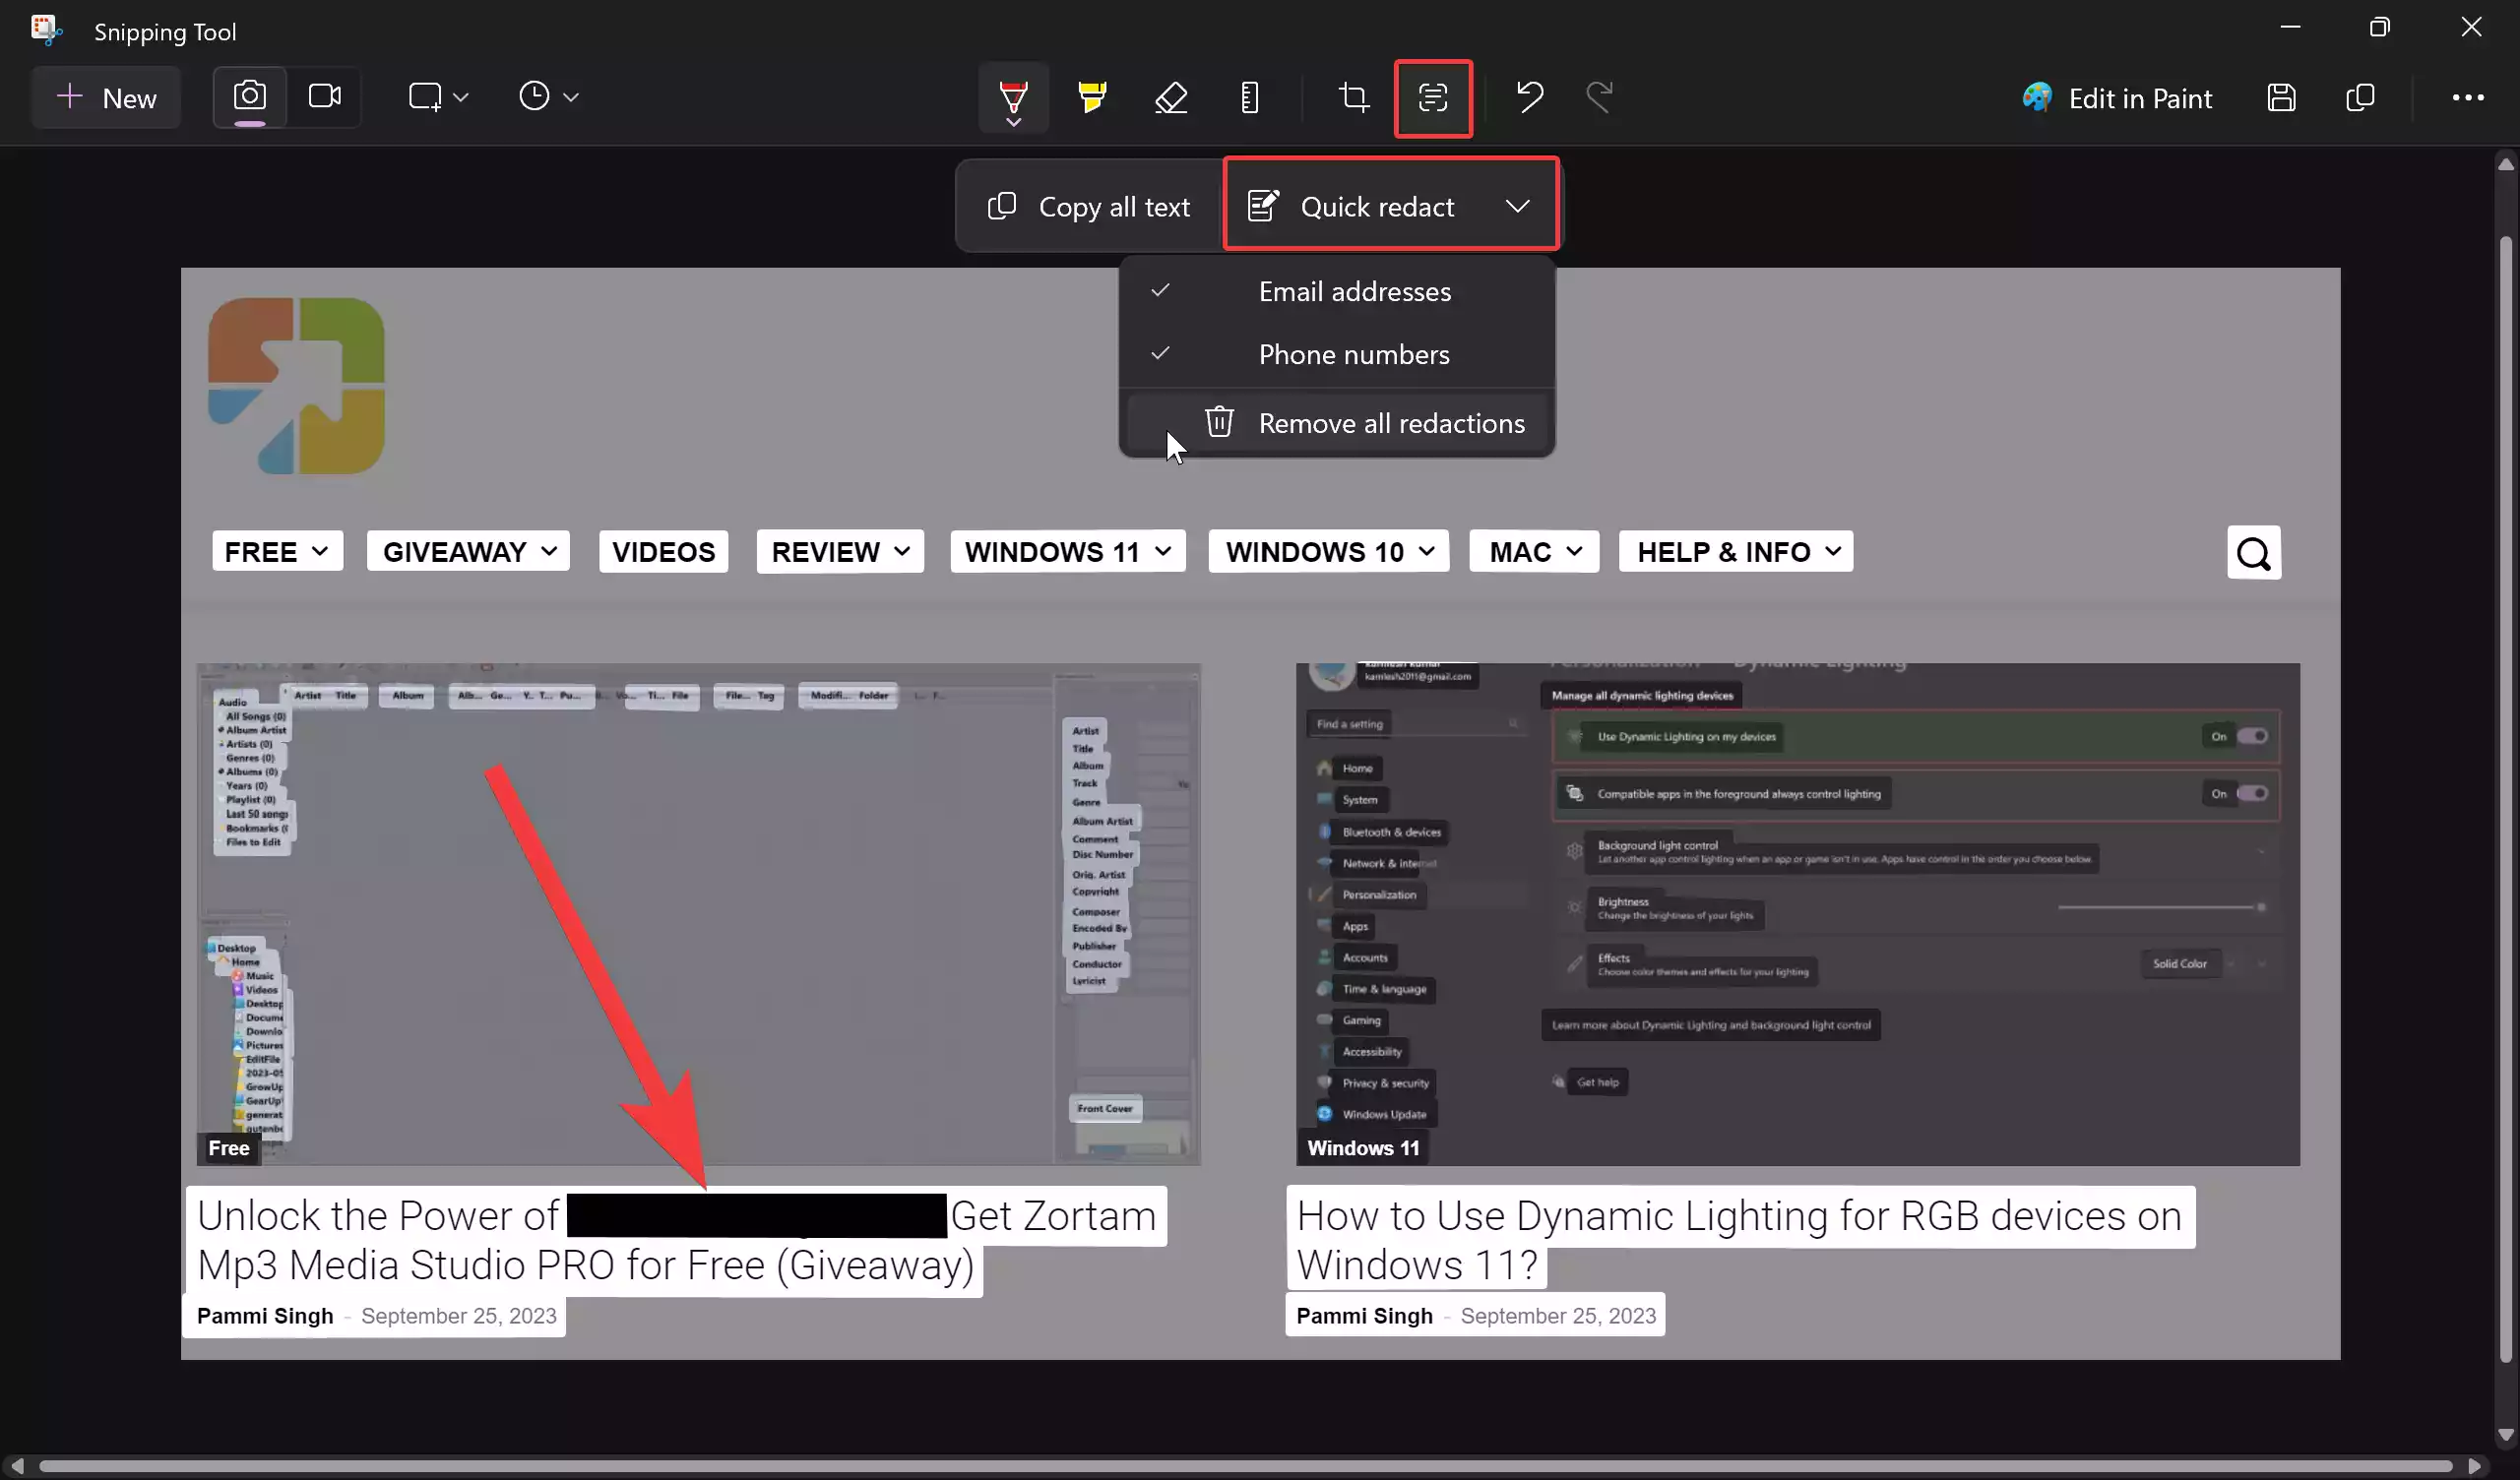
Step 3. Once you’ve captured the screenshot, you’ll find a handy feature known as “Text actions” in the Snipping Tool’s command bar.

Step 4. Here’s where the magic happens. With the “Text actions” menu open, use your cursor to select the text you wish to hide. Once selected, right-click the chosen text and select “Redact text” from the context menu. Alternatively, you can use the “Quick redact” button to automatically hide emails and phone numbers within the selected text.
Step 5. Should you ever need to reverse the process and reveal the redacted text, the “Text actions” menu provides a solution. Click the “Text actions” button again, open the menu next to “Quick redact,” and choose “Remove all redactions.”
 Step 6. With the sensitive information securely hidden, click the “Save” button to save your redacted screenshot. Now, you have a sanitized image ready for sharing without compromising your privacy or security.
In a world where data privacy is paramount, Windows 11 Snipping Tool’s text redaction feature is a valuable tool in your digital toolkit. It empowers you to communicate, collaborate, and share information confidently while keeping sensitive data concealed.
Whether you’re a professional handling confidential information, a student sharing coursework, or simply someone who values privacy, mastering the art of hiding text from screenshots on Windows 11 Snipping Tool is a skill worth acquiring. With this tool at your disposal, you can navigate the digital realm with peace of mind, knowing that your sensitive information remains safe and hidden from prying eyes.