Windows 11 and Windows 10 offer a plethora of features to enhance your computing experience, including the ability to install programs and applications. However, over time, your system drive (usually C:\) can become cluttered with installed program files, leading to decreased performance. In such cases, you might want to move these program files to another drive (e.g., D:\) to free up space on your primary drive without uninstalling the applications. This guide will walk you through the steps to move installed program files from one drive to another in Windows 11 and Windows 10.
Important Considerations Before Moving Program Files
Before you begin moving your installed program files, here are a few crucial considerations:-
- Backup: Always back up your important data and create a system restore point in case anything goes wrong during the process.
- Space Availability: Ensure that your target drive (the drive you want to move the program files to) has enough free space to accommodate the files you intend to transfer.
- Administrator Rights: You need administrative privileges to perform certain actions, so make sure you’re logged in as an administrator.
- Program Compatibility: Not all programs can be moved to a different drive. Some programs rely heavily on registry entries and other system files, which cannot be easily relocated without causing issues.
Now, let’s get started with the process of moving installed program files.
How to Move Installed Desktop Program Files from One Drive to Another in Windows 11/10?
Moving desktop programs to another drive in Windows can be a bit tricky since Microsoft doesn’t recommend directly relocating installed program files due to potential issues. However, if you still want to proceed, it’s important to be cautious and follow these steps.
Please note: The safer approach is to uninstall the program and then reinstall it on your desired drive, as this method reduces the risk of potential issues.
Here’s a guide on how to move desktop programs to another drive using a program called Steam Mover:-
Step 1. Ensure that both the source drive (where the program is currently installed) and the destination drive (where you want to move the program) are in the NTFS format.
To check this, press the Windows key + E to open File Explorer. Then, navigate to “This PC.” After that, right-click on a drive and select “Properties.” Now, look for the “File system” field to confirm that it’s listed as “NTFS.”
Step 2. Now, download Steam Mover which was originally designed to move Steam games between drives but can work for relocating any program.
Step 3. Unzip the downloaded file and run it as administrator.
Step 4. Next to “Steam Apps Common Folder,” click the three-dot button to select the folder path on the source drive containing the programs you wish to move. Typically, this folder is where your programs are currently installed, such as your “Program Files” or “Program Files (x86)” on the “C:\” drive.
Step 5. Next to “Alternative Folder,” click the three-dot button to select the drive and folder path where you want to move the program to. This should be on the destination drive where you intend to relocate the program.
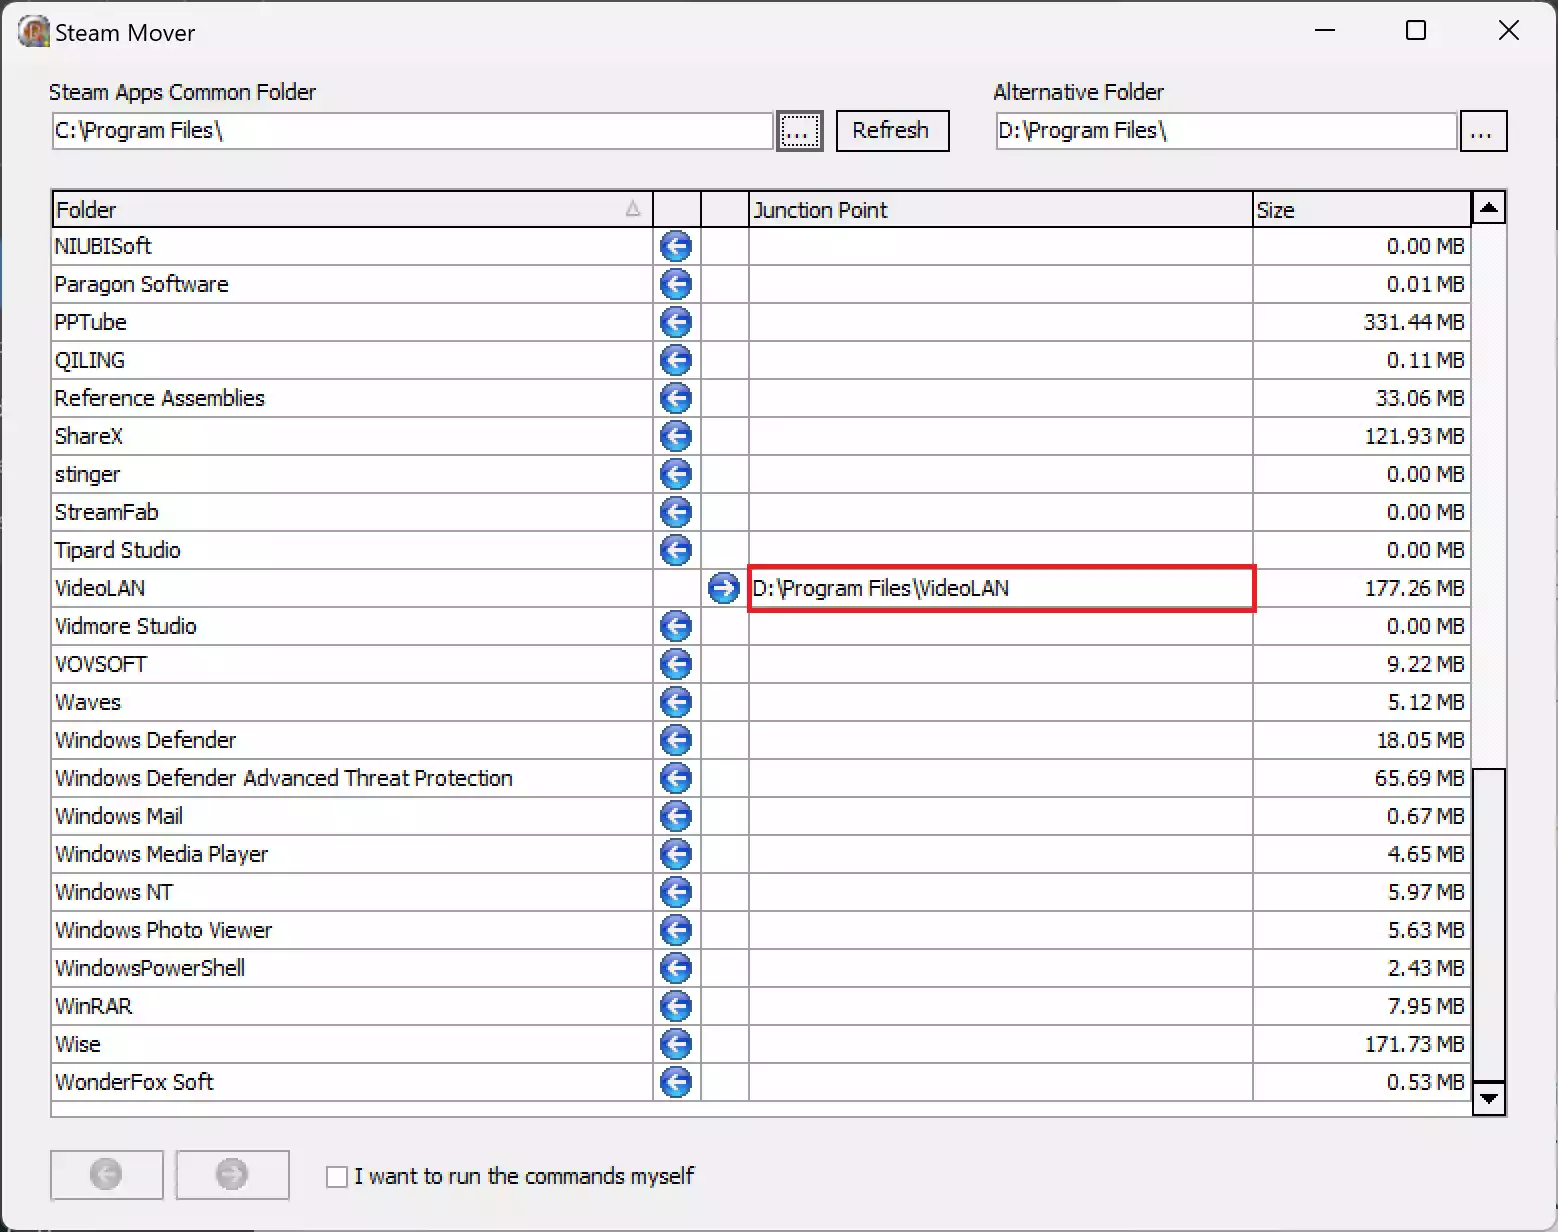
Step 6. Inside the Steam Mover interface, you’ll find a list of programs available for moving.
Step 7. Select the program(s) you want to move by clicking on them. To select multiple programs, hold down the Ctrl key while clicking.
Step 8. Once you are ready to commence the move of the selected program(s), click the right arrow icon located at the bottom of the Steam Mover window. This action will prompt a Command Prompt window to open and carry out the move operation.

Step 9. After the move has been successfully completed, you’ll see the new folder path next to the program in the “Junction Point” column within the Steam Mover interface. This signifies that the program is now located on the destination drive.
Please keep in mind that this method may not work for all programs, and certain programs may encounter issues after being moved. Consider the alternative of reinstalling the program on the desired drive to avoid potential complications.
Conclusion
Moving installed program files from one drive to another in Windows 11 and Windows 10 can be a useful strategy to free up space on your primary drive without uninstalling applications. However, it comes with important considerations, such as backing up your data, ensuring space availability on the target drive, and understanding program compatibility issues. While it’s possible to use tools like Steam Mover for this purpose, Microsoft generally recommends uninstalling and reinstalling programs on the desired drive as a safer approach.
