Microsoft Excel is a versatile tool used for a wide range of tasks, from basic data organization to complex data analysis. One common task is importing data from websites into Excel for further analysis, reporting, or visualization. This process allows you to extract information from the internet and use it in your spreadsheets. In this comprehensive guide, we’ll walk you through the various methods and techniques for importing data from websites into Excel.
Why Import Data From Websites to Excel?
Importing data from websites to Excel offers several advantages:
- Data Consolidation: You can collect data from multiple web sources and consolidate it into a single Excel workbook, simplifying your data management.
- Automation: Automating data import processes saves time and reduces the risk of errors associated with manual data entry.
- Data Analysis: Excel provides powerful tools for data analysis, making it easier to derive insights from web data.
- Regular Updates: You can set up your Excel file to automatically update with fresh data from websites, ensuring your analysis is always based on the latest information.
Now, let’s dive into the methods of importing data from websites to Excel.
How to Import Data From Websites to Excel?
Method 1: Manual Data Entry
The most basic method of importing data from a website into Excel is manual data entry. While this method can be time-consuming for large datasets, it’s simple and effective for small amounts of information. Here’s how to do it:-
Step 1. Open Excel and create a new worksheet.
Step 2. Navigate to the website containing the data you want to import using your web browser.
Step 3. Highlight the data on the website using your mouse and then right-click to copy it.
Step 4. Return to your Excel worksheet, click on the cell where you want to paste the data, and then right-click to paste it.
Step 5. Excel will paste the data into the selected cell, and you can further manipulate and format it as needed.
Method 2: Import Data Using Web Queries
Web queries are a powerful feature in Excel that allows you to automate the process of importing data from websites. Here’s how to use web queries:-
Step 1. Open Excel and create a new worksheet.
Step 2. Click on the “Data” tab in the Excel ribbon.
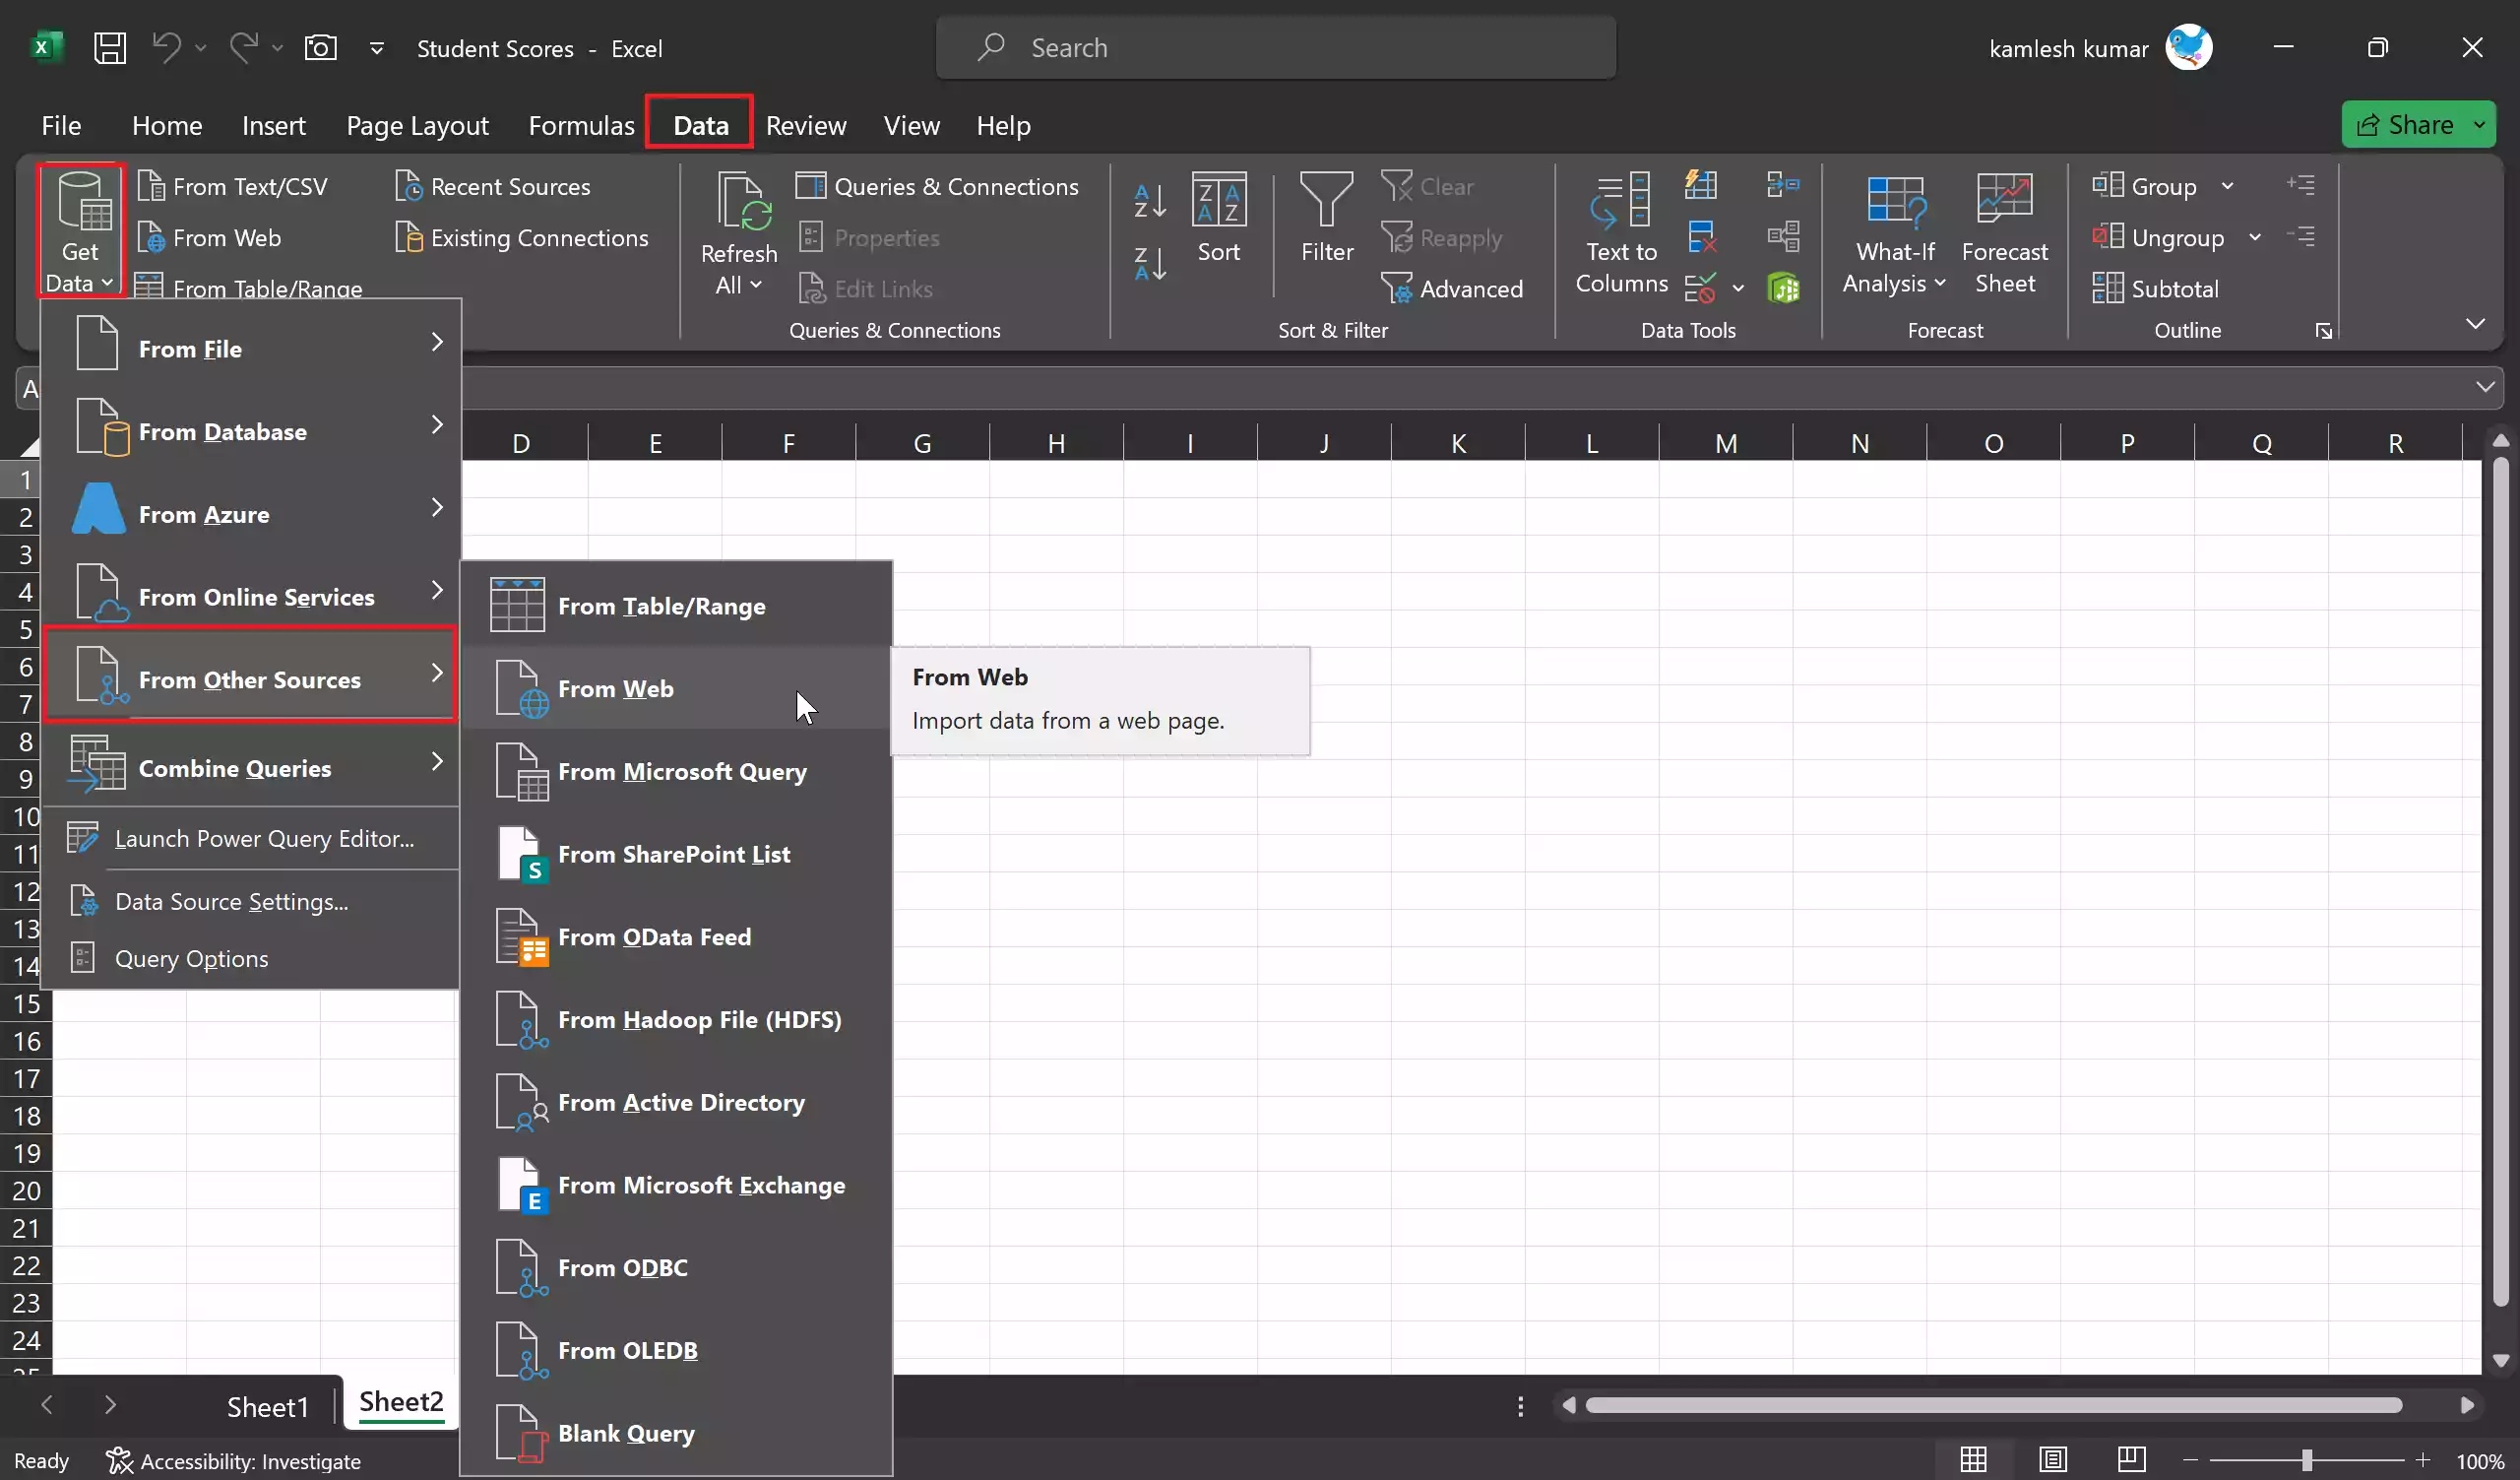
Step 3. Select “Get Data” or “Get External Data,” depending on your Excel version.
Step 4. Choose “From Other Sources” > “From Web” from the dropdown menu.
Step 5. A “From Web” dialog box will appear. Enter the URL of the website containing the data you want to import.
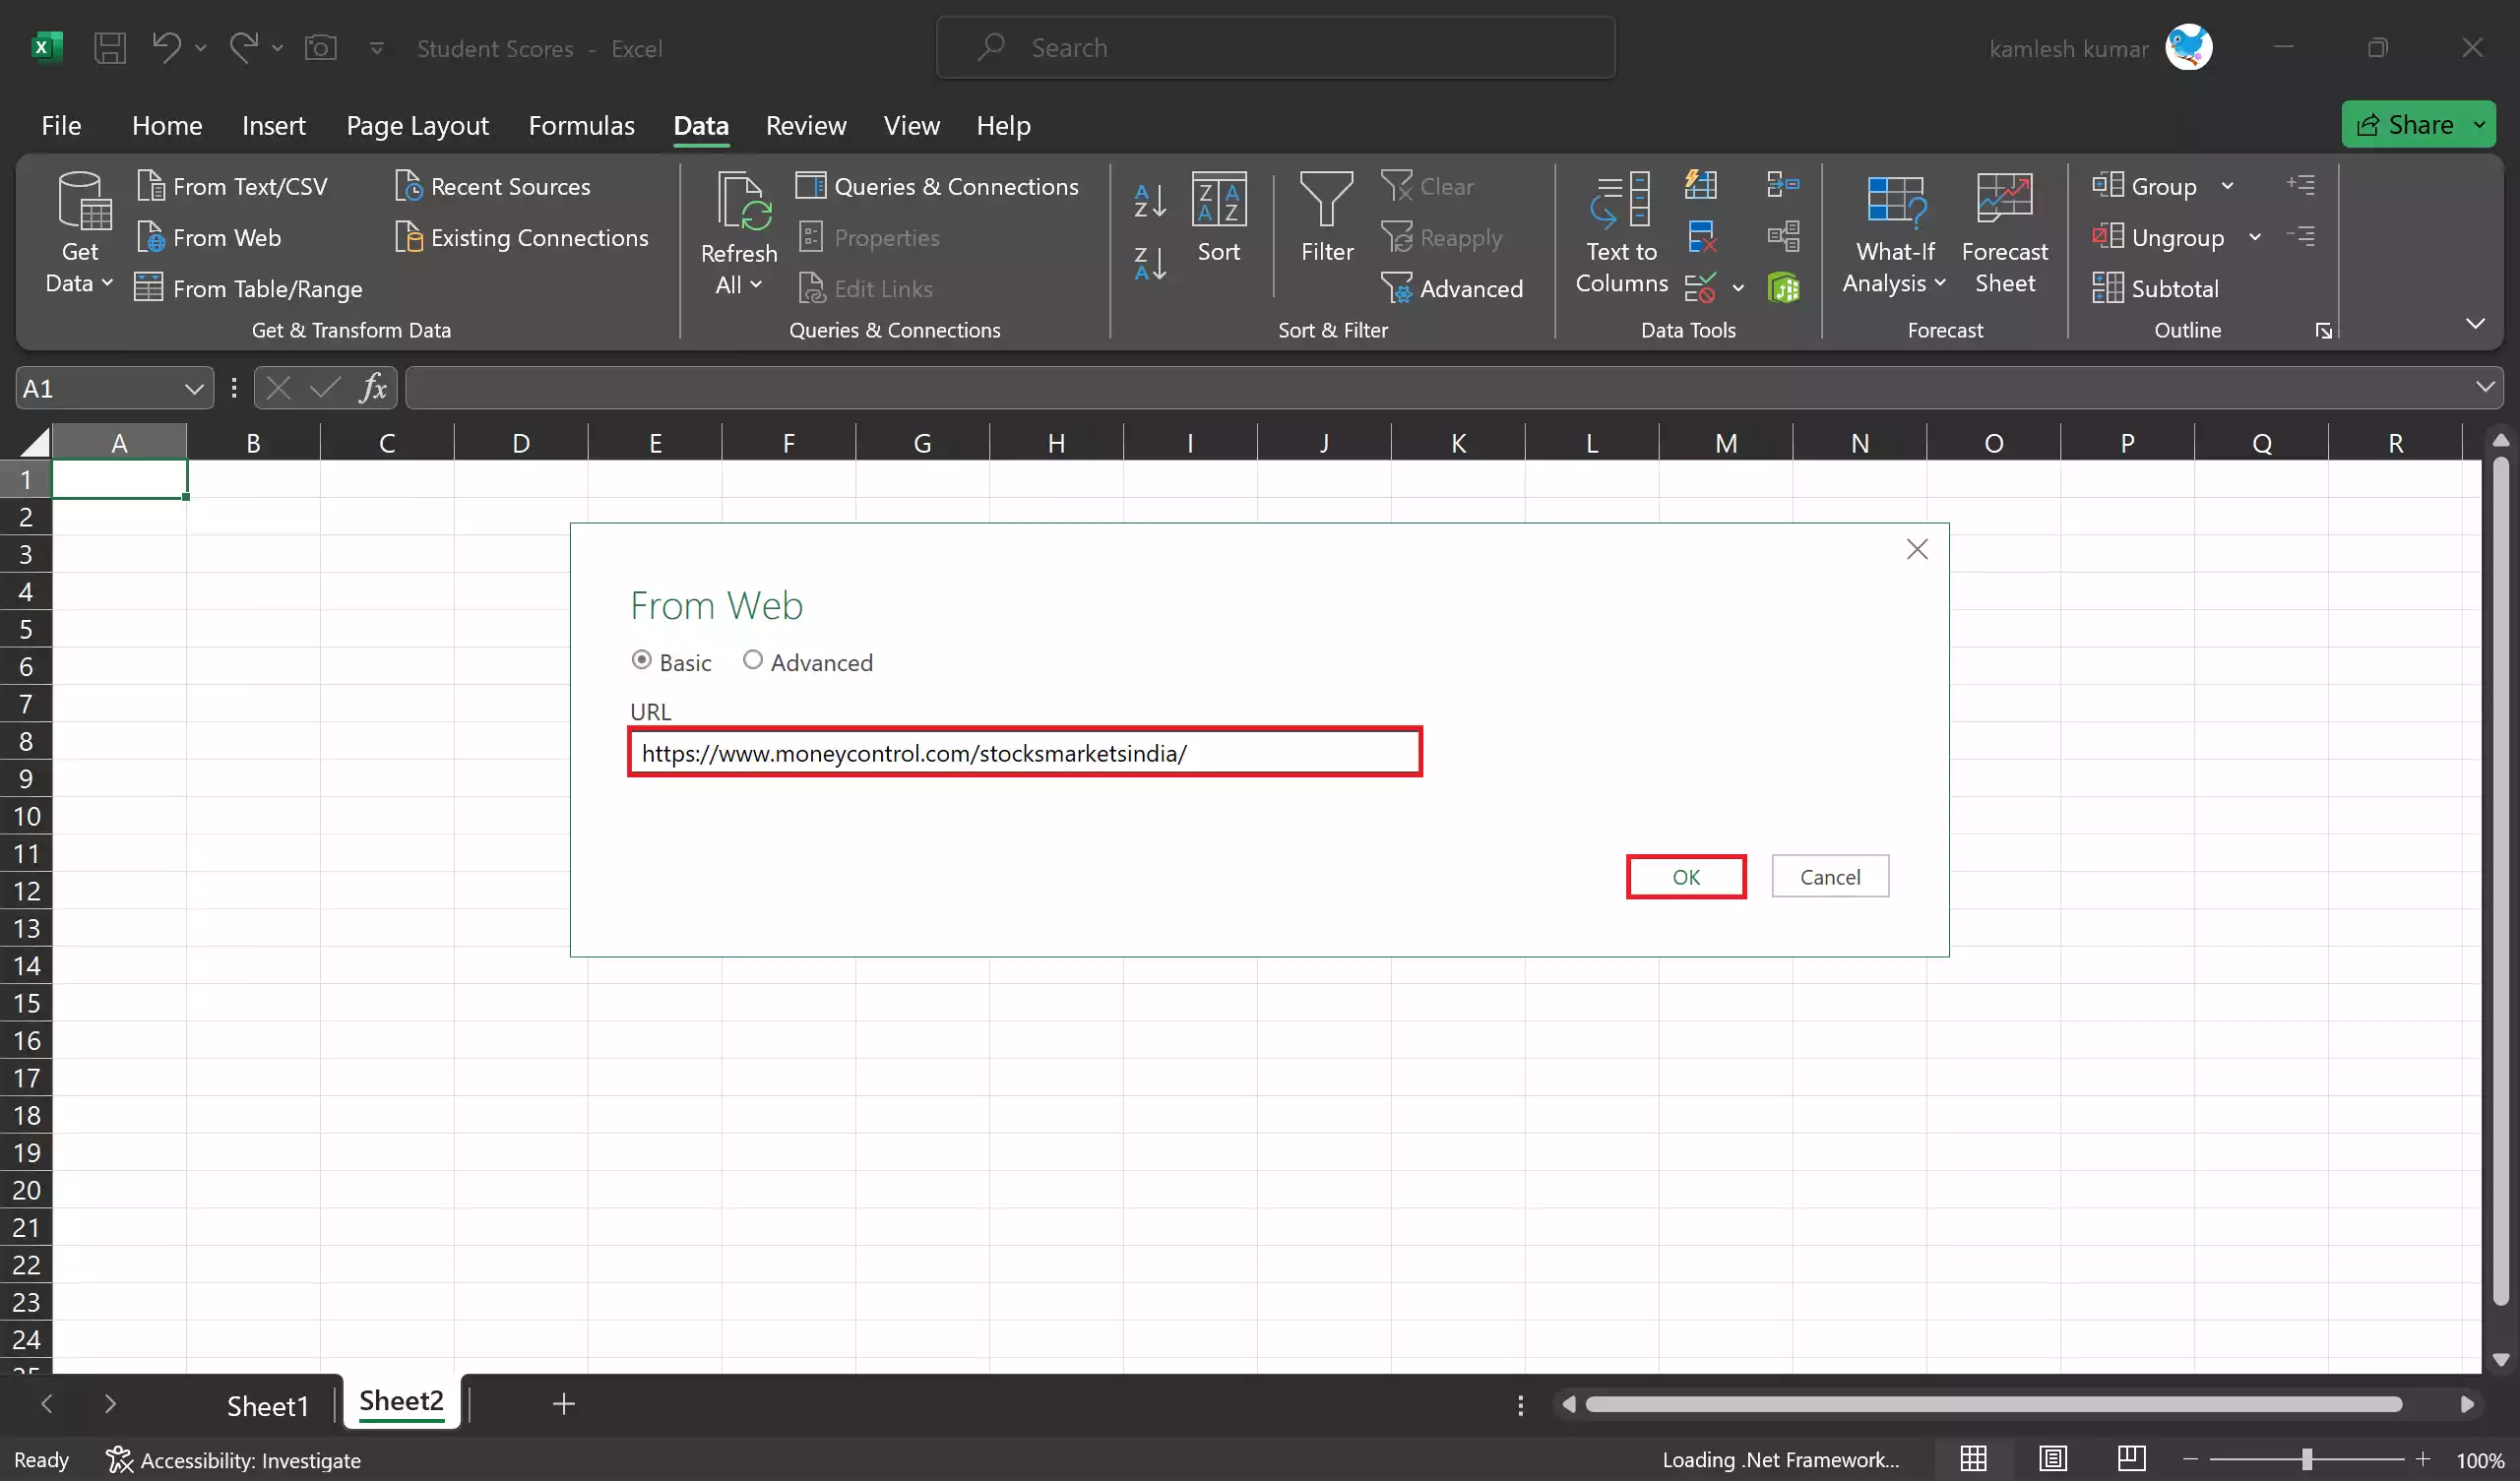
Step 6. Click “OK” to load the website.
Step 7. A Navigator window will open, displaying the various elements on the web page. Select the data you want to import by checking the box next to it and click “Load.”
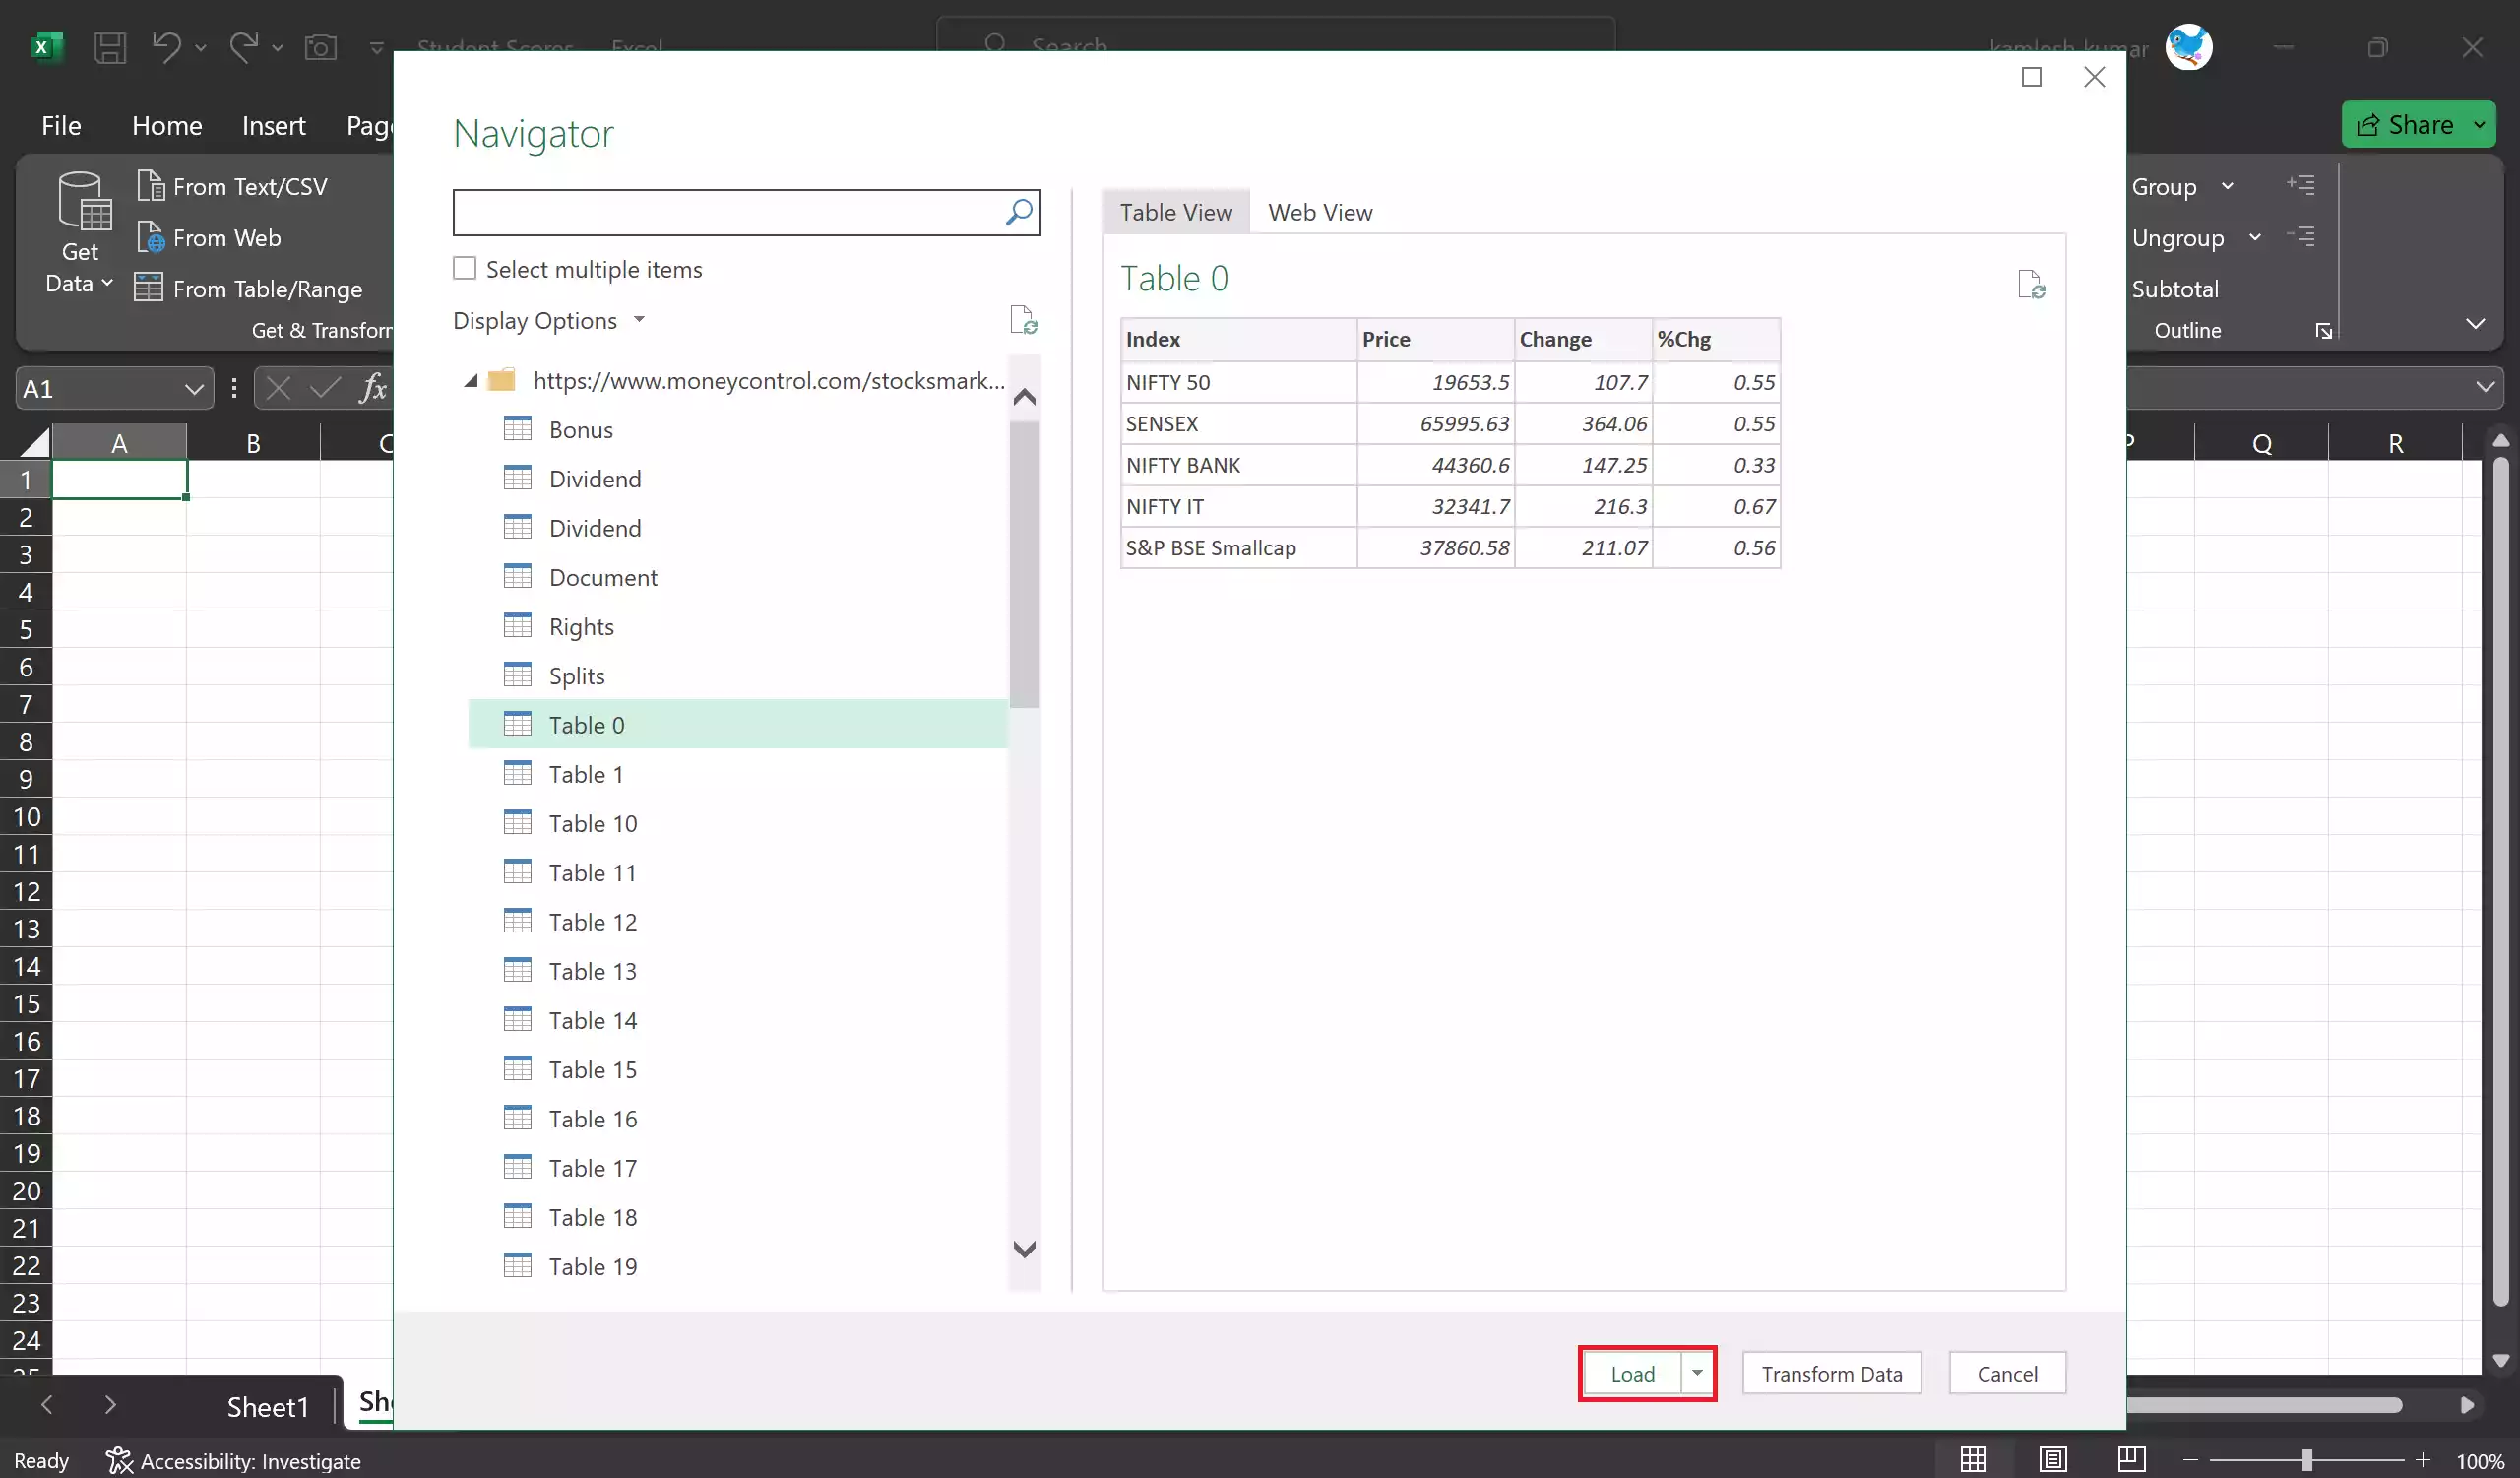
Step 8. Click “Load” to import the data into Excel.
Step 9. Excel will import the data, and you can refresh it whenever needed by right-clicking on the imported data and selecting “Refresh.”

Conclusion
Importing data from websites into Excel is a valuable skill that can save you time and streamline your data analysis tasks. Whether you prefer manual data entry or, web queries Excel offers a range of options to cater to your data import needs. Choose the method that best suits your requirements and start harnessing the power of web data in your Excel spreadsheets. Remember to respect website terms of service and data usage policies while importing data from the web.