Microsoft PowerPoint is a powerful tool for creating visually engaging presentations. One of the key elements that can enhance the visual appeal of your slides is the use of images. Whether it’s photographs, illustrations, icons, or other visual elements, adding and editing images in PowerPoint can help convey your message effectively. In this gearupwindows article, we will guide you through the process of inserting and editing images in PowerPoint.
How to Insert Images in PowerPoint?
To add images in PowerPoint, use these steps:-
Step 1. Launch Microsoft PowerPoint and open the presentation where you want to insert an image.
Step 2. Click on the slide where you want to add the image. This will ensure the image appears on the selected slide.
Step 3. There are several ways to insert an image:-
Option 1: Insert Picture from File
– Click on the “Insert” tab in the PowerPoint ribbon.
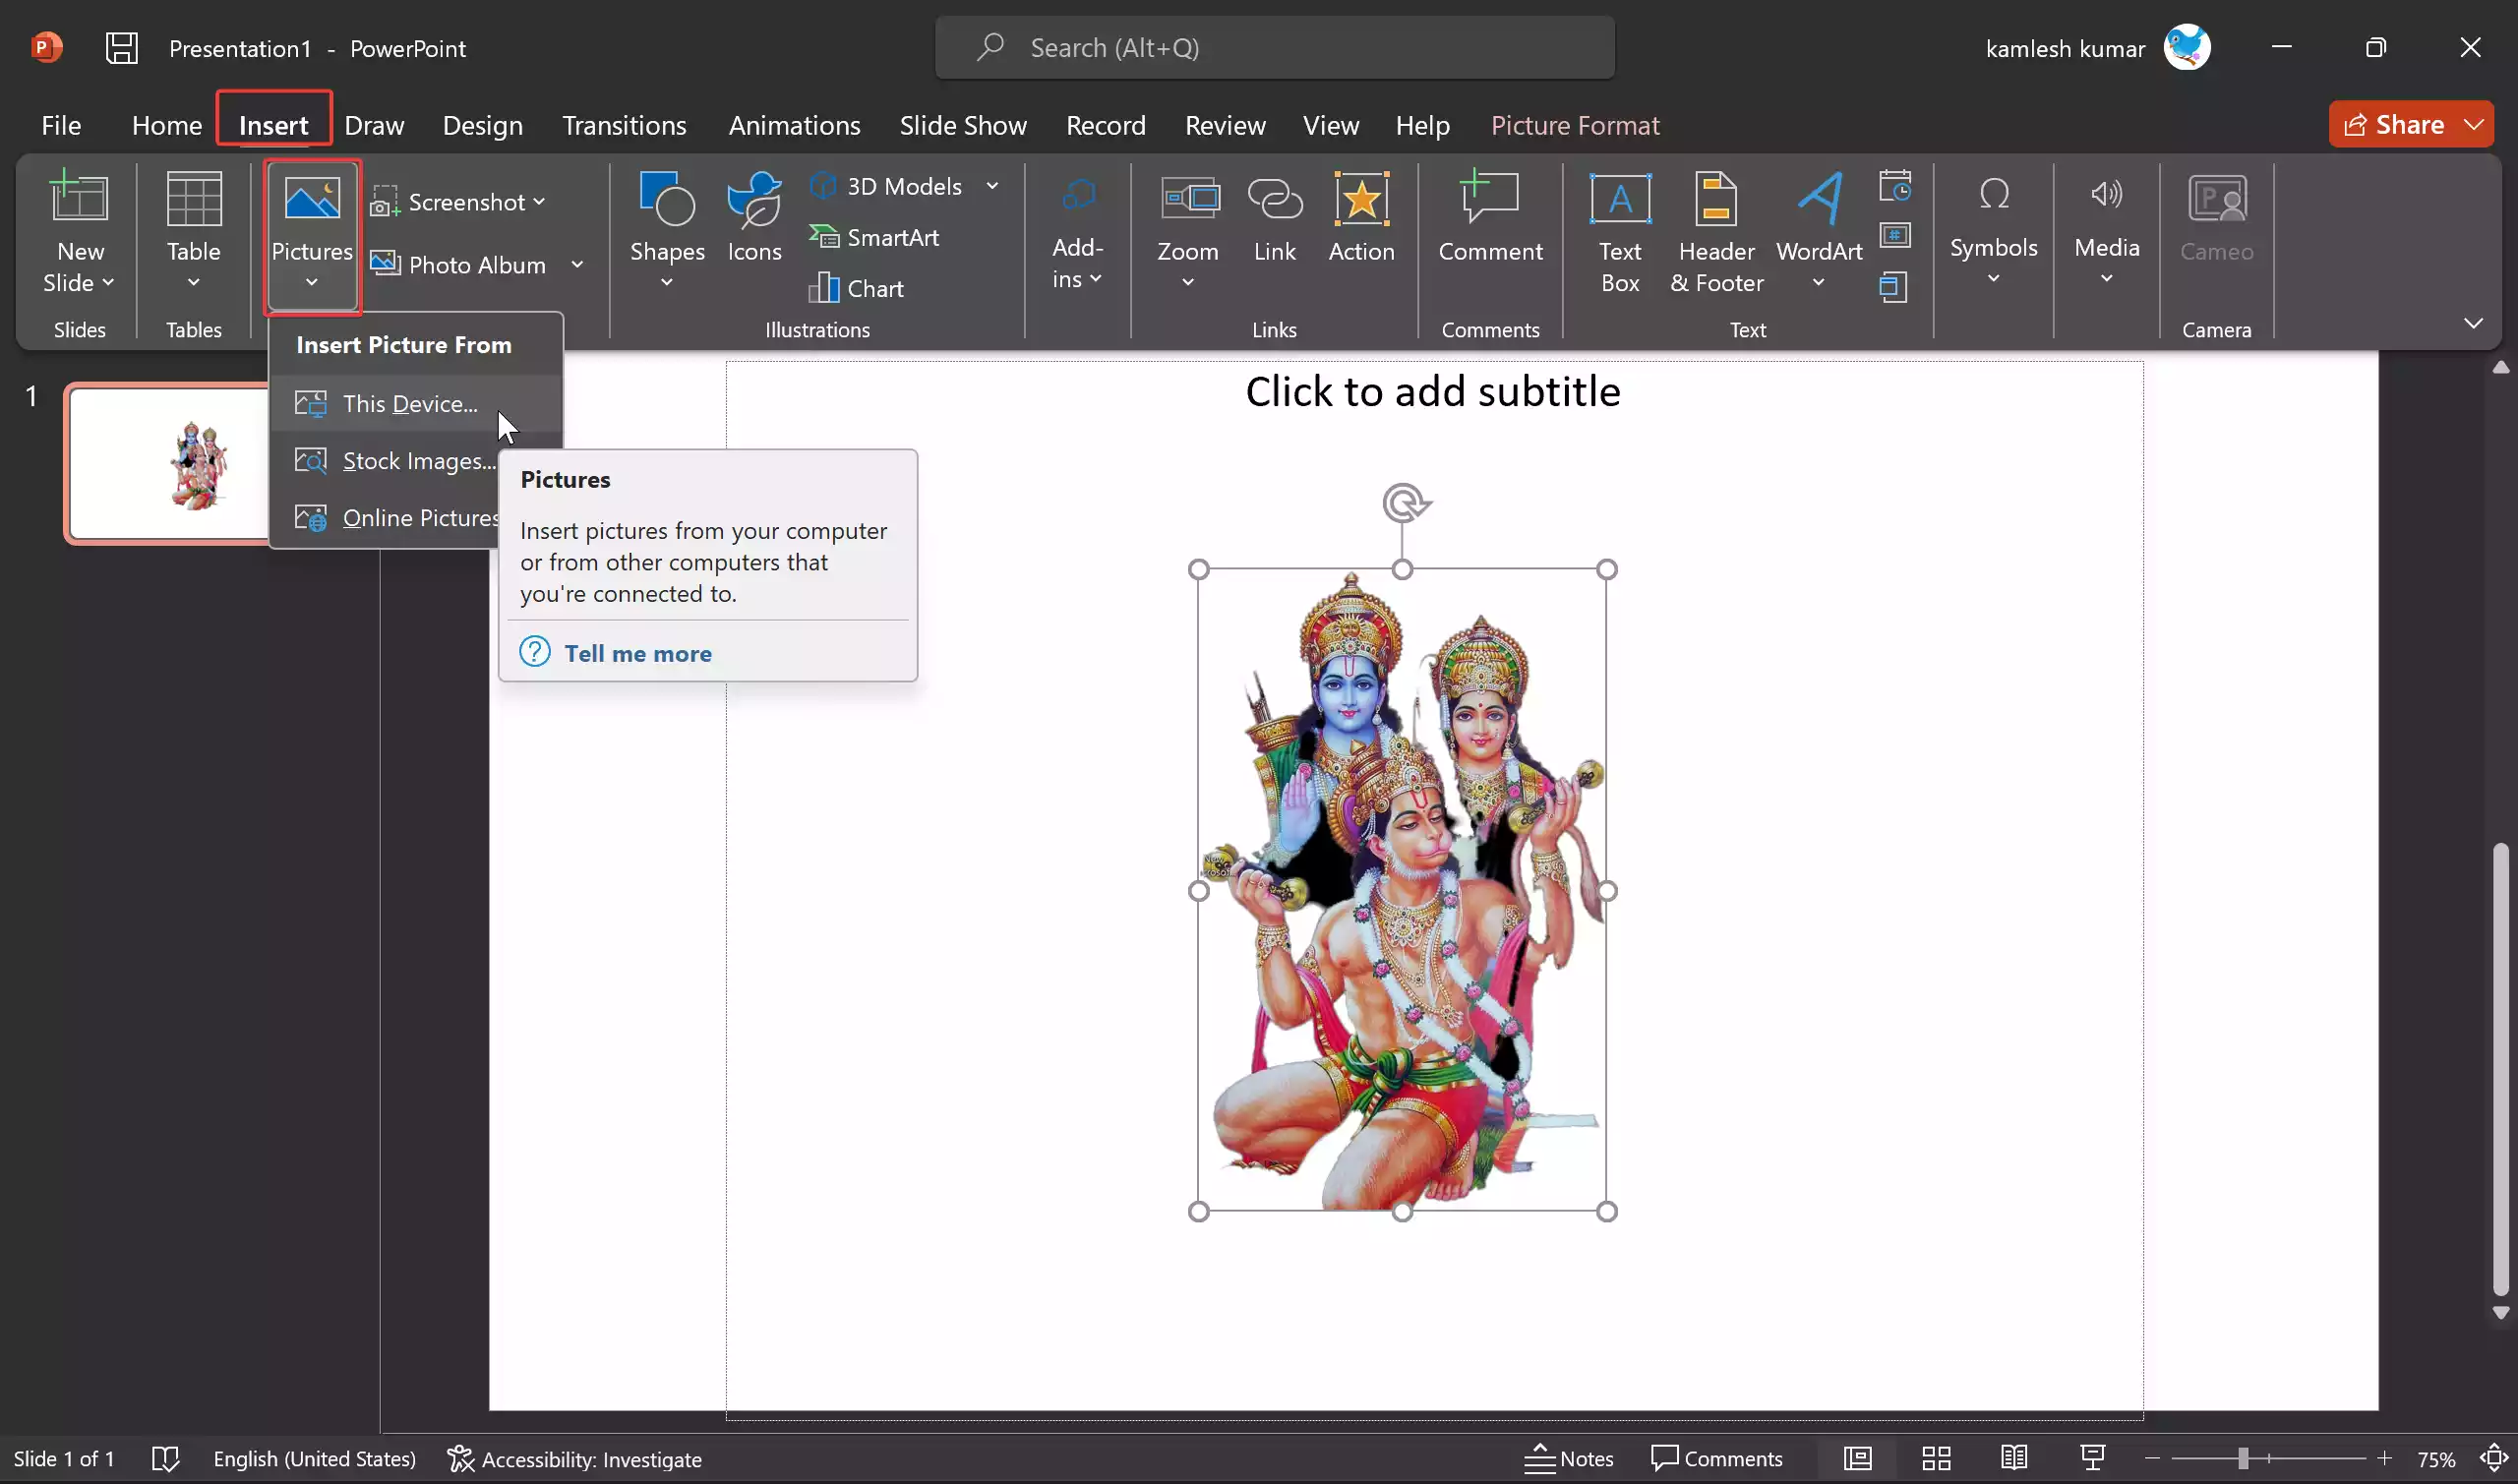
– Choose “Pictures” or “Picture” (the exact wording may vary depending on your PowerPoint version).
– Select “This Device.”
– Browse your computer for the image file you want to insert and click “Insert.”
Option 2: Online Pictures
– Click on the “Insert” tab.
– Select “Online Pictures” to search for images on the web (requires an internet connection).
– Use the search bar to find your desired image and click “Insert.”
Option 3: Stock Images
– Click on the “Insert” tab.
– Select “Stock Images” to browse images, icons, cutout people, stickers, etc.

– Select an image(s) and click “Insert.”
Step 4. Once you insert the desired image into your slide, click and drag the corners or edges of the image to resize it.
Step 5. Click and drag the image to position it on the slide.
How to Edit Images in PowerPoint?
Now that you’ve inserted an image, let’s explore how to edit and enhance it:-
Step 1. Click on the inserted image to select it.
Step 2. Go to the “Picture Format” tab in the PowerPoint ribbon.
Step 3. In the “Adjust” group, you can adjust brightness, contrast, and saturation. Apply artistic effects. Remove the background (if applicable). You can also crop in the “Size” group.
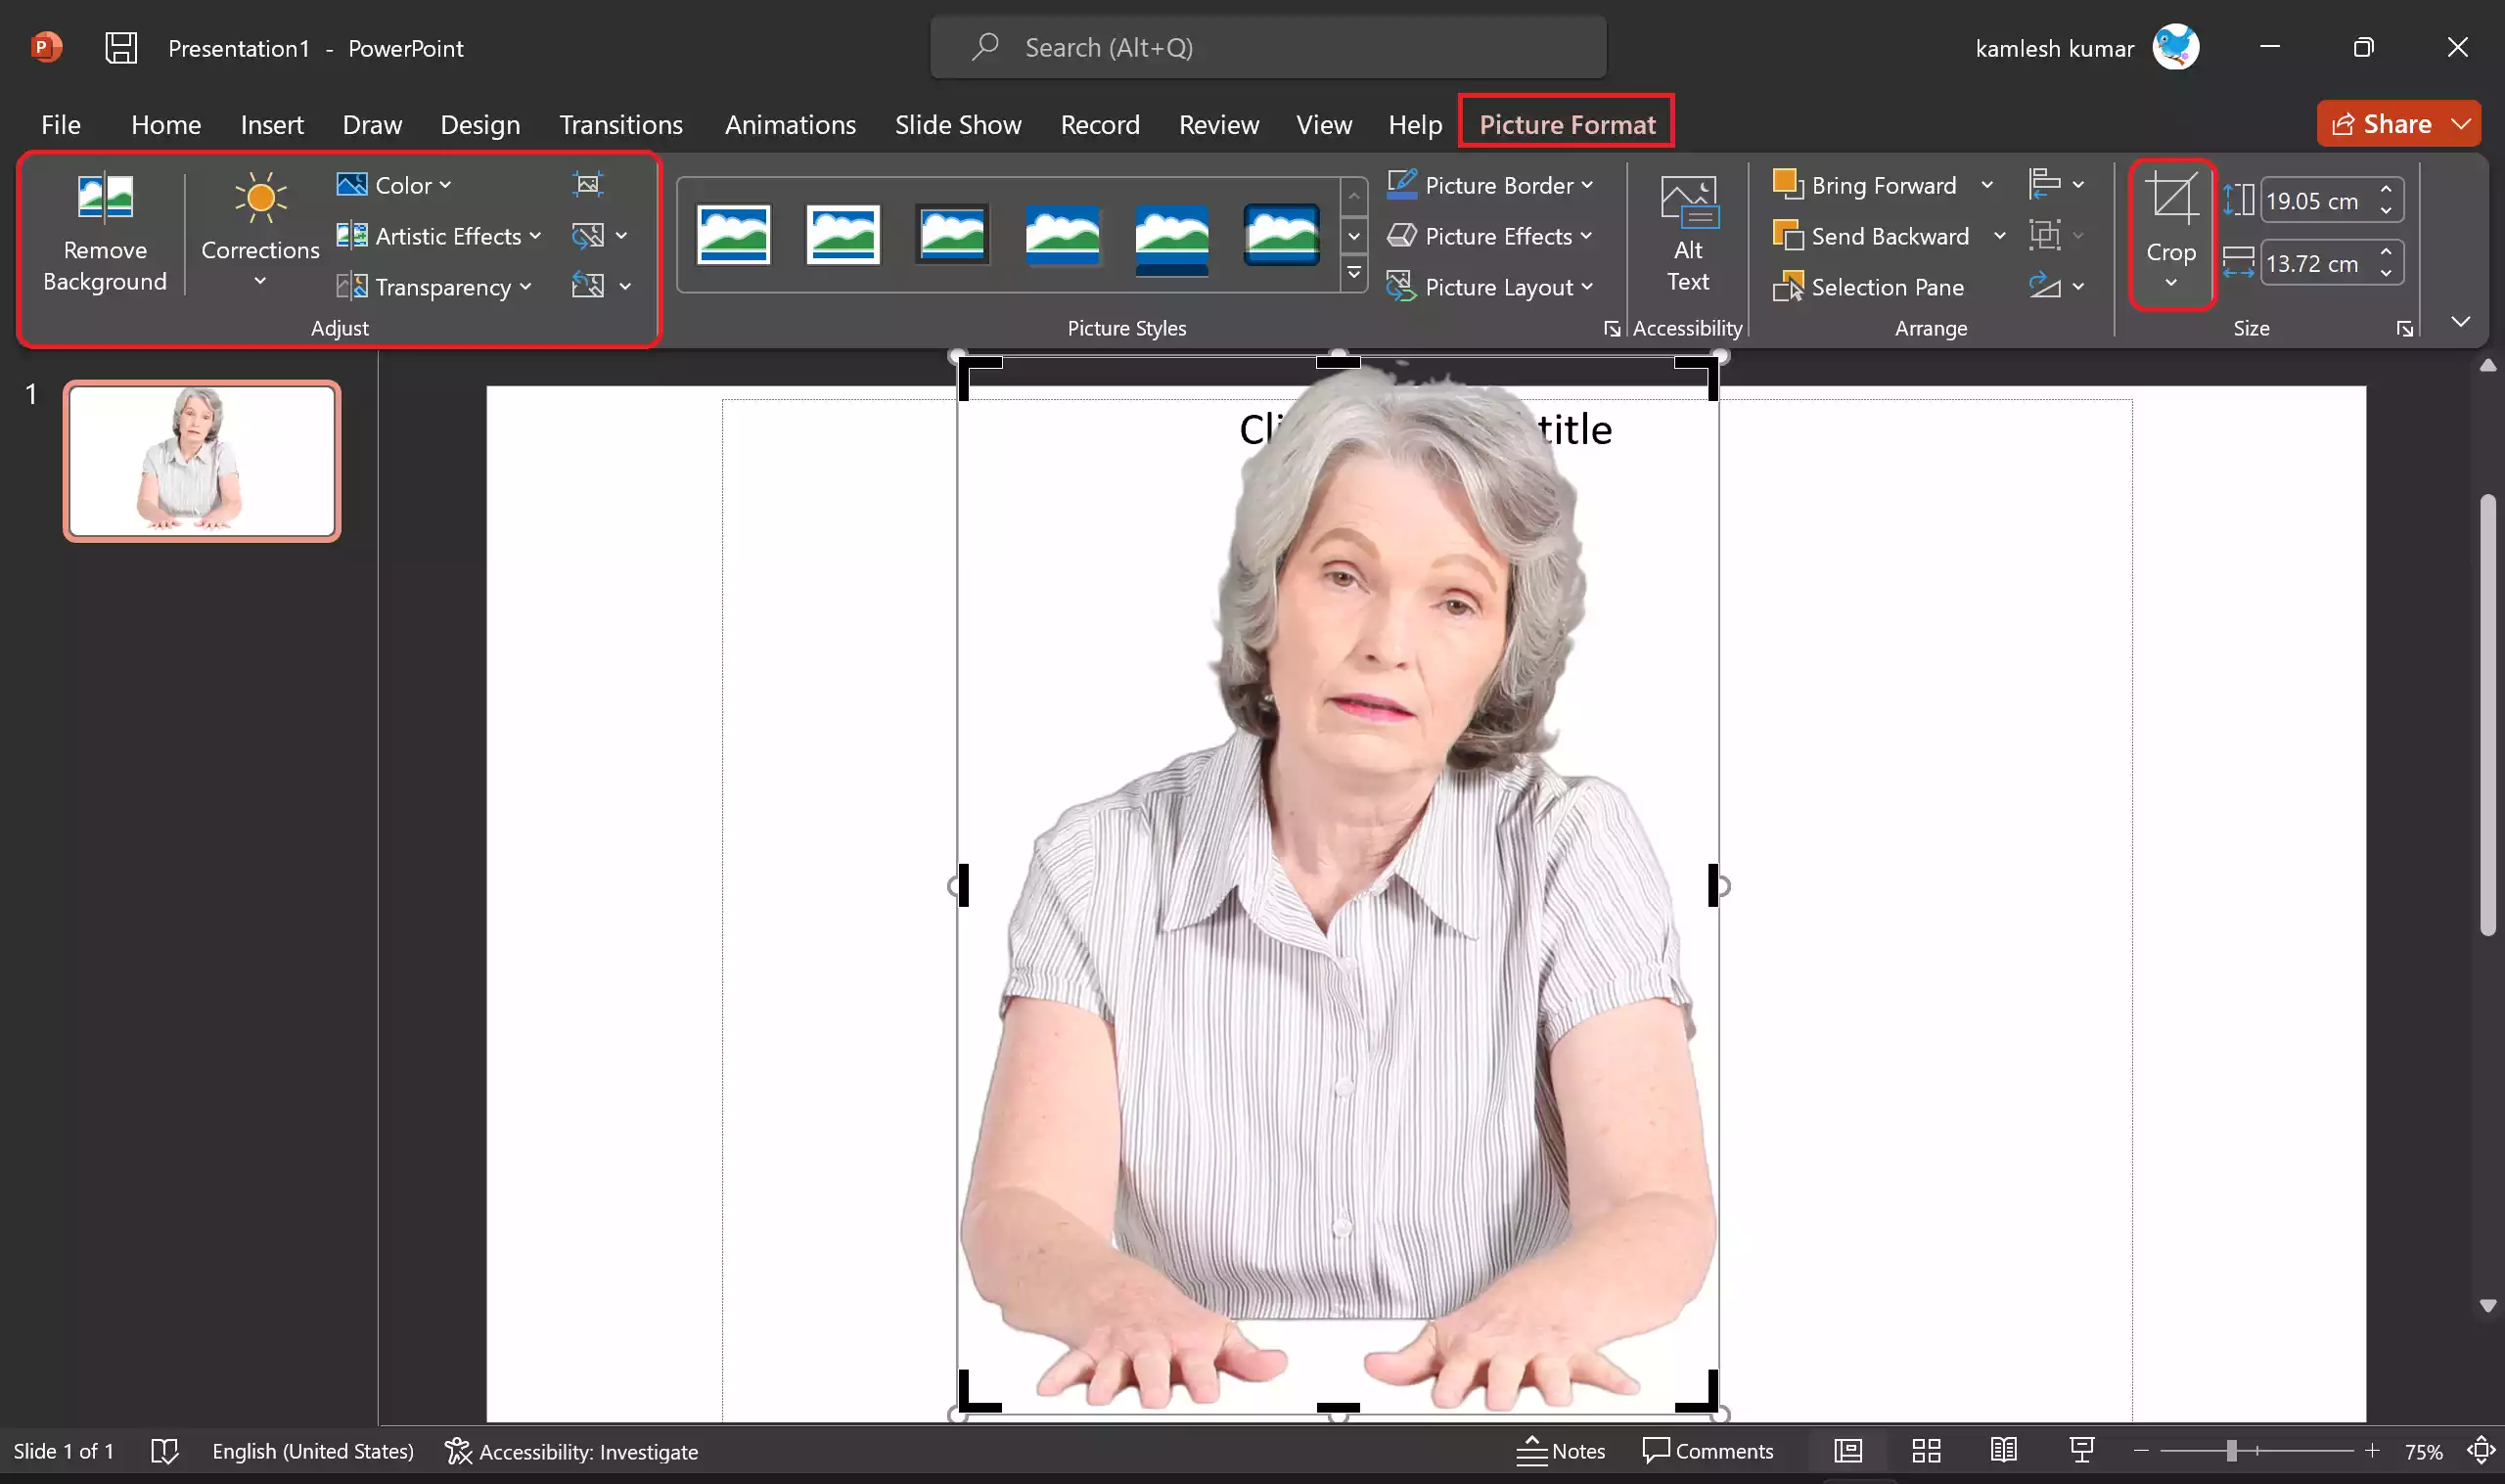
Step 4. Still, in the “Picture Format” tab, you can apply various pre-defined image styles, such as shadows, reflections, and bevels, to give your image a unique look.
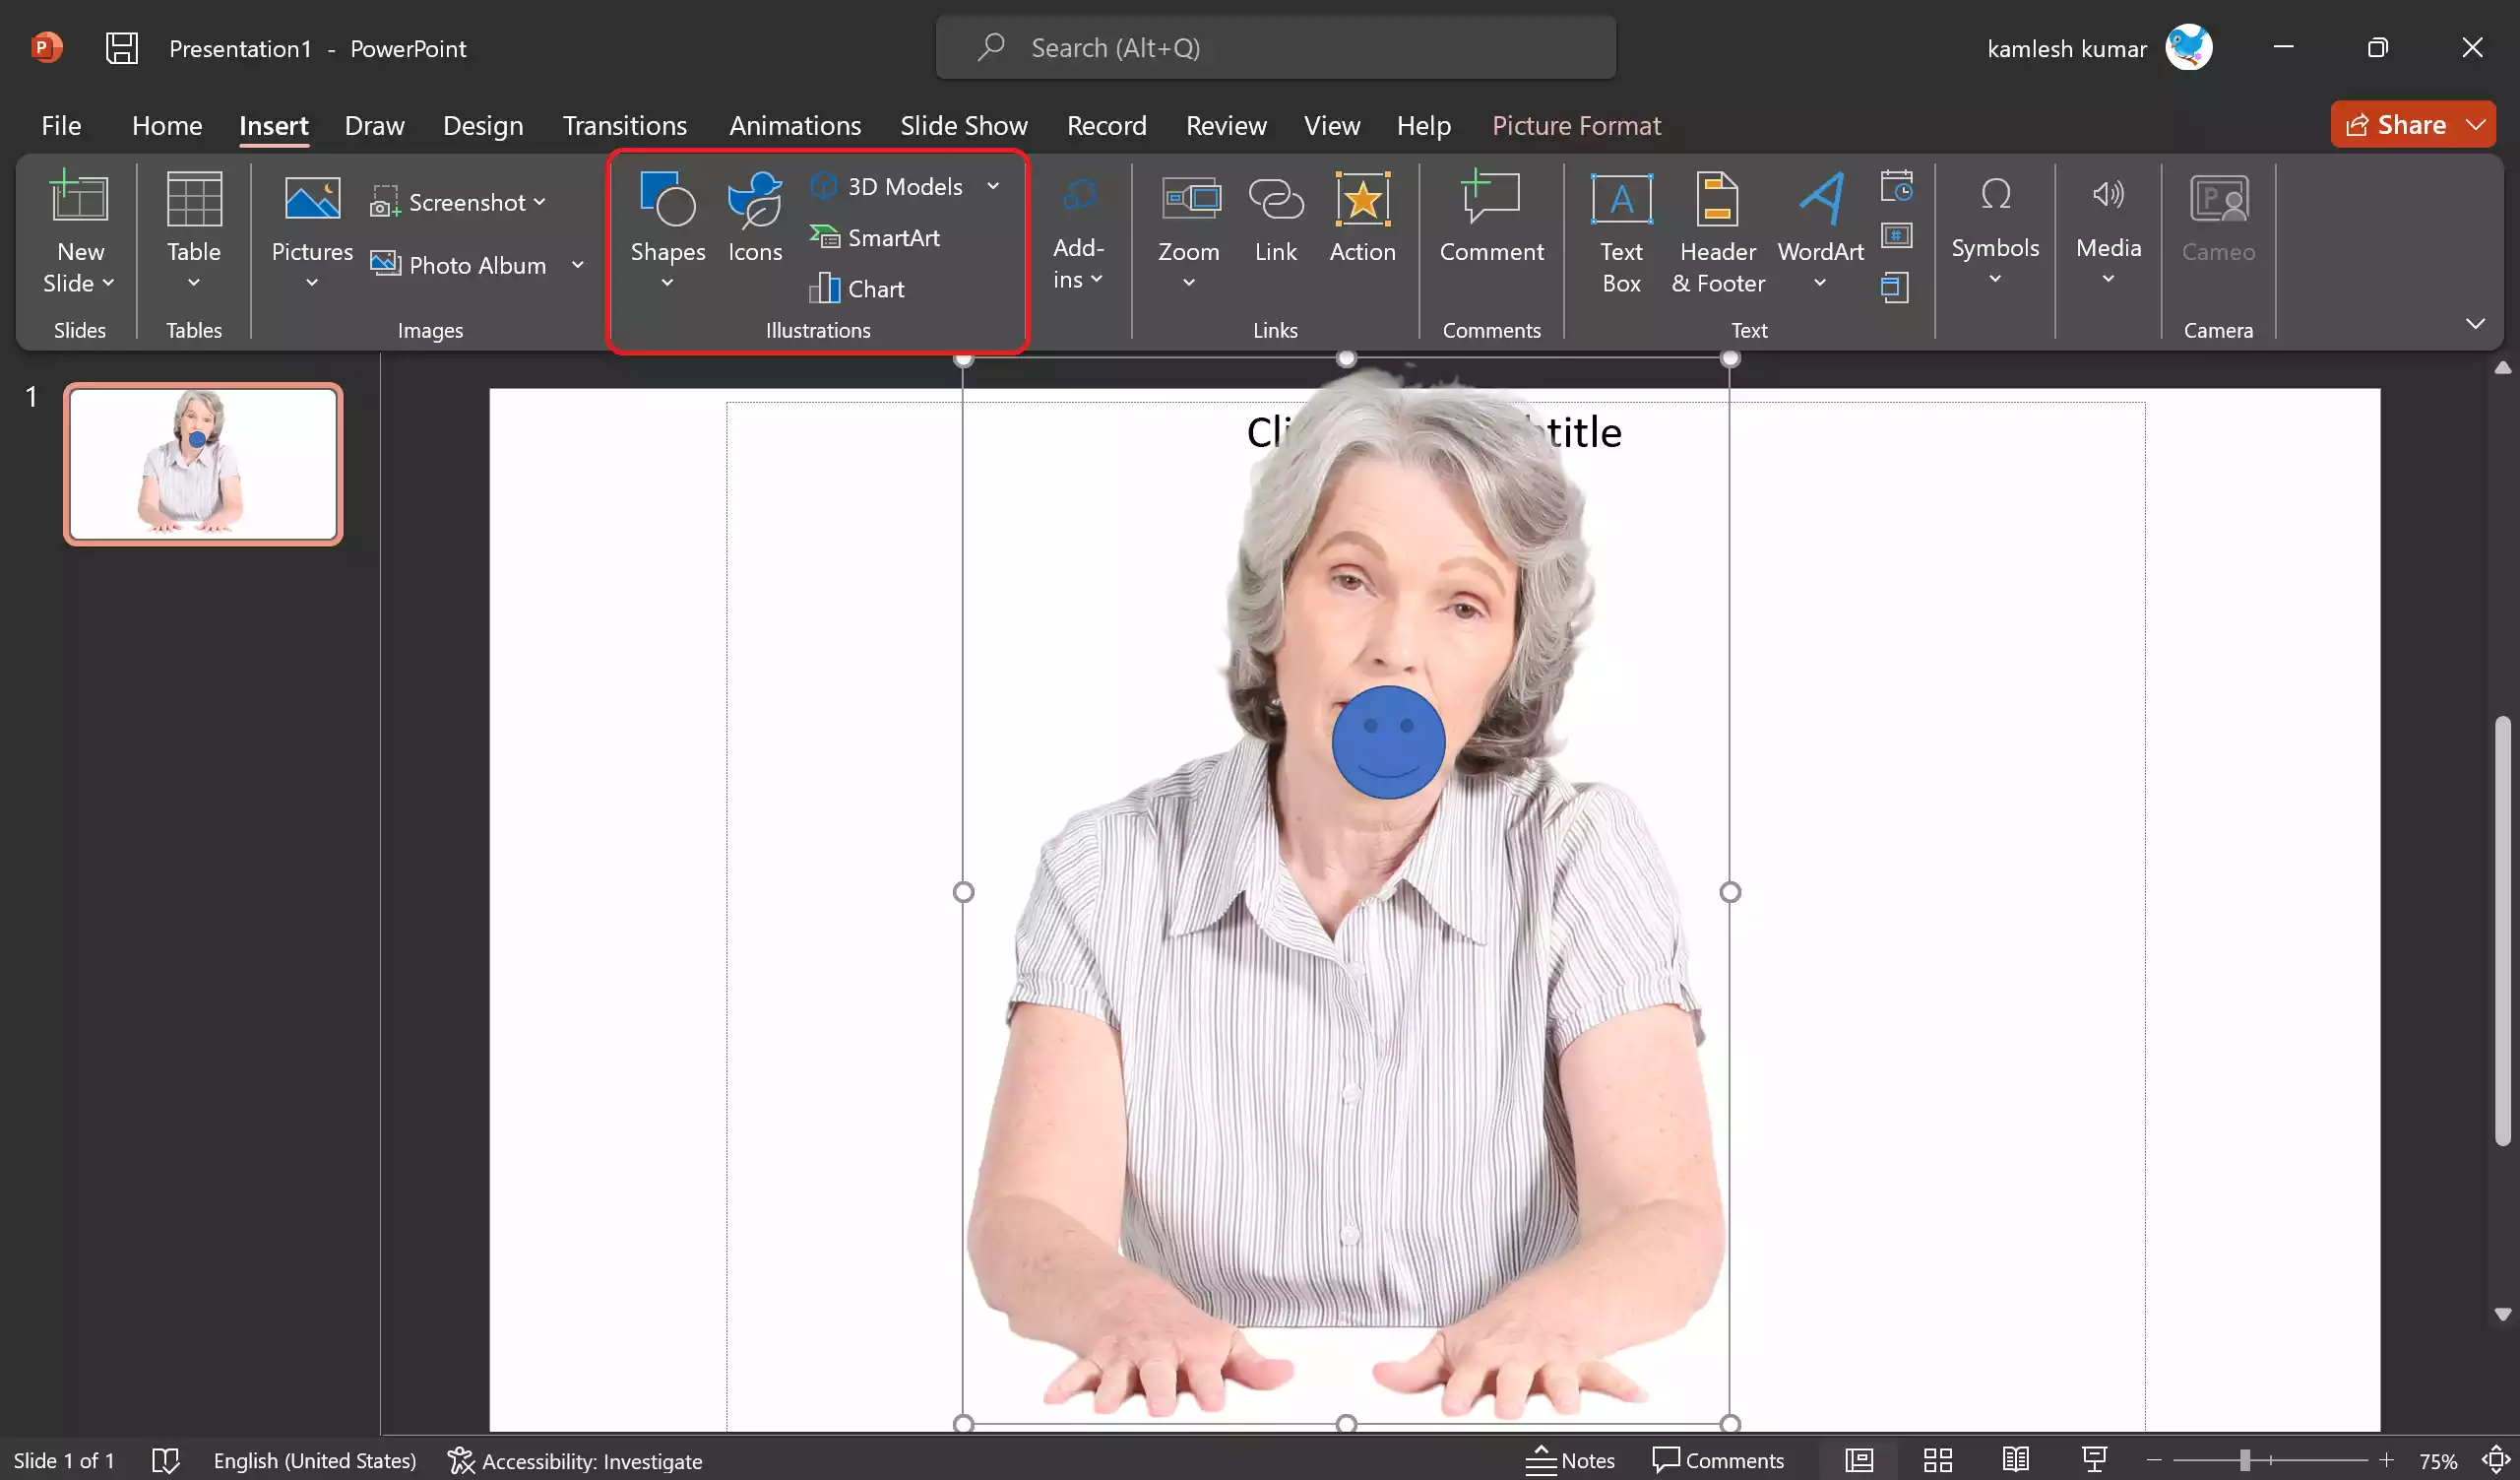
Step 5. You can add text boxes, shapes, or other elements on top of your image for annotations or labels. Use the “Insert” tab to add text boxes or shapes, and then position them over the image as needed.
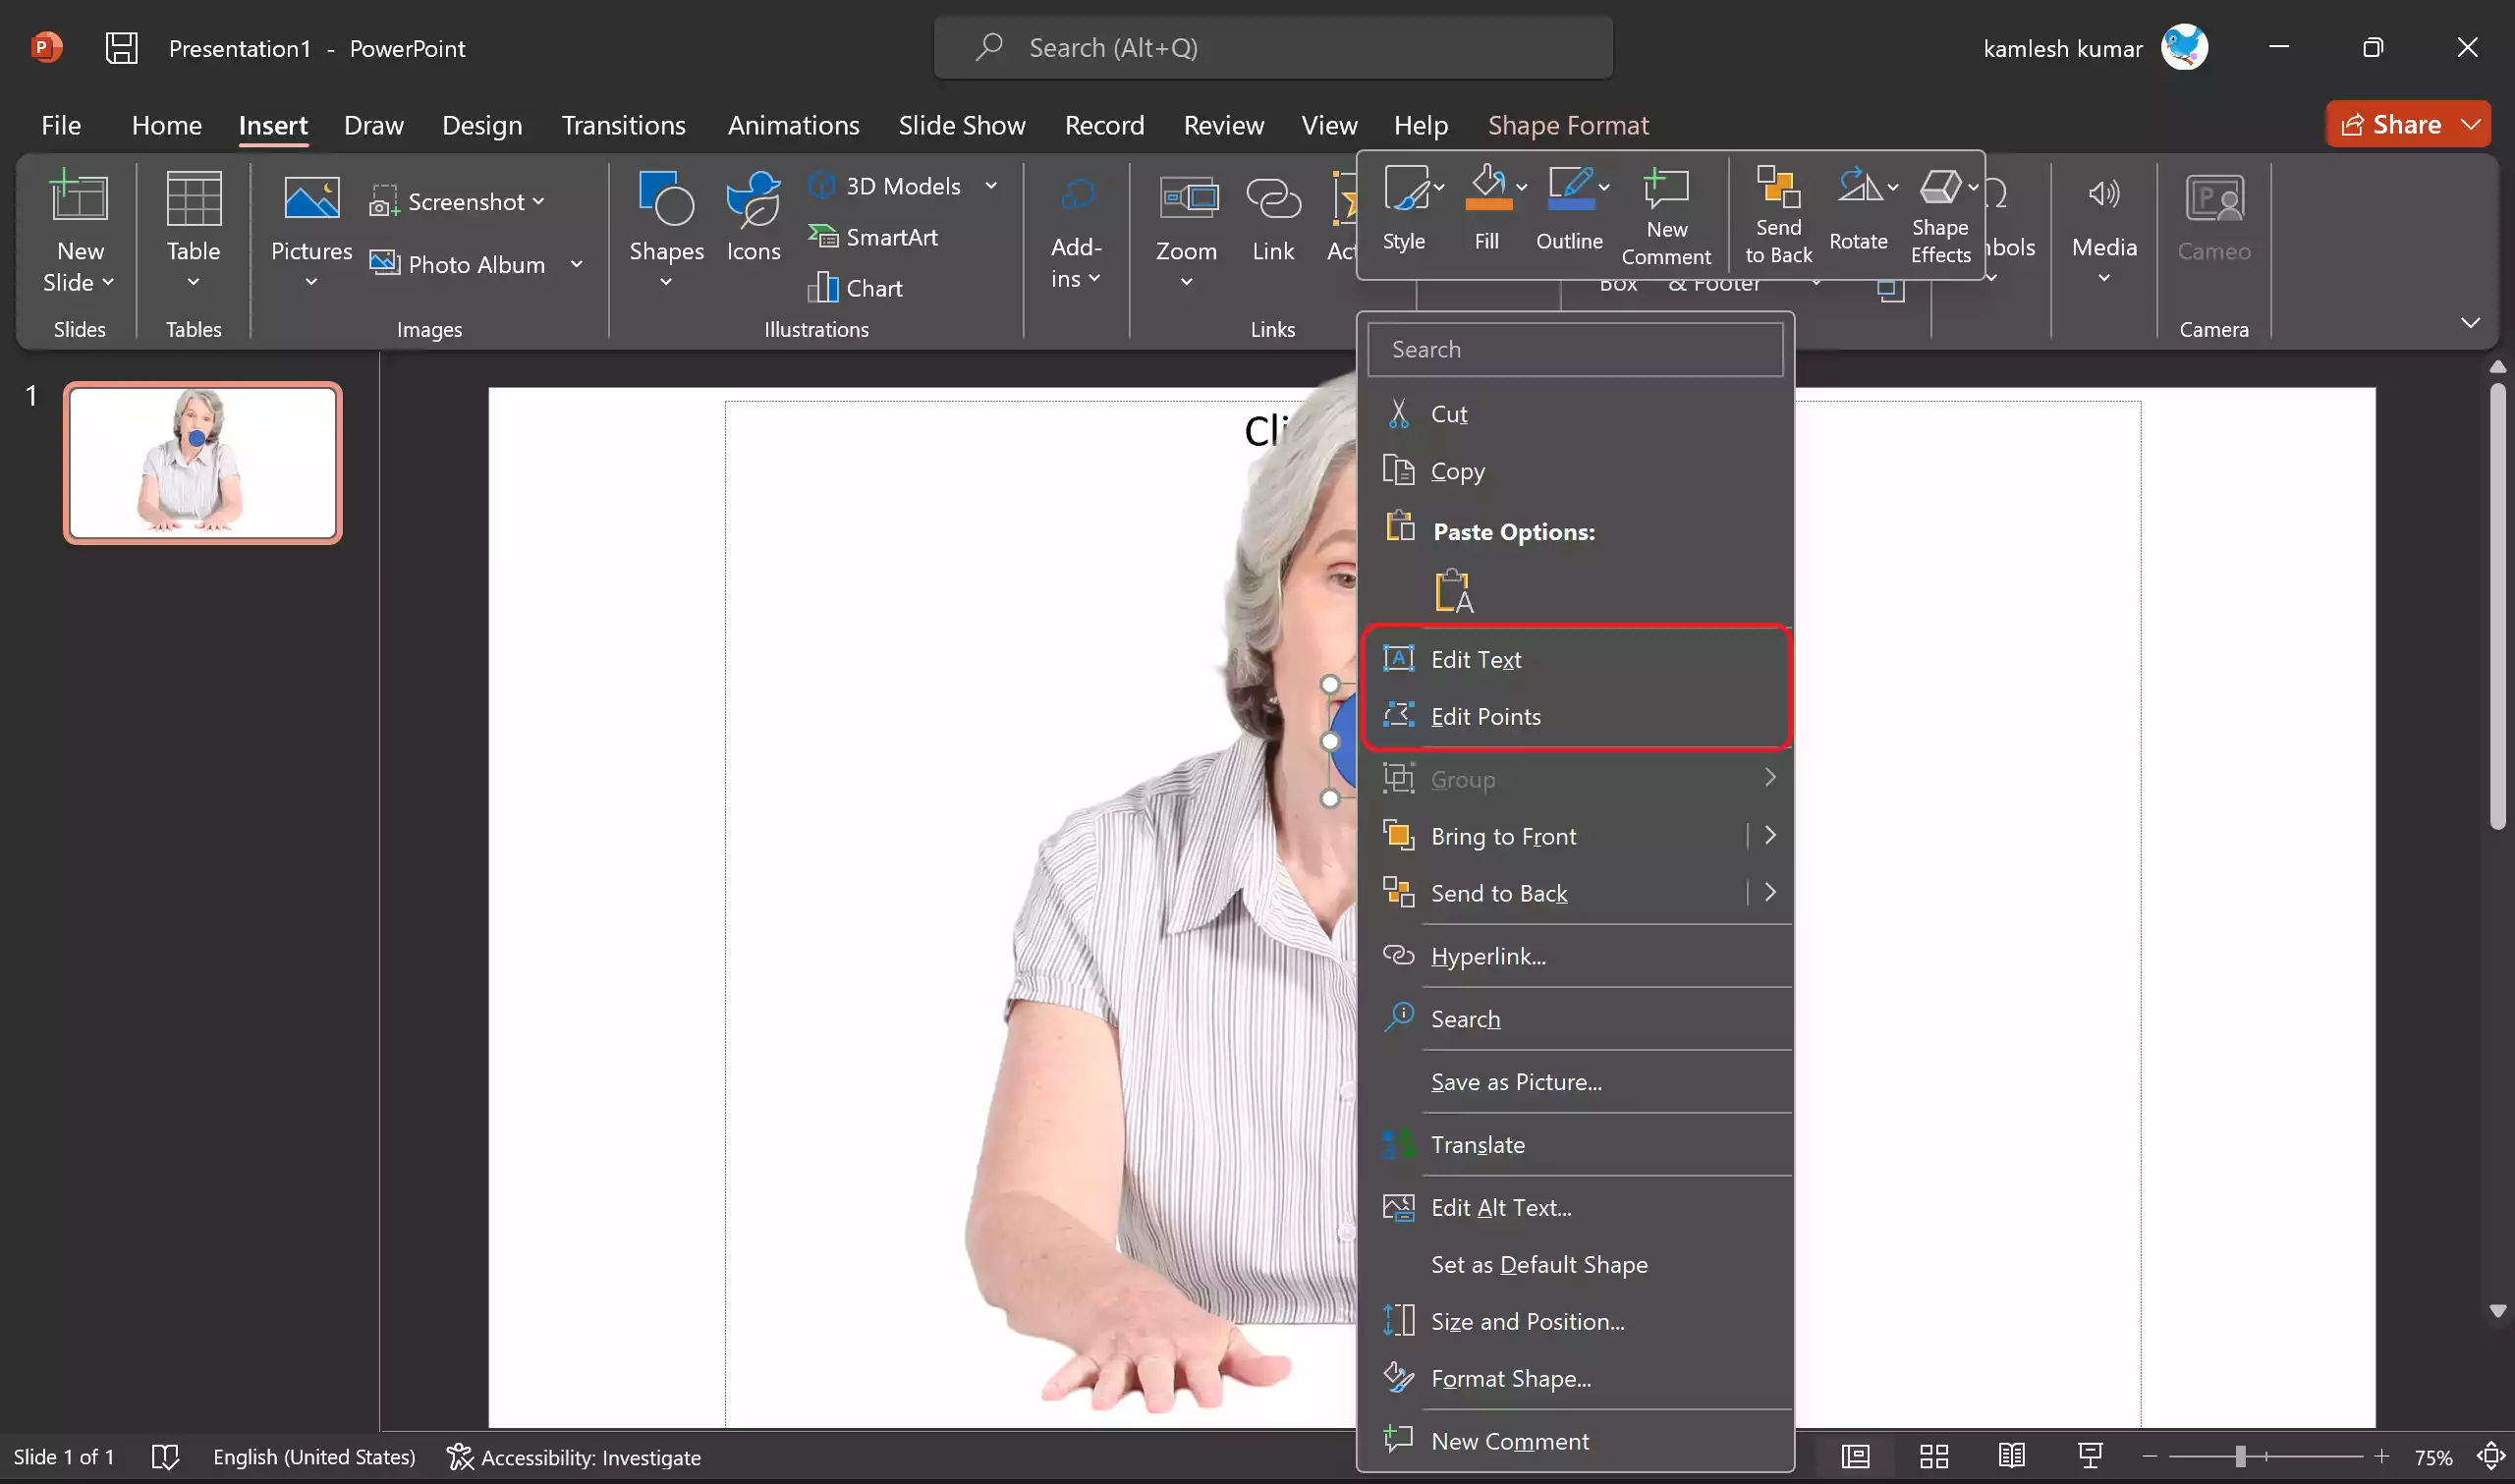
Step 6. To control the layering of objects on your slide, right-click on an object and choose “Bring to Front” or “Send to Back.” This is useful for ensuring text or shapes do not obscure the image.
Step 6. Explore advanced image editing features in PowerPoint or use external image editing software like Photoshop for more complex edits.
Step 7. Remember to save your PowerPoint presentation after making edits to images to ensure your changes are preserved.
Conclusion
Inserting and editing images in PowerPoint allows you to create visually appealing and informative slides that captivate your audience. By following the steps outlined in this article, you can seamlessly integrate images into your presentations and make them more engaging and memorable. Experiment with different editing options to unleash your creativity and enhance the impact of your PowerPoint presentations.