VirtualBox is a versatile software that supports a vast range of guest operating systems, including Windows, Linux, Solaris, and Macintosh hosts. It allows you to create and run virtual machines on your computer, making it an excellent tool for testing different operating systems or applications. In our previous post, we discussed how to install Windows 10 on VirtualBox. In this post, we will guide you through the process of installing Windows 8.1 on VirtualBox.
Before proceeding with the installation, you should ensure that you have already installed VirtualBox software on your computer or laptop. If you have not installed it yet, you can download it from the official VirtualBox website. Once you have installed VirtualBox, you can follow the steps below to install Windows 8.1 on a virtual machine.
How do I set up Windows 8.1 on Oracle VM VirtualBox?
Follow these steps to set up Windows 8.1 on Oracle VM VirtualBox:-
Step 3. Under “Create Virtual Machine,” write a useful name of the virtual machine, e.g., Windows 8.1, select the location of the folder where you want to store the new virtual machine and select the OS type and version.
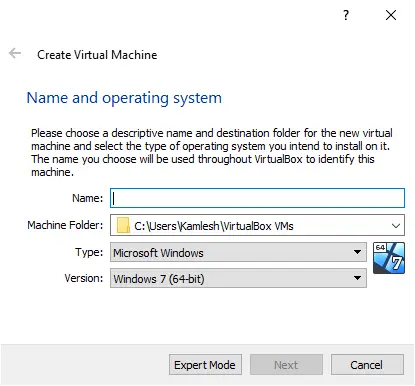
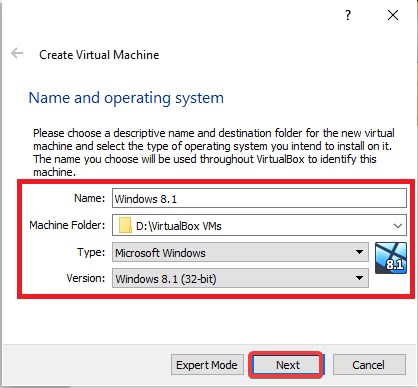
Step 4. After the details of the new VM are completed as above, click the Next button.
Step 5. In the following window, specify the RAM size for the virtual machine. You can use the scroll bar to increase or decrease the RAM size of your VM.
Note: 2GB RAM is recommended for a 64-bit OS, and at least 1GB RAM is recommended for a 32-bit OS. However, you can increase or reduce the RAM size depending on the capacity of your PC.
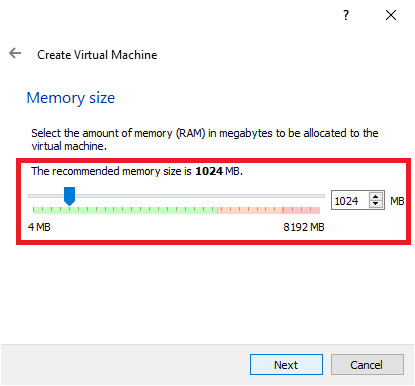
Step 6. When you finish the above steps, click the Next button.
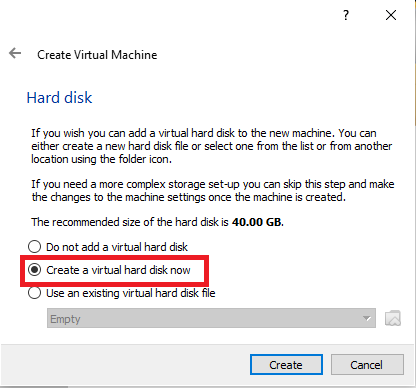
Step 7. On the next screen, select the “Create a virtual hard disk now” option.
Step 8. On the next screen, you can leave the default VDI (VirtualBox Disk Image) as the hard drive type.
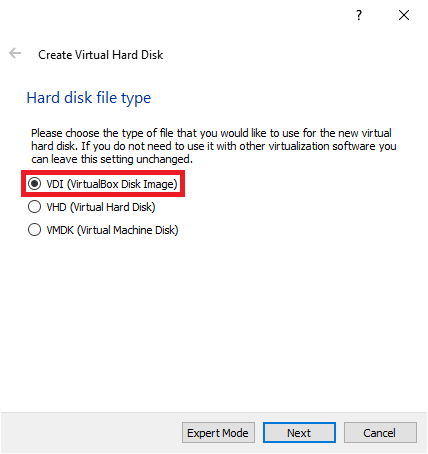
Step 9. Click the Next button.
Step 10. In “Storage on physical hard disk,” you have two options: Dynamically Allocated and Fixed Size. You may select one of these. If you select Dynamically Allocated, it depends on your virtual machine’s size; it will continue to increase or decrease the virtual hard drive’s size automatically. You may notice a performance problem, but it is good for running out of storage problems. The fixed size option will set the size for your virtual hard drive that you specify.
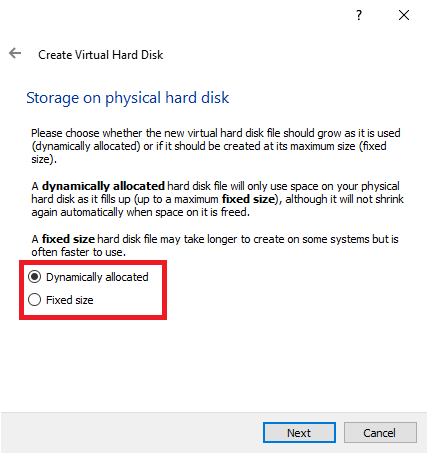
Step 11. Once you have decided what option to select for your virtual HDD, click the Next button.
Note: We have selected the Dynamically allocated option for my virtual hard drive.
Step 12. On the following screen, you can specify the max size of your virtual hard drive. VirtualBox will not take longer than the storage specified by you. You can increase or decrease the maximum size of the allotted hard disk by using the slider.
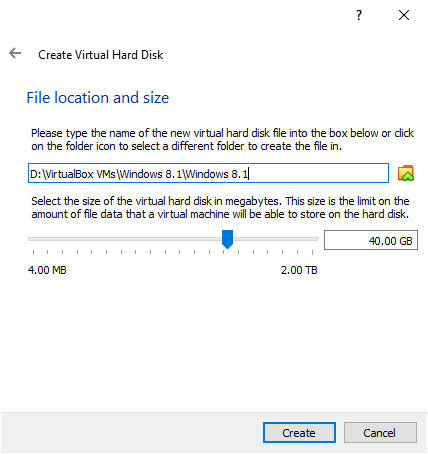
Step 13. After completing the previous steps, click the Create button to create the virtual HDD.
Step 14. Now, depending on your selection, a virtual hard drive will be created, displaying details about your virtual machine.
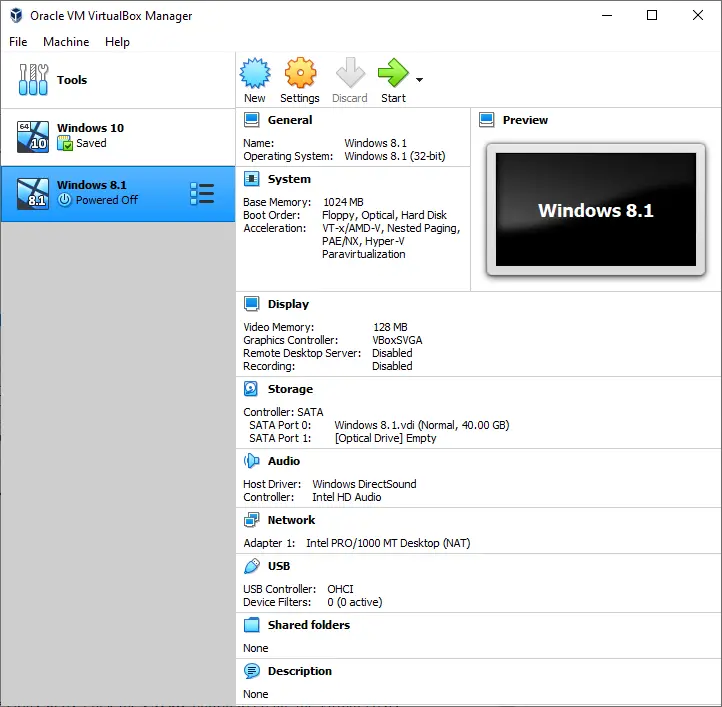
After the virtual HDD is created for your Windows 8.1, its status will be Powered off.
So far, we have specified the Windows version to be installed and created a virtual hard drive to install the Windows 8.1 operating system. Now we are going to install Windows 8.1 on VirtualBox. To install Windows 8.1 on a virtual machine, we need a bootable Windows 8.1 USB stick or a bootable Windows 8.1 DVD, or a bootable Windows 8.1 ISO. To install Windows 8.1 on a virtual machine, it is preferable to use a Windows 8.1 bootable ISO. If you do not have any bootable ISO file for Windows 8.1, you can download it here.
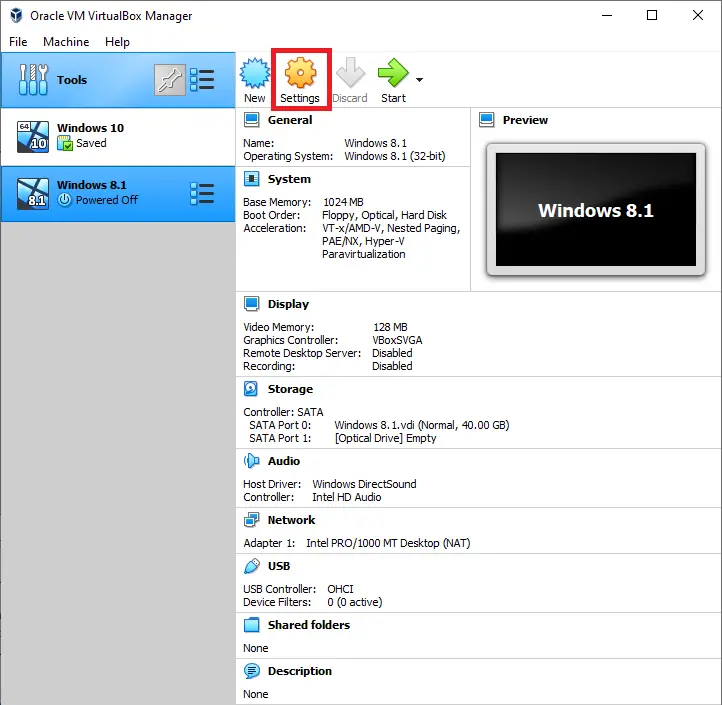
Step 15. Once you are ready to boot Windows 8.1 ISO, click the Settings icon on the VirtualBox.
Step 16. In the Settings window, click the Storage option on the left.
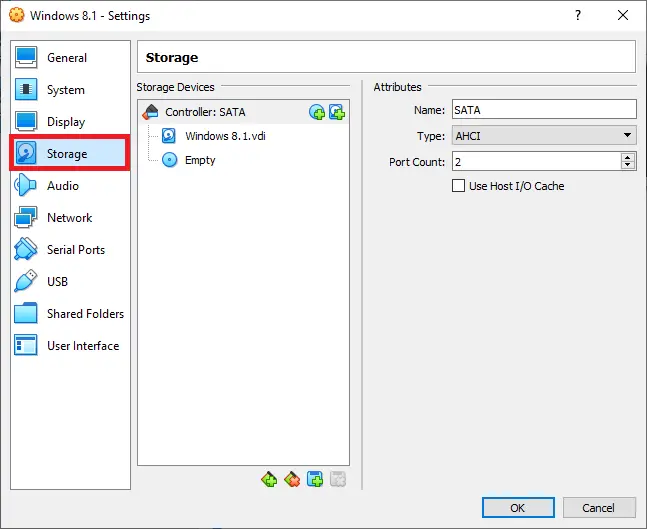
Step 17. Under Storage options, select Empty.
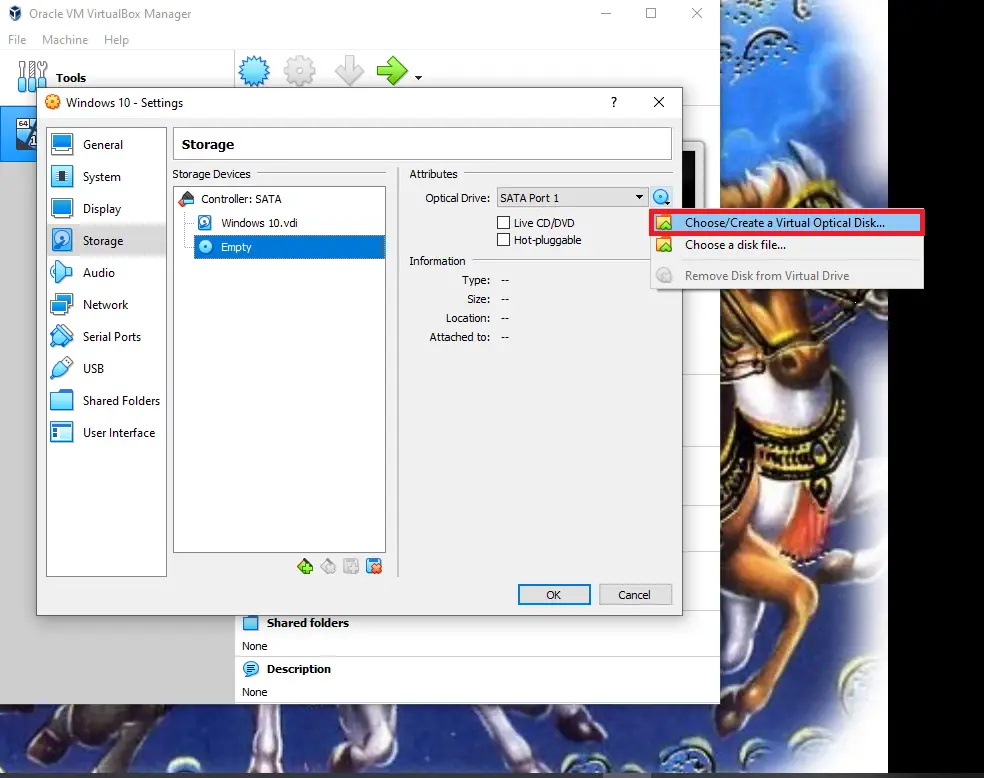
Step 18. Click the CD icon in front of the optical drive.
Step 19. In the options available from the CD icon, click “Select/Create Virtual Optical Disk.”
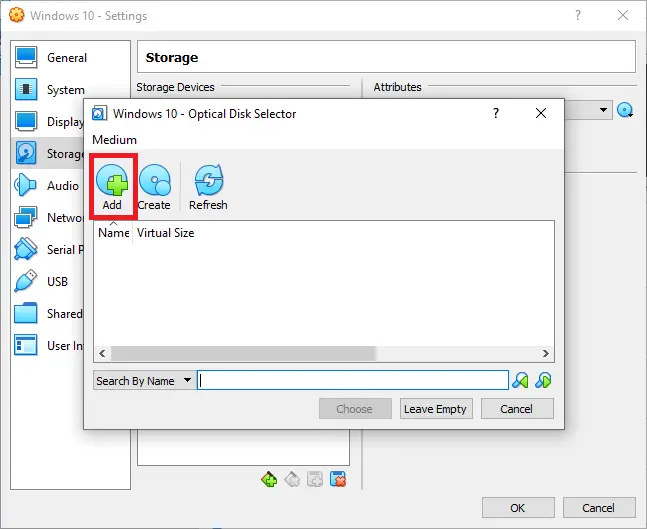
Step 20. Under the “Optical Disk Selector” window, click on Add from the menu.
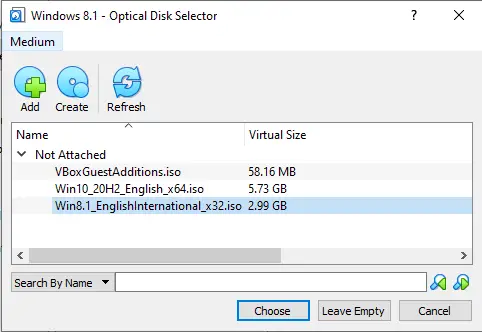
Step 21. Select your bootable ISO file of Windows 8.1 from your PC.
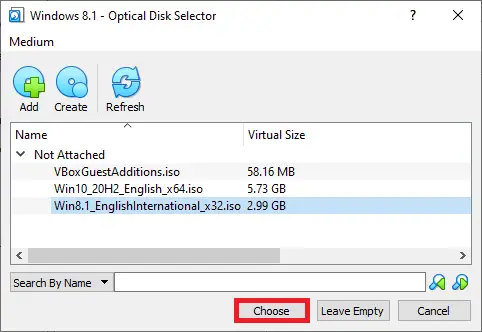
Step 22. Click the Choose button after clicking the Windows 8.1 ISO file to attach the ISO file to your virtual Windows 8.1 machine.
Step 23. After performing the above steps successfully, you should see something like the image below in the Windows 8.1 – settings.
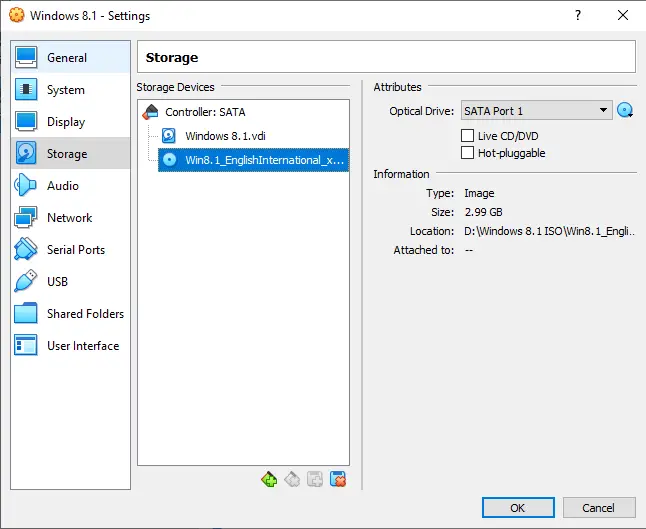
Step 24. Click the OK button to continue.
Step 25. You can now install Windows 8.1 on your virtual computer. Select the Start button.
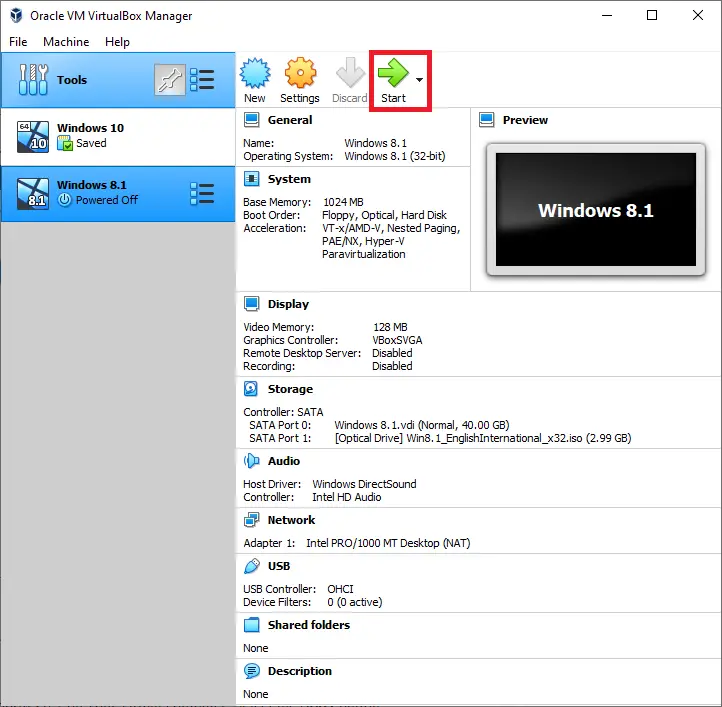
Step 26. Now, your virtual machine will be booted from the selected ISO, and the installation of the Windows 8.1 operating system will be launched on your virtual machine.
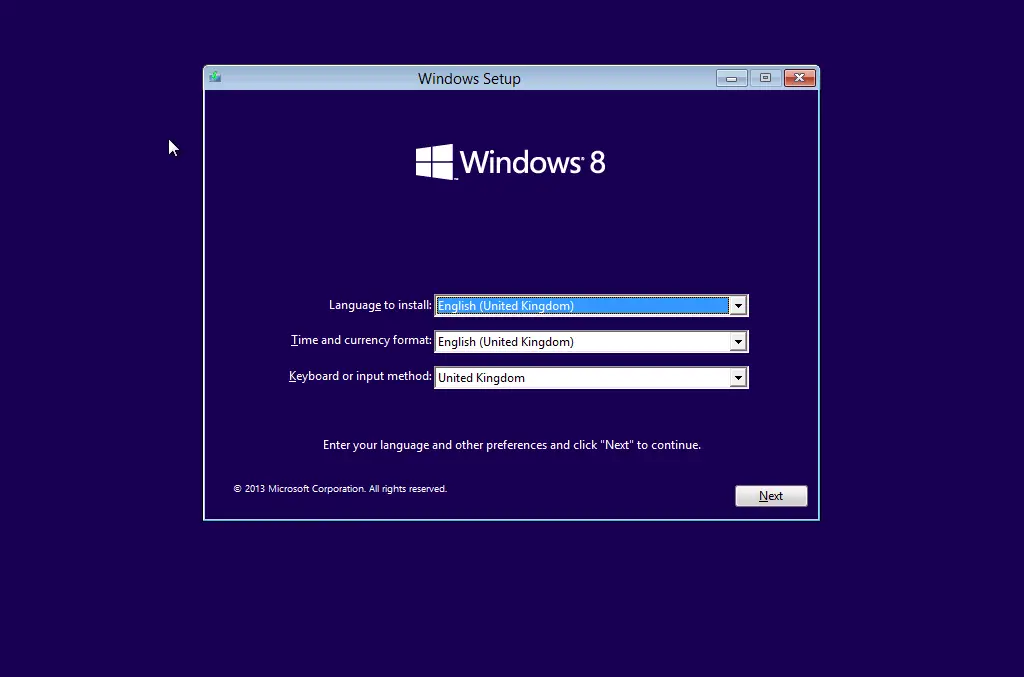
Step 27. Select “Language to install,” “Time and currency format,” and “Keyboard or input method” and click on the Next button.
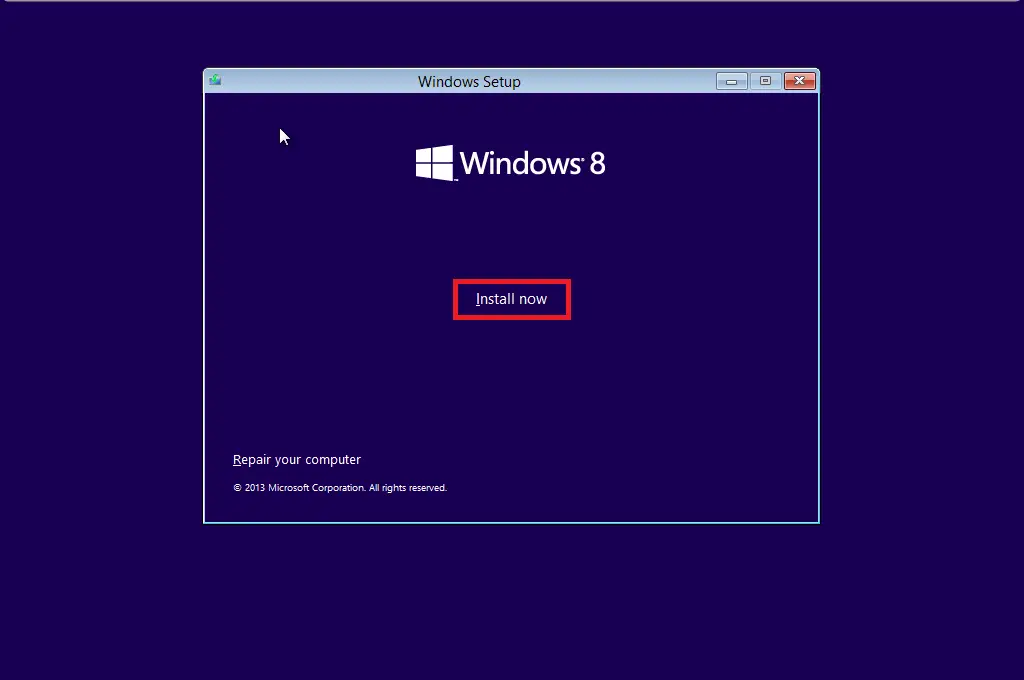
Step 28. Click the Install now button to install a fresh Windows 8.1.
Step 29. Type the product key on the next window.
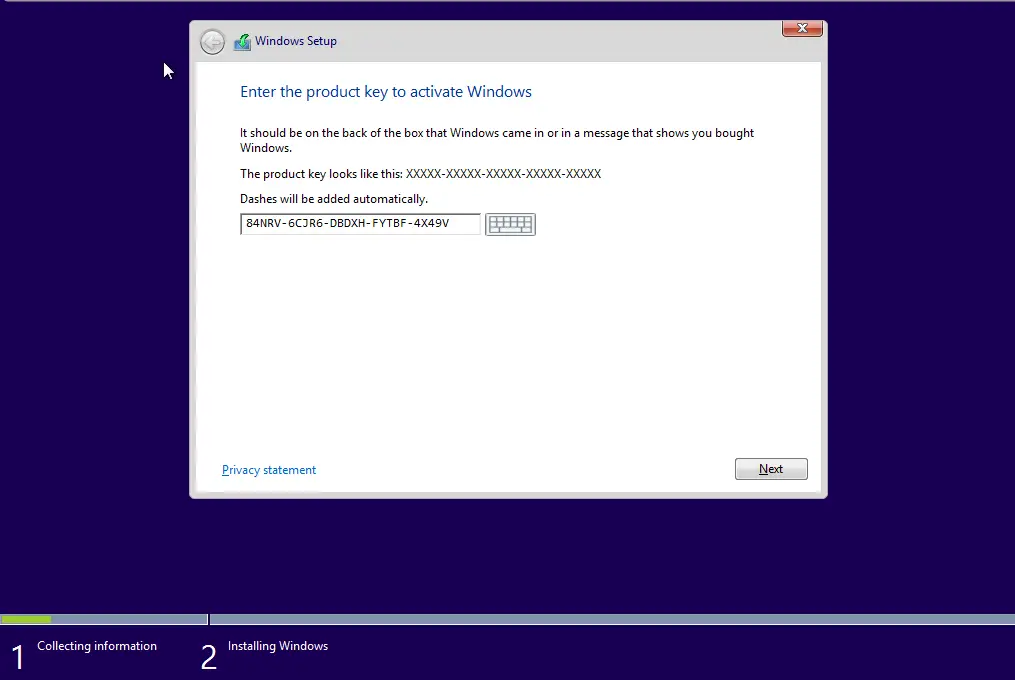
Step 30. Once the correct key is applied, click the Next button.
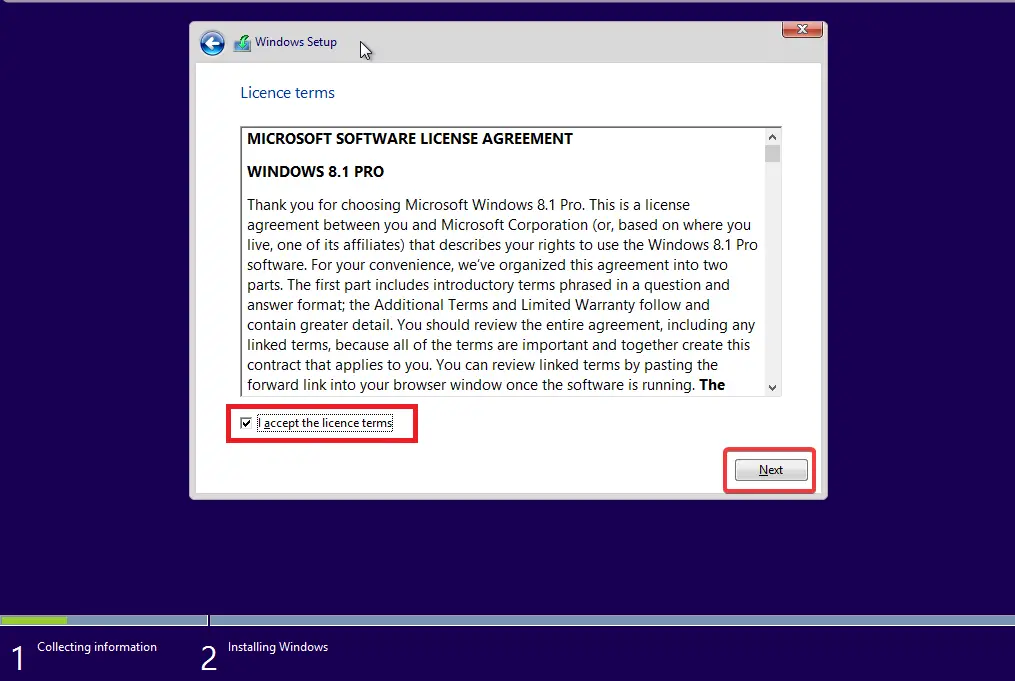
Step 31. Click on the “I accept the license terms” checkbox and then click on the Next button.
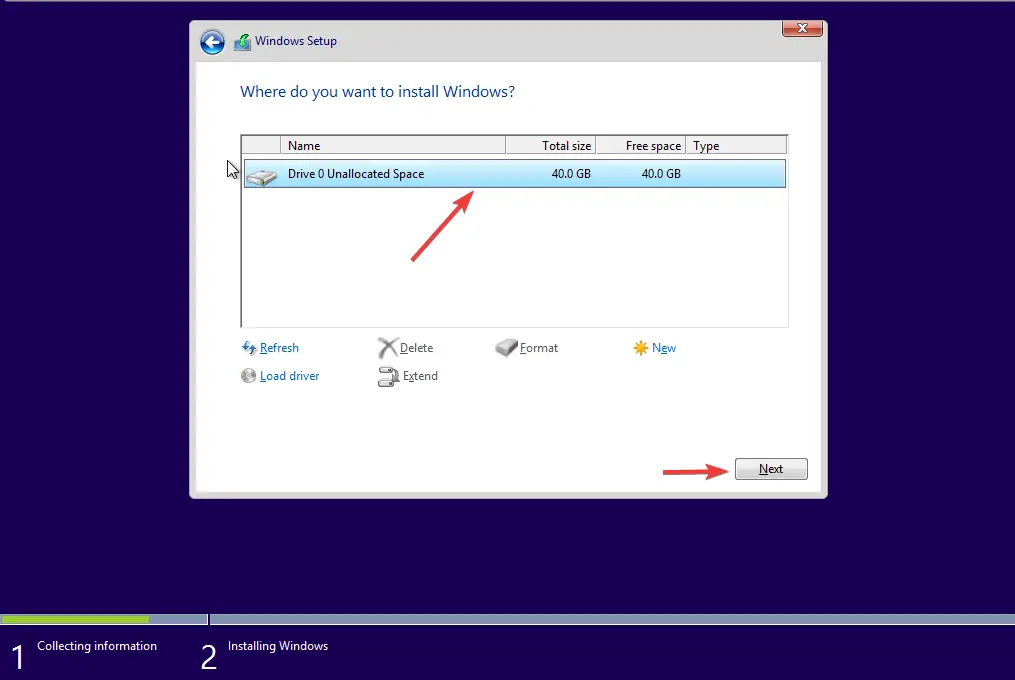
Step 32. Select the “Custom: Install Windows only (advanced)” option.

Step 33. Select the Disk Drive and click the Next button.
Step 34. Once you access the Personalise window, in the PC name text box, type the username you want to sign in to your Windows 8.1.
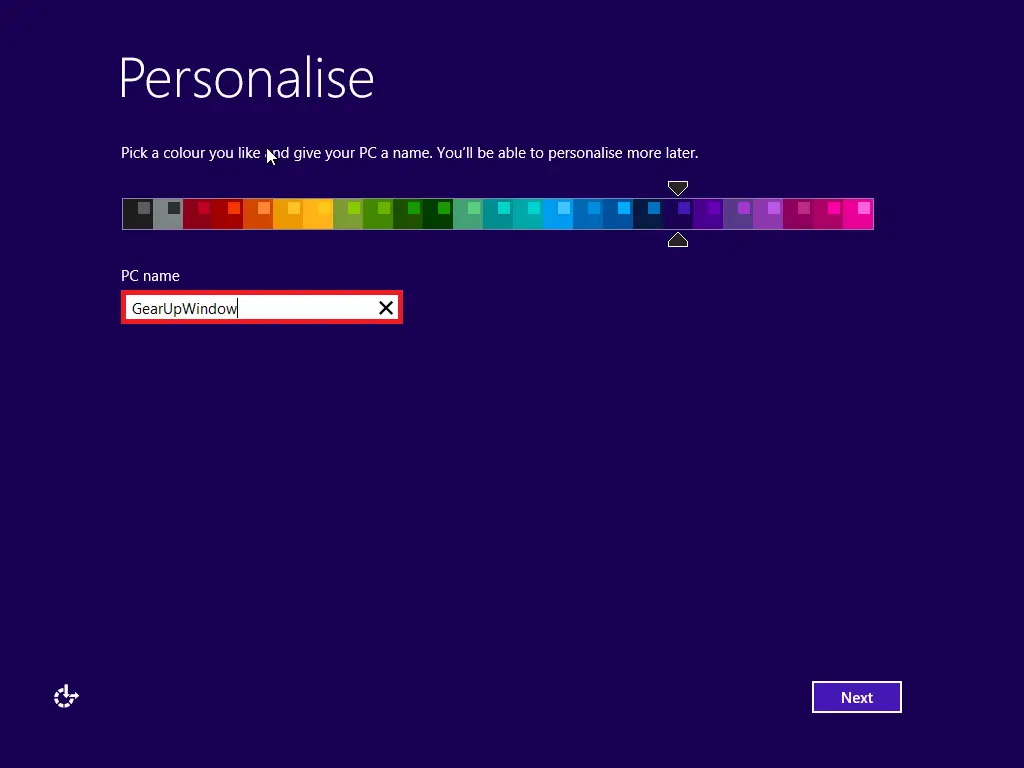
Step 35. Once the username is entered, click the Next button.
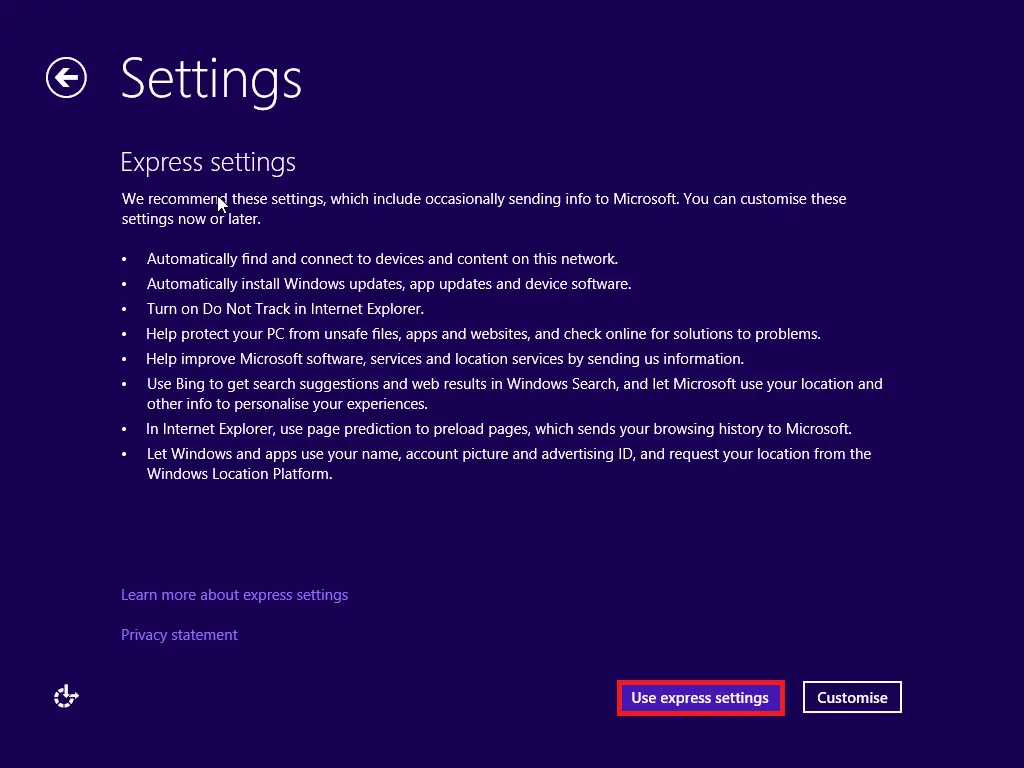
Step 36. On the next screen, click the “Use express settings” button.
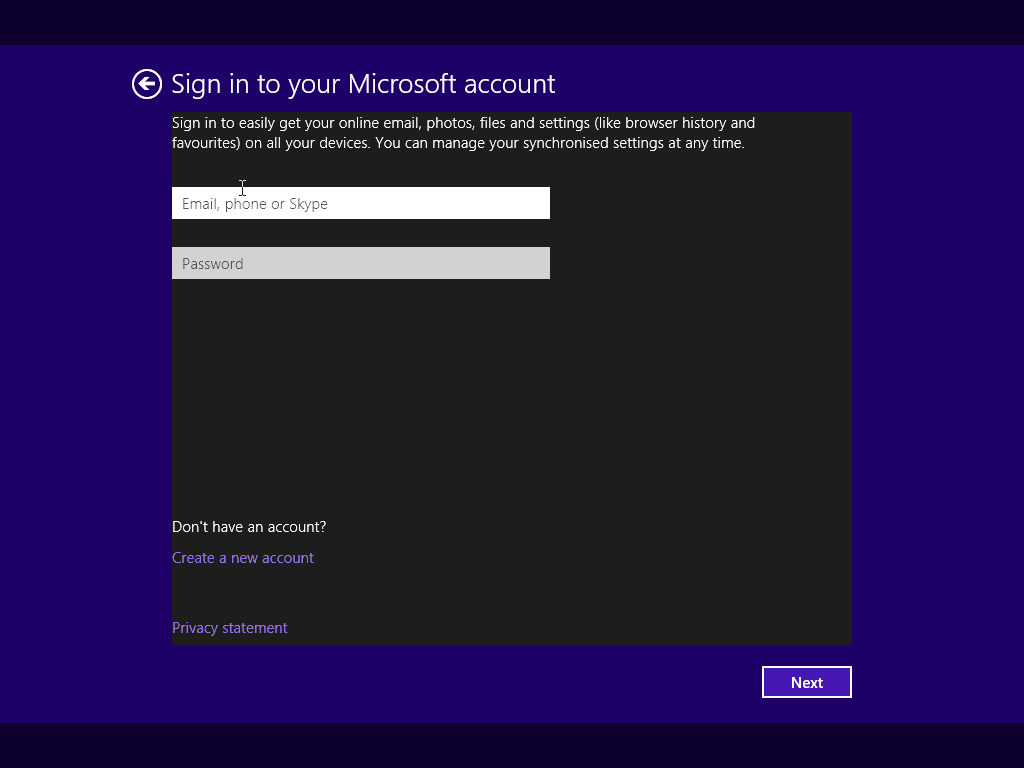
Step 37. On the following screen, if you have a Microsoft account, log in with that details or create a new account.
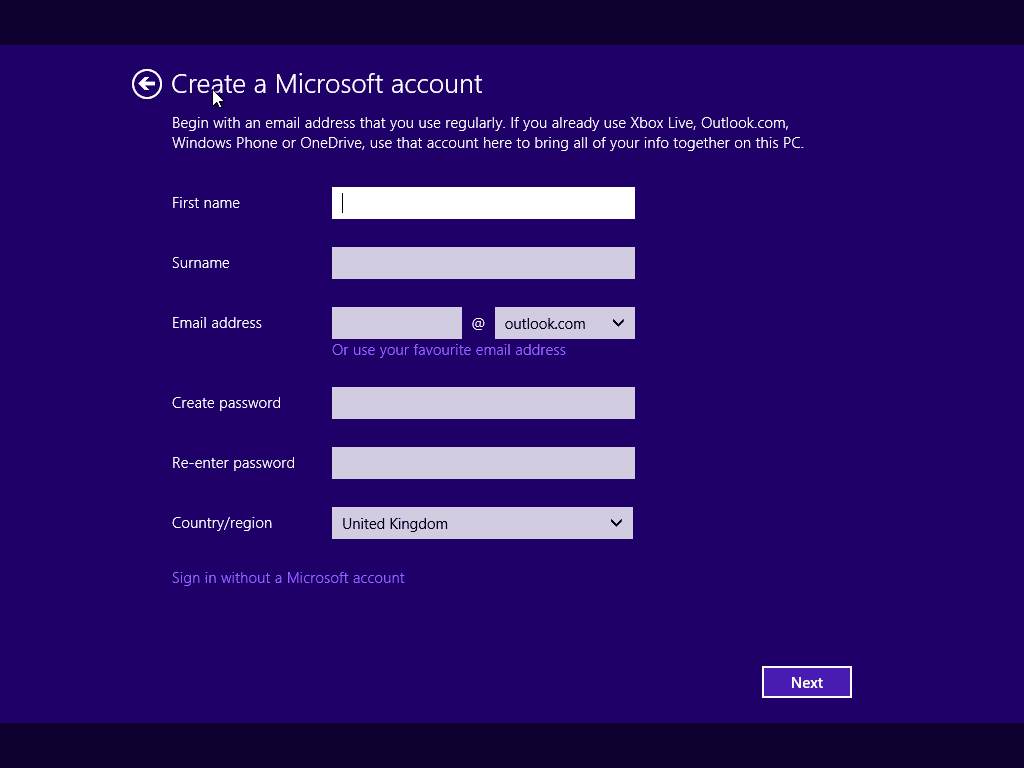
Step 38. Fill in the details to complete the creation of the Microsoft account.
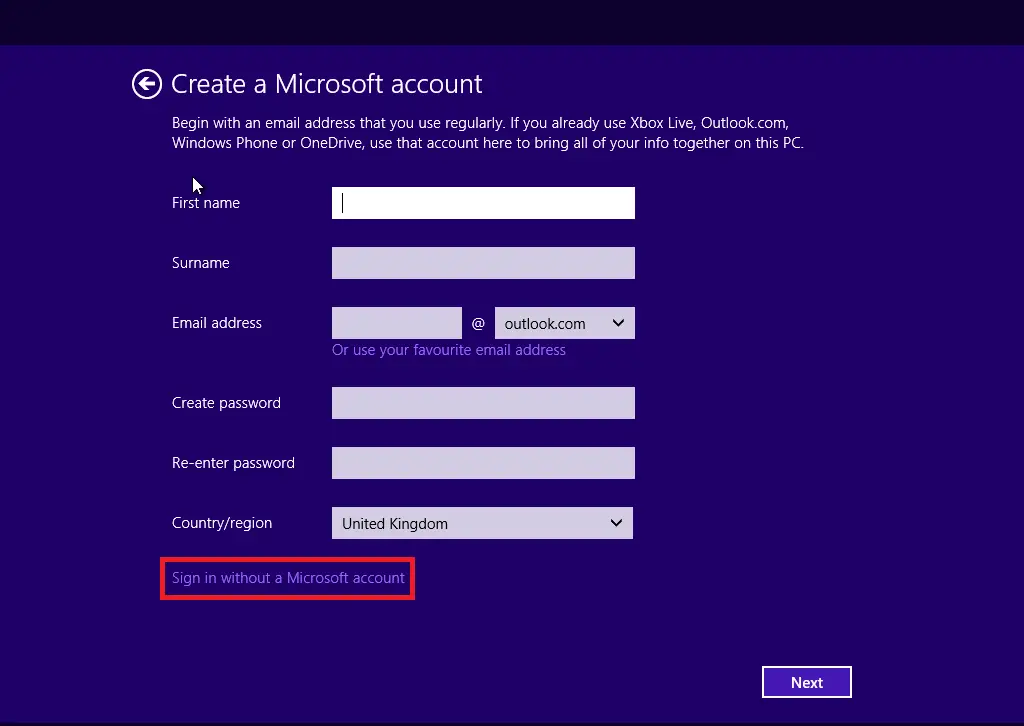
Step 39. If you don’t want to create an online account, then click on the link “Sign in without a Microsoft account.”
Step 40. Under the “Your account” window, fill in the Username, Password, Re-enter password, and Password hint text boxes.
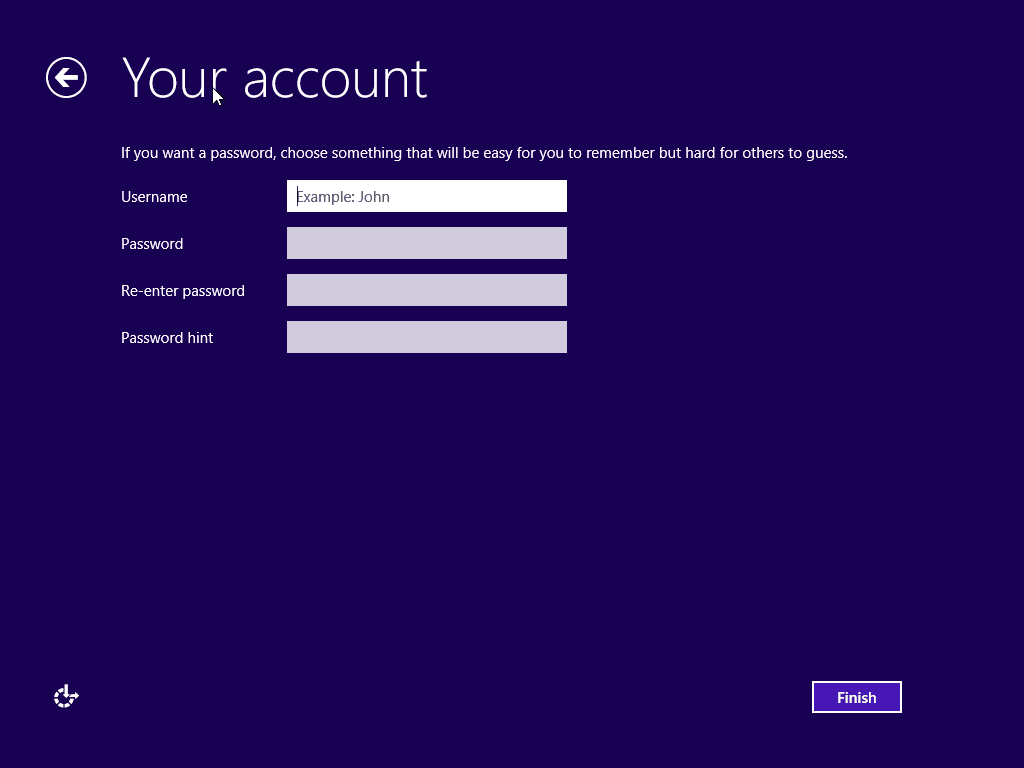
Step 41. Click on the Finish button once the above steps are completed.
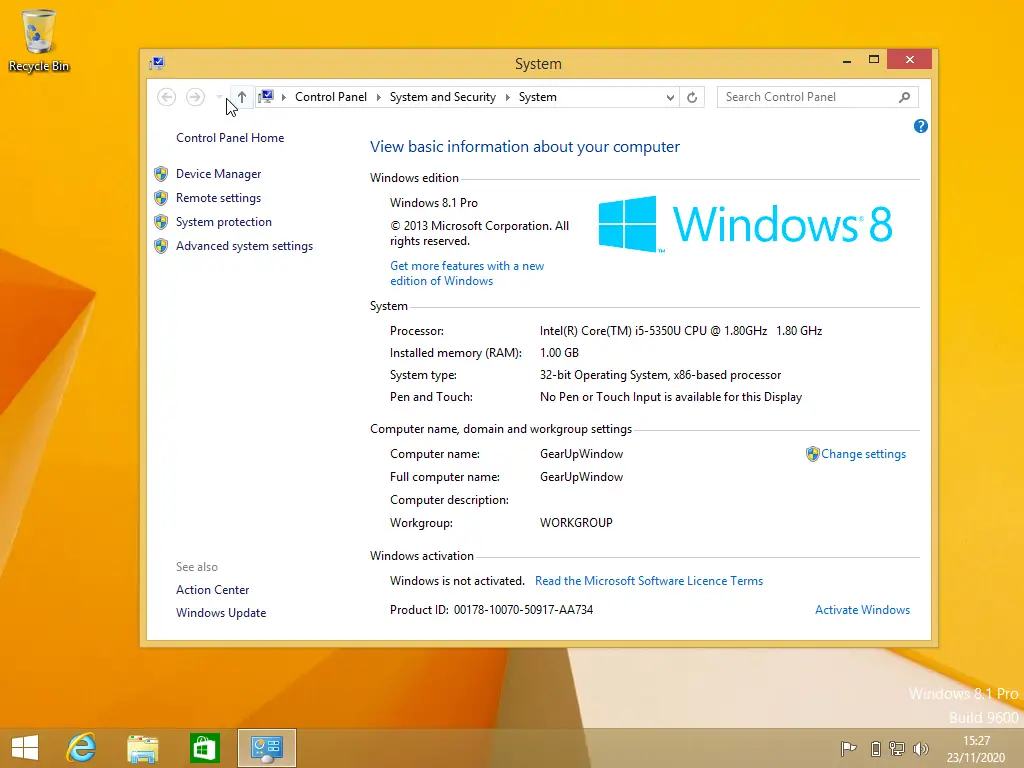
Now you should have a fully functioning Windows 8.1 running on your VM.
Conclusion
In conclusion, installing Windows 8.1 on Oracle VM VirtualBox is a straightforward process that can be accomplished by following the steps mentioned above. With the help of VirtualBox, users can easily create a virtual machine on their computer or laptop and install different operating systems, including Windows 8.1, without affecting their primary operating system. This provides users with the flexibility to test software or applications in different operating systems without having to install them natively. We hope this guide has helped you install Windows 8.1 on VirtualBox.