There are several free tools that can help you modify or resize partitions on your Windows 10/11 operating system. If your computer came with Windows 10/11 pre-installed, you might only have one partition. However, if you have already created multiple partitions and want to resize or merge them, you can do it without the need for any third-party tools. There is no need to hire a technician, as the process is simple and can be done by following a few easy steps.

The inbuilt tool for managing partitions in Windows 11/10 is Disk Management, which allows users to create, delete, modify, and format partitions. This tool eliminates the need for downloading additional software to manage your disk partitions, and it even enables users to change the drive letters. The Disk Management window comprises two panes, with the top pane displaying a list of volumes and the bottom pane showing a graphical representation of available disks and their respective volumes. When a volume is selected in the top pane, the bottom pane shows the disk that contains that volume. In case a disk or volume is chosen in the bottom pane, the top pane displays the corresponding volume. If your computer has more than one hard disk installed, the bottom pane will show Disk 0, Disk 1, and so on.
How to resize a partition on Windows 11/10?
To resize the existing partition, you need to shrink the volume so that the unallocated space can be allotted to another volume/partition.
Step 1. Click on the Start button and type diskmgmt.
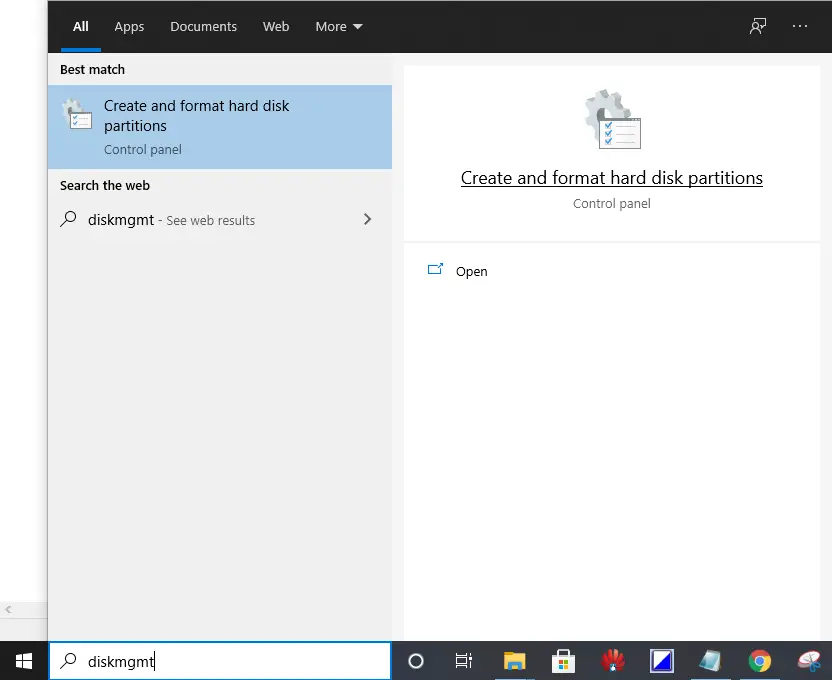
Step 2. From the search results, click on “Create and format hard disk partitions” to launch the Disk Management tool.
Step 3. Right-click a volume/partition in either pane and select the Shrink Volume option.
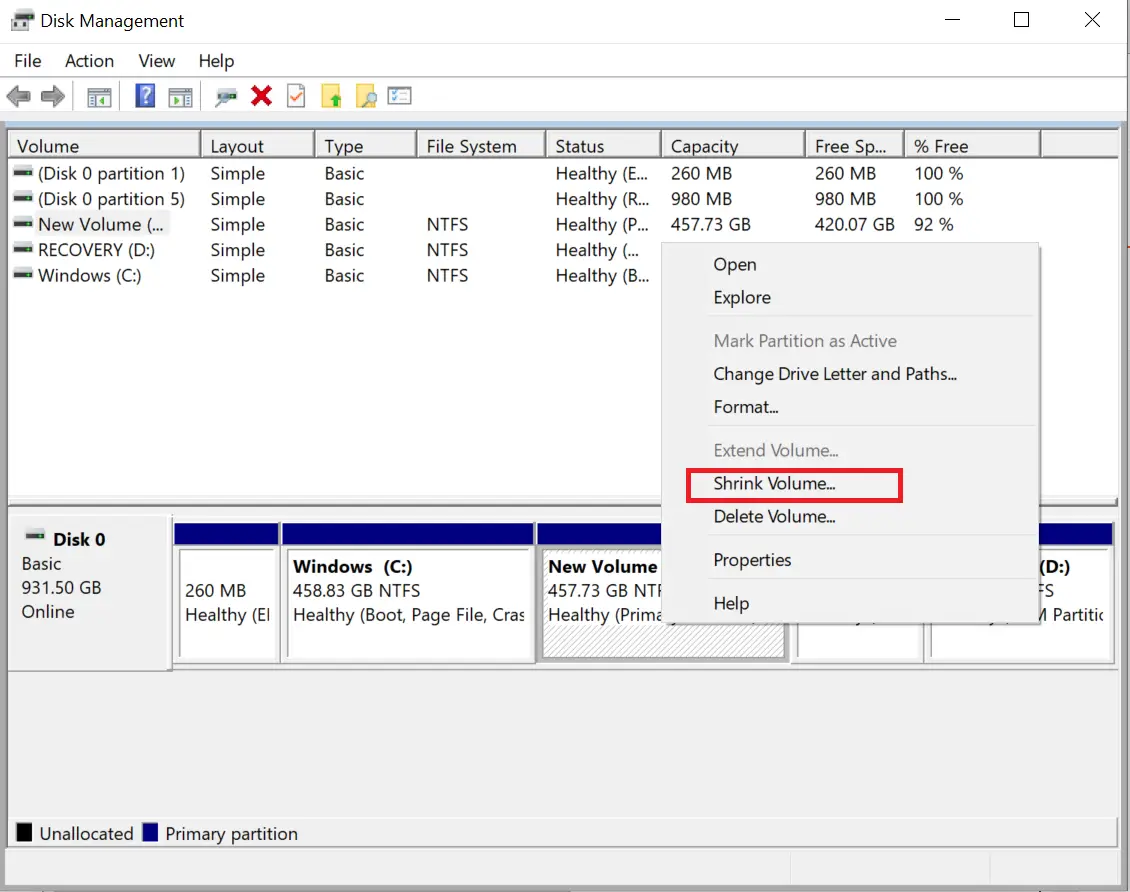
Note: You can only shrink a volume if it has enough free space. In my example, we are shrinking “Volume F,” which has enough free space.
Step 4. It will open a new window with a Shrink name; here, you can specify the size to shrink. By default, it will automatically select the maximum available free size to shrink, which is editable.
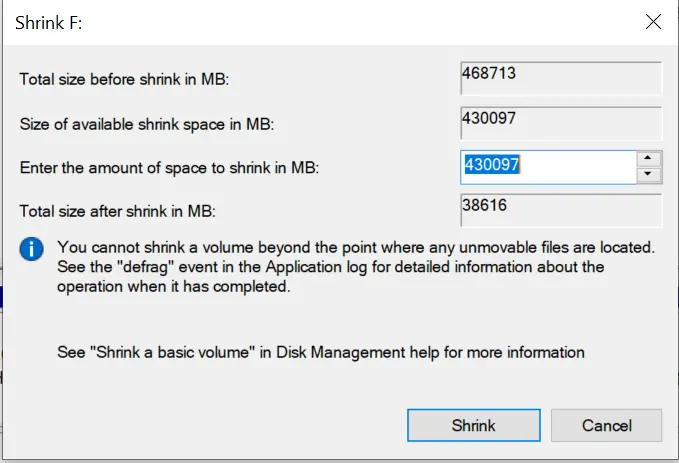
Step 5. Once you have entered the size to shrink, click on the Shrink button.

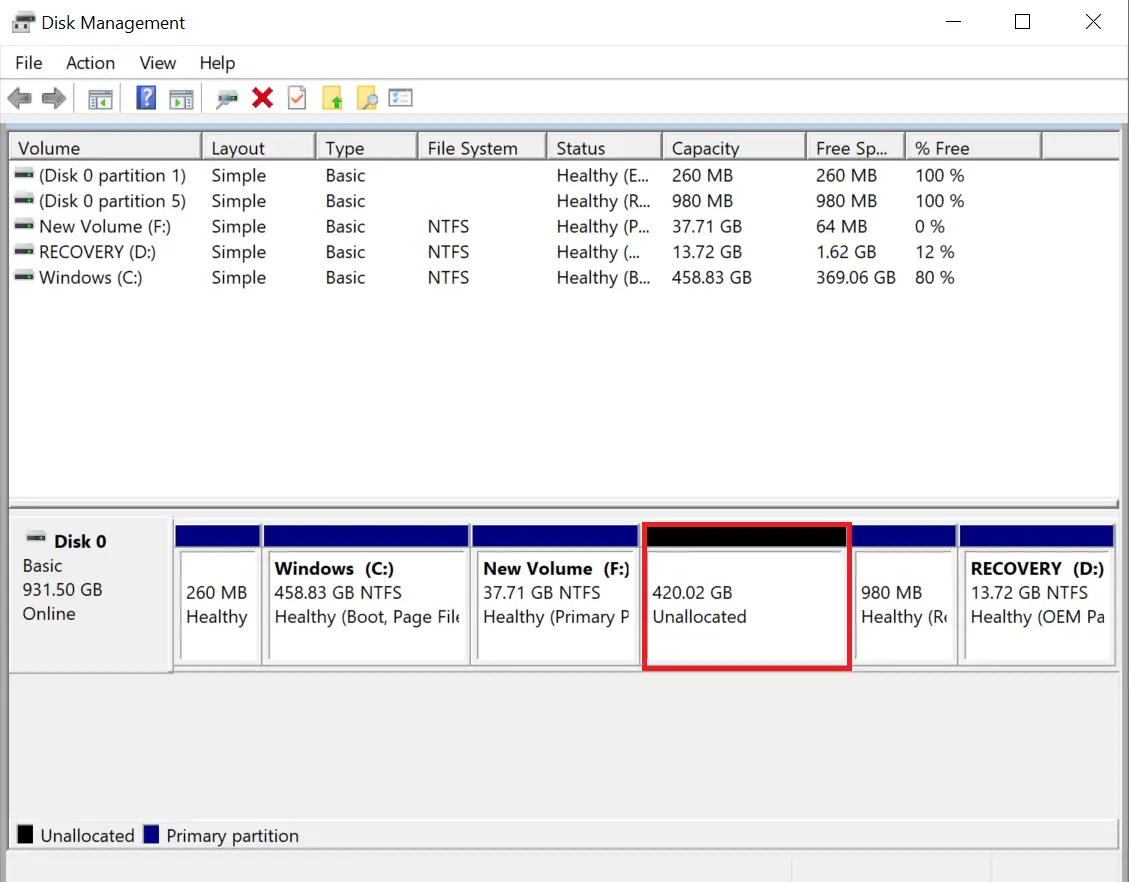
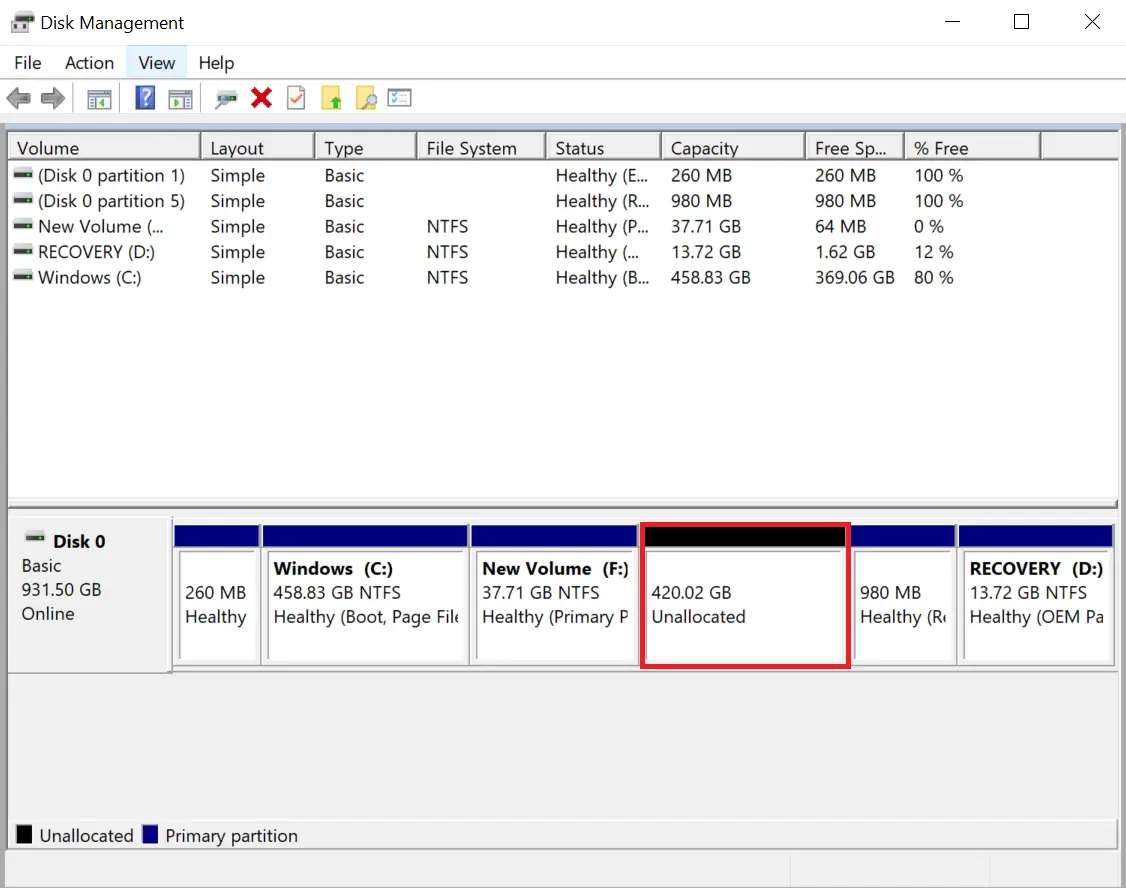
Step 6. Once the shrinking is completed, you can see that the space is unallocated.
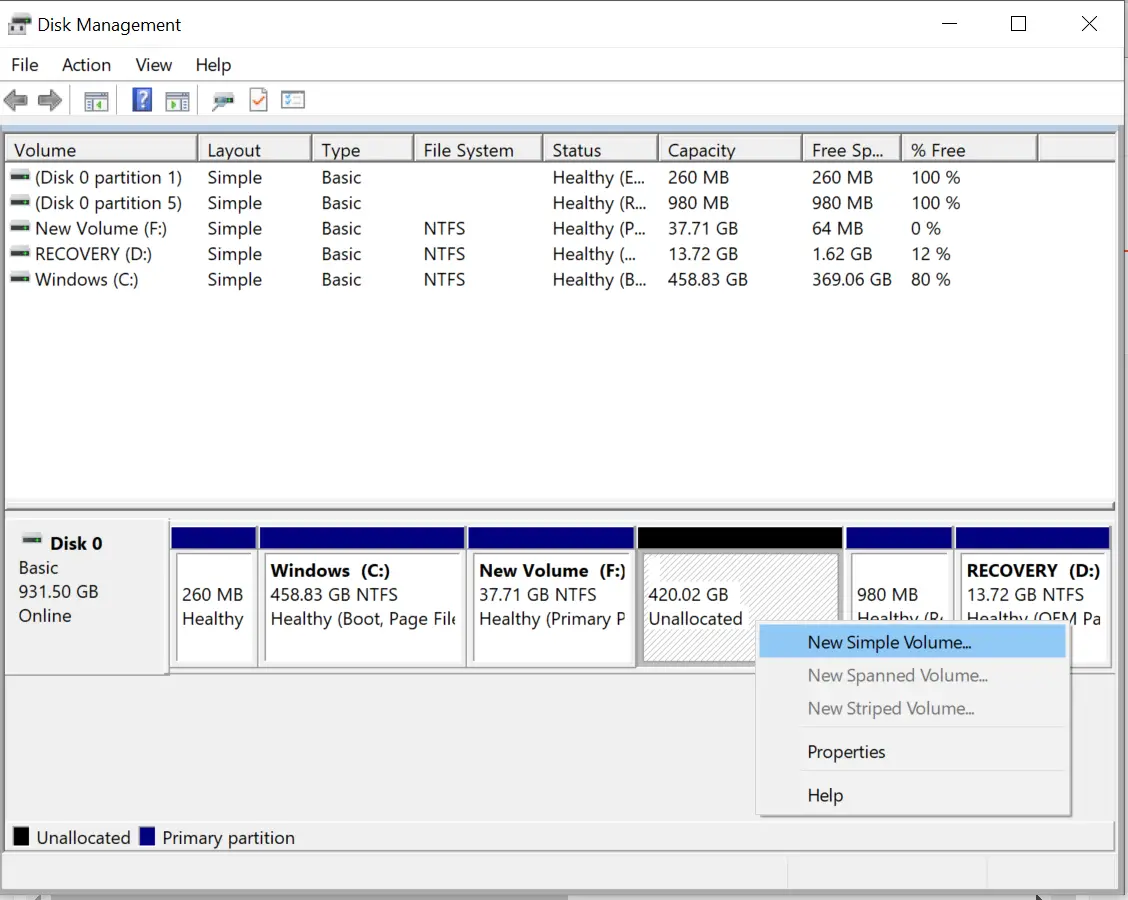
How to create a Partition on Windows 11/10?
Unallocated spaces are those free spaces that are not in use by Windows. To use this unallocated space, you need to create a partition.
Step 1. Click on the Start button and type diskmgmt.
Step 2. From the search results, click on “Create and format hard disk partitions” to launch the Disk Management tool.
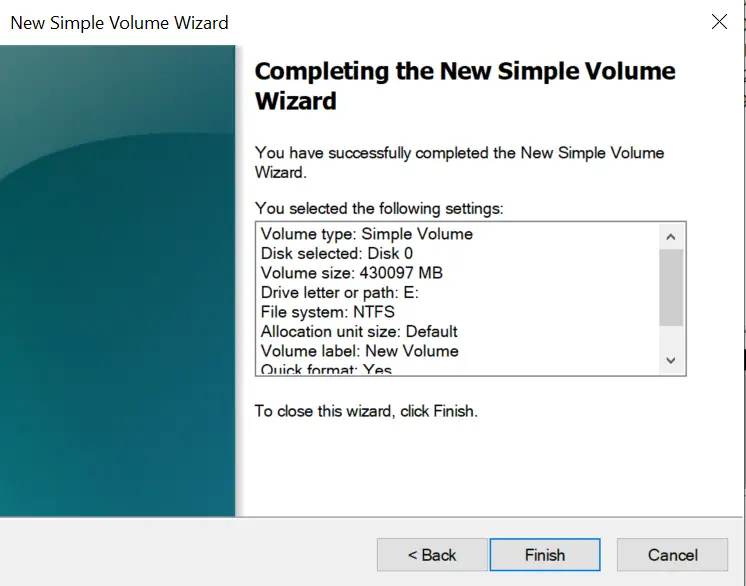
Step 3. Right-click on unallocated space from the bottom pane and select “New Simple Volume.”

Step 5. Click on the Next button.
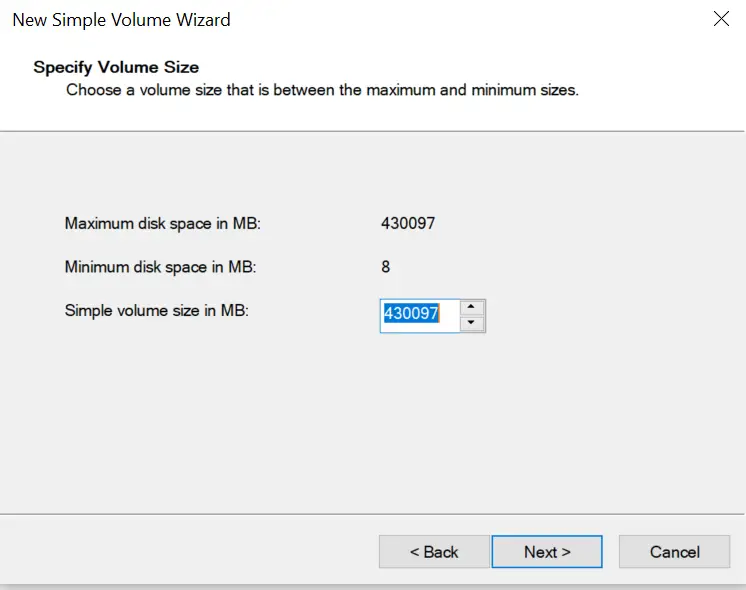
Step 6. Now, you can specify the new partition/volume size and click on the Next button.
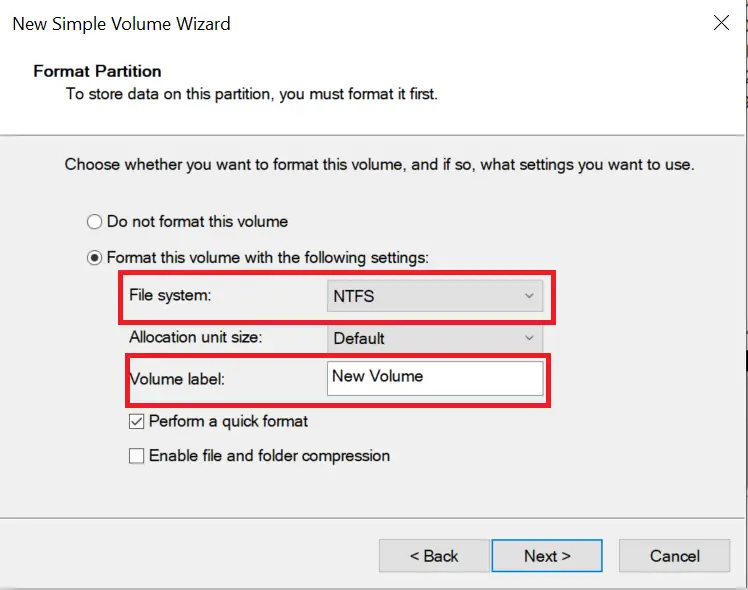
Step 8. Select a file system (NTFS is more reliable) and click on the Next button.
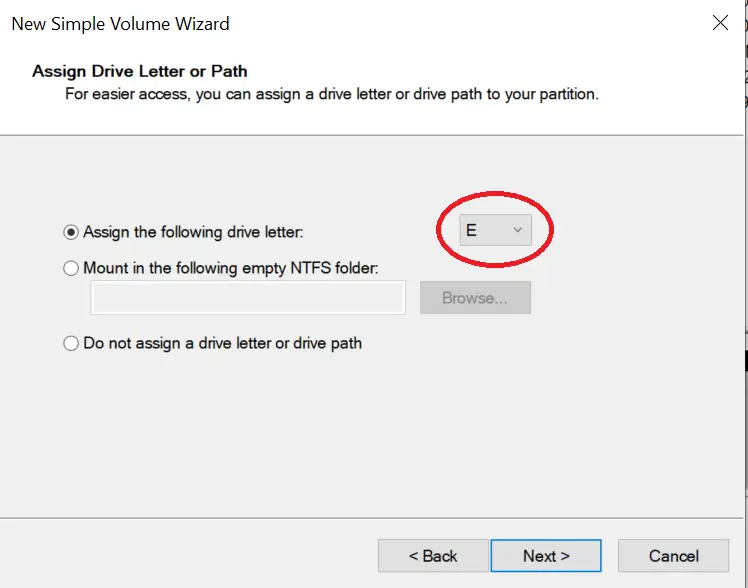
Note: Here, you can also change the volume name if you want.
How to delete/format a partition on Windows 11/10?
If you want to delete an existing partition, do the following:-
Step 1. Click on the Start button and type diskmgmt.
Step 2. From the search results, click on “Create and format hard disk partitions” to launch the Disk Management tool.
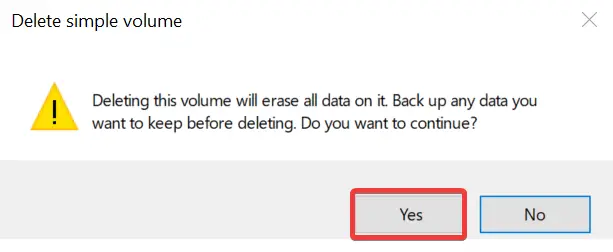
Step 3. Right-click on the partition from any panes and select “Delete Volume.”
Note: To format a partition/volume, right-click on the partition from any panes and select “Format.” Formatting will erase the data from the selected volume/partition, but it will not erase/delete the partition/volume.

Step 4. Click the Yes button to proceed with the deletion of partition/volume.
Step 5. Once you have deleted any partition/volume, it will show unallocated space in the bottom pane.
How to merge Partitions on Windows 11/10?
If you want to merge unallocated space with an existing partition without losing the data, do the following:-
Step 1. Click on the Start button and type diskmgmt.
Step 2. From the search results, click on “Create and format hard disk partitions” to launch the Disk Management tool.
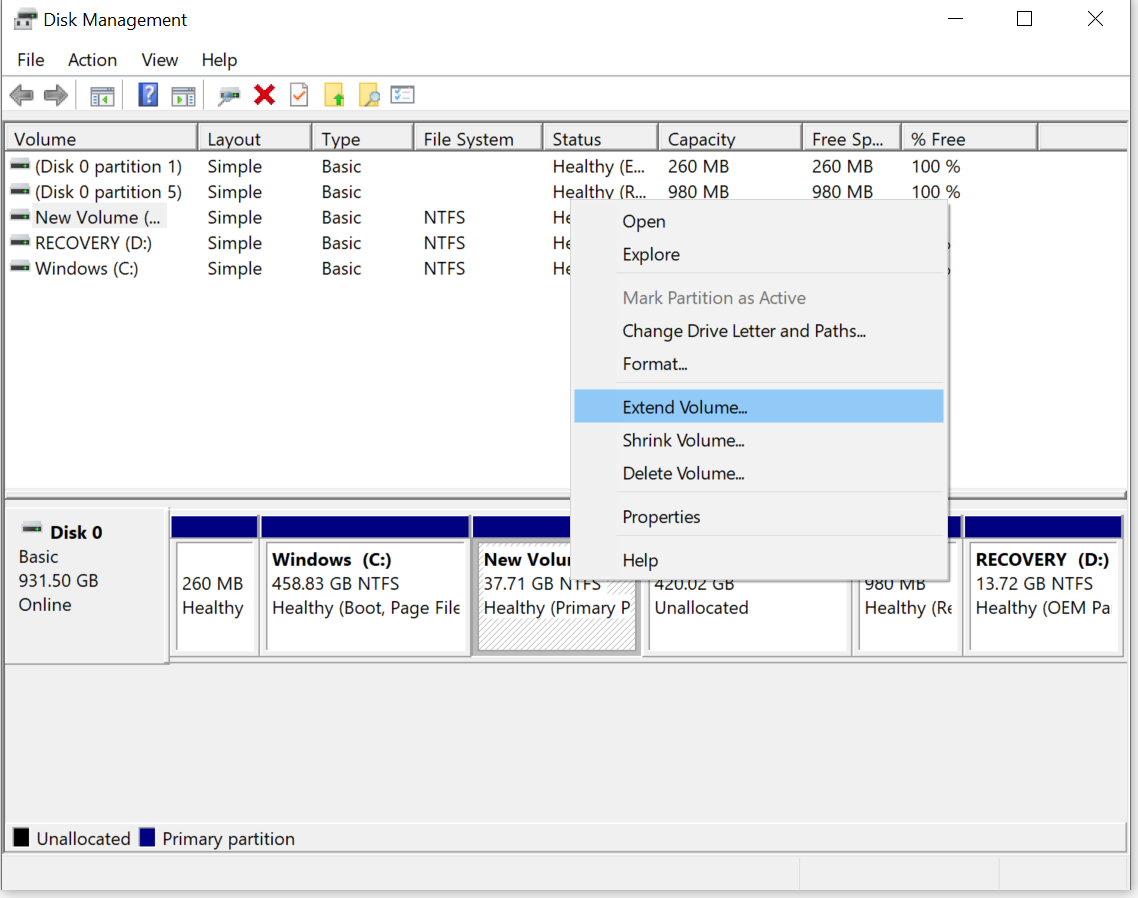
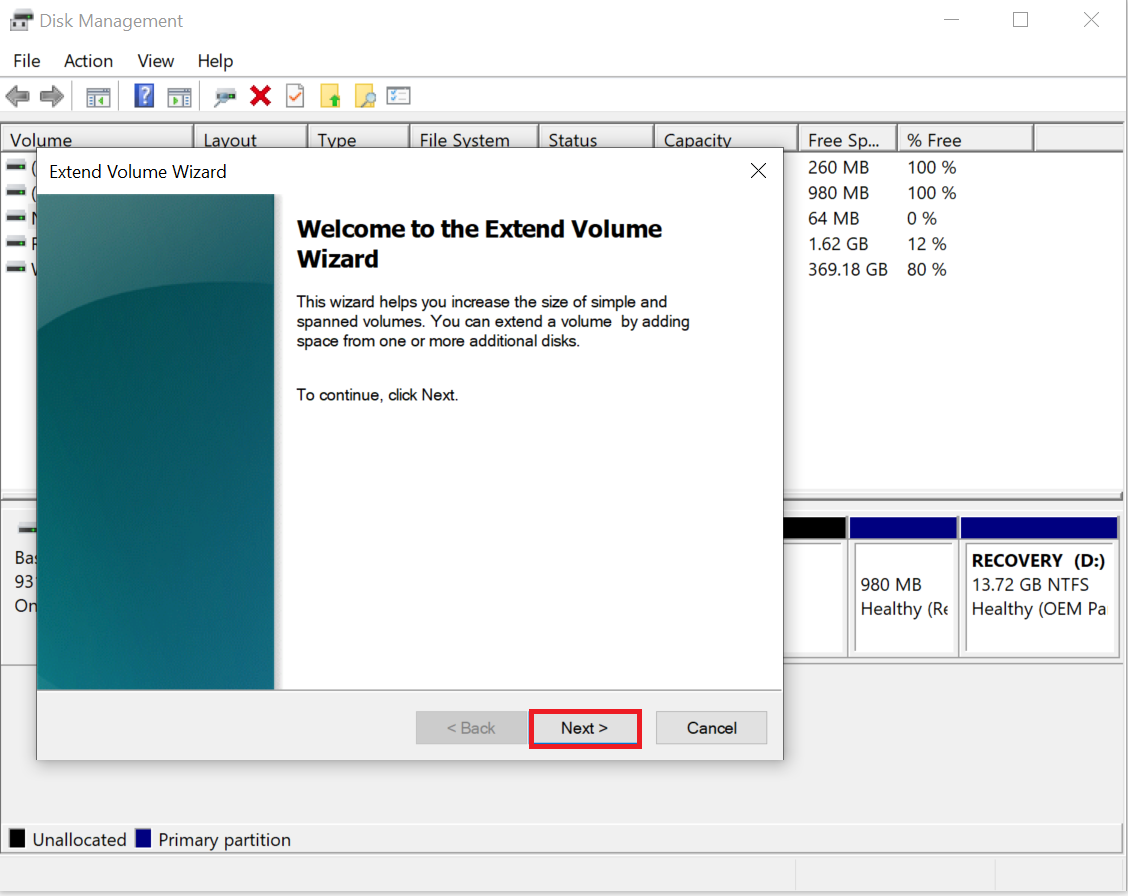
Step 3. Right-click on the nearby partition of unallocated space and select “Extend Volume.”
Step 4. Click on the Next button on Extend Volume Wizard.
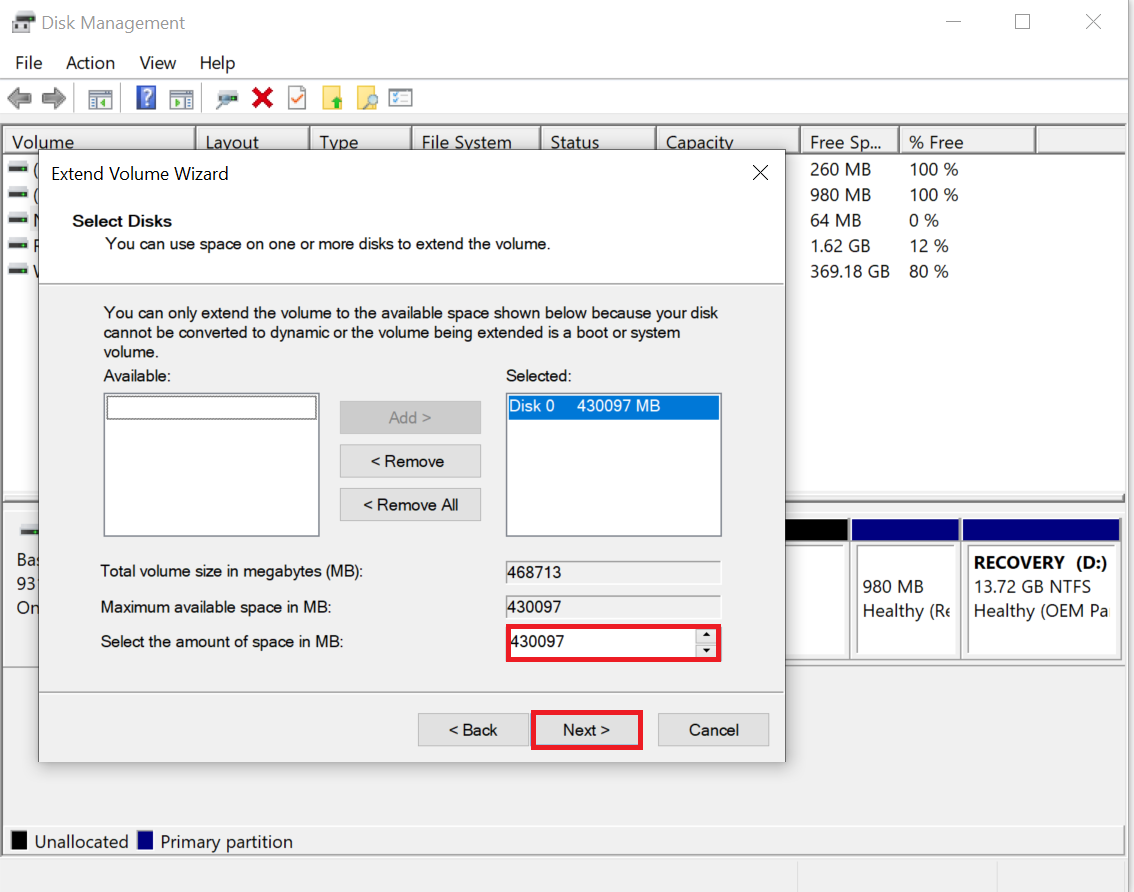
Step 5. Specify the size in MB and click on the Next button.
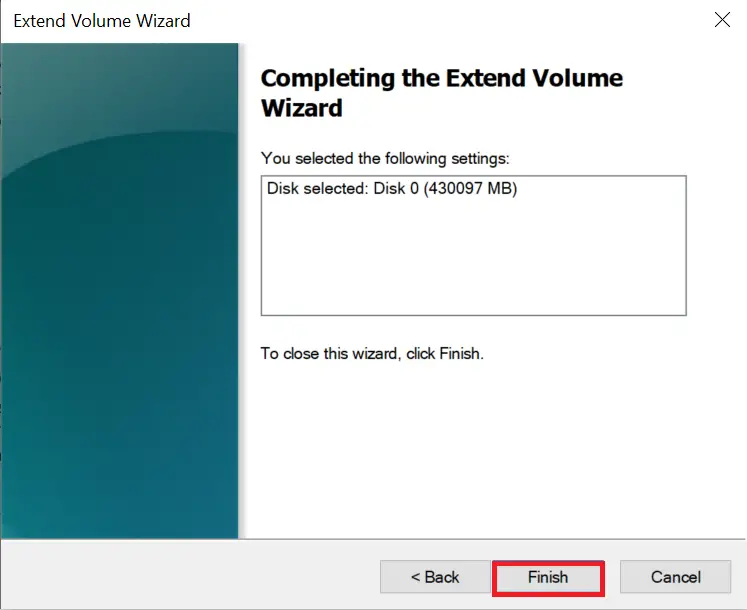
Step 6. Finally, click on the Finish button to merge the partition with unallocated space.
Conclusion
In conclusion, managing and resizing partitions on Windows 10/11 is a straightforward process that can be done using the built-in Disk Management tool. You can easily create, delete, modify, and format partitions, as well as change drive letters, without needing third-party software. With the graphical representation of available disks and volumes, it is easy to select and manage the partitions on your system. It is essential to back up your data before making any changes to your partitions, and you should proceed with caution to avoid losing any important data. By following the steps outlined above, you can manage and resize your partitions without losing any data.